When wiring a trailer with side marker lights, there are a few things you need to know. Side marker lights let other drivers know where your trailer is on the road, and they’re required by law in some states. In this article, we’ll walk you through how to wire a trailer with side marker lights. We’ll cover everything from choosing the correct bulbs to troubleshooting common problems. So read on for all you need to know about wiring side marker lights!
Summary: Wiring a trailer with side marker lights is an important task that ensures proper functioning of the trailer’s lighting system and enhances road safety. To wire a trailer with side marker lights, you’ll need a trailer wiring kit or individual components, including a wiring harness with a 4-pin or 7-pin connector, side marker lights, and any necessary tools such as wire strippers, crimpers, and a circuit tester. Before starting the process, ensure that the wiring harness and side marker lights are compatible with your trailer and that you have a clear understanding of the wiring color codes specified by the manufacturer or in your region.
Begin by running the wiring harness from the trailer’s front to the rear, ensuring that it is secured along the frame using zip ties or clips. Connect the ground wire (usually white) from the wiring harness to the trailer’s frame, ensuring a clean and secure connection. Next, connect the taillight, brake, and turn signal wires (usually brown, green, and yellow) to their respective lights at the rear of the trailer.
To wire the side marker lights, splice into the brown wire (taillight wire) and extend a new wire from the splice to each side marker light, ensuring the connections are secure and properly insulated. Connect the side marker light wires to the positive terminals of each side marker light, while the negative terminals should be grounded to the trailer frame.
After completing the wiring, test the entire lighting system by connecting the trailer to the towing vehicle and operating the lights, ensuring that the side marker lights, taillights, and turn signals are functioning correctly. Properly wiring a trailer with side marker lights not only improves visibility on the road but also contributes to overall safety for both the driver and other motorists.

Many states require trailers to have side marker lights, so it’s good to wire them even if they’re not required in your state. Side marker lights make your trailer more visible to other drivers, which can help prevent accidents. It’s also good to wire your marker lights to a separate circuit from your brake lights and turn signals. Then, if one circuit fails, the other lights will still be operational.
How to Choosing the Right Bulbs for Your Side Marker Lights
First, you need to find a stud in the wall using a stud finder. Then, drill a hole through the drywall and insert a piece of wire called “fish wire.” After that, attach the electrical wires to the fish wire and pull them through the hole.
First, you need to consider the wattage of the bulb. The higher the wattage, the brighter the light will be. However, you don’t want to choose a too powerful bulb, as this could blind other drivers. A good rule of thumb is to choose a bulb with a wattage that is about half of the maximum wattage allowed for your vehicle’s side marker lights.
Next, you need to consider the type of bulb you want. There are two main bulbs available for side marker lights: incandescent and LED. Incandescent bulbs are the traditional bulb type, and they tend to be less expensive than LED bulbs. However, they also don’t last as long as LED bulbs. If you choose an incandescent bulb, make sure to get one designed to withstand extreme temperatures, as regular incandescent bulbs can overheat and melt the plastic housing around your light.
LED bulbs are becoming increasingly popular for side marker lights as they last much longer than incandescent bulbs and use less power. However, they can be more expensive upfront. When choosing an LED bulb, make sure to get one designed specifically for use inside marker lights. Some LEDs are too powerful and can cause glare, which can be dangerous for other drivers.
Finally, you need to consider the color of the light. Side marker lights are typically available in red or amber. Amber is the more traditional color, but red is becoming more popular because it is easier for other drivers to see. If you are unsure which color to choose, it is a good idea to stick with amber.
When choosing bulbs for your side marker lights, keep these factors in mind to choose the right ones for your vehicle.
What You’ll Need
- Trailer wiring kit
- Phillips head screwdriver
- Side marker lights
- Wiring harness
- Drill
- Screws
- Wire cutters
- Electrical tape
A Step by Step Guide on How to Wire a Trailer With Side Marker Lights
Step 1: Determine the Type of Trailer Wiring Kit You Need
There are several different types of trailer wiring kits available on the market. The type you need will depend on the configuration of your vehicle’s electrical system and the number of lights and other accessories you plan on installing on your trailer.

If your car has a factory-installed trailer hitch, it probably came with a 4-way flat connector. This is the most basic type of trailer wiring kit and it will provide enough power to operate your trailer’s lights and other accessories.
If you have an older vehicle that did not have a factory-installed trailer hitch, you will need a more comprehensive wiring kit with a 7-way connector. This connector provides power for the trailer’s brakes, turn signals, and running lights.
Step 2: Prepare the Vehicle for Installation
LED bulbs are becoming increasingly popular for side marker lights as they last much longer than incandescent bulbs and use less power. However, they can be more expensive upfront. When choosing an LED bulb, make sure to get one designed specifically for use inside marker lights. Some LEDs are too powerful and can cause glare, which can be dangerous for other drivers.
You will also need to locate the vehicle’s tail light wiring harness. This is typically located near the vehicle’s rear, on either side of the taillights.
If your vehicle has a 4-way flat connector, you will need to find the corresponding wiring harness to connect it to the trailer lights properly.
Step 3: Install the Side Marker Lights
The first step in wiring your trailer is to install the side marker lights. These lights are required by law in most states and help other drivers see your trailer on the road.
To install the side marker lights, start by drilling a small hole in the back of your trailer. Next, use wire cutters to splice the vehicle’s tail light wiring harness. Then, connect one end of the wiring harness to the positive terminal on the side marker light and the other to the negative terminal.
Finally, use electrical tape to secure all connections and ensure that they are watertight.
Step 4: Install the Wiring Harness
Once you have installed the side marker lights, you can begin installing the wiring harness. Start by routing the harness from the back of the vehicle to the front, on either side of the taillights.
Then, use wire cutters to splice the vehicle’s tail light wiring harness. Next, connect one end of the wiring harness to the positive terminal on the side marker light and the other to the negative terminal.

Finally, use electrical tape to secure all connections and ensure that they are watertight.
Step 5: Install the Trailer Lights
With the wiring harness in place, you can begin installing the trailer lights. Start by connecting the positive wires from each light to the corresponding terminal on the 7-way connector.
Next, connect the negative wires from each light to the corresponding terminal on the 7-way connector. Finally, use electrical tape to secure all connections and ensure that they are watertight.
Step 6: Test the Lights
Before you hit the road, it is essential to test all of the lights on your trailer to make sure that they are working correctly. Start by turning on your vehicle’s headlights. Then, turn on the taillights, brake lights, turn signals one at a time and observe the lights on your trailer.
If any of the lights are not working, double-check all of the connections to ensure they are secure. If the problem persists, you may need to consult a qualified mechanic or electrician.

You can easily wire a trailer with side marker lights with these simple steps. Just be sure to take your time and double-check all of the connections before hitting the road.
Tips
- How to Wire a Trailer With Side Marker Lights
- Check the law in your area regarding side marker lights. Some states require them, while others do not.
- If your trailer does not have side marker lights, you may be able to install them yourself. However, it is always best to consult with a professional before undertaking any electrical work.
- When wiring side marker lights, be sure to use the appropriate size and type of wire. Using the wrong size or type of wire can create a fire hazard.
- Always test your work before driving the trailer on the road. This will ensure that the lights are functioning correctly and that there are no loose connections.
- If you are ever in doubt about your wiring, consult with a professional trailer mechanic or electrician. Improperly wired lights can create a safety hazard for yourself and other motorists.
How to Troubleshoot Common Problems With Side Marker Lights
One of the most common problems with side marker lights is that they can become disconnected. If your trailer’s side marker lights are not working, the bulbs will likely burn out, or the wires will come loose. The best way to prevent this from happening is to inspect your trailer’s side marker lights regularly.
If the bulbs have burned out, replace them with new ones. If the wires have come loose, you will need to reconnect them.
Another common problem with side marker lights is that they may not be adequately grounded. This can cause the lights to flicker or go out entirely. To fix this problem, make sure that the ground wire is securely connected to the metal frame of the trailer.

After checking these things, if your side marker lights aren’t working, there may be a more severe problem with your trailer’s electrical system. It is best to consult a professional mechanic or electrician in this case.
Frequently Asked Questions
Where Do Side Marker Lights Go on Trailer?
Most side marker lights typically go in the tail light area, but this is not always the case. Make sure to consult your owner’s manual to see where they should be placed on your trailer.
Do Side Marker Lights Need to Be Grounded?
A ground circuit is essential for the correct operation of side marker lights, and without it, they will not function correctly. Most car manufacturers require their side marker lights to be properly wired as part of the standard equipment package.
Are Front Side Marker Lights Required?
Some people feel that they provide a helpful illumination, while others find them intrusive and confusing. Ultimately, you need to decide for yourself if they are something you would like to have installed in your vehicle.
If you do choose to install them, be sure to research which models are best suited for your specific needs. Some features that may be important include beam widths and distribution patterns, light intensity levels, and lens color clarity.
Why Does Only One Side of My Trailer Lights Work?
The most common reason is that the light bulb is burned out. To test if this is the case, you can remove the light bulb and replace it with a new one. If the new bulb works, then the old one is likely burned out and needs to be replaced.
If the light bulbs are wired in series, then the circuit might be shorted out. To test this, you can remove one of the light bulbs and see if the other one turns on. If both bulbs turn on when the switch is turned off, then there’s a short circuit in the circuit.
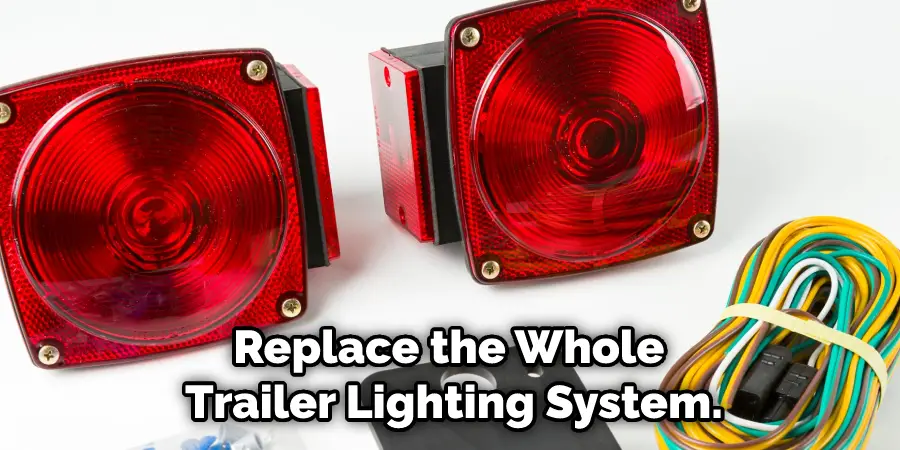
If none of these solutions work, then it might be necessary to replace the whole trailer lighting system.
Conclusion
Now that you know how to wire a trailer with side marker lights, it’s time to get out there and hit the open road! Ensure you have all of your supplies ready before starting and be safe while you work. We hope this article has been helpful and that you enjoy your next road trip safely with properly functioning trailer lights.