When customizing your home or office, there are many ways to make it feel more like your own. One popular way is to add LED lighting. In addition, you can add strip lighting under cabinets, around door frames, or even in the shape of a design.
Once you have decided that you want to add some LED lighting, the next question is how to do it. In this post, we will show you how to wire led strips in series. This is a common way to power your lights and is simple enough for anyone to do. Keep reading for step-by-step instructions on wiring your LEDs in series.
Summary: In this article, we will show you how to wire LED strips in series to create a custom lighting effect. By connecting the strips together in a series configuration, we can create brighter and more consistent lighting than we could with individual strips.
Why Should You Wire LED Strips in Series?
When connecting led strips in a circuit, there are two ways to do it: in series or in parallel. First, we’ll go over the benefits of wiring led strips in series. One reason to wire led strips in series is that it can help to reduce voltage drop. When LEDs are wired in parallel, the current passing through each individual LED is the same. However, the voltage across each led can be different, which can cause some of the LEDs to be dimmer than others.
When LEDs are wired in series, the current passing through each led is reduced, but the voltage is the same across all of the LEDs. This can help ensure that all the LEDs operate at their full brightness. Another reason to wire led strips in series is that it can help increase the strip’s overall lifespan. When connecting multiple devices in parallel, any one device that fails can cause a power surge that could damage or destroy the other devices.
However, when devices are wired in series, only the failing device is affected, and the other devices are protected from overvoltage. As a result, wiring led strips in series can help to prolong their lifespan.
How to Wire LED Strips in Series: The Step-by-Step Guide
Step 1: Cut the LED Strip to Size
First, you’ll need to cut your LED strip to size. Most strips come in standard lengths of 2, 4, or 5 meters (6.5, 13, or 16 feet). If you need a specific length, you can use a pair of scissors or a sharp knife to cut the strip at the desired location. Ensure not to damage the copper pads that make contact with the wires!
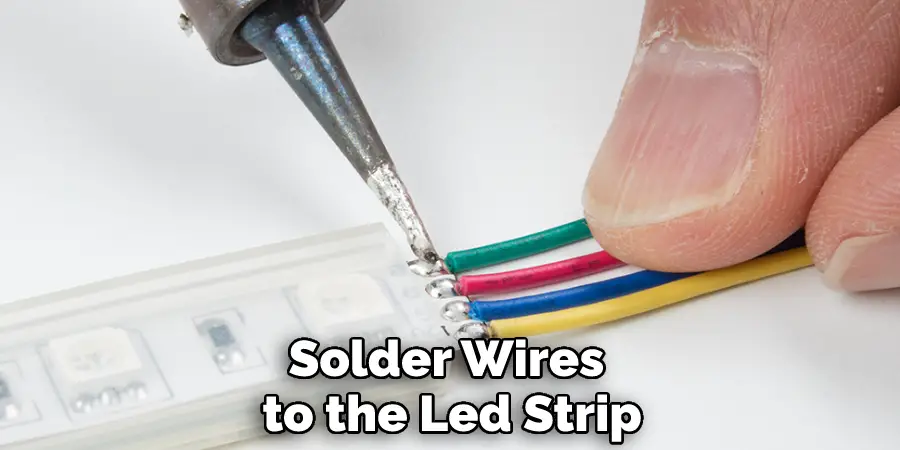
Step 2: Solder Wires to the LED Strip
Next, you’ll need to solder wires to the LED strip. To do this, you’ll need to connect the positive wire (typically red) to the anode (long pad) of the first LED and connect the negative wire (typically black) to the cathode (short pad) of the first LED.
If you’re using a strip with multiple LEDs, you’ll need to connect the wires to the anode and cathode of each individual LED. Make sure that all of the anodes are connected and that all the cathodes are connected.
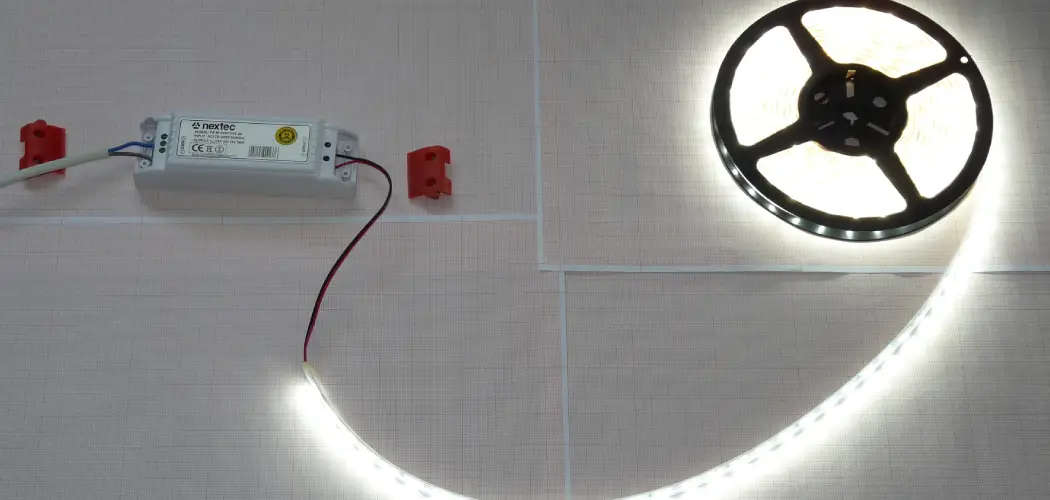
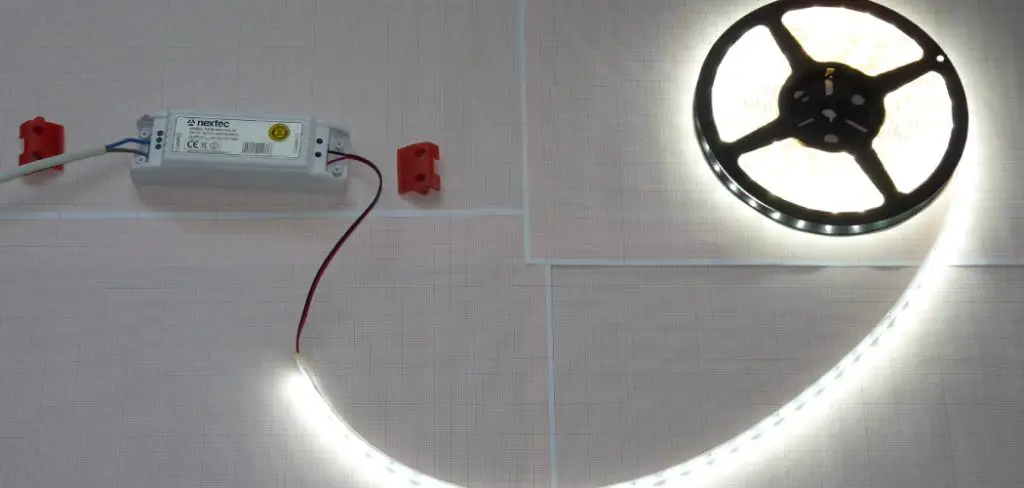
Step 3: Connect the LED Strip to the Power Source
Now that the wires are attached to the LED strip, you can connect the strip to the power source. Again, make sure to connect the positive wire to the positive terminal of the power source and connect the negative wire to the negative terminal of the power source.
If you’re using a strip with multiple LEDs, you’ll need to connect the positive and negative wires to the corresponding terminals on the power source.
Step 4: Test the LED Strip
Once you’ve connected the LED strip to the power source, you can turn on the power and test the strip. If everything is wired correctly, the LEDs should turn on.
If one or more of the LEDs don’t turn on, check the connections to ensure they’re secure. You may also need to check the power source’s polarity to ensure the positive and negative wires are connected to the correct terminals.
Step 5: Mount the LED Strip
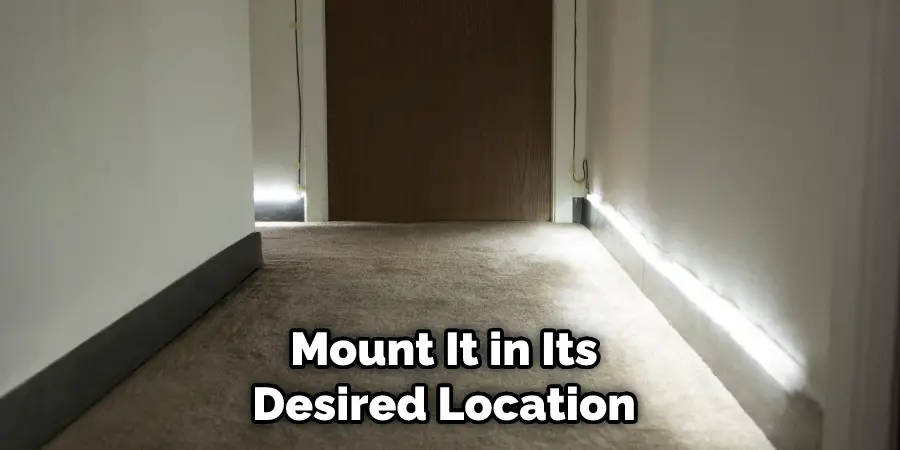
Once you’ve tested the LED strip and verified that it’s working, you can mount it in its desired location. If you’re using adhesive-backed strips, you can simply peel off the backing and apply the strip to a clean, dry surface.
For non-adhesive strips, you’ll need to use some type of mounting tape or adhesive to secure the strip in place. Again, ensure the surface is clean and dry before applying the tape or adhesive.
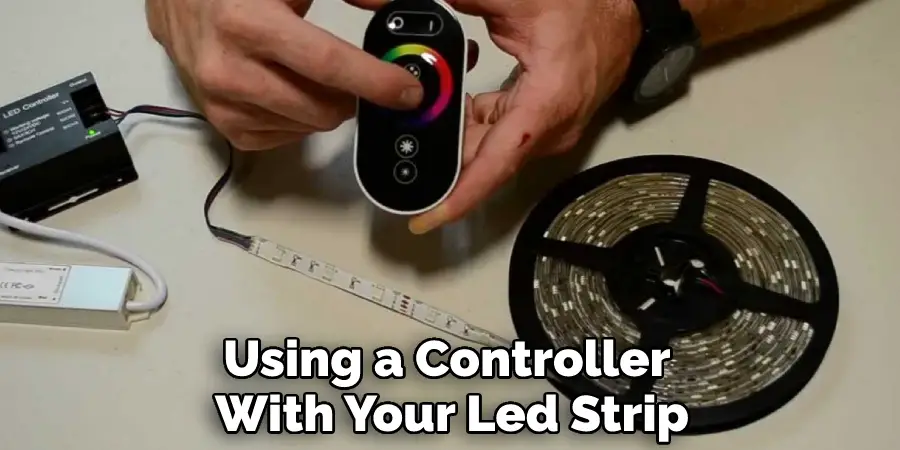
Step 6: Connect the Controller
If you’re using a controller with your LED strip, you’ll need to connect it now. Most controllers have a standard 3-pin connector that can be plugged directly into the strip.
If your controller uses a different type of connector, you may need to solder or clip wires to the appropriate terminals on the controller. Again, consult the documentation for your controller for more information.
Step 7: Enjoy Your New LED Strip!
You’ve now successfully installed an LED strip! So sit back and enjoy the new look of your space, knowing that you did it yourself.
That’s it! You’ve now learned how to wire LED strips in series. This knowledge can be used to create all sorts of different lighting effects, and it’s a great way to get started with electronics and LEDs.
You Can Check It Out To Hide Led Strip Power Supply
How to Choose the Right LED Strip For Your Project
Whether you’re looking to add some accent lighting to your kitchen or you’re hoping to create a fully immersive experience in your home theater, the right LED strip can make all the difference. However, with so many different types and styles of LED strips on the market, it can be tough to know where to start. So here are a few tips to help you choose the right LED strip for your next project.
One of the most important considerations when choosing an LED strip is the type of light-emitting diode (LED) that is used. There are two main types of LEDs: SMD (surface-mounted device) and COB (chip-on-board). SMD LEDs are smaller and more efficient, making them ideal for use in confined spaces or for applications that require a lot of light. COB LEDs, on the other hand, are larger and provide a more focused light beam, making them better suited for tasks that require less light.
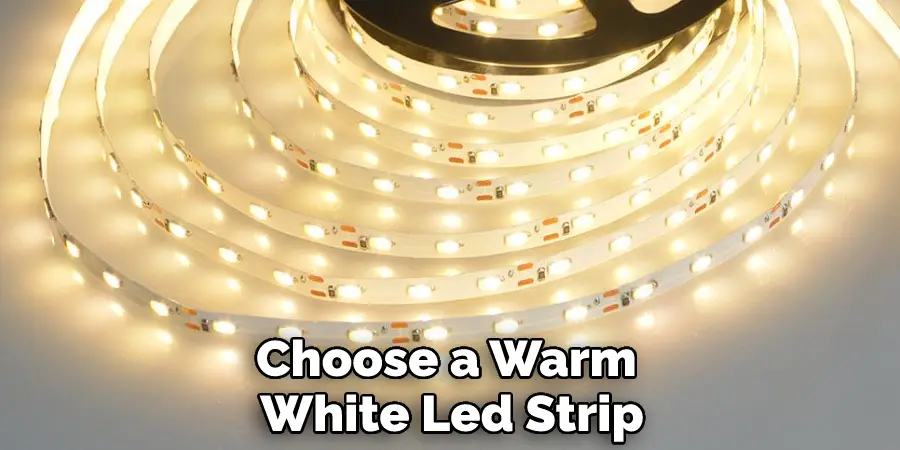
Another important factor to consider is the color temperature of the LED strip. Color temperature is measured in Kelvin (K) and refers to the hue of the light emitted by the LED. Warm white LEDs have a color temperature of around 3000K, while cool white LEDs have a color temperature of around 6000K.
The type of color temperature you choose will depend on the intended use of the LED strip. For example, if you’re looking to add some accent lighting to your kitchen, you might want to choose a warm white LED strip. On the other hand, if you’re hoping to create a more immersive experience in your home theater, you might want to opt for a cool white LED strip.
Finally, you’ll also need to decide on a power source for your LED strip. The two most common options are AC-powered and DC-powered strips. AC-powered strips are more expensive but offer a higher brightness level and are better suited for use in large spaces. On the other hand, DC-powered strips are more affordable but offer lower levels of brightness and are better suited for use in smaller spaces.
By keeping these factors in mind, you can narrow down your options and choose an LED strip that’s right for your next project. Keep reading for more information about how to wire LED strips in series.
The Benefits of Installing LED Strips
If you’re looking for a way to add some extra light to your home without spending a fortune, LED strips are a great option. LED strips are easy to install and can be used in various ways to add light to any room. Here are just a few of the benefits of installing LED strips:
- LED strips are very energy efficient. LEDs use far less power than traditional light bulbs, so you’ll save money on your energy bill by switching to LED lighting.
- LED lights to last much longer than traditional light bulbs. As a result, you won’t have to worry about changing your lights often, saving you time and money.
- LED lights to give off very little heat, so they won’t make your room feel warmer like traditional light bulbs can. This can be a great benefit when you’re trying to keep your home cool in the summer months.
- LED lights come in various colors, so you can choose the perfect hue to match your decor or create a unique look for your space.
Whether you’re looking for a way to save money or simply want to add some extra light to your home, LED strips are a great option. Give them a try today and see how they can benefit you!
You Can Check It Out To Light Up Acrylic With Led

Frequently Asked Questions
Can You Wire Led Strips in Series?
Yes, you can wire LED strips in series. The easiest way to do this is by using a breadboard. Simply connect the (+) ends of each strip together and then turn on the power to each strip (using a switch or outlet). You’ll now be able to control all of the lights from one place!
Should I Wire My Led Lights in Series or Parallel?
Wire your lights in series if you want them to work as a single unit and save energy. Wire your lights in parallel if you want more light output from each bulb, but they will use more energy overall.
Do I Need a Resistor for Led?
the optimal wiring configuration for LEDs will vary depending on the type of LED, the amount of current being drawn, and the application. That being said, some tips on how to wire LEDs in series and parallel can be helpful in general:
1. Wire LEDs in series when you need a high current draw – When you need a high current draw from your LEDs, it is best to wire them in series. This will allow for a greater current flow and increased brightness.
2. Wire LEDs in parallel when you need less current – When you don’t need a high current draw from your LEDs, it is best to wire them in parallel. This will save on battery life and overall brightness.
3. Match the LED type to the wiring configuration – When wiring LEDs in series or parallel, make sure to match the LED type to the wiring configuration. For example, if you are wiring four red LEDs in series, make sure that all the wires are connected together at the same end (the positive end).

What Happens if You Put Too Much Voltage Through an Led?
LEDs can be damaged if they’re plugged into an outlet that is too high of a voltage. When this occurs, the electric current runs wild through the LED and eventually damages it. This problem becomes particularly dangerous when children are playing with LEDs because they don’t understand how electricity works and may not realize just how powerful a voltages can be.
If you notice that your LED is dying sooner than usual or has started to flicker, it’s important to switch it out for a new one as soon as possible before damage occurs. If you do notice any damage already done, then you will need to take extra precautions by wrapping the LED in some electrical tape so that excess voltage doesn’t run through it again.
Conclusion
In conclusion, wiring LED strips in series is not difficult, but it does require some basic understanding of electricity and how LEDs work. However, by following the steps outlined in this article, you can easily wire your own LED strips in series and enjoy all their benefits. Thanks for reading our post about how to wire LED strips in series.