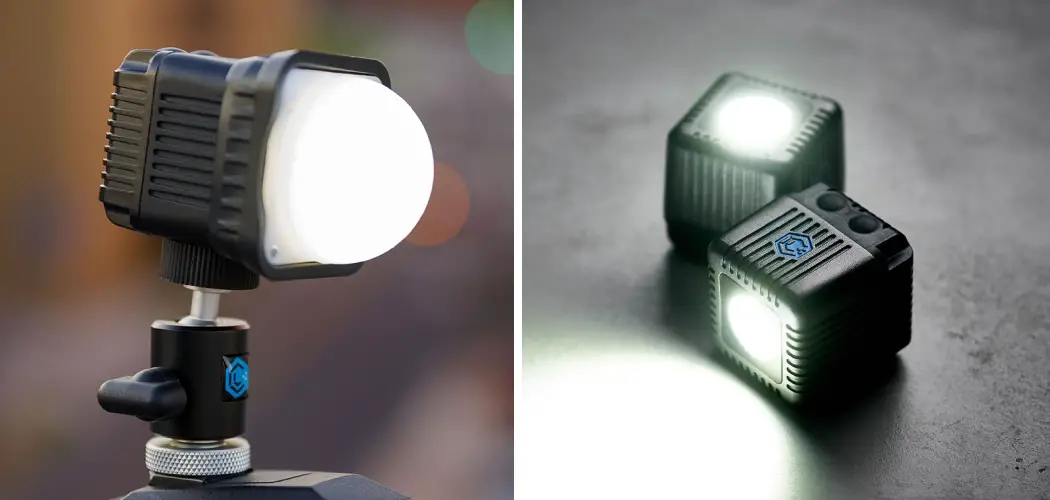
Do you want to add a pop of brightness and color to your photos? Are you looking for an easy way to spice up DIY projects or crafts? Adding Lume Cubes is the perfect solution! These portable cubes of light are great for adding dimension and depth to any photo.

But how to charge a Lume Cube? Many people are drawn to the features and capabilities of these tiny yet powerful LED lights, but getting them charged up can be tricky if you don’t know what to do.
That’s why we have created this blog post; to provide step-by-step instructions on charging it and making it ready for use! We will also cover other ways you can use your Lume Cubes, such as in photography or video production, camping, or general lighting around the home.
What are the Benefits of Using Lume Cube?
Lume Cube is a great tool for any photographer, videographer, or hobbyist. It offers powerful brightness levels and the ability to adjust light settings with just the press of a button. The small size also makes it easy to carry around in your bag and set up quickly on any location or job site.
In addition, Lume Cube tech is designed to be efficient and long-lasting – so no matter how many times you use it, you’ll always get optimal results!
Overall, the advantages of having a Lume Cube in your kit are clear – but you need to make sure that it’s charged up and ready for use. So let’s get into how to charge a lume cube!
What Will You Need?
To charge your Lume Cube, you’ll need the following:
- A USB cable compatible with the Lume Cube
- An AC/DC power adapter with a range between 5V and 24V
- A wall outlet or other power source
Once you have your supplies ready, you’re ready to move on to the next step!
10 Easy Steps on How to Charge a Lume Cube
Charging up your Lume Cube is quick and easy. Just follow these steps:

Step 1. Plug in the USB Cable:
Connect one end of the USB cable to your Lume Cube and the other end to the AC/DC power adapter. You can also use a laptop or desktop computer as the power source. If you do this, just connect the USB cable to the computer instead of the adapter.
Step 2. Plug in and Turn on the Adapter:
Plug the AC/DC power adapter into a wall outlet or other power source and turn it on. It will now begin supplying power to your Lume Cube. Additionally, you can use an external battery pack as your power source.
Step 3. Monitor the LED Lights:
The LED lights on your Lume Cube will indicate its charging progress. While red, it means that the battery is still low and not yet fully charged. When all three are solid green, it means that the cube has been successfully charged.
Step 4. Unplug the USB Cable:
Once the LED lights have turned green, you can unplug the cube from its power source and disconnect it from the USB cable. Now your Lume Cube is ready to use! You can also safely store it away, as the battery will remain charged for weeks or months, depending on your usage.
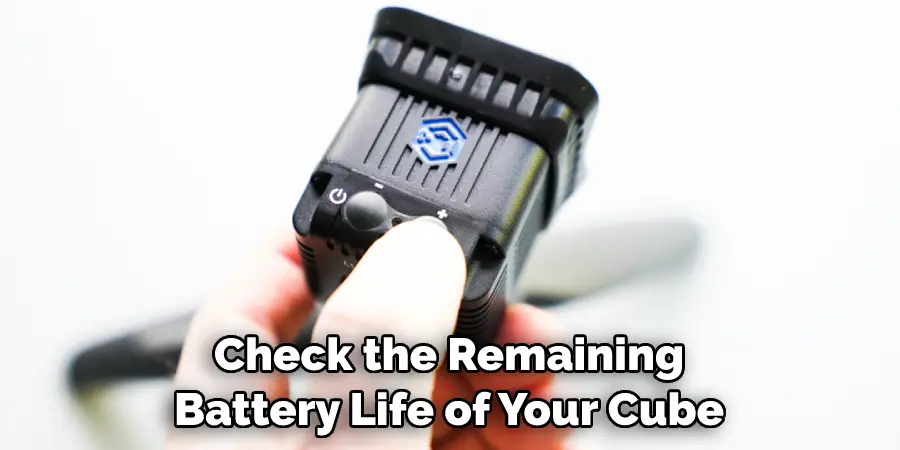
Step 5. Check the Battery Life:
If you wish to check the remaining battery life of your cube, simply press and hold the power button for three seconds. The LED lights will indicate how much charge is left in the battery. This is a great way to make sure that you’re always prepared for your next shoot or project!
Step 6. Charge Time:
It’s important to note that charging a Lume Cube fully takes 1-2 hours. Be sure not to leave it plugged in too long, or it could overcharge and cause damage. As a rule of thumb, it’s best to unplug the cube when the LED lights turn green.
Step 7. Heat Warning:
When charging your Lume Cube be aware that it may become slightly warm. This is normal and nothing to worry about; however, if it feels extremely hot, then disconnect immediately. Otherwise, you can proceed with charging as normal.
Step 8. Choose Your Brightness Setting:
Before use, you can choose the brightness setting that best suits your needs. Press and hold the power button for three seconds to access the different levels of brightness. Don’t forget to turn your cube off to save battery power when you’re done using it. Because the battery will last for weeks or months, there’s no need to leave it on when not in use constantly.
Step 9. Activate Bluetooth:
You can also activate Bluetooth on your cube by pressing and holding down the power button until all four LED lights turn blue. This will allow you to connect with any compatible devices. Moreover, you can control your cube’s settings through the Lume-X app. This app is available on both iOS and Android. So, you can easily access your cube’s settings right from your smartphone.
Step 10. Enjoy Your Lume Cube:
Now it’s time to enjoy your fully charged and ready-to-go Lume Cube! Use it as a light source in video production, photography, camping, or around the home as general lighting – whatever works for you! Remember to check the battery life regularly and recharge when needed.
By following these ten easy steps, you’ll be able to charge your Lume Cube for optimal performance properly. Enjoy your new light source!
5 Additional Tips and Tricks
1. Use the Correct Type of Charger or Adapter: Make sure you have the correct type of charger or adapter for your Lume Cube. The light is designed to be charged with a USB-C connector, so use the right one to ensure efficient charging.

2. Follow the Indicator Lights: Your Lume Cube comes with two indicator lights that tell you when it is charging and when it is fully charged. While charging, the light will be solid green, while a flashing red indicates that it is fully charged.
3. Use Multiple Ports: If you need to charge your Lume Cube faster, consider plugging it into multiple USB ports or outlets simultaneously. This will help speed up the time for a full charge.
4. Unplug Once Finished: Once your device has been fully charged, make sure to unplug it from its source of power to avoid overcharging and wasting energy unnecessarily.
5. Store in a Cool Place: To maximize your Lume Cube’s life, store it in a cool and dry environment. This will help avoid any damage to its internal components.
Following these tips will help you keep your Lume Cube charged and ready for use at all times!
6 Things You Should Avoid
1. Avoid Fast Charger: Don’t use a fast charger or sudden surge of power to charge the Lume Cube. Doing so could cause damage and reduce its effectiveness.
2. Avoid Fully Discharging the Battery: Don’t completely discharge your Lume Cube’s battery. This can affect its performance and shorten its lifespan.
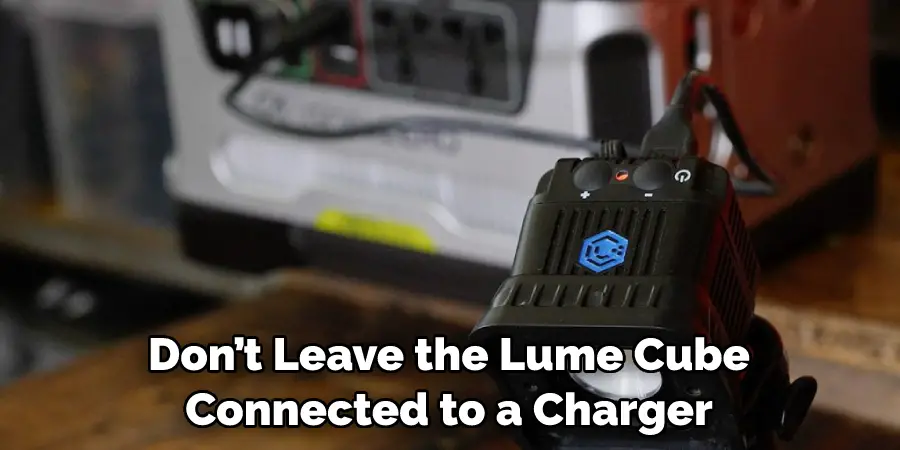
3. Avoid Overcharging: When charging, don’t leave the Lume Cube connected to a charger for an extended period of time, as this could cause damage to the battery or circuitry inside the device. It is best only to charge it when needed and disconnect it once it is done charging.
4. Avoid Using Damaged Cables: If you notice any damage or fraying on your cable, replace it immediately with a new one designed specifically for use with your Lume Cube in order to avoid any safety issues that may arise from using a faulty cable.
5. Avoid Leaving the Lume Cube in Direct Sunlight: Direct sunlight can damage the device and shorten its lifespan. Make sure to keep it away from direct light sources or store it in a cool, dry place when not in use.
6. Avoid Using Incompatible Devices: Don’t try to use your Lume Cube with any device that is not compatible. This could cause damage to the light and device, as well as potentially void any warranty on the product.
By following these simple guidelines, you’ll be able to ensure your Lume Cube charges safely and effectively so you can enjoy its full potential!
Conclusion
All in all, charging Lume Cube is a simple and straightforward process. There are several types of chargers that can be used depending on personal preference and budget. The USB charging cable is probably the most widely used, but the other options, like wall adapters and car chargers, also have their advantages. Following the steps outlined above is important to prevent potential damage to your device or battery.
Plus, knowing how to charge your Lume Cube will keep it ready when you need it, so you never miss out on creating captivating content! From there, all you need is a bit of creativity and the right environment, and you’re sure to create something great!
Hopefully, the article on how to charge a lume cube was of use to you! Best of luck with your creative endeavors.