
Led lights are a great way to decorate your home or office. They come in various colors and styles and can be used to brighten up any space. This blog post will show you how to connect the 4-pins led strip. We will also cover the different types of connectors available and give you some tips on choosing the right one. Let’s get started.
A 4-pin LED strip is a type of LED lighting that uses four pins to connect the LED lights to a power source. This type of LED strip is often used in cars and other vehicles because it is more durable and can withstand higher temperatures than other LED strips. 4-pin LED strips are also popular because they are easy to install and relatively inexpensive. Additionally, four-pin LED strips often offer a higher level of brightness than other types of LED strips.

4-pin LED strips can be connected to a power source in a few different ways. The most common way is to use a standard 4-pin connector, which can be found at any hardware store. Alternatively, you can also use a solderless connector, which makes the process of connecting the 4-pin LED strip to the power source much easier. Once you have the 4-pin LED strip and the power source connected, you will need to connect the ground wire to the negative terminal of the power source. Next, you will need to connect the positive wire to the positive terminal of the power source. Finally, you will need to connect the data wire to the data port on the LED strip.
Summary: This is a guide on how to connect four pin led strip. First, identify the pins of the led strip. Second, connect the black (ground), red (positive), green (positive), and blue (negative) wires to the corresponding pins on the led strip. Finally, connect the power supply to the remaining two pins on the led strip.
Things You Will Need:
- 4 Pin Led Strip
- 4 Pin Connector or Solderless Connector
- Power Source
- Ground Wire
- Positive Wire
- Data Wire
Step by Step How to Connect 4 Pin Led Strip:
1. Use a Standard 4 Pin Connector.
The standard 4-pin connector is the most common way to connect a 4-pin led strip. This type of connector can be found at any hardware store. Standard 4-pin connectors typically have two black wires, red and green wires.
2. Use a Solderless Connector.
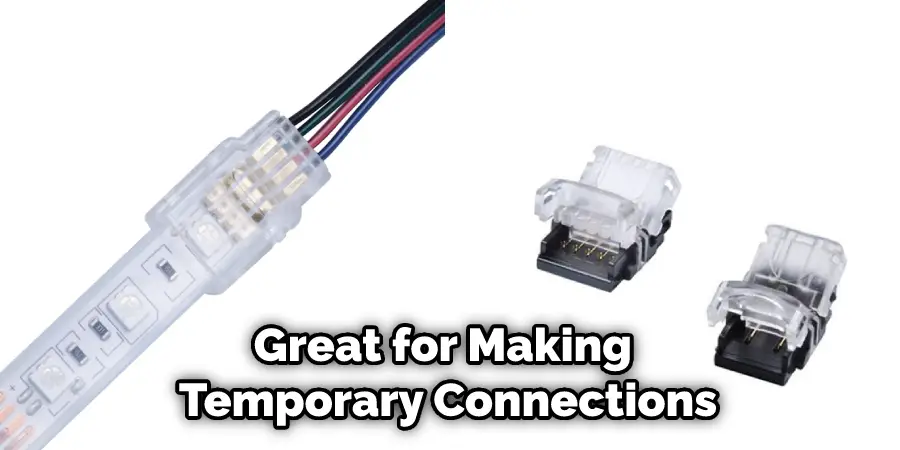
If you don’t want to solder your wires, you can use a 4-pin solderless connector. You’ll need to strip the ends of your wires and insert them into the connector. Once the wires are inserted, squeeze the connector to secure the connection. Solderless connectors are great for making temporary connections or for connecting wires that are difficult to solder.
3. Connect the Ground Wire to the Negative Terminal of the Power Source.
The ground wire is typically black wire. This wire needs to be connected to the negative terminal of the power source. If you’re using a battery, this would be the negative end. If you’re using an AC adapter, the ground wire or the “-” sign would be the ground wire.
4. Connect the Positive Wire to the Positive Terminal of the Power Source.
Once you’ve determined that a loose connection is causing your headlights to flicker, it’s time to clean all connections. Start by cleaning the connection between the battery and the headlight bulb. To do this, use a wire brush to remove any dirt or corrosion. If the connection is still loose, sandpaper can be used to rough up the surfaces so that they make better contact.

5. Connect the Data Wire to the Data Port on the Led Strip.
Now that your led strip, power supply, and controller are set up, it’s time to connect the data wire to the data port on the led strip. This will allow you to control the lights on the strip using your controller. To do this, connect the data wire to the data port on the led strip. You may need to use a small screwdriver or other tools to loosen the screws on the data port to insert the wire. Once the wire is inserted, tighten the screws to secure it in place.
6. Use Electrical Tape.
Use electrical tape to secure the two remaining wires to the exposed wire of the 4-pin connector. Make sure that the wires are not touching each other to avoid a short circuit. Electrical tape is not the most permanent solution, but it will work for most purposes. You can also use heat shrink tubing to provide a more durable connection.

7. Use Zip Ties.
Attach the LED strip light to the desired surface using a zip tie. Make sure that the LED strip is not in contact with anything that could cause a short circuit. If necessary, use electrical tape to insulate any exposed wires.
8. Use Hot Glue.
Hot glue is a great way to secure your led strip lights in place. To apply, simply put a small amount of glue on the back of the light strip and press it into place. The glue will hold the strip in place and prevent it from moving around.
9. Use Screws.
To attach your led strip light more permanently, you can use screws. First, make sure the surface you’re attaching it to is clean and dry. Next, align the led strip light in the position you want it, and mark the locations of the holes. Then, remove the led strip light and drill pilot holes at the marked locations. Finally, screw the led strip light into place.
10. Use Double-sided Tape.
Double-sided tape is another great way to secure your led strip light in place. Simply apply a small amount of tape to the back of the strip light and then stick it down onto your desired surface. The great thing about using double-sided tape is that it’s removable, so you can easily take your strip lights down if you need to.

11. Connect the Controller to the Power Source.
Now that you have your led strip lights all set up, it’s time to connect the controller to the power source. Depending on the type of controller you have, this may be a battery pack or a power adapter.
If you are using a battery pack, make sure that it is fully charged before you begin. Turn on the power switch once the controller is connected to the power source. You should see the led strip lights turn on. If they do not, check the connections and make sure that everything is secure. Now that the lights are on, you can adjust the brightness of the strip lights using the potentiometer. Make sure that the potentiometer is turned all the way up when you begin adjusting the light intensity. You can increase or decrease the brightness by turning the knob clockwise or counterclockwise.
12. Use the Controller to Change the Colors of the Led Strip Lights.
Now that your led strip lights are all set up and working, you can use the controller to change the colors of the light. The controller will have different buttons that you can press to change the color. Some controllers may also have a remote that you can use to change the colors.
13. Enjoy Your 4-Pin Led Strip Lights.
4-pin led strip lights are a type of light that can be used for decoration or fun. They are easy to install and use, but it is important to follow the manufacturer’s instructions carefully. Never leave the lights on unattended, and be sure to take care of them so they will last a long time.
Tips and Warnings on How to Connect 4 Pin Led Strip:
Tips:
- Always connect the ground (negative) first and then the power (positive).
- If your project requires more than one strip, make sure to daisy chain the strips together.
- Make sure you have the correct voltage power supply for your strip.
- Use heat-shrink tubing or electrical tape to cover any exposed wires.
- Use a multimeter to test your connections before applying power.
Warnings:
- Do not exceed the maximum current rating for your led strip or power supply. This can damage your LEDs and strip.
- Be careful when handling led strips as they are sensitive to static electricity.
- Make sure your work area is well-ventilated, as soldering can produce harmful fumes.
- Do not look directly into the LEDs when illuminated, as this can damage your eyesight.
Why Is My 4-Pin Led Strip Not Working?
If your 4-pin led strip is not working, it could be for many reasons. First, check the following, make sure that your power supply is working and properly connected to the led strip. If it is, then check the connection between the controller and the led strip.
Next, make sure that the controller is properly programmed and that the correct settings are selected. Finally, check the led strip itself for any damages or loose connections. If all of these things are in working order, then you may have a defective led strip or controller. In this case, you will need to replace the defective component.

Frequently Asked Questions
Why Does My Led Strip Have 4 Wires?
When looking at a standard light bulb, you will see that it has three wires connected to its inner chamber. These are the white (hot), green (middle), and yellow (cold) wires. The fourth wire is purposely left unused so that the heat from the other 3 can be evenly distributed throughout the bulb.
Same principle applies to LED strips- each color corresponds to one of those visible wavelengths in sunlight: red, orange, yellow green, blue, indigo). By having 4 separate outputs for each color instead of just 1 continuous output like with incandescent bulbs or CFLs , LEDs create a more intense hue and better quality brightness than traditional lights because there’s no interference from neighbouring colors .
Can I Use 4-pin Led With 3 Pin?
While it is possible to use 4-pin led with 3 pin, it is not recommended because the current output voltage of a four-pin LED is higher than that of a three-pin LED. This can cause damage to your equipment if you’re not using the correct voltages. It’s important to consult with an electrician or technician when installing new lights in order to avoid any undesirable consequences.
What is 4-pin Rgb Led?
4-pin rgb led is a type of led light that uses 4 pins for connecting to an Arduino or other microcontroller. They are commonly used as indicators, status lights, or pointers. They are available in different colors and can be controlled using various programming languages.
Can You Control 4 Pin Rgb?
However, if you are struggling with focusing or seeing details in color that are close up, it may be a good idea to wear glasses or contact lenses when using LED lighting. Additionally, make sure that the light source is placed where you can see it best and avoid direct sunlight when possible.
Conclusion
So there you have it, our guide on how to connect 4 pins led strip. We hope that this article has been helpful and provided all the information you need to get your new lighting project up and running. If you have any questions or run into any problems while connecting your LED strip, be sure to leave a comment below, and we’ll do our best to help out. Thanks for reading!