
LED strips are a great way to add some color and excitement to your project, but what do you do when one of the LEDs goes out? This blog post will show you how to fix a broken LED strip. We’ll also cover some tips for extending the life of your LED strip. So, if you’re having problems with your LED strip, keep reading.
A broken LED strip is a LED light strip that has been damaged or stopped working correctly. The damage can be caused by many things, such as water, heat, physical damage, or even wear and tear. When a LED strip stops working, it can often be fixed by replacing the damaged parts. However, sometimes the entire strip will need to be replaced.

This Instructable will show you how to fix a broken LED strip. The first thing you need to do is find the break in the strip. To do this, plug in your LED strip and turn it on. Then, slowly move your hand along the strip until you find the break. Once you find the break, mark it with a piece of tape so you can easily find it later.
Summary: Fixing a broken LED strip can be a little bit tricky, but with a little know-how and a few tools, it’s not too difficult. First, remove the damaged strip by gently pulling it out of the housing. Then, use a flat head screwdriver to pry up the adhesive backing, and peel it off the LED strip. Finally, use a razor blade or a utility knife to cut the old adhesive off the new LED strip, and then press it firmly onto the housing.
What Causes a Broken Led Strip?
Many things can cause a LED strip to break. Some of the most common causes are listed below:
Water Damage:
If a LED strip gets wet, it can short circuit and stop working. Water can also cause the adhesive holding the strip in place to fail, causing the strip to fall off.
Bending:
LED strips are flexible, but they will be damaged if they are bent too much. Bending them at too sharp of an angle can result in the internal wires breaking, which will cause the LEDs to stop working. Try to avoid bending the strips more than 90 degrees.
Heat:

If a LED strip gets too hot, it can be damaged. Heat can cause the adhesive to fail, causing the strip to fall off. It can also cause the LEDs to fail. If your LED strip is getting too hot, there are a few things you can do to prevent damage:
- Use a lower power setting. This will help to prevent the strip from getting too hot.
- Use a shorter strip. This will help to dissipate the heat more effectively.
- Use a larger heatsink. This will help to keep the strip cooler.
- Use a fan to cool the strip. This will help to keep the strip cooler and will also help to prevent the adhesive from failing.
Physical Damage:
If a LED strip is hit or crushed, it can be damaged. This type of damage is often irreparable and can render the LED unusable. Physical damage can occur in several ways, such as:
- Hitting or crushing the LED
- Puncturing the LED
- Folding or creasing the LED
- Applying too much pressure to the LED

Tools & Materials Required:
- LED strip
- Tape
- Wire cutters
- Wire strippers
- Soldering iron
- Solder
- Heat shrink tubing (optional)
- Electrical tape (optional)
- Multimeter (optional)
10 Easy Methods – How to Fix a Broken Led Strip:
1. Check Your Power Supply
The first step in troubleshooting a broken LED strip is to check your power supply. Make sure that it is plugged in and turned on. If it is not plugged in, plug it in and turn it on. If it is plugged in but not turned on, turn it on.
2. Check the Connection Between the Power Supply and the LED Strip
If the LED strip is not lighting up, it may not be receiving power. First, check the connection between the power supply and the LED strip to make sure it is secure. If the connection is loose, tighten it. If the connection is damaged, you may need to replace the power supply or the LED strip.

3. Check the Fuse
If the LED strip is not working, check the fuse to see if it is blown. If the fuse is blown, replace it with a new one. You can use a multimeter to test the fuse to see if it is blown. Fuse ratings are usually printed on the side of the fuse.
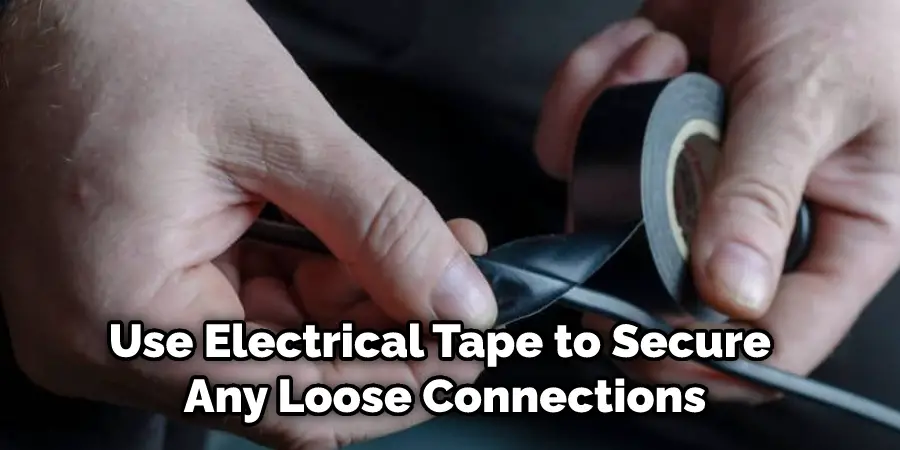
4. Check for Loose Wires
If the LED strip is not receiving power, the problem may be loose wires. Check all of the connections and make sure that they are secure. If you find any loose wires, tighten them up and see if that fixes the problem. Use electrical tape to secure any loose connections.
5. Try a Different Power Supply
If the LED strip still isn’t working, the problem may be with the power supply. Try using a different power supply, and if that doesn’t work, check the voltage rating on the power supply to make sure it’s compatible with the LED strip. If you’re using a 12V power supply, ensure the voltage rating is at least 12V. If you’re using a 24V power supply, make sure the voltage rating is at least 24V. If you’re using a 1A power supply, make sure the current rating is at least 1A. If you’re using a 2A power supply, make sure the current rating is at least 2A.
6. Check the LEDs
If the LED strip is not lighting up, the problem may be with the LEDs. Check to see if all of the LEDs are in working order. If even one LED is not working, the whole strip will not work. Use a multimeter to check if the LEDs are receiving power. If they are, then the problem may be with the soldering.

7. Check the Soldering
If the lights are not working, it may be because the connections are not secure. Check all of the connections to make sure they are tight. If any of them are loose, you can try soldering them again. Use a multimeter to check for continuity between the positive and negative leads on the strip. If there is no continuity, then the connection is not complete and needs to be fixed.
8. Replace the Driver Chip
If the LEDs are still not working, the problem may be with the driver chip. This chip controls the current going to the LEDs. To replace the driver chip, you will need to solder a new one in place of the old one. You can purchase replacement driver chips online or at an electronics store.
9. Replace the Damaged LED
If one of the LEDs is not working, you can try replacing it with a new one. You will need to find the damaged LED and remove it from the strip to do this. Then, solder a new LED in its place. Once the new LED is in place, test the strip to see if it is working properly.
10. Call a Professional
If you have tried all of these troubleshooting tips and the LED strip still isn’t working, you may need to call a professional. An electrician or lighting technician will be able to diagnose the problem and make the necessary repairs.

Tips and Warnings
Tips:
- Use a multimeter to test continuity. If the circuit is open, then you will need to replace the strip.
- Check for any visible damage. If the strip is damaged, then it will need to be replaced.
- Make sure that the power supply is working properly. If the power supply is not working, then you will need to replace it.
Warnings:
- Always follow the manufacturer’s instructions when working with electronics.
- Never work on a live circuit. Always disconnect the power before working on any electrical components.
- Use extreme caution when working with high-voltage circuits. Always use proper safety equipment and follow all safety precautions.
How Long Does Led Strip Light Last?
The answer to how long LED strip light lasts is that it depends on many factors. The lifespan of an LED is around 50,000 hours, so in theory, your LED strip lights should last a very long time. However, other factors can affect the lifespan of your LED strip lights, such as how often you use them, how well you take care of them, and what type of LED strip lights you have.
- The quality of the LED strips. Cheap LED strips are more likely to fail prematurely than high-quality ones.
- How often do you use LED strip lights? If you use them all the time, they will inevitably wear out faster than if you only use them occasionally.
- How well do you take care of the LED strip lights? If you store them properly and don’t expose them to excessive heat or moisture, they will last longer.
With all that said, if you take care of your LED strip lights and don’t use them excessively, you can expect them to last several years. So, if your LED strip lights have stopped working, it’s likely due to one of the other factors mentioned above and not because the LEDs themselves have failed.
Frequently Asked Questions
Can You Use Super Glue on Led Strip Lights?
It’s important to be careful when using super glue on led strip lights because the adhesive can cause permanent damage. That being said, there are a few ways that you can safely and effectively use super glue on led strip lights. One way is to first remove any excess adhesive with acetone or alcohol before applying the super glue. You should also make sure that the area where you’re applying the super glue is dry and clean so that it doesn’t create further dirt or dust particles in contact with the adhesive.
How Long Do Led Strip Lights Last?
LED strip lights are usually rated for a lifespan of up to 50,000 hours. This means that they should last between 8 and 12 years with average use. However, like any other light source, LED strip lights will eventually fail if not properly maintained. Make sure to clean them regularly using an all-natural solution like white vinegar or baking soda to remove built-up contaminants and dust particles. If there is excessive glare or flicker from the LEDs, then it may be necessary to replace the entire strip light unit.
Can You Connect Led Strips Together?
Yes, you can connect led strips together using a standard electrical cable. Just make sure that the polarity of the leads is correct – positive to positive, and negative to negative. Once you have connected the strips, you can begin wiring them together in any configuration you desire.
Do Led Strip Lights Burn Out?
Yes, LED strip lights do eventually burn out. This is because LEDs are a type of lighting that emits light through electricity rather than heat, and as such they will wear out over time. There are several factors that can contribute to the lifespan of an LED strip light, including how often it is used, the quality of the lighting system itself, and proper care and maintenance. It’s important to replace your LED strips every 2-3 years if you’re using them regularly for general illumination or decoration purposes.
Conclusion
This guide has shown you how to fix a broken LED strip. If all of these tips don’t work for you and your strip is still broken, it might be time to consider purchasing a new one. But before you do that, try out our methods and see if they work for you. And as always, feel free to reach out to us if you have any questions or concerns about this process or anything else related to LED strips. Thanks for reading!