
If you’re looking to add some extra holiday cheer to your home, consider hanging lights on your aluminum siding. It’s a quick and easy way to dress up your house for the holidays and can be done in just a few minutes. Here are a few tips on how to hang lights on aluminum siding.
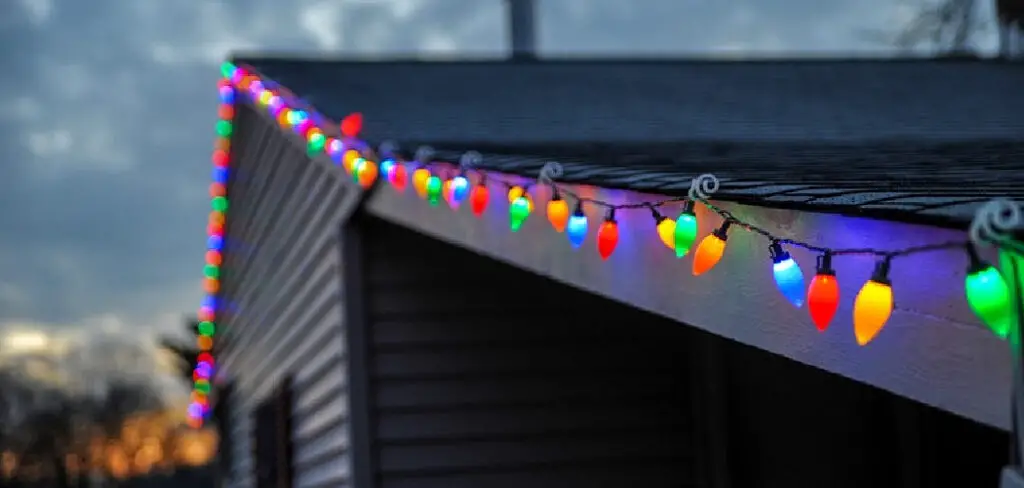
If you’re looking for a quick and easy way to add some holiday cheer to your home, consider hanging lights on your aluminum siding. This can be a great way to show off your holiday spirit, and it’s a project that can be completed in just a few minutes. Here are the steps you need to follow to get the job done.
Summary: Hanging lights on aluminum siding can be a challenging task, but with the right tools and techniques, it is possible to securely install your lights without causing damage to the siding. Before you begin, gather the necessary materials, such as the lights you wish to hang, specialized clips or hooks designed for use with aluminum siding, a measuring tape, a pencil or marker, and a ladder or step stool for reaching the desired installation points. It is essential to use clips or hooks specifically designed for aluminum siding to avoid drilling holes, which can lead to potential moisture issues or void your siding warranty.
First, plan the layout of your lights, taking measurements and marking the intended placement of each clip or hook along the siding. This will help ensure even spacing and a visually appealing result. Using a ladder or step stool to access the installation points, attach the specialized clips or hooks to the siding according to the manufacturer’s instructions. These clips or hooks typically slide, snap, or clip onto the siding without the need for drilling or causing damage.
With the clips or hooks securely in place, begin hanging your lights by attaching the light strands to the clips or hooks, ensuring that the lights are taut but not overly tight. Continue attaching the light strands to the clips or hooks along the siding, adjusting as needed for an even and visually pleasing result. Once the lights are hung, plug them in and test them to ensure they are functioning correctly. By following these steps and using the appropriate materials, you can safely and effectively hang lights on aluminum siding, creating a beautiful and festive display for any occasion.
What Are Aluminum Siding?
Many homeowners choose aluminum siding for its durability and easy maintenance. Unfortunately, attaching lights to aluminum siding can be more challenging than with other materials. The good news is that there are a few different ways to do this, which we will explore below.
There are various options for hanging lights on aluminum siding, but using 3M command strips specifically designed for this purpose is one of the best. These strips come in different sizes, so you can choose the one that best fits your needs. They are also easy to install and remove, so you can take them down at the end of the season without damaging your siding.
Another option is to use zip ties. This method is a bit more permanent, but it will still allow you to remove the lights at the end of the season if you need to. Attach the zip ties to the hooks on your lights and then wrap them around the aluminum siding. Ensure that you do not overtighten the zip ties, as this can damage the siding.
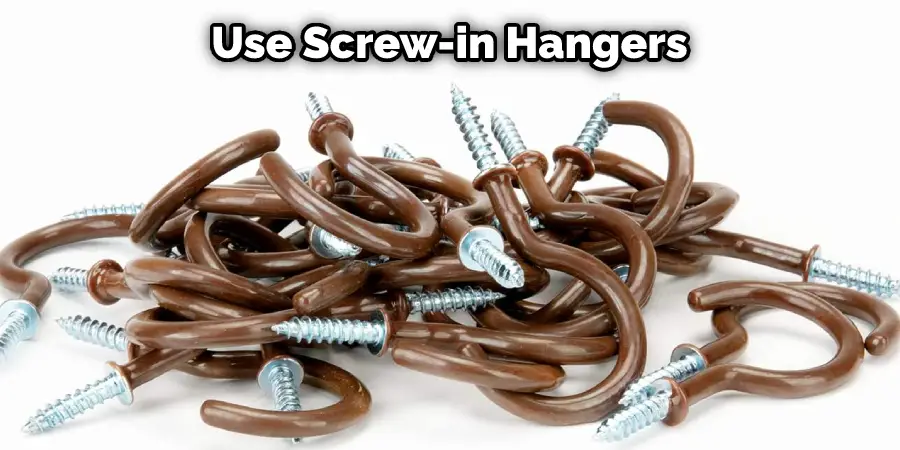
A final option is to use screw-in hangers. This is the most permanent option, but it will also provide the most secure hold for your lights. Screw the hangers into the aluminum siding and then hang your lights from them. Be careful not to overtighten the screws, as this can damage the siding. Now that you know how to hang Christmas lights on aluminum siding, you can make your home look beautiful for the holidays. If you’re still unsure about how to do it, you can always hire a professional to take care of it for you.
If you want to put up lights for Christmas, it’s important to test how well they stay in place before you put them up all over. You can do this by hanging a few lights in an inconspicuous area and then waiting a few days to see if they stay up. That way, you’ll avoid any surprises come Christmas time.
You Can Check It Out to Hang Lights on Second Story
Tools and Materials Needed
- Lights (preferably LED)
- Hooks (plastic, rubber-coated metal, or coated hangers)
- Tape (masking, clear, or electrical)
- Extension cord (optional)
- Ladder (optional)
Step by Step Process on How to Hang Lights on Aluminum Siding
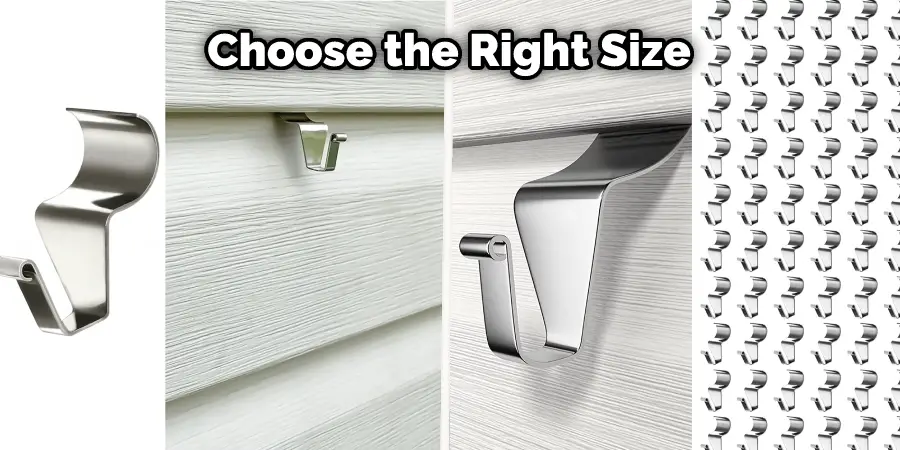
Step 1. Purchase the Correct Type of Hangers
The first step is ensuring that you purchase the correct type and size of hangers for your aluminum siding. There are several different types available, including: Plastic Hooks: These are the most common type of hooks and can be found at any hardware store.
They come in a variety of sizes, but make sure to get one that is slightly larger than the aluminum siding. This will ensure that the hook doesn’t slide off when you are trying to hang something.
Magnetic Hangers
These hangers use small, powerful magnets to attach securely to metal surfaces. They are quick and easy to install and can be used with various light sizes and shapes.
Clip Hangers
These hangers grip the edge of your siding and are ideal for use with mini lights. Clip hangers are available in plastic or metal and can be found in various sizes. It is important to choose the right size hanger for your siding thickness.
Stick-On Hangers
As the name suggests, these hangers stick directly onto your siding. Stick-on hangers are available in a variety of sizes and shapes, so you can find one that best suits the type of light you’re hanging. Most stick-on hangers are made of plastic or rubber and have a metal loop on top for attaching your light.
To use a stick-on hanger, peel off the backing and press the hanger onto your siding. Make sure the hanger is firmly attached before proceeding. Once the hanger is in place, thread your light’s cord through the loop and secure it in place.
Step 2. Clean the Area Where the Hangers Will Be Attached
Before attaching any hangers to your siding, it is important to clean the area well. This will help ensure that the hangers adhere properly and do not fall off. You can use a mild soap and water solution or a commercial window cleaner. Be sure to rinse the area well after cleaning and allow it to dry completely before proceeding. Clipping any loose paint or caulking will also help ensure a good bond.
Step 3. Attach the Hangers to the Siding
Once you have your design laid out, it’s time to attach the hangers to the siding. For this step, you will need:
- A drill
- 1/8″ bit
- Wire cutters
- Needle nose pliers
- Hanging light clips (we recommend C9 style or shark fin style)
- Zip ties (optional)
Begin by drilling a small hole through the top of each aluminum siding panel at the location where you want to attach a hanger. Next, use wire cutters to cut a length of hanging light clip wire that is long enough to reach from the hole in the siding to the base of the light clip. Thread the wire through the hole in the siding, and then use needle nose pliers to twist the end of the wire around itself to secure it in place.
Now, take your hanging light clip and gently push it onto the wire until it is snug against the siding. If you are using C9 style clips, be sure to orient the clip so that the metal tab is facing up (this will make it easier to insert the bulb later on). You can secure the light clip in place by adding a zip tie around the wire just above the hook, or by wrapping the excess wire around the base of the clip. Repeat this process for each light clip that you are using.
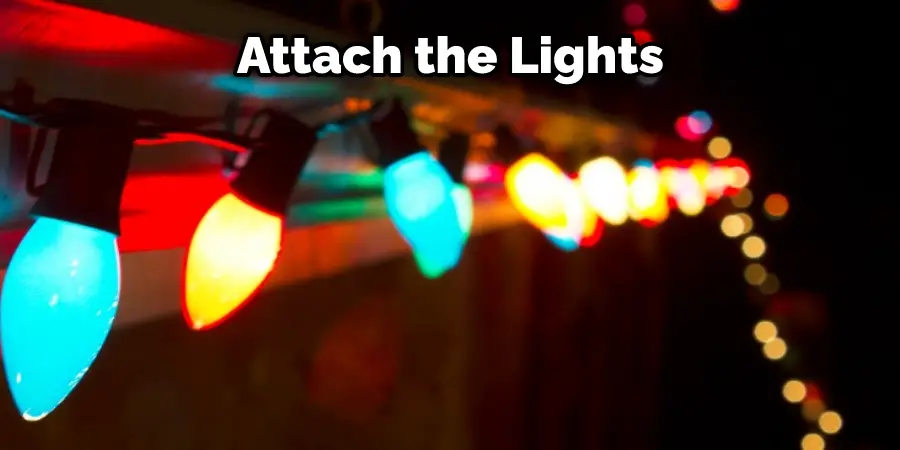
Step 4. Attach the Lights
Now that you have all of your light clips in place, it’s time to start attaching the lights! For this step, you will need:
- Lights
- Wire or zip ties
- Screwdriver (if using wire)
If you are using wire to attach the lights, start by threading it through the clip. Once the wire is in place, twist it around the back of the siding and screw it in place. If you are using zip ties, thread the zip tie through the clip and around the back of the siding. Repeat this process until all of your lights are in place. Now that you know how to hang lights on aluminum siding, you can enjoy your holiday decoration with peace of mind.
Step 5. Test Your Lights
Before you call it a day, be sure to test your lights to make sure they are working properly. Test each individual light and the string of lights as a whole. This will help you avoid any surprises come on Christmas Eve when you turn on your lights. If you notice any issues, now is the time to fix them, rather than waiting until the last minute. Then, once you have tested your lights and they are all in working order, you can sit back and enjoy the holidays, knowing that your home is looking its best.
You Can Check It Out to Attach Lights to Vinyl Fence
Tips and Warnings on How to Hang Lights on Aluminum Siding
Tips
- Use only lights that are rated for outdoor use.
- Be sure to follow the manufacturer’s instructions for wiring and installation.
- Use only UL-approved extension cords.
- Inspect lights and cords before each use.
- Do not overload circuits.
- Turn off all lights when leaving the house or going to bed.
- Keep flammable materials away from light strings and bulbs.
- Do not nail or staple cords to walls, ceilings, or other surfaces.
- Do not place lights in areas where they might be damaged by foot traffic or lawn care equipment.
- Discard damaged light sets and replace them with new ones.
Warnings
- Never use nails or tacks to hang lights on aluminum siding. The metal is too soft and will dent easily.
- Use only UL-approved lights and cords.
- Inspect cords and plugs for fraying or other damage before each use.
- Do not overload circuits.
- Turn off all lights when you leave the house or go to bed.
- Keep a fire extinguisher nearby when using any type of light.

Frequently Asked Questions
Can you nail into aluminum siding?
Yes, you can nail into aluminum siding. Nailing into aluminum siding is a common way to secure it to a building or structure. Aluminum siding is a lightweight material, which makes it easy to move and install. Additionally, aluminum siding is an affordable choice for a roofing material.
When nailing into aluminum siding, use a standard framing nail. Make sure the head of the nail is slightly below the surface of the aluminum so that the head does not protrude through the material. Drive the nail into the substrate with a gentle hammer strike. Hold the nail in place with a pair of pliers until it seats fully in the substrate. Repeat this process along the length of the siding.
Why is aluminum siding no longer used?
Aluminum siding is no longer used in most residential applications because it is not weatherproof or durable enough. The metal panels can corrode and decay over time, and the metal can also become too brittle to support the weight of a roof or walls. In addition, aluminum siding is not as energy-efficient as other materials options, so it may not be the best choice for a home that needs to save on energy costs.
Can you screw hooks into aluminum?
Yes, it is possible to screw hooks into aluminum. However, it is important to note that this will create a weaker connection between the hook and the surface, and the hook may eventually fall off. It is also important to keep in mind that screws will eventually wear down the aluminum surface, so it may be necessary to replace the screws periodically.
What are the disadvantages of aluminum siding?
There are several potential disadvantages of using aluminum siding, including:
1. susceptibility to weathering and erosion.
2. high maintenance requirements.
3. potential for fire damage.
4. decreased insulation values.
5. decreased energy efficiency.
6. increased cost of repair or replacement.
Conclusion
Hanging lights on aluminum siding can be a difficult task, but it can be done with the right tools and some patience. Here are a few tips to help you get started. First, find the studs in the wall by using a stud finder. Once you’ve located the studs, mark them with a pencil, so you know where to drill your holes. Next, drill pilot holes into the marked spots using a small drill bit. This will make it easier to insert the screws later on and will also help protect the aluminum from being damaged. Next, insert screws into each of the drilled pilot holes until they are tight against the siding. Make sure that all of the screw heads are facing in the same direction so that they can be easily covered by the wire or zip ties.
In this post, we will provide you with three different methods for how to hang lights on aluminum siding. Each of these methods has its own set of benefits and drawbacks, so choose the one that best suits your needs.
Which of these methods will you use to hang your holiday lights this year? Whichever method you choose, make sure to take into account the weather conditions in your area and how much weight your siding can support.