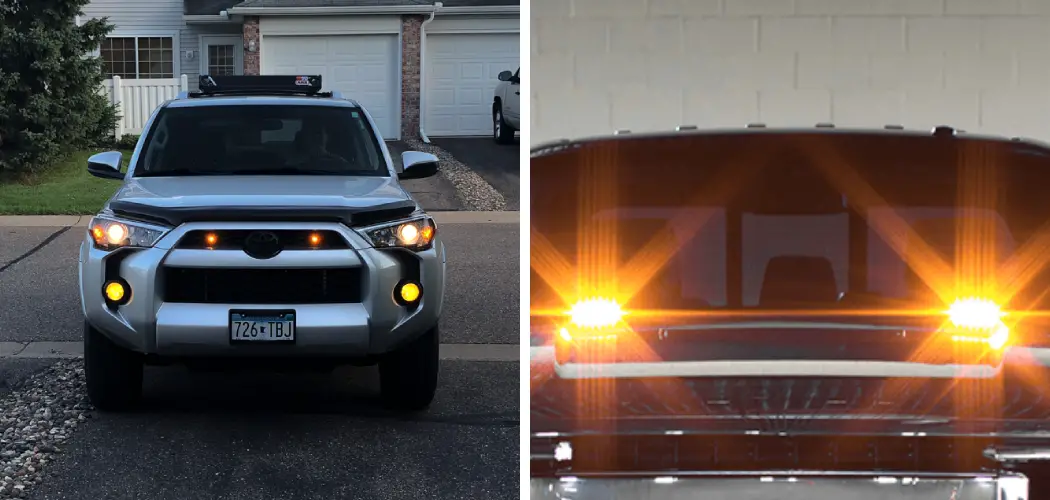
Have you ever been driving down the road and seen a car with amber lights on and thought to yourself, “What are they doing?” or “I wonder what that’s for?” If so, then this blog post is for you! It is important to know how to install amber lights.

In this post, we will discuss the purpose of amber lights and how to install them on your car. Stay tuned! Amber lights are a great way to add style and safety to your car. They are easy to install and relatively inexpensive, making them a popular choice for many car enthusiasts. In this blog post, we will walk you through the process of installing amber lights on your car.
What You’ll Need
- Amber lights
- Installation kit
- Drill
- Screwdriver
- Socket wrench
- A wire stripper/cutter
- Electrical tape
- Zip ties
8 Steps Guide on How to Install Amber Lights
Step 1: Clean the Area
Before you begin, it is important to clean the area around the light. This will help to ensure that the light is properly secured and will not fall off after installation. You should apply a thin layer of silicone to the area before proceeding to the next step. There are many cleaning products available that are specifically designed for this purpose.
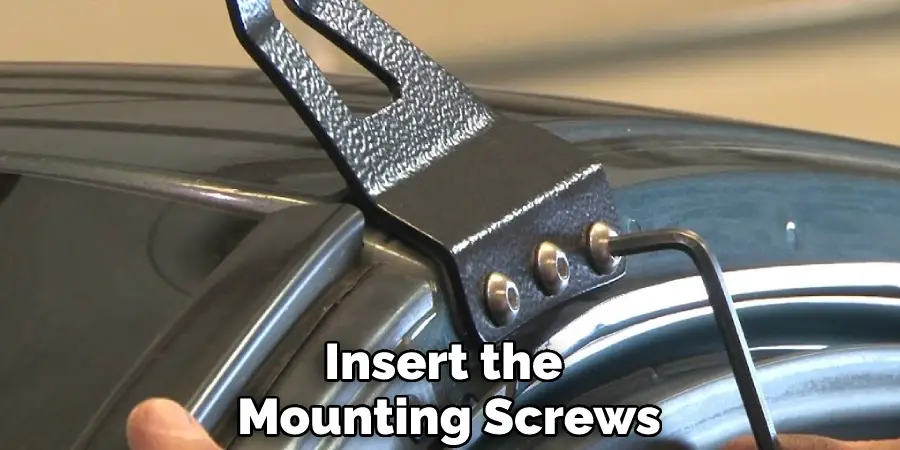
Step 2: Attach the Mounting Bracket
Use the drill to make holes in the mounting bracket. Once the holes are created, use the screwdriver to attach the bracket to the car. Make sure that the bracket is securely in place before moving on to the next step. Mounting brackets are typically made of metal or plastic.
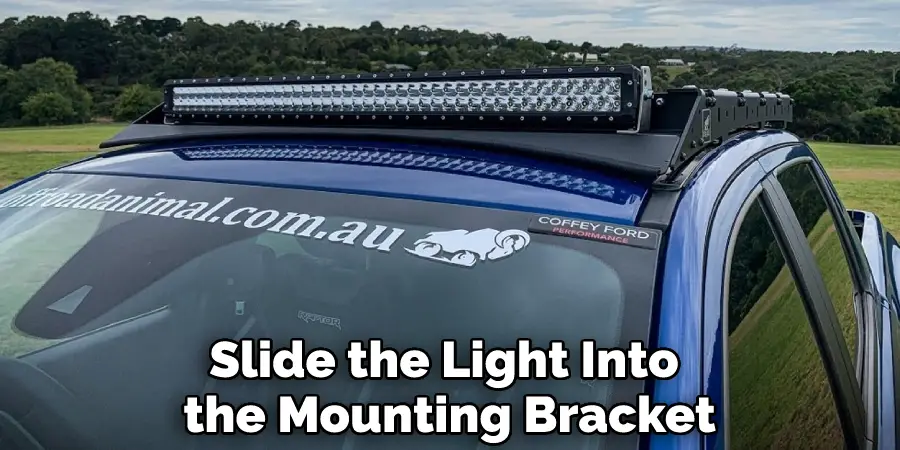
Step 3: Install the Light
Slide the light into the mounting bracket. Use the socket wrench to tighten the nuts or bolts that hold the light in place. The lights are usually secured with bolts or screws. Some voltage may be required to test the light before installation is complete. Proper placement of the light is essential for safety and proper functioning.
Step 4: Connect the Wires
Strip the ends of the wires that will be connected to the light. Use the wire cutter to trim any excess wire. Once the wires are prepped, twist them together and use electrical tape to secure the connection. The wires should be wrapped tightly so that they are not loose. To connect these wires to the light, you will need to access the back of the light.
Step 5: Run the Wires
Route the wires from the light to the battery. Use zip ties to secure the wires in place along the way. Proper arrangement of the wires is important for both safety and aesthetics. You want to make sure that the wires are not in danger of being cut or damaged. If the wires function properly, you can proceed to the next step.
Step 6: Connect to the Battery
Use the socket wrench to remove the negative terminal from the battery. This will prevent any sparks from occurring when you make the connection. Attach the wire from the light to the negative terminal and use the wrench to tighten the connection. Fuse holders are recommended use to protect the circuits.

Step 7: Test the Lights
Before you make the final connection, it is important to test the lights. Connect the positive terminal to the battery and make sure that the light comes on. If everything is working properly, you can proceed to the next step.
Step 8: Replace the Battery Terminal
Once you have confirmed that the light is working, use the socket wrench to replace the positive terminal on the battery. Make sure that the connection is tight to prevent any sparks or electrical problems. The terminal should be replaced with the original one that came with the battery.
Congratulations! You have successfully installed your amber lights. Be sure to follow these steps carefully to ensure a safe and successful installation.
Tips on How to Install Amber Lights
- Read the instructions that come with your amber lights carefully before beginning the installation process.
- Choose a location for your amber lights that will allow them to be easily seen by other drivers on the road.
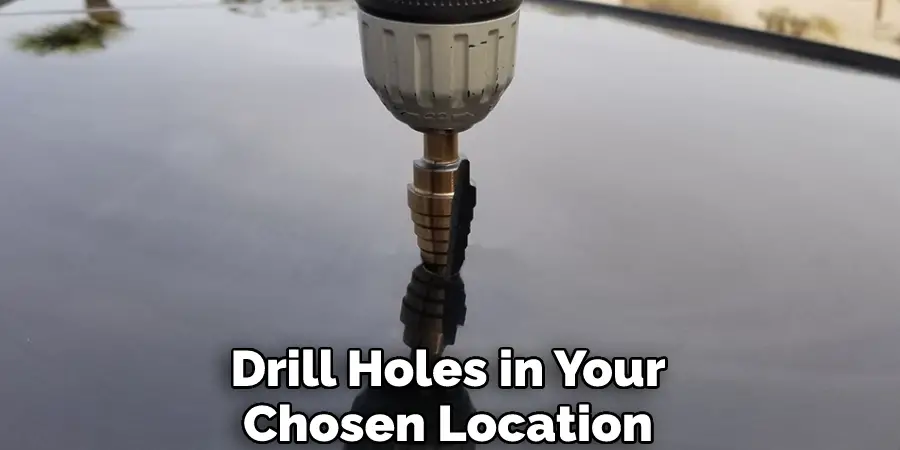
- Drill holes in your chosen location for the mounting screws. Be sure to use the appropriate size drill bit for the screws you are using.
- Use a screwdriver to secure the mounting screws in place. Do not overtighten the screws, as this could damage the lights.
- Plug the power cord into a nearby outlet and turn on the switch to test the lights.
- If your amber lights do not have a built-in switch, you will need to wire them to your vehicle’s electrical system. Consult your vehicle’s owner’s manual or a qualified automotive technician for assistance with this step.
- Once your amber lights are wired into your vehicle’s electrical system, they should turn on automatically when you turn on your headlights. If they do not, consult your vehicle’s owner’s manual or a qualified automotive technician for assistance.
- Enjoy improved visibility and safety on the road!
Frequently Asked Questions
How to Choose the Right Location for Your Amber Lights?
Now that you’ve decided to install some amber lights on your property, it’s time to choose the right location for them. One factor to consider is the amount of light you want the lights to emit. If you want a soft, subtle light, then you’ll want to position the lights near a source of darkness, such as a garden or a grove of trees.
On the other hand, if you want your amber lights to be more visible, then you’ll want to place them in an open area where they can reflect off of surfaces such as buildings or cars. Another factor to consider is the purpose of the amber lights.
If you’re trying to create a romantic ambiance, then you’ll want to choose a location with good lighting and plenty of privacy. However, if you’re trying to deter intruders or illuminate a dark path, then you’ll need to choose a location that is well-lit and free of obstructions. By taking these factors into account, you can ensure that your amber lights are both effective and aesthetically pleasing.
How to Drill Holes for the Mounting Screws?
Drilling a hole for the mounting screws is an essential part of the installation process. To drill the holes, you will need a power drill and a Drill Bit. The first step is to determine the location of the holes. Once you have determined the location, mark the spot with a pencil or pen.
Next, set the power drill to low speed and carefully drill the holes. Be sure to keep the drill bit perpendicular to the surface to avoid damage to the material. Finally, remove any debris from the holes and insert the mounting screws. With a few simple steps, you can easily drill holes for the perfect fit.
How to Secure the Lights in Place?
There are different types of lights that you can use to decorate your home. Some of these lights are designed to be hung from the ceiling or on a wall. Others are designed to be placed on a table or shelf. No matter what type of light you choose, you will need to secure it in place so that it does not fall and break.
The best way to do this is to use a lighted cover. A lighted cover is a clear plastic cover that fits over the light bulb. The cover has a hole in the center that allows the light to shine through. The cover also has a slit along one side so that you can insert the wires. Once the cover is in place, it will hold the light in place and prevent it from falling and breaking.
How to Connect the Wires?
Most homes have only two hot wires and one neutral wire running to the service panel. The two hot wires are normally color-coded black and red but may be different colors in some instances. One of these wires is called the line wire, while the other is called a load. The line wire comes directly from the power company to provide power to the panel.
The load wire goes out to an appliance or device and returns the power to the panel. To connect these wires, twist each end around a terminal screw clockwise until it is tight. Make sure that you do not over-tighten the screws, as this can damage the wire. Once all of the wires are connected, put the cover back on the service panel and turn on the power.
How to Replace the Battery Terminal?
At some point, every car owner will need to replace a battery terminal. The battery is one of the most important parts of your car, and it needs to be in good working condition to start the engine. Replacing a battery terminal is a relatively simple task, but it’s important to do it correctly to avoid damaging the battery or causing an electrical fire. Here’s a step-by-step guide to replacing a battery terminal.
- Start by disconnecting the negative terminal from the battery. This is usually indicated by a black cable or a “-” sign.
- Next, disconnect the positive terminal from the battery. This is usually indicated by a red cable or a “+” sign.
- Using a wrench, loosen the bolts that hold the old battery terminal in place.
- Remove the old terminal and clean the area around the terminals with a wire brush. This will help ensure that the new terminal makes good contact with the battery post.
- Attach the new terminal to the battery post and tighten the bolts securely.
- Reconnect the positive terminal to the battery, followed by the negative terminal. Make sure that the terminals are tight to avoid sparks or shocks.
- Test the connection by starting your car’s engine. If everything is working properly, you’re all set!

Conclusion
Now that you know how to install amber lights, be sure to follow the proper safety precautions. Driving at night can be dangerous and it is important to do everything you can to make your car as visible as possible. You should determine carefully how to install amber lights. Amber lights are one way to improve your visibility on the road and keep yourself and others safe. Do you have any other tips for driving safely at night? Share them with us in the comments below!