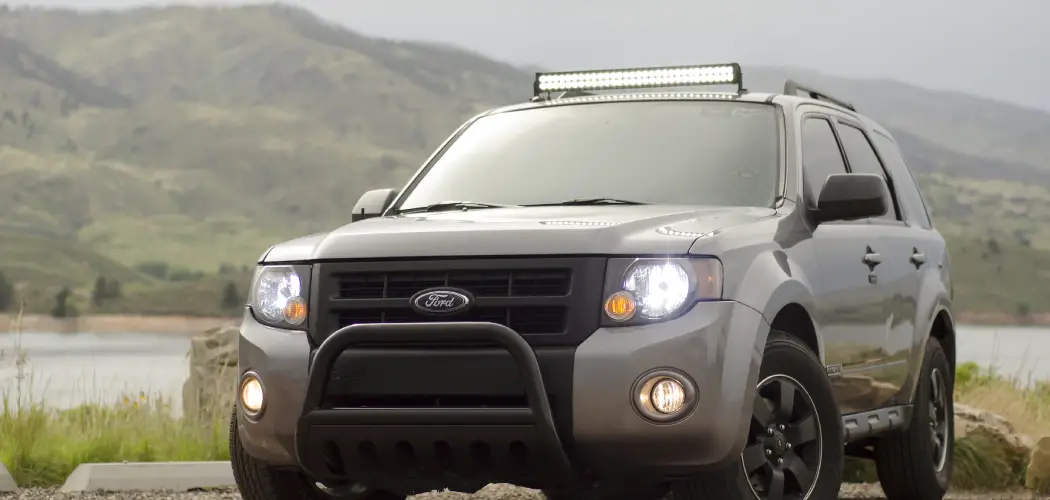
Are you looking for an easy way to add a touch of flare to your vehicle’s bull bar? Installing an LED light bar is one of the most cost-effective and attractive ways to enhance your bull bar’s look and functionality. Not only can it create a stylish aesthetic, but it can also improve visibility in darker conditions.

Whether you’re a first time DIYer or experienced with auto installations, follow this step-by-step guide to learn how to install led light bar on bull bar properly and safely
In this blog post, we will discuss the process that needs to be taken when it comes to installing an LED light bar on a bull bar. We’ll discuss some important safety precautions and provide helpful tips or tricks that will ensure optimal results for this project.
What Will You Need?
Before starting any installation, it’s important to make sure you have all the necessary equipment and materials. Here is a list of what you’ll need to get the job done:
- LED light bar
- Bull bar
- Mounting brackets and hardware
- Wiring harness
- Electrical tape
- Pliers and screwdriver
Once you have all the materials you need, it’s time to begin preparing for installation.
10 Easy Steps on How to Install Led Light Bar on Bull Bar
Step 1. Examine the Bull Bar:
Begin by examining the bull bar to ensure that it is compatible with the LED light bar and mounting brackets. You can also take some measurements to make sure the mounting brackets are properly aligned with the bull bar. It’s also a good idea to check for any damage or corrosion.
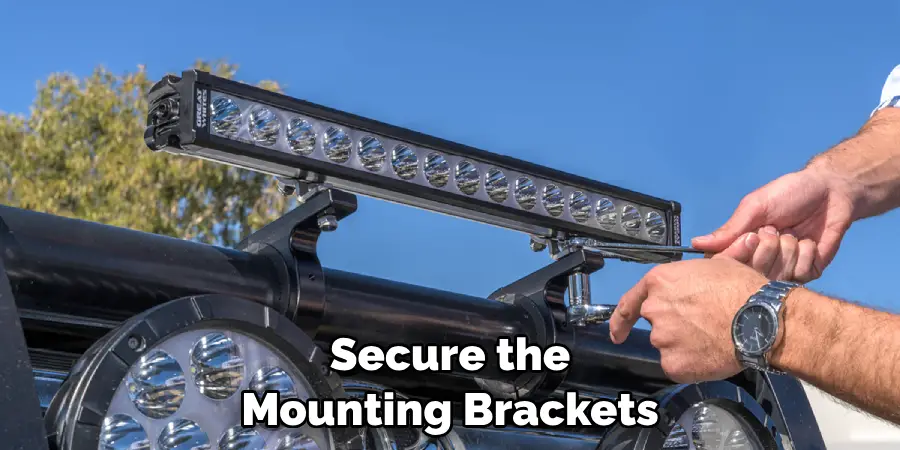
Step 2. Secure the Mounting Brackets:
Once you have determined that the bull bar is compatible with the LED light bar, it’s time to secure the mounting brackets. Use screws and nuts to attach the brackets in place. Make sure they are tightly secured before proceeding.
Step 3. Connect Led Light Bar to Wiring Harness:
Next, connect one end of the wiring harness to the LED light bar and then attach the other end to a power source. If you use a vehicle battery as your power source, ensure it is properly connected and insulated from any contact with metal surfaces or components. Don’t forget to use electrical tape to seal the connection.
Step 4. Secure the LED light bar to mounting brackets:
Once all connections have been made, it’s time to secure the LED light bar onto the mounting brackets. Ensure that the LED light bar is firmly secured in place, and check for any potential loose connections or components. If everything looks good, you can proceed to the next step.
Step 5. Connect Wiring Harness to Power Source:
Now it’s time to connect the wiring harness to a power source. If you are using a vehicle battery, make sure the connections are properly insulated from contact with metal surfaces and components. Once all connections have been made, it’s time to test the connection and make any necessary adjustments.
Step 6. Test Installation:
Make sure all connections are secure before testing the installation. Turn on the vehicle’s ignition switch and then turn on the LED light bar to ensure that everything is working as intended. If there are any issues, make sure to adjust the connections or components accordingly.
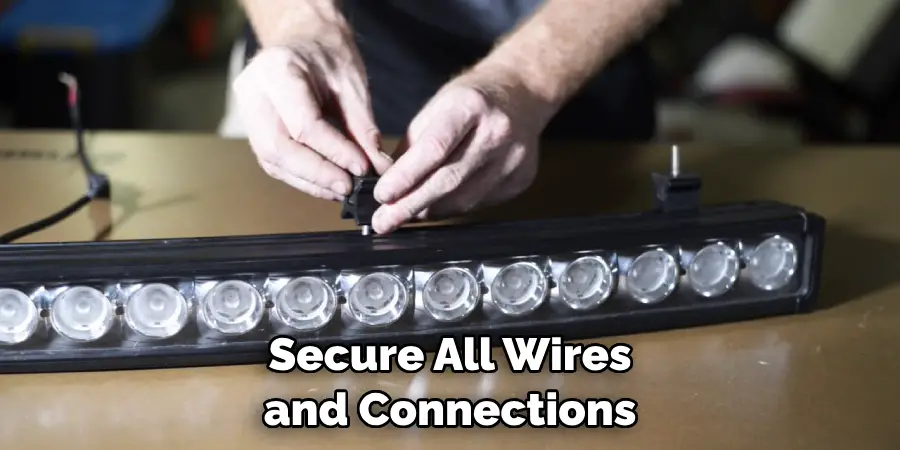
Step 7. Secure Wires and Connections:
Once you have determined that the installation is working correctly, it’s time to secure all wires and connections with electrical tape. This will help prevent any possible short circuits due to contact between metal surfaces or components. Additionally, you can use zip ties to secure the wiring harness in place further.
Step 8. Close up Bull Bar:
Finally, make sure to close up the bull bar completely before driving your vehicle. Make sure that all screws and nuts are tightened properly to ensure a safe and secure fitment for the LED light bar. If necessary, can use sealant to ensure a water-tight fitment.
Step 9. Enjoy Your New Look:
Now that everything has been installed correctly, it’s time to enjoy your new look! The LED light bar will provide you with a bright, stylish addition to your vehicle. If necessary, you can adjust the brightness of the lights to your liking.
Step 10. Perform Regular Maintenance:
Remember that it’s important to regularly check and clean the LED light bar in order to ensure its proper function over time. Make sure all connections are properly sealed and free from any corrosion or damage. Remember, a well-maintained LED light bar is safer, more efficient, and more reliable.
Following these steps will guide you on how to install an LED light bar on a bull bar safely and correctly. If you have any questions about the process, please consult an experienced technician for assistance. With the right preparation and knowledge, you can be confident that your installation will go smoothly and without incident.
5 Additional Tips and Tricks
1. Start by checking the electrical wiring of your bull bar. Ensure all the wires are properly connected, and no bare wires are exposed.
2. Use a drill to make holes for the brackets that will hold the LED light in place. Depending on the size of your bull bar, you may need more than one set of brackets.
3. If your LED light has a separate power switch, install it in a location that is easy to reach while still keeping it safely out of the way.
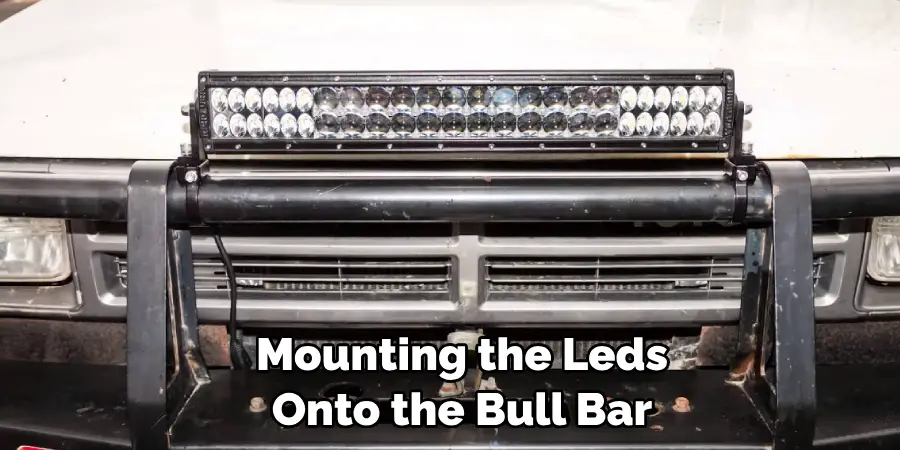
4. When mounting the LEDs onto the bull bar, make sure they are securely fastened and properly sealed against any moisture or dirt.
5. Connect the wiring harnesses together so that all the wires are linked up correctly. Test that they work by turning on the power switch before finally putting everything back together again.
Following these tips will ensure that you have a safe and successful installation of an LED light bar on your bull bar!
5 Things You Should Avoid
1. Avoid using any chemicals to clean the area where you’ll be mounting the light bar.
2. Do not overtighten the screws or brackets that hold the light bar in place, as this may damage it.
3. Make sure all wires are correctly wired and secured before testing them for power.
4. Never attempt to modify or customize your LED light bar beyond what its manufacturer recommends or specifies, as this could cause serious damage.
5. Under no circumstances should you mount an LED light bar without proper safety measures, such as wearing eye protection and avoiding contact with live wires and electrical current.
Installing an LED light bar on a bull bar requires care and attention, so always follow the manufacturer’s instructions and proceed cautiously. Doing so will ensure a successful installation and a safe driving experience.
Where Do You Mount a Light Bar on a Bullbar?
The ideal location for mounting an LED light bar onto a bull bar is in the center of the bar, near the middle. This will ensure maximum visibility and help keep cables and wiring away from any electrical components or moving parts.
Additionally, make sure that your chosen mounting location can accommodate the size of your light bar and accessories, such as switches or brackets.
With careful planning and consideration, you’ll be able to enjoy the many benefits that come with having bright and reliable lighting right at your fingertips!
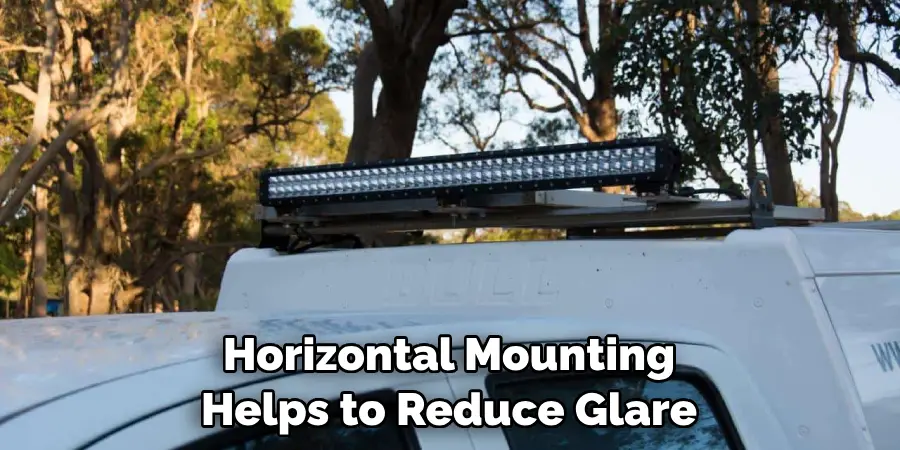
Should Led Lights Be Vertical or Horizontal?
Led lights should always be mounted horizontally, as this will provide the widest spread of light and offer the most visibility. Additionally, horizontal mounting helps to reduce glare and improve overall visibility while driving in low light conditions.
All in all, bright and reliable lighting is essential to a safe driving experience. With the correct LED light bar installation, you’ll be ready to hit the road in style!
Remember these tips when it comes time to install your LED light bar on a bull bar, as doing so will ensure a successful installation. Stay safe!
Conclusion
How to install led light bar on bull bar is not as difficult as it may initially appear. With the right components, a little patience, and the guidance from this article, you should now be ready to light up your own bull bar with ease. Setting up these lights can drastically improve visibility in rain, fog, and general low light situations that may otherwise render driving conditions dangerous. It also looks striking when mounted for some added aesthetic appeal. Don’t skimp on safety. Take the time to set up LED lighting on your bull bar today!
Who knows what else you can come up with once you have seen their capabilities for yourself? And if you’re ever in doubt about any part of the installation process, consulting an expert can make all the difference. Whether it’s installing LED lights or something more complex like a full-engine diagnostic, it’s always best to leave complex tasks such as this in the hands of professionals.
So doing so is definitely encouraged before you embark on any potentially risky automotive maintenance and repair jobs.