When you’re looking to create a custom light display, adding strip lights can be a great way to do it. But when you have a lot of strip lights to work with, how do you join them together? In this post, we’ll show you how to join strip lights together using tape and connectors. Read on for instructions!
LED strip lighting is quickly becoming a popular choice for home décor. It’s easy to install, and the options for color and style are endless. If you want to create a custom look in your home, you can join two or more LED strips together. Here, we’ll show you how to do that! So without any further ado, let’s get started.
Summary: In order to join strip lights together, follow these simple steps: 1. Turn off all the lights in the room. 2. Disconnect each light’s power cord. 3. Take one light and hold it so that the metal contacts are facing outwards. 4. Take the other light and hold it so that the metal contacts are facing inwards. 5. Connect the metal contacts of the two lights together by placing the light with the contacts facing outwards over the light with the contacts facing inwards.

Why May You Need to Join Strip Lights Together?
1. Easy to Install
One of the primary benefits of strip lights is how easy they are to install. Compared to traditional lighting options, such as ceiling lights or lamps, installing strip lights is relatively simple and straightforward.
2. Versatility
Another major benefit of strip lights is their versatility. These versatile lighting options can be used in a wide range of applications, from under-cabinet lighting in the kitchen to mood lighting in the living room.
3. Energy Efficiency
Strip lights are also known for their energy efficiency, which can be a major concern for many homeowners. With energy costs continuing to rise, having an efficient lighting option can help you save money on your electricity bill over time.
4. Affordable
Finally, strip lights are also an affordable lighting option, making them a great choice for many homeowners on a budget. Whether you’re looking to replace outdated lighting in your home or want to add new lighting fixtures, strip lights provide an affordable and effective solution.
5. Vibrant Touch
Another great benefit of strip lights is their ability to add a vibrant touch to any room. With so many different color options available, you can create the perfect atmosphere for your home simply by choosing the right lighting.
If you’re considering joining strip lights together, there are several factors to consider. Some of the key considerations include the type of strip lights you’re using, as well as where and how you plan to use them.
How to Join Strip Lights Together in 5 Easy Steps
Step 1: Determine the Place to Join the Strip Lights Together
This is the very first step you need to take in joining your strip lights together. First, you will need to determine where the two ends of each of your strips will meet. This can be done by carefully measuring and marking off the locations on your LED light strips that you want to join together.
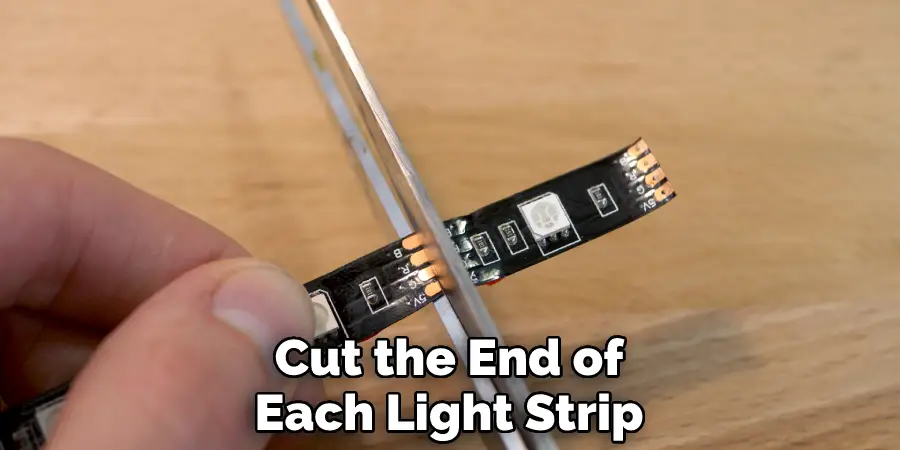
Step 2: Prepare Your Strip Lights for Joining
In order to successfully join your strip lights together, you will need to cut the end of each light strip so that you have a clean, exposed surface. Depending on the type of LED strips you are working with, this may involve removing a small section of protective coating from the ends of your strips. Some LED strips also have connectors built into them, in which case you will not have to do any cutting.
Step 3: Connect the Strip Lights Together
Once your strip lights are prepared, you can connect them together using one of several joining methods. For example, if you have strips with built-in connectors, simply plug one strip into another to create a single continuous strip. Otherwise, you can use any number of specialized connectors that are available for LED strips. These typically involve using wire or screws to hold the two ends of your light strips together.
Step 4: Test Your Joined Strip Lights
Once your lights have been joined, it is a good idea to test them to make sure they are working properly. This can be done by applying power to the joined light strips and checking that they are working as intended. If anything seems off, make sure to double-check your connections and try joining the lights together again if necessary.
Step 5: Secure Your Joined Strip Lights
Once you have confirmed that your strip lights are working as expected, you should take steps to secure them in place. This can be done by using screws, clips, or any other method that you see fit. You may also want to use some type of adhesive, such as silicone or hot glue, to hold your joined light strips together permanently.
Some Additional Tips to Join Strip Lights Together
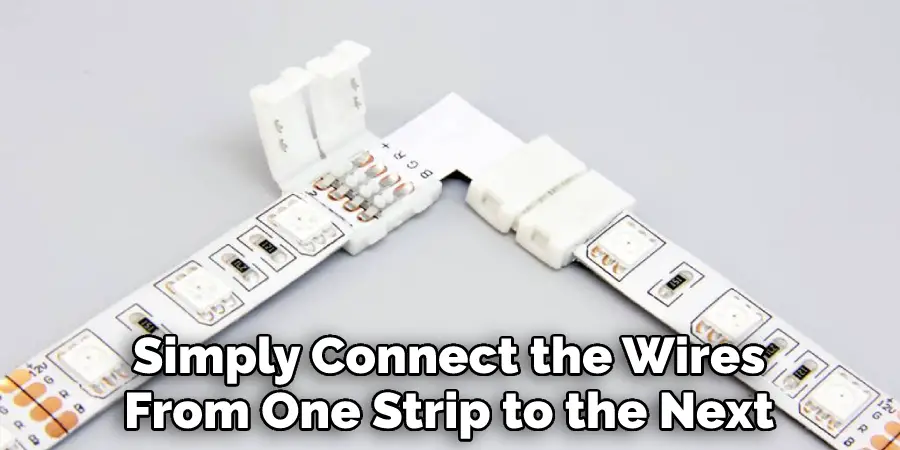
1. Use Screw to Connect
If you have a strip light that comes with screw terminals, you can use these to easily join multiple strips together. Simply connect the wires from one strip to the next using the corresponding screws and vice versa.
2. Use Adhesive Tape or Glue
Another common method for joining strip lights together is by using adhesive tape or glue. Simply apply the tape or glue to the end of one strip light and press it firmly against the other strip until they are securely joined.
3. Use Connector Cables
If your strips don’t come with any screw terminals or adhesive tape, you can also use connector cables to join them together. These cables typically have a pair of metal contacts on each end that can be easily attached to the strip lights. But make sure that the connector cables are rated for the amount of current that your strip lights require, as exceeding this can cause damage to the strips and lead to a fire hazard.
4. Consult Your Strip Light Manufacturer
If you’re not sure how to safely join your strip lights together, it’s always best to consult with your strip light manufacturer or a professional electrician. They will be able to provide you with advice and guidance on the best way to connect your strip lights, as well as any safety precautions that you need to take.
With the right knowledge and tools, joining strip lights together is a relatively easy task that can help you create vibrant and dynamic lighting setups in your home or workplace.
You Can Check It Out To Make Pastel Pink Led Lights

Frequently Asked Questions
How Many Led Strip Lights Can You Connect?
The number of LED strip lights you can connect depends on the type and power rating of the strips that you are using. Generally speaking, most LED strip lighting will come with connectors or leads that allow for simple plug-and-play installation, making it easy to connect multiple strips. Some strips may also come with solderless connectors, which allow for even more flexibility when it comes to joining and extending your LED lights.
Can Led Strip Lights Be Daisy Chained?
Yes, LED strip lights can be daisy-chained together, which means that you can connect multiple strips together to form longer runs of lighting. This is ideal for applications where you need a lot of light over a large area, such as in backyards or garages. There are many different types of connectors available for LED strip lights, so be sure to choose a connector that is compatible with the strips that you are using.
Can I Connect a Led Strip From Either End?
In most cases, you can connect a LED strip light from either end. Depending on the type of connection that you are using, some strips may require that you attach them to the lighting strip at one end only.
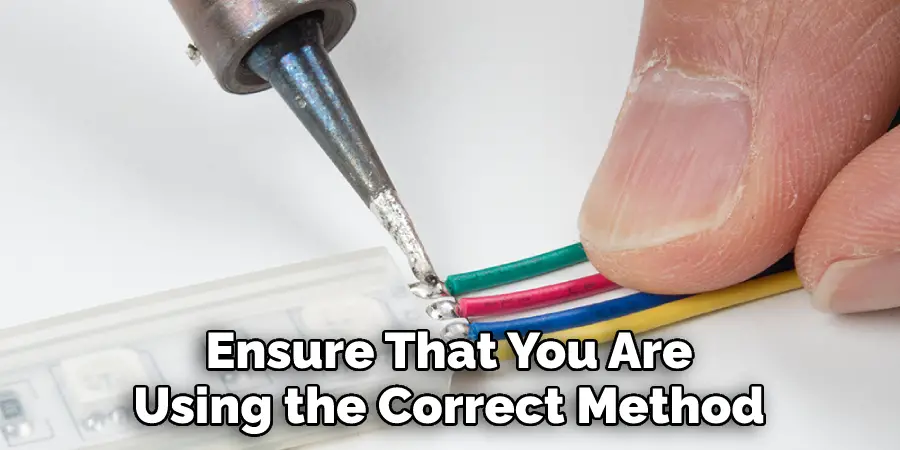
However, if your LED strips have solderless connectors or plug-and-play connections, then you should be able to connect them from either end without any problem. To be extra safe, always consult the manufacturer’s instructions before connecting your LED lights to ensure that you are using the correct method.
You Can Check It Out To Turn on Fog Lights Ford Flex
Conclusion
That’s it! You now know how to join strip lights together. Be sure to follow the instructions in this article carefully to avoid damaging your lights. With a little practice, you’ll be able to do this quickly and easily. And once you’ve mastered the basics, you can start experimenting with different ways of joining and configuring your lights to create unique effects. So have fun, and don’t be afraid to experiment!
By following these simple steps, you can join your LED strip lights together without any issues, ensuring that your finished product looks great and functions properly. Do you have any other tips for joining LED strip lights? Let us know in the comments below!