Those looking for an interesting DIY project that is also environmentally friendly may want to consider making a pipe from a light bulb. The process is simple and can be completed in just a few steps. By following these instructions, you can create a smoking device that is both unique and easy to use.
In today’s article post, we will show how to make a pipe from a light bulb! This is a great way to recycle an old light bulb and turn it into something new and fun.
Summary: Creating a makeshift pipe from a light bulb is a potentially dangerous activity and not recommended due to the risks of inhaling harmful chemicals and causing physical injury. Many light bulbs contain toxic substances, such as lead, mercury, and other hazardous materials, which can be released when heated.
Additionally, the thin glass of a light bulb can easily shatter, causing cuts and other injuries. Rather than attempting to create a pipe from a light bulb, it is safer and more advisable to use proper smoking devices designed for this purpose, which are available at smoke shops and online retailers.
In the interest of promoting safe and responsible practices, we will not provide instructions on how to make a pipe from a light bulb. Instead, we encourage individuals to seek out safer alternatives for their needs. There are many different types of smoking devices on the market, such as glass pipes, metal pipes, and vaporizers, that are specifically designed for safe and efficient use.
These devices are made from materials that can withstand high temperatures and are less likely to break or release harmful substances when used properly. By choosing a dedicated smoking device, you can ensure a safer and more enjoyable experience.
A Stepwise Guide on How to Make a Pipe From a Light Bulb
Step 1: Determine How Thick an Outer Layer the Pipe Will Have
The thicker the outer layer, the more heat-resistant it will be. An ideal range is between 1.2 mm and 4.8 mm. If you don’t have any wire tools, use your hands to squeeze the glass near its bottom to create a dent around which you can work. Be careful not to exert too much force itself in case it breaks. Please do this by pushing down with both hands at an even pressure along its length while rotating it slowly in circles within one hand.
Step 2: Remove Bulb Base Using Metal Tongs or Pliers
Use metal tongs or pliers resistant to heat to remove the bulb, since other types could melt. Grasp the bulb base firmly and pull it out slowly, taking care not to touch or drip any remaining contents onto yourself. The contents are hazardous, containing poisonous chemicals such as mercury, arsenic, phosphorus, and antimony.
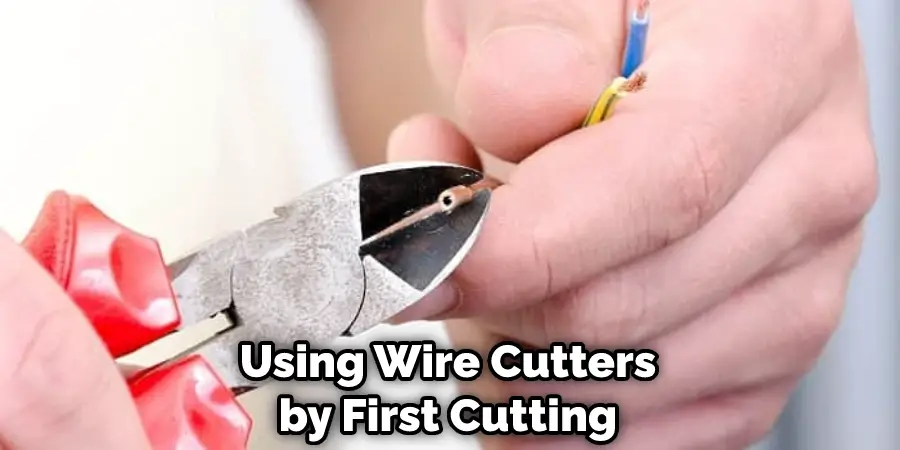
Step 3: Cut Bulb Into Two Pieces Using Wire Cutters
Cut the bulb in half using wire cutters by first cutting through its neck and then its shoulder. The glass at this stage should still be scorching, so use metal tongs or a thick cloth to hold it securely while you work with it if possible since rubber gloves will insulate heat too much, although you could wear them for protection against sharp shards of glass later on.
Step 4: Clean and Seal Pipe Lamps Parts
Place the two pieces of glass on top of each other and seal them together using duct tape. You can now remove the excess glass from each piece separately using wire cutters without cutting yourself as your fingers will not be inside the pipe. After cleaning any remaining fragments out, you should wash them under a tap to ensure they are clean and dry before continuing to the next step.
If you are going to be handling a hot object, you need to make sure that your hands are clean. Wipe them down with a cloth if necessary, and be careful not to leave any fingerprints or smudges.
Step 5: Preassemble Lamp Parts
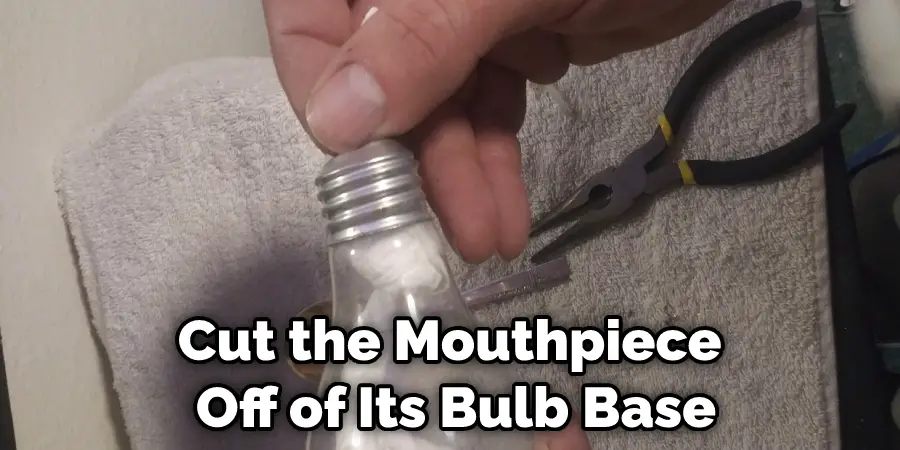
In order to make a working penny whistle, you first need to cut the mouthpiece off of the bulb base. Once this is done, you should take care to glue it securely back onto one half of the whistle using epoxy or hot glue. After the mouthpiece is in place, you should fit the two halves of the whistle snugly together and mark where you need to drill holes in each half for airflow.
Use these holes as a guide to line up where to cut with wire cutters before slowly inserting your pencil into one end of the tube and gradually expanding it until you can pull it all the way through (this will prevent cracks), then push the upper half down over this hole afterward to ensure an airtight seal; ensuring not to leave behind any bits of pencil lead during this process which could later be harmful if smoked. This is a crucial step in how to make a pipe from a light bulb.
Step 6: Attach the Lamp Base to the Mouthpiece
To create a funnel shape, carefully cut one end of the bulb base at a 45-degree angle. You can then glue or epoxy it securely into your mouthpiece. If you want to reduce the heat that will be conducted up through your representative, you can wrap it with unbleached cigarette paper. This is especially important if you’re smoking certain types, such as hashish.
After this has been done and dried, test to see whether it fits properly onto its bulb by placing them together and twisting them slowly in opposite directions, so they don’t break off – always proceeding cautiously – before attaching their electrical wires.
Step 7: Attach Wires and Fuse to Base and Bulb
After stripping the ends of the white and black electrical wires, attach them to the bulb and switch, respectively. Leave enough slack on either side so that you can adjust the level of the lamp after gluing it into place. Secure the wires with epoxy or hot glue, then attach a fuse into the base of the lamp using a soldering iron. Plug it in to test it out – the filament inside should light up and provide the warmth necessary for vaporization.
Step 8: Connect a Lamp Switch & Socket
To operate your lamp, connect a 15 or 20 amp lamp switch and socket, which you can usually find in the electrical section of most hardware stores with the wiring already cut to length. Attach them by removing their rear fuses; wrapping exposed wire around screws on either side before replacing them again-taking care not to over tighten-to ensure they are securely attached before clipping excess wire off.
Step 9: Secure Lamp Wires Into Fuse Box
Finally, secure all loose wires into an open wire clamp as shown before placing it into a more permanent electrical box that can be attached to the wall or ceiling, if necessary. If your lamp needs to stand on its own for this stage, prop it up with something during each of these stages-being careful not to knock anything over to prevent them from falling, which could create cracks in any of your already fragile pieces.

In order to make a pipe from a light bulb, you must first attach all loose wires into place. Once you have done this, you should turn the power back on and test how well everything works. If everything works properly, you can then secure your finished creation in an airtight container. After they are smoked, they still contain high quantities of THC, which will evaporate naturally over time.
Precautions
As with any new skill, some precautions need to prevent injury.
- Wear protective eyewear and gloves while cutting the bulb.
- Make sure the room you work in and your clothes don’t have a strong scent of any kind. Even a hint of perfume or cologne can leave an unpleasant smell on your finished pipe.
- Do not attempt to light the bulb while it is hollowed out; the inside of the bulb still contains amounts of poisonous gas (although less than before). In addition, the flame may reflect upon you and cause more harm than good.
- When hollowing out the inside of the bulb, take precautions not to inhale any drops that may fall into your mouth. Only use the tools you brought to this project in this one.
FAQs
What Can I Use to Seal the Ends of My Pipe if I Want to Keep Them Clean and Free of Dust??
If you want to seal the ends of your pipe after inserting the screen, you can use solid adhesive tape. Brown-colored electrical tape works incredibly well, but plenty of other options are available to you. If you plan on smoking out of your homemade pipe regularly, consider using hot glue or silicone glue in conjunction with aluminum foil pieces cut into squares or triangles so that they fit snugly inside the bulb’s neck.
Once the details have dried in place, pop in your screens, fill up your bowl, and enjoy! Make sure not to let anything fall into the bulb when lighting it, though, because this could cause flare-ups that would melt everything.
What Are the Benefits of Making a Pipe From a Light Bulb?
There are many reasons you want to make a pipe from a light bulb. For example, it is often much cheaper than buying one in the store when they sell them individually. Furthermore, when you make your own out of old or discarded parts, you don’t need to worry about breaking any laws and thus getting into legal trouble. Finally, with enough practice and trial and error over time, it can be just as easy and rewarding as making a bong out of glass is these days.
Conclusion
If you want to know how to make a pipe from a light bulb, we have the instructions for you. All it takes is some essential household ingredients and an empty toilet paper roll! The process should take less than ten minutes if everything goes as planned. You’ll have a homemade working pipe that should be very easy to use when you are done. Because it is made from everyday household items, this device can easily be disposed of and makes a great way to avoid buying tobacco smoking products!