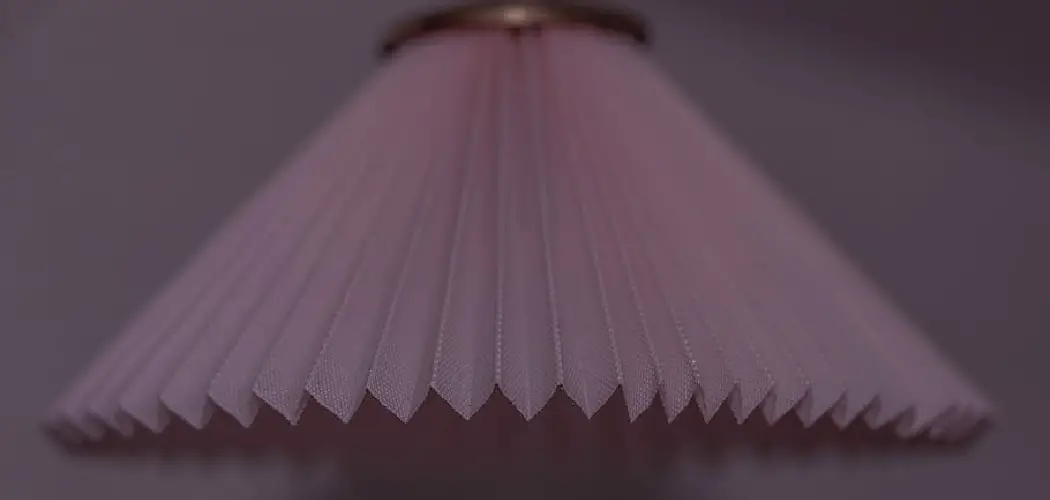
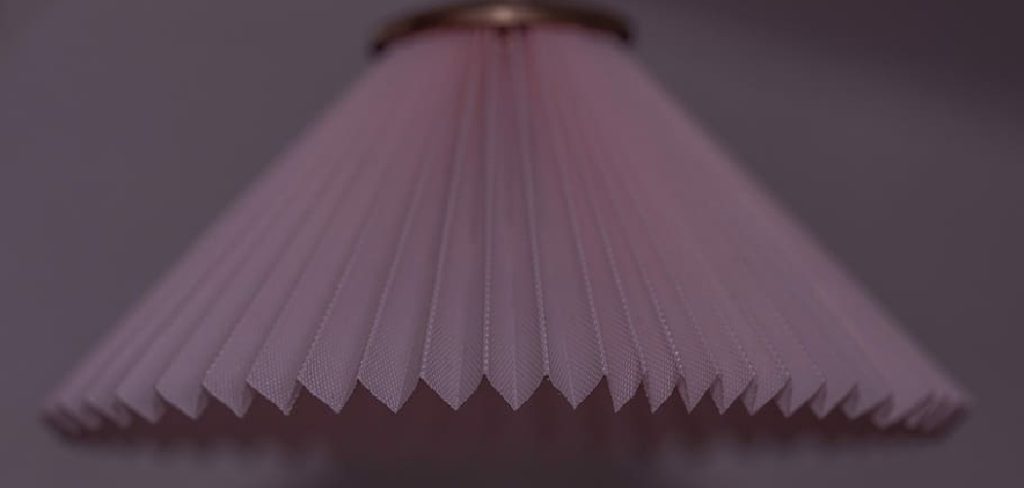
Have you ever wanted to learn how to make a pleated lamp shade for your living room? DIY pleated lamp shades can be a fun project that not only adds an eye-catching accent to your home décor but also provides the satisfaction of creating something beautiful with your own hands!
In this blog post, we’ll take a look at all of the steps involved in making high-quality pleated lampshades from start to finish. From selecting the fabric for the exterior shell and frames to understanding what type of lining works best, everything you need to know is right here. Ready? Let’s get started by discussing setting up your workspace!
Tools and Materials You Will Need to Make a Pleated Lamp Shade:
- A flat, stable surface
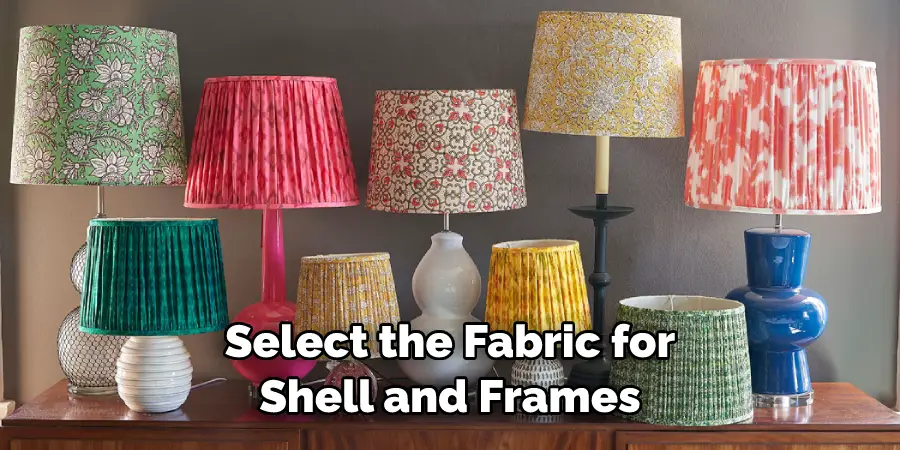
- Fabric for the exterior shell and frames
- Scissors
- Measuring tape
- Iron
- Sewing machine (or needle and thread)
- Lampshade wire frame in the desired size
- Glue gun or fabric glue
- Lampshade lining material
- Hook and loop tape (optional)
Step-by-Step Guidelines on How to Make a Pleated Lamp Shade
Step 1: Choose Your Fabric and Measure the Shade Frame
Before you start any work on your pleated lamp shade, it’s important to select the fabric for the exterior shell and frames. Consider the kind of look you want for the final product, as well as how much light is needed in that part of your home. Make sure to measure both the width and the height of your shade frame so that you’ll be able to properly size the fabric pieces.
Step 2: Cut the Fabric for the Shell and Frames
Once you have measured your lampshade frame, it’s time to cut out the fabric pieces for both the exterior shell and frames. For the outer shell, cut a piece of fabric a few inches larger than the lampshade frame so that you can fold over the edges. For each of the frames, cut two strips of fabric 1 inch wider than your lampshade frame and twice as long. While cutting the fabric, make sure to take care not to fray or tear it.
Step 3: Iron the Fabric for Both Shell and Frames
Before you begin assembling your pleated lampshade, it’s important to iron the fabric pieces for both the shell and frames. This will help the fabric look neat and wrinkle-free while also making them easier to handle during sewing. Ironing should be done on a low setting to prevent any damage to the fabric.
Step 4: Sew the Exterior Shell
Now it’s time to sew your exterior shell together. First, fold over one of the edges of your fabric piece so that it covers the wrong side of the fabric. Then, line up your sewing machine so that the stitch will be on top of the folded edge. Stitch along the entire width and height of your fabric piece to create a neat and finished shell. While sewing, make sure to go slow and double-check that the stitch is even.
Step 5: Sew the Frame Pieces Together
Once the shell has been sewn together, it’s time to move on to the frames. Place two of your fabric pieces right side up and line them up so that their edges are aligned. Then, sew along three sides of each piece, leaving one side open. Lastly, turn the pieces inside out and iron them so that they look neat and wrinkle-free.
Step 6: Assemble the Pleated Lamp Shade
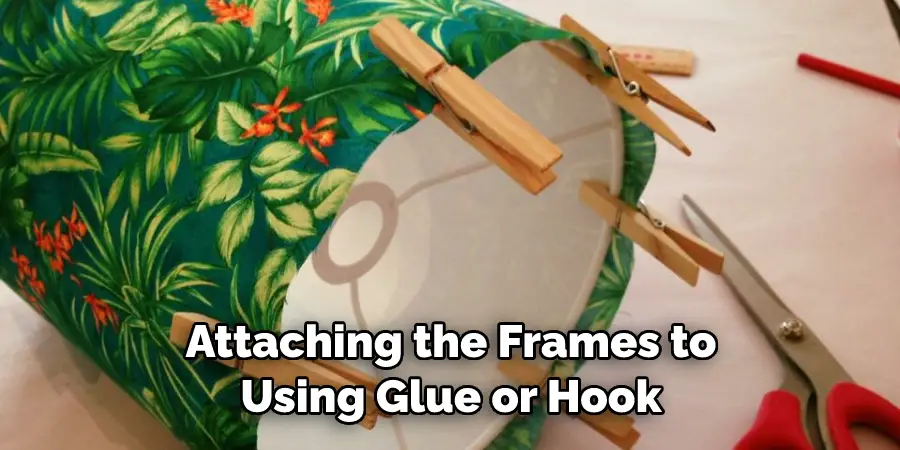
Now it’s time to assemble your pleated lampshade! Start by attaching the frames to each other using glue or hook and loop tape. Then, attach your lampshade wire frame to the exterior shell and finish off by inserting your fabric frames into the top and bottom of the lampshade. Finally, cut a piece of lining material that is slightly bigger than the exterior shell and attach it to the inside with glue or stitches.
And there you have it! Your very own DIY pleated lampshade is now complete. With a few simple tools and materials, you can create a beautiful addition to your home décor in no time. We hope that this blog post has given you the confidence and information needed to make high-quality pleated lampshades from start to finish! Good luck and have fun!
Additional Tips and Tricks to Make a Pleated Lamp Shade
- Cut the fabric for the pleats. Measure twice and cut once is a good rule to follow when cutting material, especially if you’re using expensive fabric. Make sure all your cuts are precise and even, as this will make pleating easier later on.
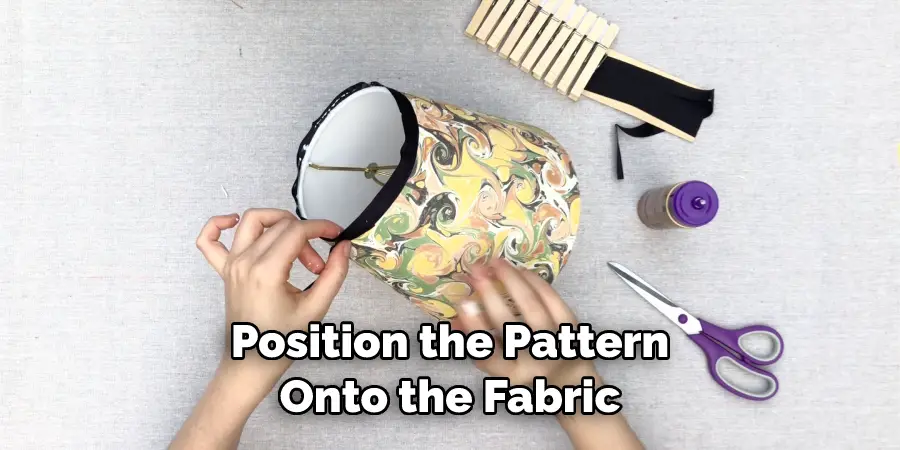
- Position the pattern onto the fabric. Once you have cut your fabric pieces, you can begin positioning them onto the pattern. Pinning is a great way to keep your fabric pieces in place while you work on them.
- Sew the pleats together. After you have everything pinned down, start sewing the pleats together. Make sure to keep your stitches even and consistent as this will give an even finish when ironing later on.
- Iron the pleats. After you have sewn your fabric pieces together, use an iron to press down and flatten out the pleats. Make sure to be gentle when doing this as too much heat can damage or discolor your fabric.
- Apply interfacing to the inside of the fabric. Interfacing is essential for adding structure to the fabric and helping it keep its shape. Cut a piece of interfacing to size and use an iron to adhere it to the inside of your lampshade.
- Assemble the frame for your pleated shade. Depending on what kind of frame you are using, this step can vary in difficulty. Make sure that everything fits together properly before continuing on with the next step.
- Attach the pleated fabric to the frame. Once you have assembled your frame, it is time to attach your pleated fabric to it. If necessary, add some extra pins or clips to help keep the pleats in place while you work on them.
- Secure all edges with a stitch or glue gun. Finally, it is time to secure all the edges with a stitch or glue gun. This ensures that everything will stay in place and your lampshade won’t unravel at any point.
These are just a few tips and tricks for making your own pleated lampshade. With practice and patience, you can create beautiful pieces of home decor that will last for years. Good luck!
Things You Should Consider to Make a Pleated Lamp Shade
- Understand the size, shape, and color of the lampshade that you want to make. The size and shape should be determined by the type of lamp that it will be used for, while the color can be chosen to match or complement other elements in your home décor.
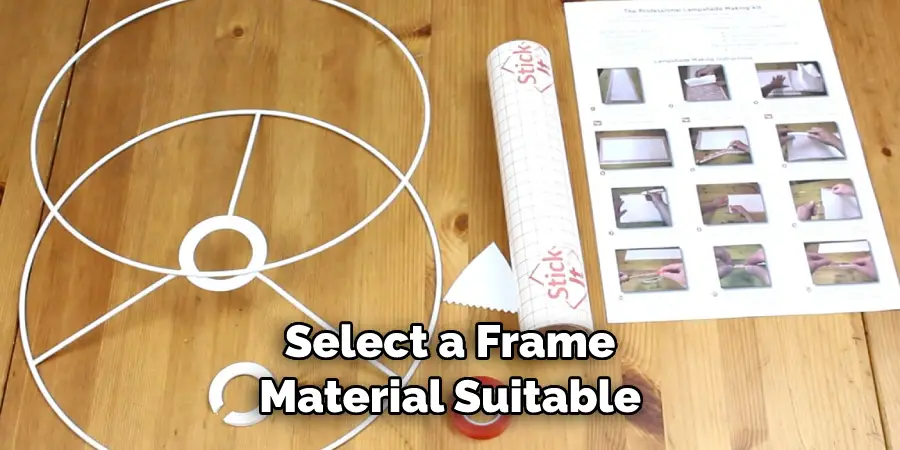
- Select a frame material suitable for supporting a pleated fabric. Frames are usually made of cardboard, plastic, or metal.
- Choose the pleating style for your lampshade. There are different kinds of pleats with varying widths and shapes that can add texture to the shade.
- Select a fabric material suitable for making a pleated lampshade. Lightweight silk or cotton fabrics create beautiful shades but may be difficult to pleat. Upholstery fabric or even paper is more suitable for a lampshade that will last longer and keep its shape better.
- Use the right kind of adhesive when attaching the fabric to the frame. Make sure it’s strong enough to hold up against heat and light, but not so strong that it will damage the fabric.
- Determine the type of fasteners you need to secure the shade around the lamp base or cord. These could include clips, ties, screw-in rings, or even Velcro straps.
- If desired, add decorative trim such as fringe or tassels to your pleated lampshade for an extra touch of style.
- Once your lampshade is finished, attach it to the lamp base and plug in the cord. Your pleated lampshade is now ready for use! Enjoy the soft glow of light cast from your handmade shade!
By keeping these considerations in mind, you can create a beautiful pleated lampshade that will last for years. With the right materials and techniques, you can make a unique accessory for your home décor that is sure to be admired by all. Happy crafting!
Precautions Need to Follow for Making a Pleated Lamp Shade
- Ensure that the fabric used for the lampshade is fire retardant, as this will help prevent accidental fires from happening with your homemade lampshade.
- When measuring the circumference of the frame, be sure to include extra fabric in order to account for pleating and gathering the material.
- Keep in mind that if the lamp is to be used with an electric lightbulb, you’ll need to use a thicker fabric that won’t let heat through and cause melting.
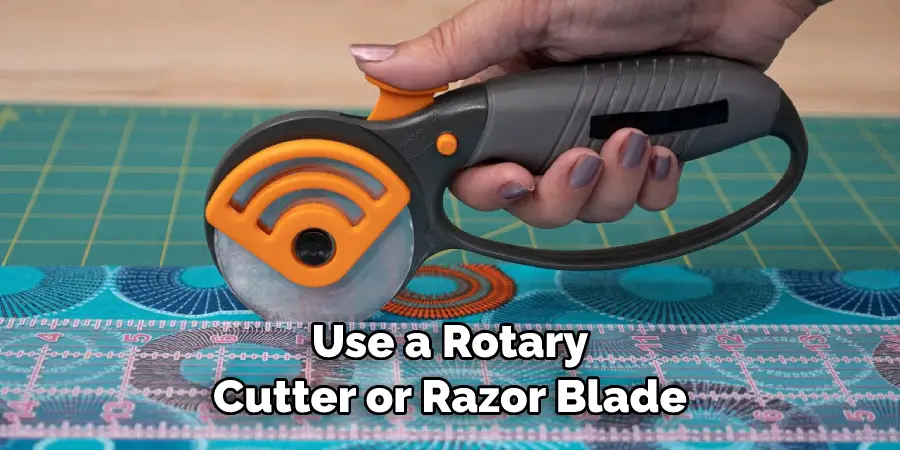
- When cutting out the fabric for the shade, it’s important to avoid using scissors. Instead, use a rotary cutter or razor blade so that you can get a straight cut without any jagged edges.
- When gathering the fabric for pleating, use a zig-zag stitch on your sewing machine to ensure that the fabric stays securely in place and doesn’t unravel or pull out of the pleats.
- Make sure you have all the necessary supplies before starting, as it will be difficult to add on or change elements once the pleating process has begun.
- Wear safety glasses and gloves to protect your eyes and hands from sharp edges or accidental cuts while handling materials during the creation of the lamp shade.
- Take your time when creating a pleated lamp shade, as it requires a lot of precision and attention to detail in order to get professional results.
Following these precautions will help you create a beautiful and safe pleated lampshade for your home. With the right materials and attention to detail, you’ll be able to make a stunning statement piece that will last for years to come!
Frequently Asked Questions
What Type of Fabric is Best for a Pleated Lamp Shade?
The selection of fabric for your pleated lampshade will depend on the size and shape of the shade. Silk and cotton blends are great choices as they provide good light diffusion. If you want a heavier material, consider using linen or velvet. You can also use patterned fabric to add a unique look to your shade.
What Kind of Fittings Are Needed for a Pleated Lamp Shade?
The type of fittings you need will depend on the size and shape of your lampshade. Traditionally, lampshades have been fitted with an adjustable ring that screws onto a light bulb holder. You can also choose to use a collar or hook style fitting, depending on the size of your shade.
Can I Make a Pleated Lamp Shade with Wire?
Yes! Using wire is a great way to make a modern-style pleated lampshade. With this method, you’ll need to measure and cut the wire into small pieces and then attach them to the frame of the shade. This technique is more difficult than using fabric, so you may want to enlist the help of a professional if you’re not confident with your skills.
What Other Types of Lamp Shades Can Be Pleated?
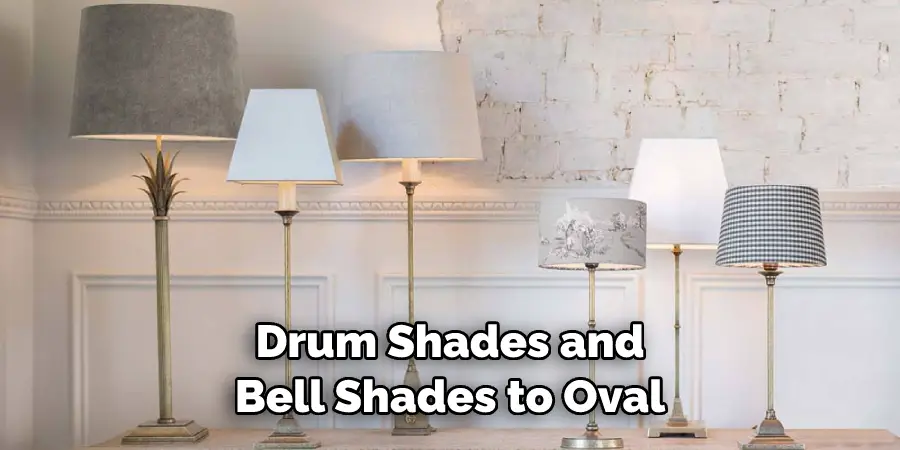
Pleats can be applied to almost any type of lampshade, from drum shades and bell shades to oval and rectangular shapes. The pleating process is slightly different for each type, so it’s important to research the proper technique before beginning your project.
Conclusion
Crafting a pleated lampshade is no small feat, but with a bit of patience and practice, you can create beautiful lamps for your home or office. Doing it yourself gives you complete control over every element of the design, from the fabric selection to the final touches.
Whether you’re on a tight budget, are looking for something unique and custom-made, or just want to express yourself through art, making a pleated lampshade can be an interesting and rewarding project.
And who knows? You may even find that creating a unique lampshade is something you become passionate about. To turn your ideas into reality, use our step-by-step guide on How to Make a Pleated Lamp Shade to help get started today!
You Can Check It Out to Choose Lamp Shades