
Led light strips are a great way to add extra lighting to your home. They come in various colors and styles and can be used to create elaborate displays or provide extra light in a dark corner. One of the challenges with using LED light strips is getting them to stick to the surface you want them to. Here are some tips on how to make led light strips stick.
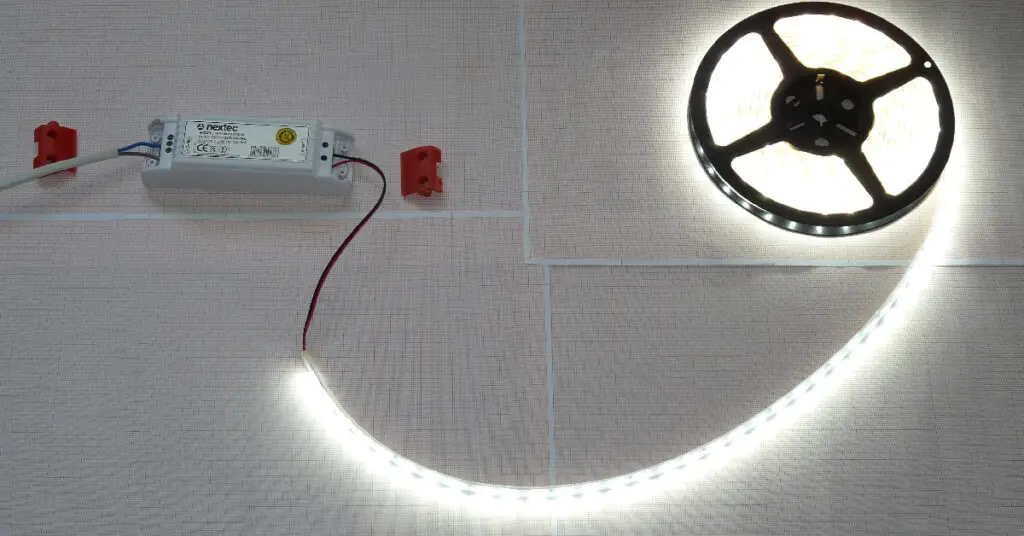
Are you looking for a way to spice up your décor without spending much money? One option is to use LED light strips. These strips come in a variety of colors, and they are easy to install. The only problem is that the adhesive can often fail over time. This blog post will show you how to make your LED light strips stick better. By following these tips, you can ensure that your light strip installation lasts for years. Let’s get started.
Summary: If you’re looking to add a little bit of extra pizzazz to your lighting setup, try using led light strips. These little beauties are easy to install and can be customized to create any sort of look you desire.
Why It Is Important to Make Your Led Light Strips Stick
The first question you might be asking is why it is important to make sure that your LED light strips stick. After all, the adhesive is already there, so what more do you need to do? The answer is that the adhesive is not always as strong as it should be. Over time, the adhesive can break down, especially if it is exposed to heat or moisture.
If the adhesive on your LED light strip is not strong, the light strip can fall off and be dangerous. Also, if the adhesive fails, the LED light strip can short-circuit and cause a fire.
Things You Will Need
Before you begin, there are a few things you will need to gather.
- LED light strips
- Strong adhesive
- Lighter
Some Effective Ways Ways How to Make Led Light Strips Stick
1. Clean the Surface
The first step in creating your LED light display is to clean the surface where the strips will be adhered. This is important in order to remove any dust, dirt, or grease that may be present; otherwise, the adhesive will not be able to properly adhere to the surface. You can use a variety of cleaners for this purpose, such as alcohol or vinegar. Just be sure that the surface is completely dry before proceeding to the next step.

2. Use a Strong Adhesive
To ensure your LED light strips stay in place for a long time, use a strong adhesive. There are many adhesives on the market, but not all are equal. For best results, use an adhesive specifically designed for LED light strips. This type of adhesive is stronger and will last longer.
3. Apply the Adhesive
It’s time to apply the adhesive to the surface. You’ll need to apply a generous amount of adhesive to make sure the LED light strips stick properly. To do this, you can use a brush or roller. First, apply the adhesive to the back of the LED light strip. Then, carefully place the LED light strip on the surface. Next, use a weight to hold the LED light strip in place while the adhesive dries.
4. Use a Lighter
If you have trouble getting the LED light strip to stick, you can try using a lighter. The heat from the lighter will help to melt the adhesive and make it more pliable. First, hold the lighter close to the adhesive. You should see the adhesive start to melt and become shiny. Then, press the LED light strip into place. Again, the lighter’s heat will help make the adhesive more sticky.
5. Apply Pressure to the Light Strip
It’s important to apply pressure to the LED light strip after you’ve put the adhesive on it. This will help the adhesive stick to the surface. You can use your hand or a weight to apply pressure. Just make sure you do it evenly so you don’t create any bubbles. If you see any bubbles, use a needle to pop them.
6. Let the Adhesive Dry
After you have applied the adhesive and pressed the LED light strip into place, it is important to let the adhesive dry. This can take anywhere from a few hours to a few days. The time will vary depending on the type of adhesive that you use. Once the adhesive is dry, you can turn on the LED light strip.
7. Use a Heat Gun
If you have trouble getting the adhesive to stick, you can try using a heat gun. The heat from the heat gun will help melt the adhesive and make it more pliable. First, hold the heat gun close to the adhesive. You should see the adhesive start to melt and become shiny. Then, press the LED light strip into place. Again, the heat from the heat gun will help to make the adhesive more sticky.
8. Use a Hairdryer

If you don’t have a heat gun, you can use a hairdryer instead. The heat from the hair dryer will help to melt the adhesive and make it more pliable. First, hold the hairdryer close to the adhesive. You should see the adhesive start to melt and become shiny. Then, press the LED light strip into place. Again, the hairdryer’s heat will help make the adhesive more sticky.
9. Hang the Light Strip From the Ceiling
Now that the adhesive is dry, you can hang the LED light strip from the ceiling. To do this, you will need to use a hanger. First, find a hanger that is the right size for your LED light strip. Then, use a screwdriver to attach the hanger to the ceiling. Next, thread the LED light strip through the hanger. Finally, use a zip tie to secure the light strip in place. If you want, you can use multiple hangers to support the light strip.
10. Sew the Light Strip Into Place
If you are using a fabric light strip, you can sew the light strip into place. This is a good option if you are looking for a permanent solution. First, find a thread that matches the color of the light strip. Then, sew the light strip into place using a needle and thread. Start at one end of the light strip and sew along the length of the strip. Be sure to backstitch at the beginning and end to secure the thread.
11. Use Gaffer’s Tape:
You can use gaffer’s tape if you need a quick and easy way to make your LED light strip stick. This type of tape is designed for use in the theater but can also be used to secure LED light strips. First, clean the surface where you will be applying the tape. Then, apply the tape to the surface. Be sure to apply the tape evenly to avoid creating bubbles. Finally, press the LED light strip into place.
12. Use Double-Sided Tape:
Another option is to use double-sided tape. This type of tape can be found at most hardware stores. First, clean the surface where you want to place the LED strip. Then, apply the double-sided tape to the back of the LED strip. Be sure to apply pressure, so the tape adheres well to the strip. Once the tape is in place, peel off the other side of the tape and press the LED strip onto the surface. Hold it in place for a few seconds to make sure that it is secure. You can then plug in the strip and enjoy your new lighting.
How Much Does It Cost to Make Led Light Strips Stick?
The cost of making LED light strips stick will vary depending on your method. If you use double-sided tape, you can expect to spend around $10. If you sew the light strip, you will need to purchase thread and a needle. The cost of these materials will vary depending on where you purchase them. Using gaffer’s tape, you can expect to spend around $20. The cost of making LED light strips stick will also vary depending on the size and type of LED light strip that you use. Normally, the larger and more complex the light strip, the more expensive it will be.
Some Precautions on How to Make Led Light Strips Stick
- Be careful when handling led strips as they are fragile and can break easily.
- Avoid using too much force when making the led strips stick, as this can damage them.
- Make sure that the area you are sticking the led strips to is dry and free of moisture.
- Do not attempt to make led light strips stick to surfaces that are not compatible with adhesive materials.
Frequently Asked Questions
Why Are My Led Light Strips Not Sticking?
There are a couple of things that you can do to ensure that your led light strips stick, and they all revolve around dryness. One solution is to make sure that the surface area of the strip is consistently wetted down. This can be done by spraying it with water, using a vegetable oil spray, or dousing it in a sauce or broth. Another solution is to add some weight (like coins) to the end of the strip so that it rests on top of the adhesive and creates an air seal.
Can You Put Gorilla Glue on Led Lights?
it is not as impossible as one might think. Gorilla Glue does in fact adhere to most surfaces, including metal and plastic. So if you are trying to put gorilla glue on led lights, the outcome may be less than desirable.
Do Led Lights Ruin Wall Paint?
There is some debate surrounding the effects of LED lights on wall paint, but the majority of professionals agree that they are generally safe. That said, always contact your local paint store to speak with an expert before making any changes to your paint or lighting. In most cases, they will be able to recommend a safe and tested solution for your specific situation.
How Long Do Led Strip Lights Last?
Depending on the type of light strip you are using, it can last anywhere from 6 to 12 months. Always keep your lights clean and free from debris by wiping them down with a dry cloth every time you use them. If there is any sign of peeling or corrosion, replace your strip immediately!
Conclusion
So there you have it, everything you need to know about how to make LED light strips stick. By following these simple steps, you’ll be able to create a professional and polished lighting effect for your home or business in no time at all. So have fun with it, and happy sticking.