
Are you sick of the look of your outdoor light fixtures? Do they seem too dated or boring? Outdoor light fixtures can be a great way to add some personality and style to your home, but they often seem like a missed opportunity. Instead of leaving them plain or painting them a standard white, why not try sprucing them up with a pop of color? Painting your outdoor light fixtures can be a fun and easy way to add some flare to your home’s exterior. This post will give you tips on how to paint outdoor light fixtures to achieve the look you desire. Let’s get started!
Summary: The right way to paint outdoor light fixtures is to use a light-colored paint with a low sheen. To avoid Streaks, use a damp cloth to clean the fixture before painting. Use a high sheen paint if you want a brighter look.
What Causes Outdoor Light Fixtures to Look Dirty or Faded?
There are a few reasons why your outdoor light fixtures might look dirty or faded. First, they may be made of materials that are susceptible to wear and tear, such as metal or plastic. These materials can become scratched or cracked over time, which can cause the paint to look dull. Another reason why your outdoor light fixtures might look dirty is that they’re exposed to the elements.
They may be constantly bombarded by sunlight, rain, or snow, which can cause the color to fade. Additionally, pollution in the air can also cause the paint to look dull. The other reason outdoor light fixtures may look dirty is that they haven’t been cleaned in a while. As a result, dirt, dust, and grime can build up on the surface, making them look dull and dingy. Lastly, it’s also possible that the previous paint job was not done properly, resulting in a poor-quality finish.
Why You Should Paint Outdoor Light Fixtures
Outdoor light fixtures are often overlooked when it comes to home improvement projects. However, painting them can be a great way to add some personality and style to your home’s exterior. It can also be a fun and easy project you can do yourself. Another reason to paint your outdoor light fixtures is to help protect them from the elements. A fresh coat of paint can be a barrier against sunlight, rain, snow, and pollution.
This will help to keep your outdoor light fixtures looking new for longer. A new coat of paint can also help hide imperfections, such as scratches or cracks. Finally, painting your outdoor light fixtures can be a way to personalize them and make them unique to your home.
Step by Step How to Paint Outdoor Light Fixtures
1. Cleaning the Light Fixtures
The first step is to clean the light fixtures. This will help remove any dirt, dust, or grime built up on the surface. You can use a mild soap and water solution to clean the light fixtures. First, wet a cloth with the solution and then wipe down the light fixtures. Be sure to rinse them off afterward with clean water. A pressure washer can also be used, but be sure to use the low setting to avoid damaging the light fixtures.
If the light fixtures are extremely dirty, you may need to use a stronger cleaning solution, such as a degreaser.
2. Choose the Right Paint
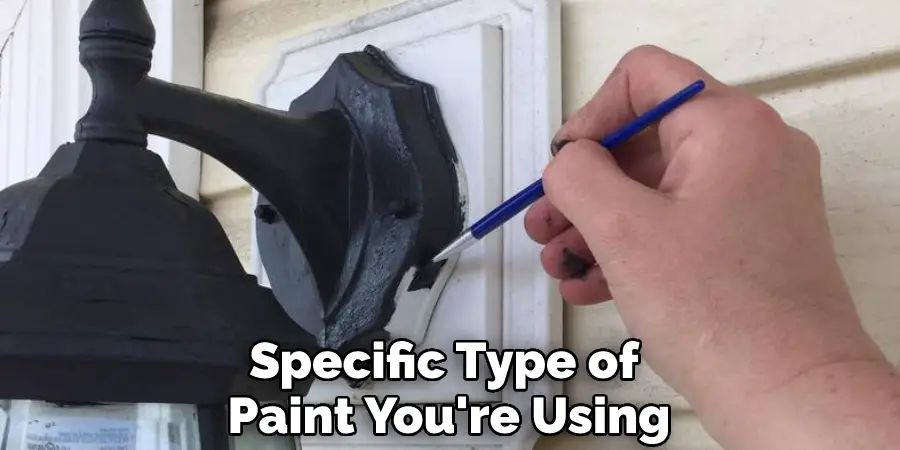
The next step is to choose the right paint for the job. You’ll want to use an exterior paint that is specifically designed for metal or plastic. These paints will be more durable and resistant to the elements. They will also have a higher level of UV protection to prevent the color from fading. When choosing a paint color, you’ll want to consider the overall look you’re trying to achieve.
A brighter color can add some personality to your home’s exterior. However, a more subdued color may be better if you’re trying to match the existing trim. Avoid using latex paint as it will not adhere well to metal or plastic.
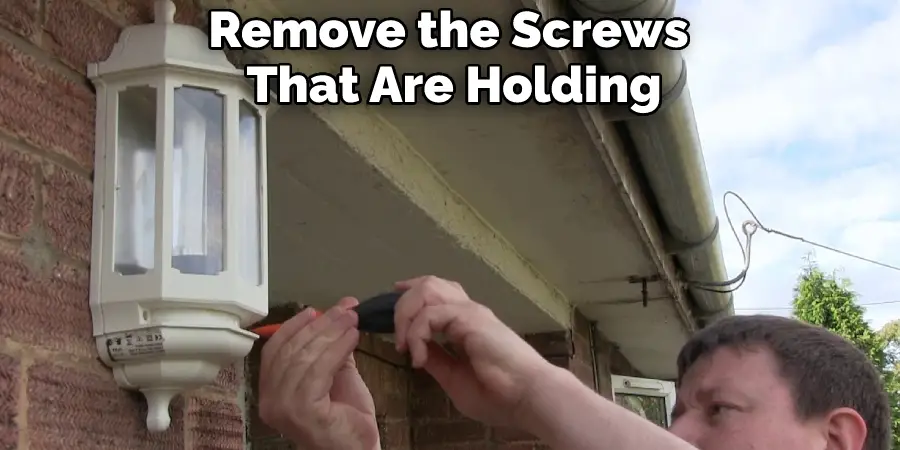
3. Remove the Light Fixtures
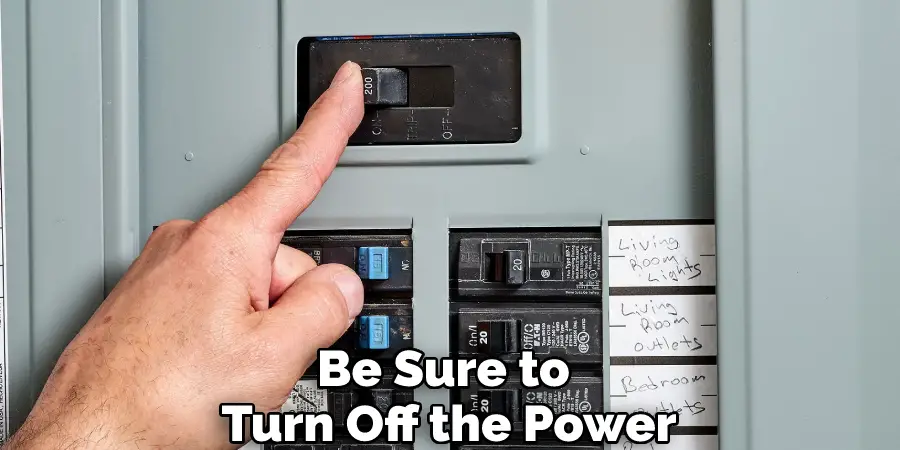
The next step is to remove the light fixtures from their mounting. This will make painting them much easier. First, turn off the power to the light fixtures at the breaker box. Then, using a screwdriver, remove the screws that are holding the light fixtures in place. Be sure to keep track of all the screws and hardware. Once the light fixtures are removed, you can proceed to the next step.
4. Prepare the Surface
The next step is to prepare the surface for painting. First, you’ll want to sand down the light fixtures. This will help the paint to adhere better. You can use fine-grit sandpaper for this. Once the light fixtures are sanded, you’ll want to wipe them down with a tack cloth. This will remove any dust left behind from sanding. Avoid using a regular cloth as it may leave behind lint.
5. Tape Off the Edges
The next step is to tape off the edges. This will help to create a clean line when painting. You’ll want to use painter’s tape for this. First, place the tape along the edge of the light fixtures. Then, press the tape down firmly using a putty knife or other sharp object. Be sure to wrap the tape around the other side of the light fixtures. This will help to create a seal. If you’re painting multiple light fixtures, you can tape them all off simultaneously.
6. Apply a Coat of Primer
The next step is to apply a coat of primer. This will help the paint to adhere better and create a more even finish. You can use a brush, roller, or sprayer to apply the primer. If you’re using a brush, dip it into the primer and then brush it onto the light fixtures in long, even strokes. If you’re using a roller, load it up with primer and then roll it onto the light fixtures. Be sure to use even strokes and avoid leaving any lumps.
If you’re using a sprayer, hold it about 6 inches away from the light fixtures and spray in a back-and-forth motion. Avoid over-spraying, as this can create a mess. Once the primer is applied, you can proceed to the next step.
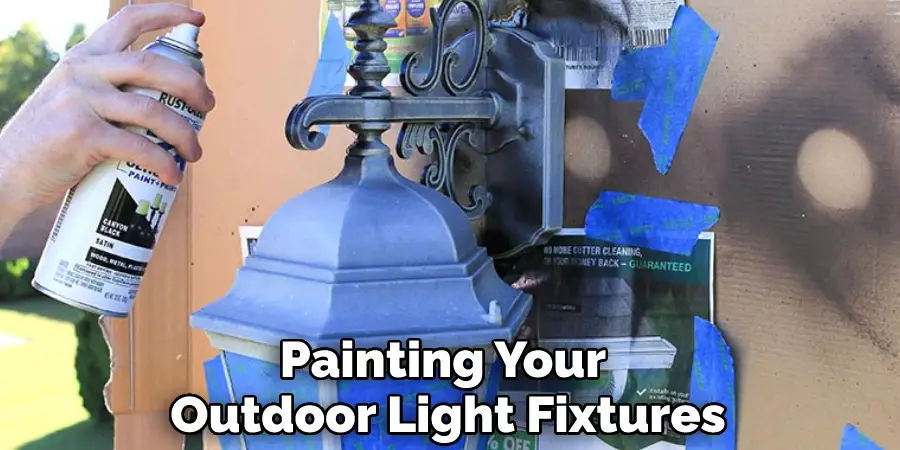
7. Paint the Light Fixtures
The next step is to paint the light fixtures. You can use any paint you like, but be sure to use paint designed for outdoor use. You can find these types of paints at most hardware stores. To paint the light fixtures, first load up your brush, roller, or sprayer with paint. Then, apply the paint to the light fixtures in long, even strokes. Be sure to wrap the paint around the other side of the light fixtures.
You can do them all simultaneously if you’re painting multiple light fixtures. Try to avoid painting yourself into a corner. Avoid over-painting, as this can create a mess.
8. Allow the Paint to Dry
Once the light fixtures are painted, you’ll need to allow the paint to dry. This usually takes about 2 hours. However, be sure to check the manufacturer’s instructions for the specific type of paint you’re using. If the paint is still tacky after 2 hours, you may need to give it more time to dry. Once the paint is dry, you can proceed to the next step.
9. Reattach the Light Fixtures
The next step is to reattach the light fixtures. First, place the light fixtures back in their mounting. Then, using a screwdriver, tighten the screws. Be sure not to overtighten the screws as this can strip the threads. Once the light fixtures are secure, you can turn on the power at the breaker box. Test the light fixtures to make sure they’re working properly.
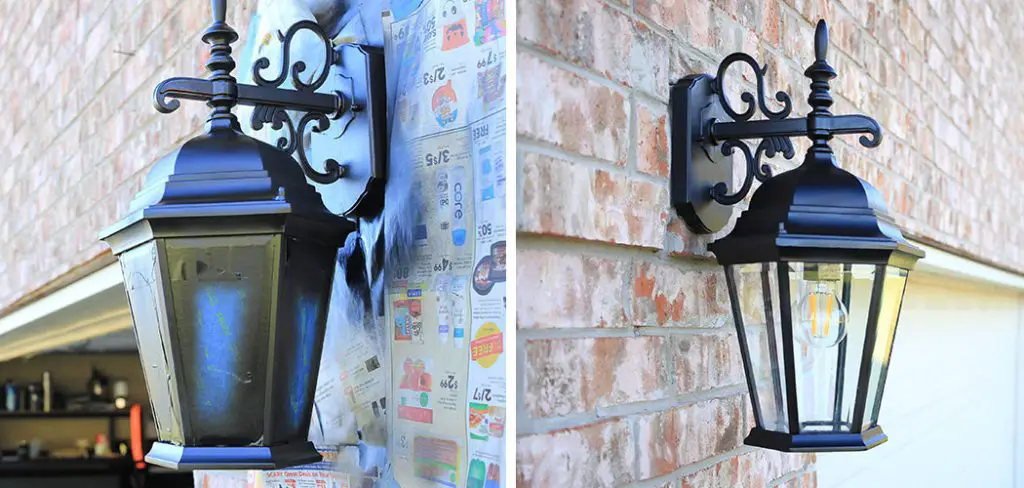
10. Enjoy Your New Look!
You’ve now successfully painted your outdoor light fixtures. Enjoy your new look! With a little bit of time and effort, you can easily update the look of your home. Be sure to take before and after photos to see the transformation yourself.
Tips and Warnings on How to Paint Outdoor Light Fixtures
Tips:
- If the light fixtures are old and have chipped paint, sanding may be necessary before painting. However, sanding is still recommended if they are new or want a smooth surface.
- Choose a paint made for outdoor use that can withstand the elements.
- Use painter’s tape to protect any areas you don’t want to be painted.
- Apply a primer before painting to help the paint adhere better and last longer.
- Use a brush or roller designed for use with the type of paint you have chosen.
- Follow the directions on the can for dry times before applying a second coat, if needed.
- Be sure to turn off the power to the light fixture before painting.
Warnings:
- Be careful when sanding not to damage the light fixture.
- Do not use paint not made for outdoor use, as it will not withstand the elements and need to be replaced sooner.
- Be careful when painting not to get paint on areas that you don’t want to paint.
- Do not turn the power to the light fixture on until the paint is completely dry.
Frequently Asked Questions
What Kind of Paint Do You Use on Outdoor Light Fixtures?
The colors and finishes that work best will vary depending on the specific fixture and the climate where it is installed. However, some general tips that may be useful in many cases include using a paint that is specifically designed for outdoor use (e.g. a polyurethane or acrylic paint), using a high-quality primer and paintball, and letting the painting dry fully before installing the light fixtures.
Can I Paint Outside Light Fixtures?
Yes, it is possible to paint outside light fixtures. However, there are a few important things to keep in mind. First, make sure that the light fixtures are dry and free of any debris or oil prior to painting. Second, be sure to use a high-quality paint that will adhere well to the metal surfaces of the light fixtures. Third, be sure to wait until the weather is warm and dry before painting, as cold temperatures and rain can cause the paint to crack and peel. Finally, be aware of your surroundings while painting – avoid working in areas where there is a risk of falling objects or being hit by traffic.
What is the Best Finish for Outdoor Light Fixtures?
The best finish for outdoor light fixtures depends on a variety of factors such as the type of fixture, the weather conditions, and the aesthetics of the installation. However, some common finishes for outdoor light fixtures include:
- An outdoor light fixture that is finished in a high-gloss black or stainless steel finish will look sleek and modern, and will resist scratches, fading, and other signs of wear.
- A low-gloss finish may be more durable and resistant to weather conditions, but it may not look as good as a high-gloss finish.
- A semi-gloss or matte finish may be a good compromise between durability and aesthetics.
- A reflective finish may be ideal for areas where additional brightness is desired or when security is a concern.
It is important to take into account the specific needs of your installation when selecting a finish for your outdoor light fixtures. By consulting with a qualified contractor, you can choose the finish that looks best in your particular situation and meets your overall lighting needs.
Do Outdoor Light Fixtures Need to Be Sealed?
Yes, outdoor light fixtures should be sealed to protect them from the elements and ensure they last longer. Sealing the fixture prevents dirt, dust, and other debris from entering the light bulb and causing it to fail prematurely. It also helps guard against water damage, which can lead to corrosion and eventual loss of the light bulb. To seal a light fixture, first remove the cover by unscrewing it or removing the screws that hold it in place. Next, clean the surface of the light fixture with a dry cloth or a mild cleaning agent. Apply a sealant to the surface of the light fixture, making sure to evenly coat all sides. Replace the cover or screws, and screw it securely in place.
Conclusion
So there you have it! Now you know how to paint outdoor light fixtures. Follow these steps, and you’ll be sure to achieve great results. We hope you found this article helpful. If you have any questions or comments, please feel free to leave them below. Thank you for reading!