
Replacing a Ring Floodlight bulb is a straightforward process, but it’s important to take your time and follow the proper steps to avoid any potential injuries. Unfortunately, if one of your light bulbs goes out, replacing it can be a little tricky. Again, if you want to avoid any potential injuries, it’s important to take your time and follow the proper steps.
In this blog post, we’ll walk you through the steps of how to replace ring floodlight bulb. We’ll also show you how to remove the old bulb and install the new one. So whether you’re a first-time homeowner or just want to learn more about light bulbs, this blog post is for you!
Summary: If your floodlight is out, you can replace the bulb with little effort. First, determine which type of bulb you need. There are three types of bulbs: incandescent, halogen, and LED. Next, remove the cover on the floodlight by unscrewing the two screws on either side. Inside you will find the bulb. To install the new bulb, put it in the same orientation as the old one and screw the cover back on. Be sure to change the screw if necessary.
When Should You Replace Ring Floodlight Bulb?
The average lifespan of an LED floodlight is about 50,000 hours, which is much longer than traditional bulbs. However, there are a few factors that can shorten the lifespan of your Ring floodlight bulb, including:
- Frequent or Extended Use: If you use your floodlight frequently or leave it on for long periods, it will likely need to be replaced sooner. As the bulb is used, the filament slowly wears down, which can cause the bulb to burn out prematurely. Also, it is possible to overuse an LED bulb, which can cause it to overheat and fail.
- Power Surges: If your home experiences a power surge, it can damage the floodlight bulb and cause it to fail prematurely. Even if the bulb doesn’t burn out completely, it may not function as well as it did before the power surge.
- Extreme Temperatures: LED bulbs are designed to withstand extreme temperatures but can still be damaged by extreme heat or cold. If the temperature in your home fluctuates dramatically, it could shorten the lifespan of your floodlight bulb.
If any of these factors have contributed to a shortened lifespan for your floodlight bulb, it’s important to replace it as soon as possible. Not only will this ensure that your floodlight continues to function properly, but it will also help to prevent any further damage to the fixture. If this is the case, here is a guide on how to replace your ring floodlight bulb:
Step by Step Guide: How to Replace Ring Floodlight Bulb
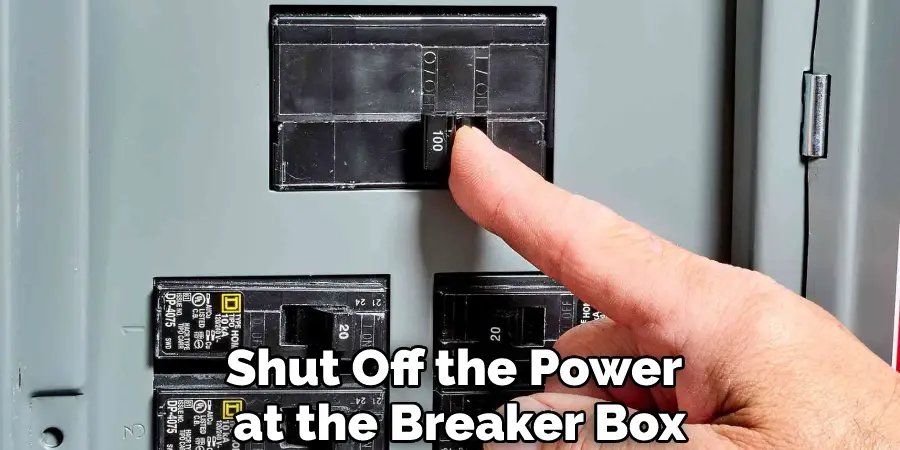
Step 1: Turn Off the Power
Before you begin, turn off the power to the floodlight. The easiest way to do this is to find the switch that controls the light and flip it to the “Off” position. If you don’t have a switch, you’ll need to shut off the power at the breaker box. Make sure the power is off before continuing to the next step.
Step 2: Remove the Old Bulb
Using a ladder, climb up to the floodlight and unscrew the old bulb. Be careful not to touch the glass of the new bulb with your fingers, as this can cause it to break. If the new bulb is broken, you must dispose of it properly and purchase a new one.
Step 3: Choose the New Bulb
Now that you know what kind of replacement bulb you need, it’s time to choose the new one.
When it comes to LED floodlights, there are a few things you should keep in mind. First, make sure the lumen output is high enough. For example, if your old bulb was 100 watts, you’ll need an LED that produces at least 1,500 lumens.
Another thing to consider is the beam angle. If you want wide light coverage, look for an LED with a beam angle of 120 degrees or more. Finally, check the color temperature. If the light from your old bulb was too yellow for your liking, look for a cool white LED with a color temperature of 4,000K or higher.

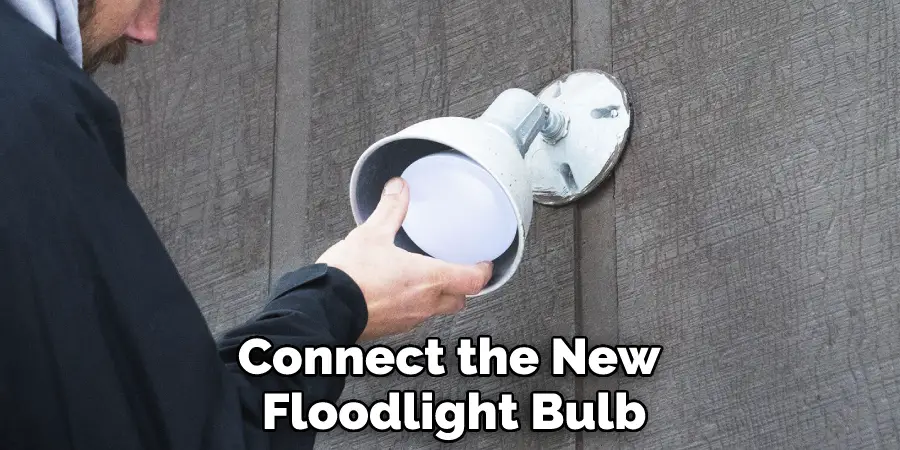
Step 4: Insert the New Bulb
Carefully insert the new bulb into the socket and screw it in place. Be sure not to touch the glass of the new bulb with your fingers, as this can cause it to break. Once the new bulb is in place, screw the metal ring back into place and tighten it until it is snug. Your floodlight is now ready to use! Make sure the power is back on before you test it out.
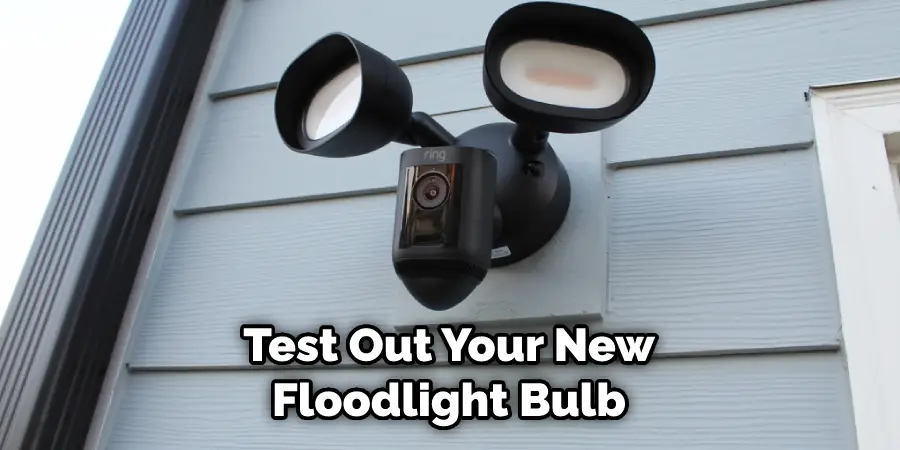
Step 5: Testing the New Bulb
Once the power is back on, flip the switch to the “On” position and test out your new floodlight bulb. You should see a bright light shining from the fixture if everything works properly. If not, check the connections and make sure the bulb is screwed in tightly. Once you’ve confirmed that the bulb is working properly, you can close up the fixture and enjoy your new light.
If your new bulb is not working, ensure the power is on and the bulb is screwed in tightly. If it still isn’t working, you may need to purchase a new one.
Some Helpful Tips and Advice
1. Always turn off the power to your floodlight before beginning any work on it. This will help prevent any accidents.
2. To remove the old bulb, first unscrew the retaining ring that holds it in place. Be careful not to touch the bulb’s glass with your fingers, as this can cause it to break.
3. Always remember to dispose of fluorescent bulbs properly. They contain mercury and other hazardous materials that can harm the environment.
4. When installing the new bulb, be sure to screw it in tightly so it doesn’t come loose and fall out.
5. While replacing the bulb, take a moment to inspect the floodlight’s wiring and make sure it is in good condition. If you see any frayed or damaged wires, be sure to replace them before turning the power back on.
6. Once you have replaced the bulb and ensured all the wiring is secure, you can turn the power back on and test your floodlight.
7. Ensure that the new bulb is the correct type and wattage for your floodlight. Using a bulb with too high of wattage can damage the fixture.
Following these simple tips will help you replace your Ring floodlight bulb quickly and safely.
How Long Does a Floodlight Bulb Last?
Most floodlight bulbs have a lifespan of around 2,000 hours. For example, using your floodlight for an average of three hours per day will last approximately 667 days or just over one and a half years. However, some things can shorten the lifespan of a floodlight bulb.
For example, if the bulb is frequently turned on and off, it will not last as long as one is left on for prolonged periods. Additionally, if the floodlight is subject to extreme hot or cold temperatures, this can also reduce its lifespan. If you think your floodlight bulb is not lasting as long as it should, there are a few things you can do to troubleshoot the issue.
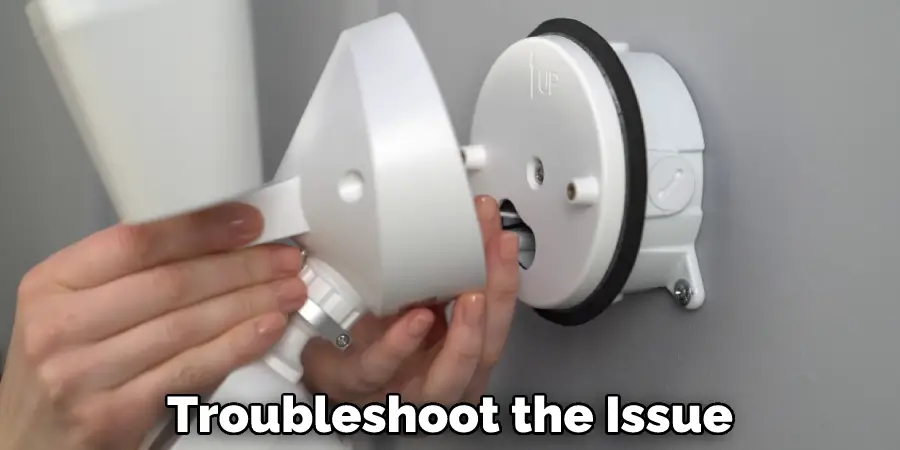
Troubleshooting Ring Floodlight Bulb Issues
If your floodlight bulb is not lasting as long as it should, there are a few things you can do to troubleshoot the issue. First, check to see if the bulb is loose in the socket. If it is, screw it in tighter. Next, check the wattage of the bulb to ensure it is the correct type for your fixture. If not, replace it with the proper wattage.
Finally, check the condition of the floodlight’s wiring and ensure there are no frayed or damaged wires. If everything looks good, then the bulb may simply be reaching the end of its lifespan and will need to be replaced. It would help if you bought a replacement bulb with the same wattage and base type as the original.
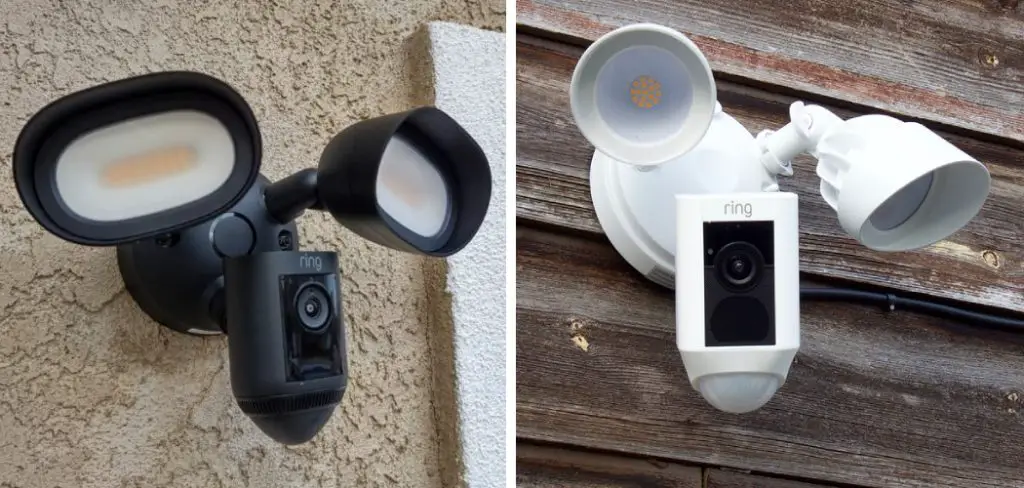
What Kind of Bulbs Are in Ring Floodlight?
The Ring Floodlight uses two kinds of bulbs: halogen and LED. You can find the bulb type in your light by looking at the model number on the back of the light. The first two digits will tell you what kind of bulb is in your light. For example, if the model number is 10W, the light has two halogen bulbs.
If the model number is 14W, the light has two LED bulbs. To replace the bulbs in your Ring Floodlight, you must purchase the same type and wattage. You can find the wattage of your bulbs by looking at the back of the light. The wattage will be listed next to the model number.
Frequently Asked Questions
Can I Change the Bulb on My Ring Floodlight?
There are a few ways to change the bulb on your ring floodlight, but each one is technically advanced and may not be for everyone. The most common way to do this is by using a screwdriver or an Allen wrench. However, if you’re feeling brave (or foolhardy), there are also instructions available online that involve removing the entire floodlight unit.
If you decide to go with the more technical approach, make sure that you have all of the necessary tools before beginning: a voltmeter, soldering iron and wire strippers/cutters, flat head screws driver size 17mm-27mm (1 inch-6 inch), Phillips-head screws driver size #0x3x7 mm(0.12 inch x 0.18-inch × 0.078inch), etc. First things first – remove any light fixtures in the vicinity so that you don’t accidentally short out anything while working on your floodlight!
Once you’ve gathered all of your supplies, locate and unscrew both ends of the housing unit in order to access the lightbulb inside it – making sure not to lose either end as they will come in handy later!
Next comes marking where each screw goes based on what type of screwdriver/wrench you have at hand; mark holes near clip mount points as these will likely need extra securing when reattaching everything back together again).
Why is My Ring Floodlight Lights Not Working?
Many times, when a ring floodlight fails, it is due to either the light bulb or the electrical socket. To determine which part is defective, you can try switching out the bulbs with another set that are of the same type (e.g., A20), and see if that helps. If replacing all of the bulbs does not fix your issue, then it may be necessary to replace your electrical socket.
Do Ring Lights Burn Out?
Yes, Ring Lights do eventually burn out. This is due to the high amount of light output and the limited battery life. In most cases, the light will begin to flicker and eventually go out completely. It is important to replace the ring light as soon as it begins to experience these issues in order to maintain optimal lighting for your photography or video project.

What Are the Parts of a Ring Light?
A ring light is a type of lighting equipment that resembles a halo or eclipse. It is typically used for taking photographs, videos, and makeup applications. The lamp has numerous lights around its circumference which create an illusion of depth and roundness when viewed in photos or videos.
The main advantages of using a ring light over other types of lighting are its portability and the ability to isolate specific areas of your subject’s face or body. Additionally, it can be used to enhance natural sunlight photography by adding warmth and vitality to outdoor scenes.
Some disadvantages include the high cost (relative to other types) and difficulty in getting good results with Aberrations issues (face wrinkles). So before making any purchase decisions, make sure you have tried out different brands and models so that you can find one that best suits your needs!
Final Thoughts
Replacing a Ring Floodlight Bulb is not as difficult as it may seem. In this blog post, we have provided step-by-step instructions on how to replace ring floodlight bulb and offer tips on what to do if you encounter any problems. First, remove the old bulb by unscrewing it counterclockwise. Second, connect the new floodlight bulb to the wires leading into the light fixture.
Tighten the screws clockwise until they’re snug against the bulb. Finally, replace the light cover and test your work by flipping on the switch. If everything is in order, you should see a bright white light emanating from your Ring Floodlight. We hope this guide has been helpful to you. If you have any questions, please feel free to reach out to us in the comments section below. We want to make sure you have a successful replacement experience!