
Are you wondering if your car’s automatic headlights are working correctly? Testing your car’s automatic headlight sensor can seem daunting, but it doesn’t have to be. In this blog post, we’ll show you how easy it is to identify any problems with your vehicle’s lights and make sure they continue providing the necessary visibility on the roads.

We’ll also discuss tips for preventing future issues and explain why regular testing of this system is so important for maintaining safe driving conditions. Read on to learn more about how to test automatic headlight sensor.
Maintaining your car’s automatic headlight sensor is an important part of the overall upkeep and safety of your vehicle.
Your headlights provide vital illumination so that you can see clearly when driving in dark or low-light conditions, but even more critically they help make sure other drivers around you will be aware of your presence! To do this effectively, it’s necessary to periodically test the automatic headlight sensor to ensure its proper functioning. So if you’ve been wanting to learn how to assess and evaluate the working condition of your vehicle’s automated lighting system, read on!
Why May You Want to Test Automatic Headlight Sensor?
1. To Make Sure the Headlights Work Properly
One of the main reasons why you may want to test an automatic headlight sensor is to make sure that the headlights are working properly. While this type of equipment is designed to be reliable, it can still suffer from wear and tear over time. By testing the system regularly, you can ensure that it functions as expected for your headlights to always be illuminated when they need to be.
2. To Check for Malfunctions
Another reason why you may want to test an automatic headlight sensor is to check for any malfunctions with the system. If a malfunction occurs, then it can affect the performance of your headlights and potentially lead to safety hazards. Regular testing will help you identify these problems so that they can be fixed quickly before they cause any major issues.
3. To Check for Problems with the Sensor
Finally, you may want to test an automatic headlight sensor in order to check for any problems with the actual sensor itself. This could include anything from physical damage or dirt buildup that can affect its performance. Regular testing will enable you to identify any potential problems and perform necessary repairs before they cause further complications.
With these reasons in mind, it’s important to know how to test an automatic headlight sensor correctly. By following the steps outlined below, you can ensure that your headlights work properly and remain illuminated when they need to be.
How to Test Automatic Headlight Sensor in 5 Easy Steps
Step 1: Gather All The Tools
The very first step is to gather all the necessary tools and materials that you’ll need to test your automatic headlight sensor. You’ll need some basic hand tools like a multimeter, screwdriver, and pliers.
Step 2: Identify The Sensor
Once you have all your tools in place, it’s time to identify the sensor. This is usually done by locating the headlight switch, which should be located underneath the dashboard. Once you have identified it, carefully remove it from its mounting bracket and examine it for any signs of damage or corrosion.
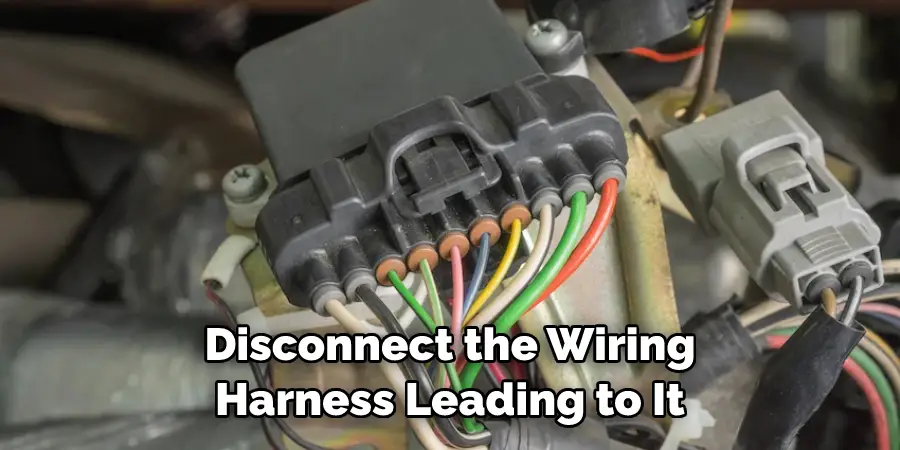
Step 3: Disconnect The Wiring Harness
Once you’ve identified and removed the sensor, disconnect the wiring harness leading to it. This will allow you to access the sensor and its electrical connections. Make sure that you take note of which connection is going where, as this will be important during the testing process.
Step 4: Test The Sensor
Now it’s time to test the automatic headlight sensor. Using your multimeter, check the voltage at each terminal on the sensor. This should tell you whether the sensor is working correctly or not. If the voltage is too low, it may be a sign that the sensor has gone bad and needs to be replaced.
Step 5: Reassemble The Sensor
Once you’ve tested the sensor, it’s time to reassemble everything. Carefully reconnect all wiring harnesses in accordance with their original connections, and then fit the headlight switch back in place. Make sure to double-check your work before you move on to the next step.
Once you’ve followed these steps, your automatic headlight sensor should be functioning properly. If it isn’t, chances are there is a more serious underlying issue that needs to be addressed by a professional. Make sure to take your car to a certified mechanic if you have any further issues with the headlight sensor.
Some Extra Tips to Test Automatic Headlight Sensor
1. Do Not Turn On the Lights in a Dark Area
Make sure to test your headlight sensor in an area with some light. If you turn on the headlights in a completely dark area, it may not be able to detect any changes and thus won’t work correctly. Also, make sure not to turn on the lights while you are indoors as this could also cause issues.
2. Clean the Sensors Regularly
It’s important to keep your headlight sensor clean in order for it to work correctly. Make sure that you are regularly cleaning off any dirt or debris that may be preventing it from detecting changes in light levels.

3. Check the Connections
Ensure that all of the connections to the headlight sensor are working correctly and securely. If any of them are damaged or loose, this could cause problems with their ability to detect changes in light levels. Additionally, you may need to check for any updates if they become available for your particular make and model of car in order to ensure that it is functioning properly.
4. Perform Regular Tests
In order to ensure that your headlight sensor is working correctly, you should be performing regular tests on it. This will help you identify any issues or potential problems before they become more serious. It’s also important to note that this type of testing should only be done in a well-ventilated area as there may be fumes from the engine or other components that could affect the performance of the sensor.
By following these tips and performing regular tests, you can help make sure that your automatic headlight sensor is working properly at all times and keeping you safe on the roads. Additionally, it’s always best to contact a qualified mechanic if any issues arise so that they can properly diagnose and address any problems.
Frequently Asked Questions
What Precautions Should I Take When Testing an Automatic Headlight Sensor?
When testing a sensor, it is important to take the necessary safety precautions. Always make sure that you are wearing protective eyewear and gloves when handling the parts of the sensor. Make sure to also disconnect all power sources from both your car and the headlight before attempting any repairs or testing on the sensor.
Additionally, make sure to consult your car’s manual for any specific instructions regarding the testing of the sensor. Finally, if you feel uncomfortable with performing any testing or repairs on your own, it is always advised to seek professional assistance.
What Should I Do If My Automatic Headlight Sensor Is Not Working Properly?
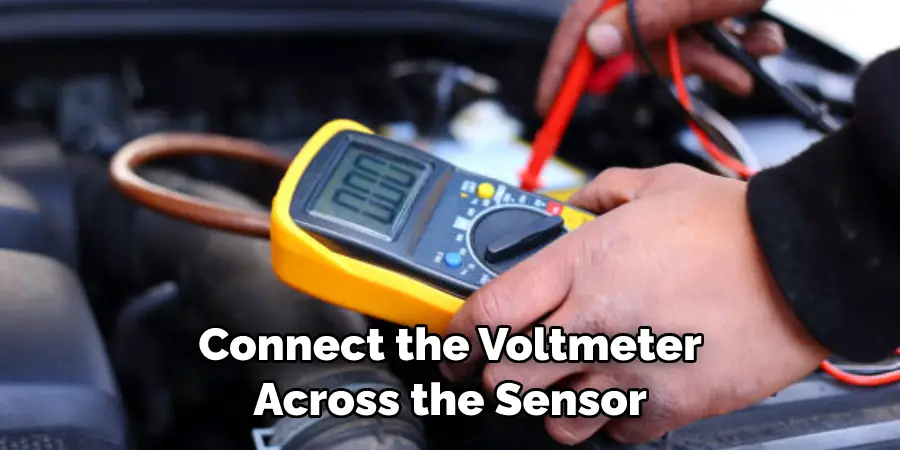
If your automatic headlight sensor is not functioning correctly, the first step is to check all of the connections. Make sure that they are properly plugged in and that there is no corrosion or dirt on any of them.
If everything appears to be connected correctly, you can then move onto testing the sensor. Connect a voltmeter to your car’s battery and test the voltage across the two pins of the headlight sensor. If the voltage is lower than the specified range, it means that the sensor is failing. In this case, you may need to replace it.
What Are Some Common Signs That My Automatic Headlight Sensor Might Need Replacement?
If your automatic headlight sensor has stopped working or is not responding accordingly when light conditions change, then it might be in need of replacement. Additionally, if the headlights are not turning on and off at the right times or your car has failed a safety inspection due to faulty headlights, then it is also likely that the sensor will need replacing. Finally, you may notice a clicking sound coming from the headlight when it is turned on or off. This could indicate a problem with your headlight sensor as well.
Can I Test the Automatic Headlight Sensor Myself?
Yes, you can test an automatic headlight sensor yourself using a voltmeter. First, disconnect all power sources from both your car and the headlight. Then connect the voltmeter across the two pins of the headlight sensor and turn on your car’s ignition key.
Conclusion
It is important to test the automatic headlight sensor of your car at least every six months. Not only will it help ensure the safety of yourself and other drivers on the road, but also help alert you to any problems before they become bigger issues. Furthermore, if something is wrong with the sensor, it could be as small as a dirty wire or poor connections which can be rectified quickly.
Now you know how to test automatic headlight sensor! However, if nothing seems to work, it would be wise to take your vehicle into an auto body repair shop for a proper diagnosis. If done correctly and regularly, testing your car’s automatic headlight sensor should have no problems whatsoever and provide clear vision when driving in dark conditions!
You Can Check It Out to Wire Headlights Directly to Battery