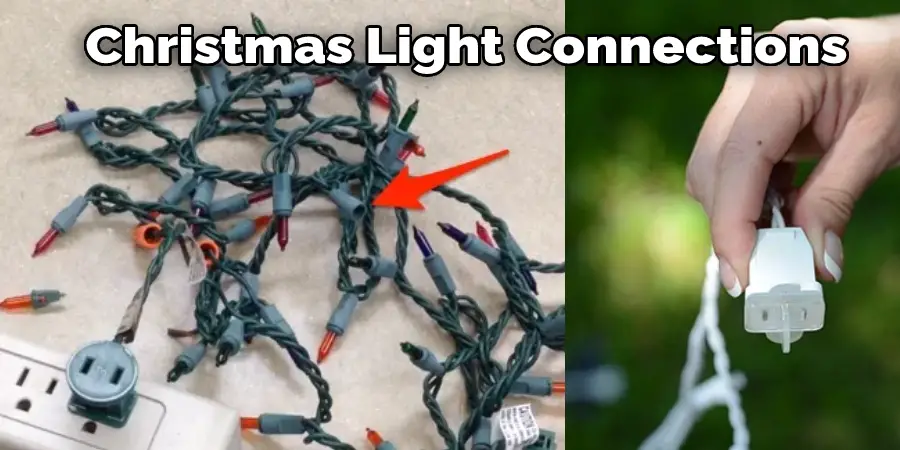
If you’re like most people, you probably enjoy using Christmas lights to decorate your home during the holiday season. However, if you’re not careful, all of that festive cheer can quickly turn into a seasonal disaster. One of the most common ways for Christmas lights to fail is by becoming waterlogged; fortunately, there are several ways that you can waterproof your light connections and protect them from the elements. In this article, we’ll explore some of the best methods how to waterproof christmas lights connections. Stay safe and merry!
Christmas is a time for family, friends, and lights. Lots and lots of lights. But if you’re not careful, all of those lights can turn into one big electrical hazard. Water and electricity don’t mix, so it’s essential to ensure that your light connections are safe and dry before plugging them in. Unfortunately, many people don’t realize that there are several ways to waterproof Christmas lights, and as a result, their lights often fail prematurely.
Summary: There are a few ways to waterproof Christmas lights connections. One way is to use a coat of clear sealant. Another is to pour a small amount of boiling water into the light socket and wait one minute. Then, pour a pot of cold water into the light socket and wait two minutes. Finally, use a plunger to suck the water out of the light socket.
A Detailed Guide on How to Waterproof Christmas Lights Connections
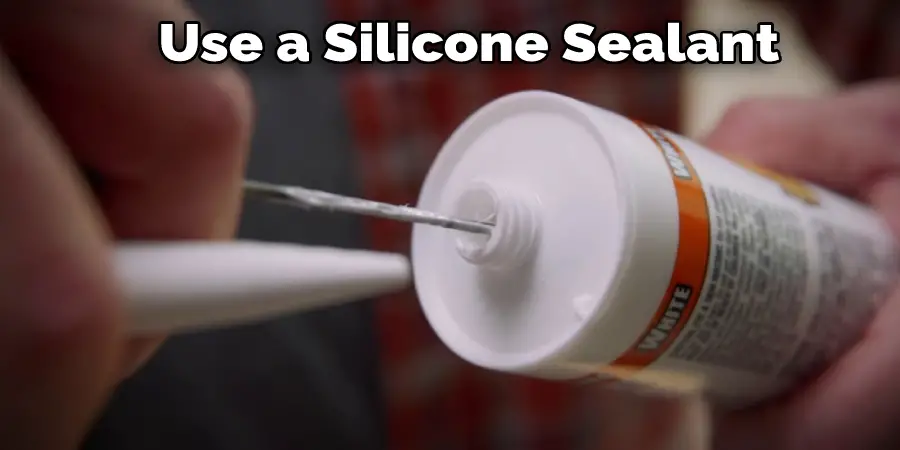
Method 1. Use a silicone sealant
The thermocouple is a safety device that senses when the pilot light is lit and tells the gas valve to stay open. If the thermocouple is damaged, it might not be able to sense that the pilot light is lit, which would cause the gas valve to close and cut off the flow of gas to the pilot light.
You Will Need:
- A tube of silicone sealant
- A caulking gun (optional)
- A utility knife
- Painter’s tape
- A lint-free cloth
Step 1. Prep the Area for Waterproofing.
You need to clean the surface around the connection with a lint-free cloth, so that the sealant can adhere correctly. If there is dirt, dust, or debris, remove it. You may need to use painter’s tape to mask off any areas you don’t want to accidentally get silicon on.
Step 2. Cut the Tip Off the Silicon Sealant Tube.
Using a utility knife, carefully cut the tip off the tube of silicon sealant at a 45-degree angle. If you’re using a caulking gun, attach the tube to the gun now.
Step 3. Apply the Silicone Sealant.
Starting at the base of the connection, slowly squeeze the trigger (or tube) to apply a bead of silicone sealant around the joint. Continue moving slowly and evenly until the entire connection is sealed. Use a wet cotton swab or your finger to smooth the bead of sealant. Depending on the manufacturer’s instructions, let the sealant dry for 24 hours before applying power or water.
If you are sealing an exposed end of pipe that will be used later, lightly spray with WD-40 to prevent stickiness.
Step 4. Allow the Sealant to Dry.
It’s important to let the silicone sealant dry completely before using the area. This could take a few hours to a day or two.
Tips
- If you need to remove the silicone sealant for any reason, use a utility knife or razor blade to score the surface of the sealant carefully. This will make it easier to peel away.
- Be sure to store any unused silicon sealant in a cool, dry place. Exposure to air and moisture can cause it to harden and become unusable.
Method 2. Use Waterproof Gasket
One of the best ways to create a watertight seal around Christmas light connections and protect the electrical components from moisture is to use a waterproof gasket.
You Will Need:
- Waterproof gasket
- Tape measure
- Knife or scissors
- Pen or marker
Step 1: Choose the Right Size Gasket
The first step is to choose the right size gasket for your needs. Next, you’ll want to measure the circumference of the cord where it will be inserted into the socket. Then, find a gasket that is slightly larger than this measurement. This will ensure that it forms a tight seal around the cord.
Step 2: Cut the Gasket to Size
Use a knife or scissors to cut the gasket down to size if necessary. Make sure that it is still large enough to fit snugly around the cord.
Step 3: Place the Gasket Around the Cord
Place the gasket around the portion of the cord that will be inserted into the socket. Make sure that it is positioned correctly to create a watertight seal.
Step 4: Insert the Cord Into the Socket
Carefully insert the cord into the socket. Ensure that the gasket is still in place and creates a tight seal.
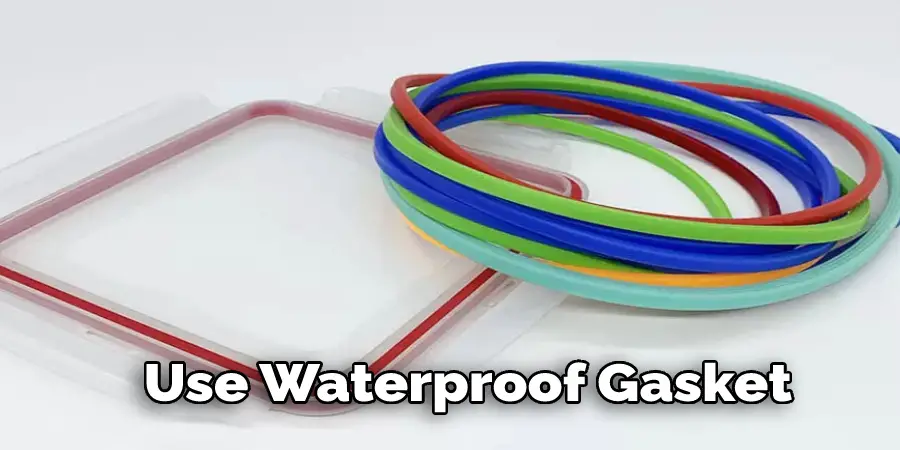
Step 5: Repeat for All Connections
Repeat this process for all of the connections on your Christmas lights. This will help to ensure that they are all protected from moisture.
By following these steps, you can easily waterproof your Christmas light connections and keep them working properly for years to come.
Tips
- If you are using outdoor lights, be sure to use a waterproof gasket designed explicitly.
- You can also use electrical tape to create a watertight seal around the connections. However, this method is not as reliable as using a waterproof gasket.
- Make sure to check your Christmas lights regularly to ensure that the connections are still intact and working correctly.
Method 3: Use a Waterproof Grease
Waterproof grease is a type of silicone-based grease that can be used to seal electrical connections. It is typically used in marine applications but can also be used for Christmas lights.
You Will Need:
- Waterproof grease
- Cotton swabs
Step 1: Prepare the Connection
Start by disconnecting the Christmas lights from the power source. Then, locate the connection you need to waterproof.
Step 2: Apply Grease to the Connection
Use a cotton swab to apply a small amount of waterproof grease to the connection. Ensure that the entire connection is covered with a thin layer of grease.

Step 3: Re-connect the Lights
Once the grease has been applied, you can re-connect the lights and turn them on. The waterproof grease will help keep moisture out of the connection and prevent corrosion.
Tips
- – Waterproof grease can be found at most hardware stores.
- You can also use Vaseline or petroleum jelly in place of waterproof grease.
- Be sure to apply the grease evenly and in a thin layer. Too much grease can cause problems with the connection.
- Make sure that the lights are turned off before working on the connection.
Method 4: Use Heat Shrink Tubing
This method uses heat shrink tubing to cover and protect your connections from moisture. Heat shrink tubing is a type of plastic that shrinks when heated, forming a tight seal around whatever it is covering.
You will need:
- Heat shrink tubing
- A source of heat (a hair dryer or heat gun will work)
Step 1. Before You Start
Before you begin, you’ll need to gather your materials. You’ll need heat shrink tubing in various sizes, depending on the size of your connections. You’ll also need a heat source, like a hair dryer or heat gun.
Step 2. Measure and Cut the Tubing
Measure the circumference of your connection, then cut a piece of heat shrink tubing to that size. It’s essential to ensure that the tubing is long enough to cover the entire connection, plus a bit extra. This will ensure that the entire connection is protected.
Step 3. Slide the Tubing Over the Connection
Slide the piece of heat shrink tubing over the connection, making sure that it covers the entire surface evenly.
Step 4. Apply Heat
Apply heat to the heat shrink tubing with your hair dryer or heat gun. The tubing will shrink as it heats up, forming a tight seal around the connection.
Step 5. Let the Connection Cool
Once the heat shrink tubing has cooled, your connection will be protected from moisture. Repeat this process for each of your links. These steps will help[ in how to waterproof christmas lights connections.
You Can Check It Out to Put Christmas Lights on A Truck
Tips
- If you’re using a heat gun, be careful not to overheat the heat shrink tubing. This can cause it to become brittle and break.
- You can also use electrical tape to waterproof your connections. Wrap the tape around the connection, covering the entire surface.
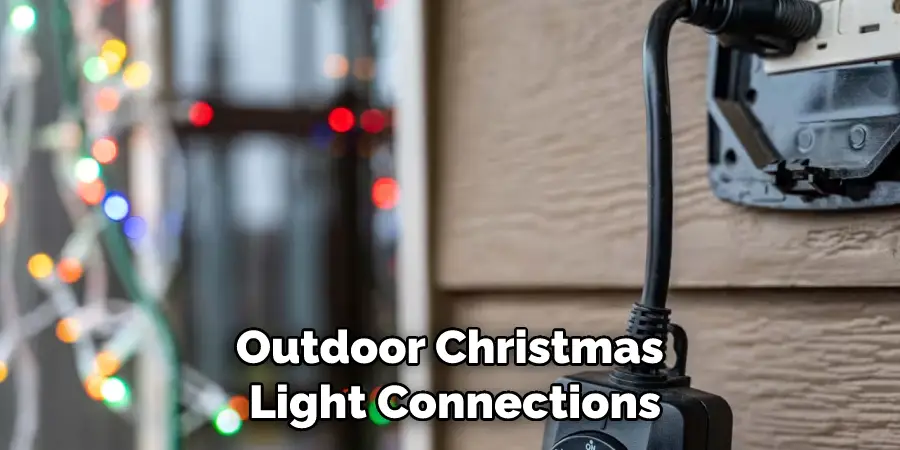
Should You Tape Outdoor Christmas Light Connections?
It’s always a good idea to waterproof your outdoor Christmas light connections. This will help prevent any water damage if moisture gets into the electrical components. While you can buy special waterproofing tape, regular clear packing tape works just as well and is much less expensive.
Wrap the packing tape around the entire connection, covering all of the exposed metal. Make sure the tape is snug against the connection so that no water can get in.
If you are using C7 or C9 bulbs, you can also buy unique weatherproof covers that fit over the bulb’s base. These are available at most hardware stores and provide an additional layer of protection against moisture.
By taking a few simple precautions, you can keep your outdoor Christmas lights looking great for many seasons to come.
You Can Check It Out To Make a Fake Pond with Christmas Lights
Is It Ok to Leave Christmas Lights on in the Rain?
One of the great things about Christmas lights is that they can be enjoyed even when it’s raining outside. However, you may be wondering if it’s safe to leave your lights on in the rain. While there’s no need to worry about electrocution, there are a few potential risks to consider.
First, if the lights are plugged into an outlet that is not weatherproof, there is a risk of short circuits and fire. Additionally, water can damage electrical components, causing the lights to malfunction. For these reasons, it’s best to use weatherproof lights and avoid leaving them on during heavy rains. Then, with care, you can enjoy your Christmas lights even when the weather is less than ideal.
Frequently Asked Questions
Should you tape outdoor Christmas light connections?
It largely depends on the specific situation. Some factors that would need to be considered include the climate where the lights are located, the strength of the light cords and connectors, and the durability of the light fixtures. In general, it is generally recommend that you do not tape outdoor Christmas light connections as this could lead to damage or malfunctions.
What tape is best for Christmas lights?
The best tape for Christmas lights will vary depending on the type of lights being used, the size and shape of the lights, and the overall aesthetic of the Christmas display. Some popular types of tape used for holiday decorating include electrical tape, masking tape, and painters tape. It is important to test different tapes to see which one works best for your specific application.
How do you waterproof a wire hole?
To waterproof a wire hole, first drill a small hole in the drywall at the location of the wire hole. Then, pour a small amount of waterproofing compound into the hole and spread it around the perimeter of the wire hole. Finally, seal the hole with a caulking gun or sealant. The waterproofing compound will help protect the hole from moisture and other damage, and the sealant will help prevent water from entering the hole and damaging the insulation inside the wire.
Why do my Christmas lights go out when it rains?
Christmas lights typically use electricity to power the light bulbs and LEDs, which can be affected by moisture. When it rains, the water droplets that fall on the Christmas lights contact the electricity and cause them to short-circuit. This can disable the lights or cause them to flicker or turn off entirely. To prevent this from happening, make sure to keep Christmas lights dry and covered when it is not in use. If you do experiences issues with your Christmas lights, try to isolate the problem area by tracing the wires back to their source. If that does not work, call an electrician to inspect and repair the circuit.
Conclusion
If you follow these simple methods, your Christmas lights will stay lit and dazzling for seasons to come. By waterproofing your connections, you can avoid the frustration and hassle of dealing with a burnt-out light strand or an entire string of lights that won’t turn on. So get out there and start wrapping those holiday lights around your house – make sure you do it safely and securely by using our easy waterproofing techniques! We hope you find this article on how to waterproof christmas lights connections helpful.
You can check it out to Run Christmas Lights Without Outdoor Outlet