
The Nebo Redline flashlight is an excellent piece of equipment, but sometimes it needs to be taken apart for repair or cleaning. This article will show you how to take apart a nebo redline flashlight step-by-step. Remember that this process should only be attempted by experienced users, as there is a risk of damaging the light if it’s not done correctly. Let’s get started!
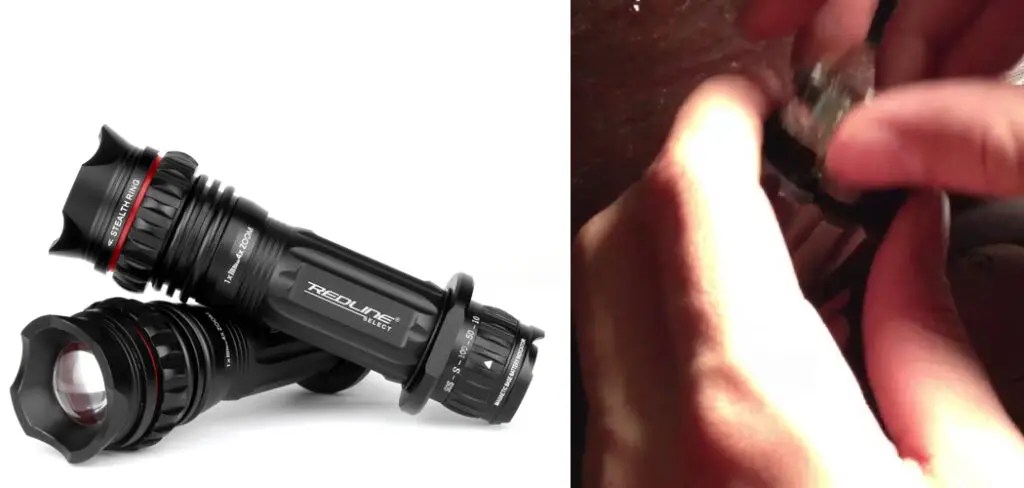
Flashlights are a must-have item for many people, and a quality one can light up a room or area in a pinch. Several well-known makers of flashlights, including Maglite and Nebo, the latter being known for their ruggedness. While most flashlights have their batteries housed inside the handle, some models store them in separate compartments that allow them to be replaced when necessary. The Redline Flashlight from Nebo is one example of this design.
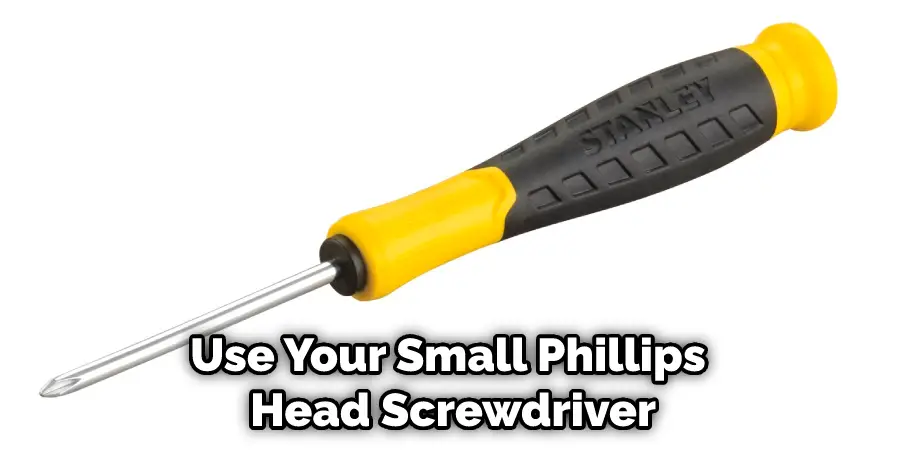
Summary: Disassembling a Nebo Redline flashlight can be useful for maintenance, repair, or troubleshooting purposes. However, before attempting to take the flashlight apart, ensure that you have a clean, well-lit workspace and the necessary tools, such as a small Phillips screwdriver, a flat-head screwdriver, or a set of precision screwdrivers. Keep in mind that taking apart the flashlight may void its warranty, so proceed with caution and refer to the manufacturer’s guidelines if necessary.
To take apart a Nebo Redline flashlight, first, unscrew the tail cap from the body of the flashlight and remove the batteries. Then, locate any screws or fasteners that hold the flashlight’s head or body together. These may be hidden under labels, rubber gaskets, or within the grooves of the flashlight. Using a suitable screwdriver, remove the screws or fasteners, taking care not to strip them.
Once the screws are removed, gently pry apart the flashlight head or body using a flat-head screwdriver or your fingers. Be cautious not to damage any internal components or wires during this process. With the flashlight disassembled, you can now access the internal components for maintenance or repair.
When reassembling the flashlight, reverse the steps used to take it apart, ensuring that all components are properly aligned and secure. Always handle the flashlight and its components with care to avoid damaging any delicate parts or voiding the warranty.
Things You’ll Need
- Small Phillips Screwdriver
- Razor Blade
A Detailed Guide on How to Take Apart a Nebo Redline Flashlight
Step 1: Removing the Lens
Use your small Phillips head screwdriver to loosen the adhesive holding your lens in place. Put the tip of the screwdriver against one of the ridges of your lens and push down while turning the screwdriver clockwise.
Use a screwdriver to break the seal on one corner of the lens. Then do the same to each corner around the lens until you can easily remove it with just your fingers. Next, pull gently on your lens, taking note not to pull too hard as there is a chance that something may still be holding onto it even after all your screwdriver work. If placed in the right spot, pulling gently should free it up.
Step 2: Determine How You Will Remove the Light from the Housing
How you take apart a Nebo Redline flashlight will be determined by whether or not you have a removable battery. If there is no removable battery, simply continue to step 4.
If your light has a removable battery, determine how you want to gain access to replace your batteries before continuing further. There are generally three options (and an infinite number of ways in which one can implement these):
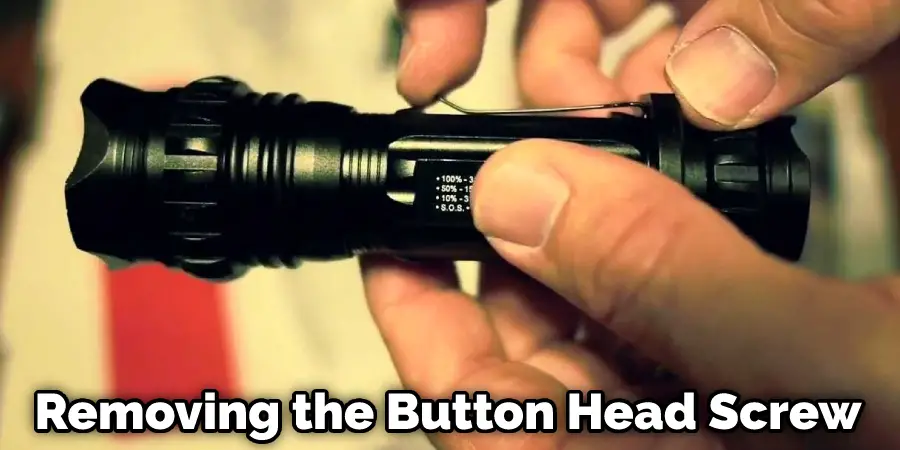
1) Removing the Button Head Screw on the bottom of the housing (there is only one visible screw). This allows easy removal and replacement of all but older model 18650 batteries with protruding terminals. Please note that this requires removing an additional cap on most lights with this tail cap.
2) Removing the tail cap from the body of the light housing (which requires removing a second screw and possibly another additional cap). This allows replacement and access to most but not all 18650 batteries like option one (newer models with flat terminals will no longer fit). Please note this method will result in the loss of the mechanical lockout feature on some models.
3) Removal of both screws and respective caps (this is only recommended when you do not care about mechanical lockout or drainage holes). This is an attractive option for many people who like to play with electronics because it opens up the possibility for rewiring to make this flashlight even more versatile than its out-of-the-box state.
If your light does not have a removable battery, cutting the plastic housing with a Dremel is probably the best option. Please note this will void any warranty and can be dangerous if done improperly. It is advisable to remove the tail cap before cutting. See step 4 below on how to cut apart a Nebo Redline flashlight.
Step 3: Remove the Battery Compartment from Your Nebo
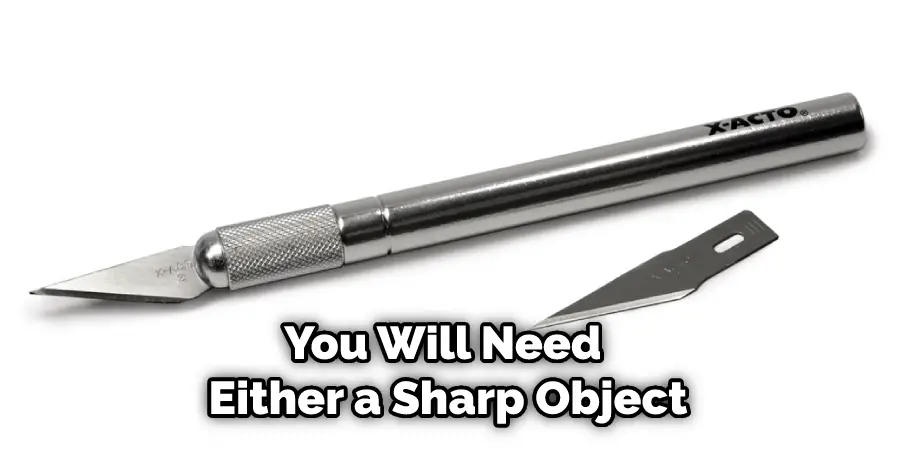
You will need either a sharp object, like an exact-o knife or box cutter, or pliers to finish this step, depending on whether your 18650 batteries have protruding terminals (the reason for removing the button head screw in Step 1). If your batteries don’t have protruding terminals, skip Step 3.
If your 18650 batteries have protruding terminals, you will need to remove the tail cap by unscrewing it or removing the second screw (depending on which type of tail cap you currently have). Then, use a sharp object to pry open the battery compartment (you will need pliers if your flashlight uses CR123A batteries) and remove any extra components in your way.
If your 18650 batteries do not have protruding terminals: Unscrew the button head screw located at the bottom of your housing (if there is only one visible screw), remove any other screws holding down parts like an anti-roll ring, and use pliers to pull off/open up any caps required to gain access to your batteries.
Step 4: Remove the Reflector from the Nebo Redline Flashlight Housing
The reflector assembly is the plastic piece under where the head of the flashlight will go. If there are any anti-roll rings or O-rings that are obstructing access to the reflector assembly, you should remove them. However, if you do not want to use a flashlight with focusing abilities again, you can skip this step.
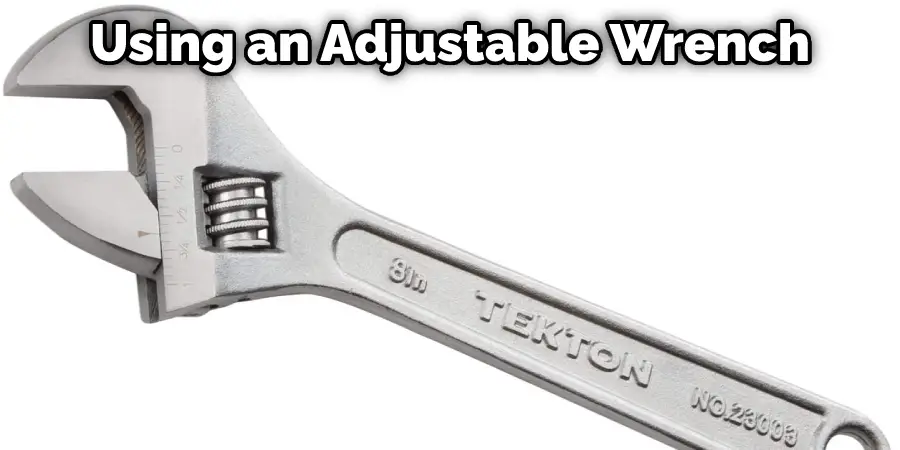
To access your reflector, unscrew it from the housing using either an adjustable wrench or pliers. It should come out relatively quickly unless thread lock were put on when assembled initially (this is rare but possible). Screw it in by hand and tighten it with pliers to put it back together.
Please note that many of the higher-end Nebo models are assembled using an anti-roll ring that you will have to take out if removed. This is why it is best to leave all rings and O-rings in place until access to the reflector has been achieved.
Step 5: Remove a Battery Cap That Requires Cutting or Unscrewing
If your batteries do not have protruding terminals, skip this step because there will be no need to remove any battery caps on your flashlight after removing the tail cap in Step 2. If you still have screws holding down caps that will not come off by themselves, then continue below on how to cut apart a Nebo Redline flashlight (all models except r
1) Cut Apart a Nebo Redline Flashlight (Non-Rechargeable Models Only):
For this step, you will need pliers and wire cutters. Depending on your model of the battery compartment, you may have one or more screws holding down caps that must be unscrewed. Unscrew any headless screws with your pliers or wire cutters if possible.
If not possible, screw them out, so there is space for wires. Then use either side of your pliers to pull off the cap(s). It is advised to use protective eyewear if any pieces are shaken loose during removal. Afterward, check inside for small parts that may have fallen out and put them in a safe place (i.e., not on the floor) so they do not get lost.
2) Cut Apart a Nebo Redline Flashlight (Rechargeable Models Only):
The flashlights that have rechargeable batteries should be disassembled differently from non-rechargeables. Instead of unscrewing screws, you should cut through any adhesive holding down caps with an exact-o knife or box cutter while being careful not to puncture any wires. Then remove all caps by pulling them straight off using pliers if necessary. Once complete, reassemble in reverse order until all parts are back together again.
Step 6: Put Back Together with a Nebo Redline Flashlight
Reassemble in reverse order of what was done before, and you should be good to go. For this task, it is best to use a thread lock or some other adhesive so all screws and caps remain secure and do not come off when in use. After assembly, test for any functionality issues, such as if your tail cap works appropriately by screwing the flashlight on and tapping the button until the light comes on.
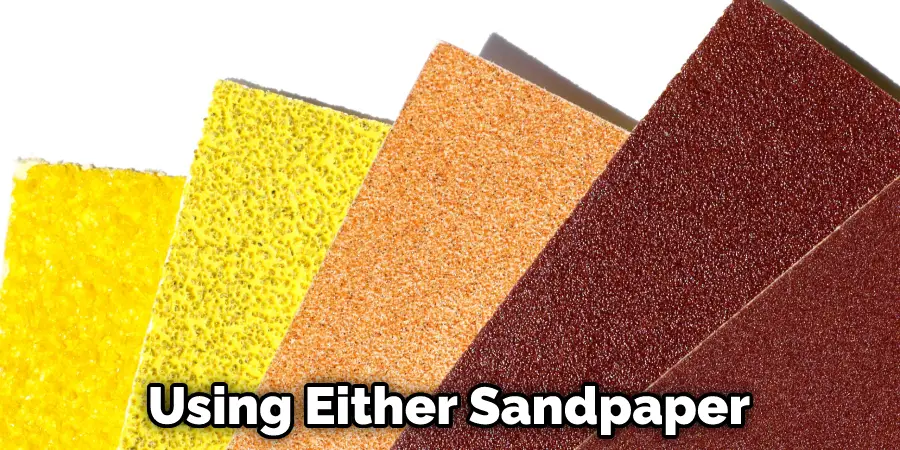
If everything has been put back together correctly, no further action may be required. However, if there are still problems such as poor performance, dimming, etc… try cleaning the threads using either sandpaper or an exact-o knife (only for non-rechargeable models) and removing any adhesive that may be obstructing performance. If problems persist, then please leave a comment below or post on the Redline Flashlight Troubleshooting & Repair page for further assistance.
Please note that there are many other methods to take apart Nebo flashlights, but the steps listed here are meant to be simple yet effective. The most common problem with lights is when users try taking them apart without knowing what they’re doing, resulting in damage.
To avoid this, always know which type of flashlight you have and what tools will be needed beforehand, so there is no guesswork involved. In addition, these procedures should only need to be done once per light. Please do not attempt to repeat the steps described in how to take apart a nebo redline flashlight.
You Can Check It Out to: Charge Nebo Flashlight
Give Tips for Troubleshooting Nebo Redline Flashlight
If you are experiencing issues with your Nebo Redline flashlight, here are some tips to help troubleshoot the problem:
- Check the batteries: First, you should check the batteries to ensure they are inserted correctly and have enough charge. Try replacing the batteries with fresh ones to see if this solves the issue.
- Clean the contacts: Dirty or corroded contacts can prevent your flashlight from working properly. Use a cotton swab with some rubbing alcohol to clean the contacts, and try turning on the flashlight again.
- Replace the bulb: If your flashlight isn’t providing enough light, it’s possible that the bulb is near the end of its life. Replacing the bulb is a quick and easy fix that can help restore brightness.
- Check the switch: If the flashlight does not turn on at all, the switch may be faulty or stuck. Try pressing the switch several times to see if it releases, or gently jiggle the switch to see if it makes contact.
- Look for damage: If you dropped your flashlight, it’s possible that the lens or the body of the flashlight may be damaged. Inspect these areas carefully and replace any damaged parts as needed.
Frequently Asked Questions
What Is the Most Powerful Nebo Flashlight?
There are a ton of great Nebo flashlights on the market, but which one is the most powerful?
Here’s a little bit about each one so that you can make an informed decision:
1. The Nebo SC50 is a powerful LED flashlight that can output up to 500 lumens. It has a tactical design and is waterproof, making it perfect for use in emergencies or during outdoor activities.
2. The Nebo F1 is another powerful flashlight that can output up to 1000 lumens. It has two light modes – high and low – as well as a strobe mode for law enforcement and emergency personnel.
3. The Nebo T21 is a small but powerful flashlight that outputs up to 1000 lumens. It also comes with an emergency whistle, making it ideal for use in emergencies or during outdoor activities.
4. The Nebo RX5 is a compact and lightweight flashlight that outputs up to 500 lumens. It also comes with an SOS signal function, making it perfect for emergencies or search and rescue operations.
Are Nebo Flashlights Lifetime Warranty?
This means that if you have any problems with the product, we will replace or refund it free of charge. We believe in maintaining high-quality standards and want to ensure that our customers are satisfied with their purchases. So don’t hesitate to reach out if you have any questions or concerns about your Nebo Flashlights!
What Flashlight Do Cops Use?
LED bulbs last longer and generate less heat than incandescent bulbs, which is important because heat can blind you in extreme conditions. Moreover, LEDs emit a narrow beam that is more effective at penetrating dense materials like clothing or hair.
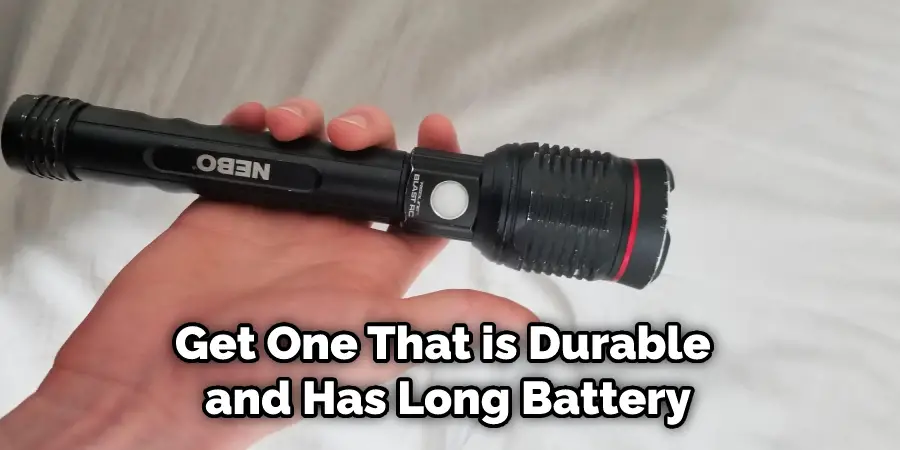
Once you have decided on the type of flashlight that best suits your needs, make sure to get one that is durable and has long battery life. It’s also advisable to get a light with multiple modes (searchlight, spotlight, etc.) so you can select the model that best fits the situation. And finally, be sure to check for quality reviews before making your purchase, so you know what to expect from it.
Conclusion
We hope this article on how to take apart a nebo redline flashlight is beneficial for those who want to know more about what they’re buying and don’t have time or patience to read through an instruction manual. Taking it apart can be broken down into three steps: unscrewing, popping off, and finally removing screws from the inside cover. Knowing this information before buying your next light will allow you to make better decisions by knowing what’s under the hood!
You Can Check It Out to: Fix a Nebo Flashlight