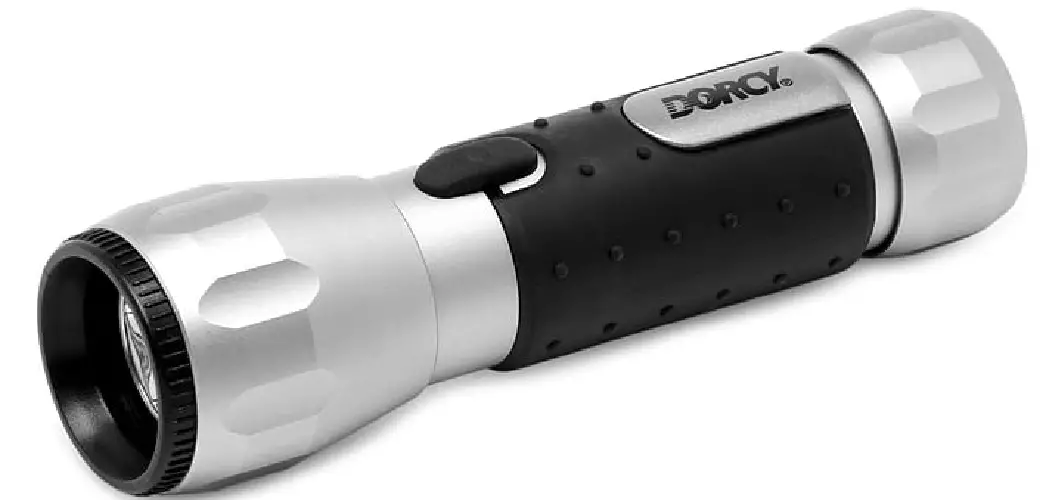
Nebo flashlights are some of the most popular on the market. They are known for their quality and durability, but even the best products have a few problems from time to time. So if your Nebo flashlight isn’t working correctly, don’t worry – there are ways to fix it! This article will show you how to fix a nebo flashlight. Keep reading to learn more!

Fixing a nebo flashlight is easier than you think. Some of these flashlights can seem complicated to resolve, but the truth is that they are easy to work with and even easier to fix if something goes wrong. With a little bit of know-how and some patience, your Nebo flashlight will be back up and running
Summary: Fixing a Nebo flashlight may involve troubleshooting various issues such as battery, switch, or bulb problems. First, examine the battery compartment for any signs of corrosion or damage. Replace the batteries with fresh ones, ensuring they are inserted correctly according to the polarity indicators. If the flashlight still doesn’t work, try cleaning the battery contacts with a cotton swab dipped in rubbing alcohol. This will help remove any residue or dirt that might be affecting the electrical connection.
If the battery is not the issue, inspect the flashlight’s switch and bulb. For a faulty switch, you may need to disassemble the flashlight to access and clean the switch components or replace them if necessary. If the bulb appears to be the problem, replace it with a compatible one, ensuring it is seated correctly in the flashlight. If these steps do not resolve the issue, consider contacting Nebo’s customer support for further assistance or exploring warranty options if available.
6 Reasons Why Your Nebo Flashlight May Not Be Working
- The batteries might be low or dead. Try replacing the batteries with new ones and see if that works.
- Dust, dirt, or corrosion on the battery contacts of the flashlight can cause it to not work. Make sure to clean out all of these substances from the contacts before trying again.
- The connection between two parts of the flashlight may have been damaged over time due to regular use and wear and tear, resulting in the light not functioning properly. To fix this issue, open up your flashlight and check for any broken parts or connections that may need to be replaced.
- If your Nebo flashlight is operated with a rechargeable battery, then make sure that you are recharging it periodically as per manufacturer’s instructions otherwise it will not work properly after some time due to lack of energy in the battery.
- The internal power switch may have gone bad over time due to regular usage and need repairing or replacement accordingly in order for it to start working again.
- A faulty power circuit inside the flashlight could also be preventing it from operating correctly so if everything else has been checked and nothing seems to be wrong then try inspecting this component as well for potential problems until you find something that needs repair or replacement in order for your device to start functioning normally again.
A Step by Step Guide on How to Fix a Nebo Flashlight
Step 1: Check and Tighten Bulb Screw
If your flashlight isn’t working properly, the first thing you should do is check the screws on the head of the flashlight. If they are loose, tighten them with a screwdriver. The screws should be snug and not wiggle side-to-side. The bulb shouldn’t be able to move around either.
You can check if tightening the screws worked by turning on your flashlight and flicking the switch up and down until it stops working again. If there is no improvement after tightening the screws, continue checking for other problems.
Step 2: Check Battery Contact
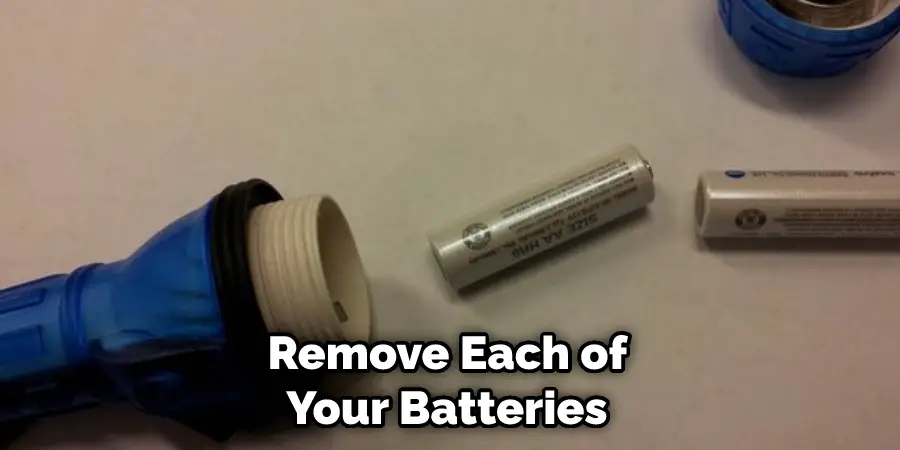
Remove the batteries from the flashlight and the battery cap or case that covers it depending on your model’s make – bulbs require more power than batteries, so they will come unscrewed from the flashlight.
If your flashlight isn’t working, the first thing you should do is check the cap for any dirt or other materials that might be blocking the contact between the batteries and the bulb. You can remove them with a cotton swab or a Q-tip, being careful not to damage the case. If that doesn’t solve the problem, try installing fresh batteries and see if it works after tightening the bulb’s screws again.
Step 3: Check How Electronics Are Connected
If you own multiple flashlights, each should have an individual warranty, so go back to where you purchased it and ask for help or send it in for repairs depending on what is available. However, if you have only one flashlight, then continue.
Take apart your flashlight by unscrewing the top and bottom halves, being careful not to lose any of the pieces.
If there is any visible damage to the connectors or wires connecting different parts of the circuit board, which could cause the flashlight to stop working, contact either where you got it or a local electronic repair shop for help. In this case, the flashlight may need to be replaced entirely, so keep trying newer models until one works.
Step 4: Fix Flashlight Circuit Board
Assuming no visible signs of damage, the problem could be due to a faulty circuit board which is harder to fix but still possible. The problem lies in that flashlights are designed with very little protection against short-circuiting.
If you have some electronic know-how, it should be easy for you to locate the battery connector on the board where your batteries were previously located. This will have two copper prongs sticking out, which are meant to contact your batteries’ positive (+) and negative (-) terminals.
If your batteries are loose in your flashlight, first push them both down halfway into their housings until they lock back into place. Next, unscrew and remove each of your batteries from your flashlight, being careful not to touch its metal portion as this will cause them to discharge in your hand, which is painful.
Bring your batteries to the nearest electronic repair shop and ask for help. They may tell you that the circuit board needs to be replaced, but even this costs money. Keep trying new models until one works or go back to where you purchased it and get customer support.
Step 5: Dirt-insulated connection
If this is your problem, contact where you purchased your flashlight for help with that. However, if you only own one flashlight, try the next step. Turn it upside down and look at the end of its handle whether there are any signs of dirt or grime buildup on the metal prongs sticking out of it. If so, carefully clean them off with a cotton swab, Q-tip, etc., being careful not to damage any parts in the process.
Allow it to remain like this for an hour or two, allowing the connection to strengthen again before turning it back over and testing out its switch. If it works properly after doing this, continue checking for other problems listed below since dirt buildup is often the cause.
Step 6: How the Switch is Connected
If you know that your batteries are fully charged and working, it could be due to loose connections at either the bottom (negative) or top (positive) of your flashlight’s handle where its switch is located. Try tightening each of them with a set of pliers, being careful not to damage any part. However, if you can’t do this yourself, then try taking it back to where you purchased it for help instead. If they cannot fix it somehow, keep trying newer models until one works again since yours may be deficient in this case.
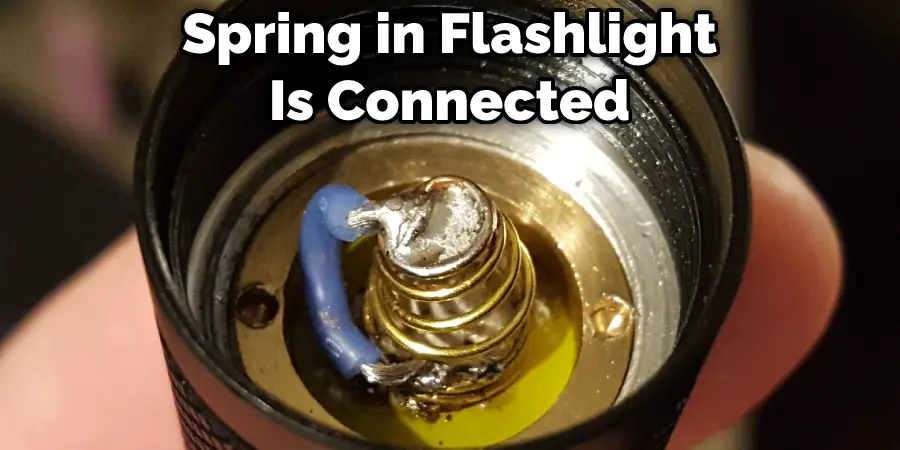
Step 7: How Spring in Flashlight Is Connected
The problem here could be that your batteries are not making proper contact with your flashlight’s switch, circuit board, or spring. Try taking each of the two metal prongs on its battery connector and swiveling them back and forth to see whether it moves up and down freely, which tells you if they are loose or corroded.
If they are corrupted, then clean them off with some vinegar being careful not to damage any part in the process by using a cotton swab. If they’re not moving freely, then try removing both of them for a possible replacement since it could be that their springs have either weakened or rusted off completely, which would require replacing your flashlight instead of just repairing it yourself at home. These steps will help in how to fix a nebo flashlight.
Precautions
- To prevent your Nebo from being damaged, please do NOT try these steps if you are not comfortable opening up a flashlight.
- The first step in repairing a Nebo is to open it up. First, make sure that the flashlight is turned off and remove the battery if there is one inside. Then start on either end and pull gently until you can see the light coming through around the edge where it opened up (as pictured). Once this has been done, carefully but firmly snap apart until you can take out all pieces within it.
- Now that you have access to the inside of the flashlight, you can examine it for any damage. For example, if your Nebo was dropped or scraped against something, scratches or dents might be visible.
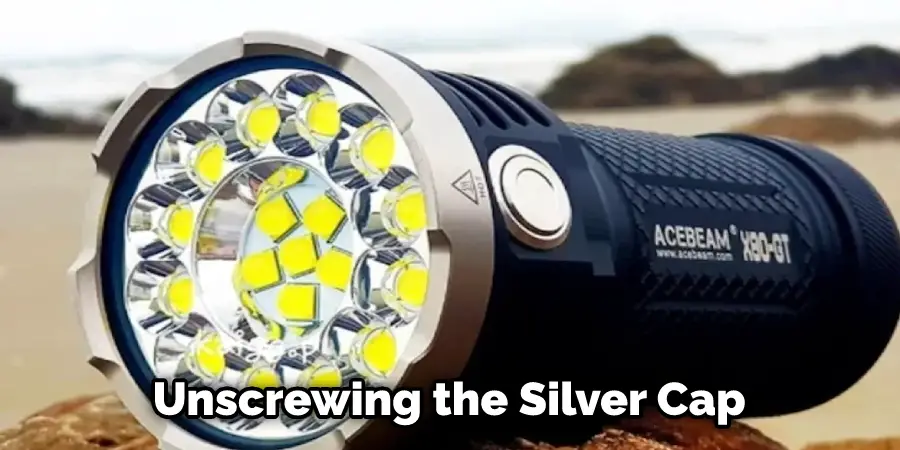
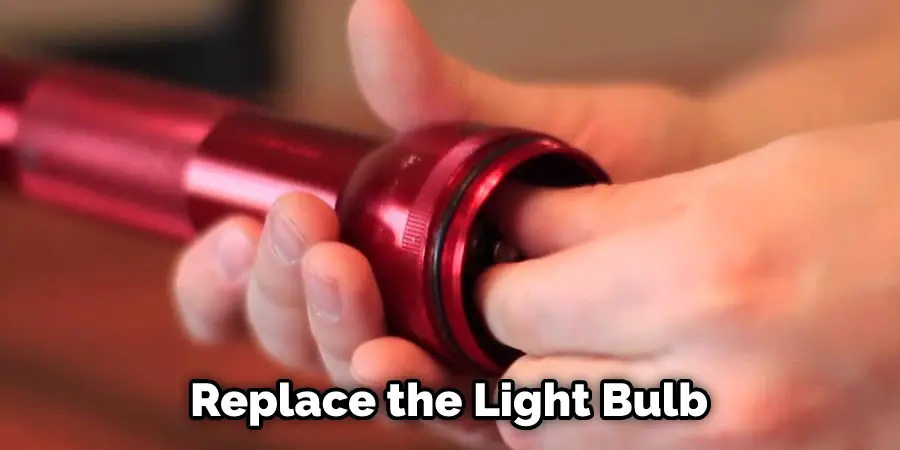
- If you have dropped your Nebo and broken its glass light bulb, we recommend replacing it with a new one to get optimal performance from your flashlight. You can do this by unscrewing the silver cap on the top of your flashlight and using an appropriate size T5 Torx screwdriver to remove the screws inside. Then you can carefully take out your old light bulb and insert a new one within its spot, then insert the screws back in and seal them up with either some glue or tape.
You Can Check It Out to: Take Apart a Nebo Redline Flashlight
Why Won’t My Nebo Flashlight Stay on?
If your Nebo flashlight isn’t staying on, a few things could be wrong. First, check and make sure the batteries aren’t dead or dying. If so, you can replace them to fix the problem. If the batteries look good and your flashlight still won’t stay on, it might be dirty inside where the contacts touch when you turn it on.
To clean this area, take a cotton swab or facial tissue and dip it into rubbing alcohol (it’s okay if you don’t have to rub alcohol; water will do in a pinch). Then wipe down both ends of the battery compartment to remove residue from old batteries.
You Can Check it Out to Take a Bushnell Flashlight Apart
Frequently Asked Questions
Why Is My Led Flashlight Not Working?
When the battery becomes corroded or damaged, it can no longer hold a charge, which means that the light will not turn on. It is also important to note that if the light comes on but then quickly goes out again after just 1-2 minutes of use, this may also be indicative of low batteries.
To test whether your flashlight has poor battery life, first try switching to an alternate source of illumination like a Coleman lantern or candle. If you still experience trouble turning on your flashlight with these other sources of light, then it likely needs new batteries. Once you have replaced the batteries, make sure to keep them charged by using a portable charger when needed.
Are Nebo Flashlights Any Good?
Nebo Flashlights are some of the most well-received LED flashlights on Amazon. They come in a variety of colors and styles, and they offer waterproofing, protection from impact, and runtime up to 100 hours. Additionally, Nebo offers a 1-year warranty that is automatically applied when you make your purchase.
One common review comments on how bright these flashlights are for such an affordable price point. Another reviewer states that he loves the convenience of being able to take them anywhere with him without having to worry about batteries or charging cables. Overall, if you’re looking for an affordable flashlight that will work great as both a security light and outdoor recreational device, then be sure to check out Nebo’s offerings!
Do Led Flashlights Burn Out?
They typically last much longer than traditional incandescent or compact fluorescent (CFL) bulbs. In fact, some models have been known to last up to 100000 hours! That is a whopping ten years of continual use!
The main reason for the longevity of LEDs is their optical design. They use a digitally controlled chip that allows them to generate more light with less energy. This means that you get brighter lights without having to run your flashlight all the time and waste valuable battery life.
Can You Replace Led in Flashlight?
Yes, you can replace a LED in a flashlight. Here’s how:
1. Remove the light bulb from the flashlight using a Phillips head screwdriver. Make sure to wear gloves and avoid coming in contact with the hot light bulb.
2. Carefully remove the old LED by unscrewing it from the plastic housing. Make sure to hold onto the wire as you unscrew it in case it comes loose.
3. Replace the old LED with a new one by screwing it back onto the housing and reattaching the wire to it. Be sure to tighten the screw until it’s snug.
4. Replace the light bulb and screw it back into place using your Phillips head screwdriver. Make sure to use gloves and avoid coming in contact with the hot light bulb again!
Conclusion
It’s important to note that you can always return or exchange your Nebo Flashlight if it stops working. However, if this is the first time you’ve had a problem, we recommend contacting customer service and seeing what they say about how to fix your flashlight. Then, you’ll be able to decide whether exchanging it would be best for you. We hope this article on how to fix a nebo flashlight has helped give some insight into fixing any problems with your Nebo Flashlight!