
There are a lot of things to consider when you are out hunting. One of the most important is making sure that you have all the right gear. This includes making sure your bow is properly adjusted and that your sights are working properly. If you’re having trouble seeing your sights in low light conditions, using a sight light can be a big help. We’ll show you how to turn on trophy ridge sight light in this post.
Summary: The Trophy Ridge sight light is designed to illuminate your bow sight pins for improved visibility during low-light conditions. To turn on the sight light, you need to install it properly on your bow sight and follow the correct operating procedure. First, ensure the sight light is compatible with your Trophy Ridge bow sight. Some models come with a built-in sight light, while others may require purchasing a separate light attachment.
To turn on the Trophy Ridge sight light, locate the on/off switch, which is typically a push button or a rotating knob. For a push-button switch, press the button once to turn on the light. The sight light may have multiple brightness settings, which can be toggled by pressing the button repeatedly.
For a rotating knob, turn the knob clockwise to switch on the light and adjust the brightness. Turning the knob counterclockwise will decrease the brightness and eventually turn off the sight light. Make sure to turn off the sight light when not in use to conserve battery life. Store the bow and sight light in a cool, dry place to ensure optimal performance and longevity.
Why It’s Important to Use a Trophy Ridge Sight Light?
There are a few reasons why it’s important to use a trophy ridge sight light. First, light can help you see your sights better in low-light conditions. This can be helpful when you’re trying to line up a shot in the dark. Second, using light can also help you stay safe while hunting. It can be very dangerous to hunt in low light conditions without being able to see your surroundings properly. Using a light, you can ensure that you’re not accidentally walking into danger.
How to Turn on Trophy Ridge Sight Light Step by Step Guide
Step 1: Remove the Screws from The Sight Light Cover
In order to get to the batteries, you will need first to remove the screws from the sight light cover. There are typically two screws that hold the cover in place.
Step 2: Connect the Red Wire
The red wire will be coming out of the back of the sight light. This is the power wire, so you’ll need to connect it to a power source. There is a 12-volt battery pack on most bows on the riser. If your bow doesn’t have one of these, you can purchase a universal battery pack. Once you have the battery pack, find the positive and negative terminals. The red wire will need to be connected to the positive terminal, and then the black wire will be connected to the negative terminal.
Step 3: Connect the Black Wire
Locate the black wire coming from the battery pack. There will be a small connector on the end of this wire. Take this connector and insert it into the “BLACK” port on the back of the sight light. Ensure that you hear a “click” when you insert the connector, indicating that it is securely in place.
Step 4: Insert Batteries into The Sight Light
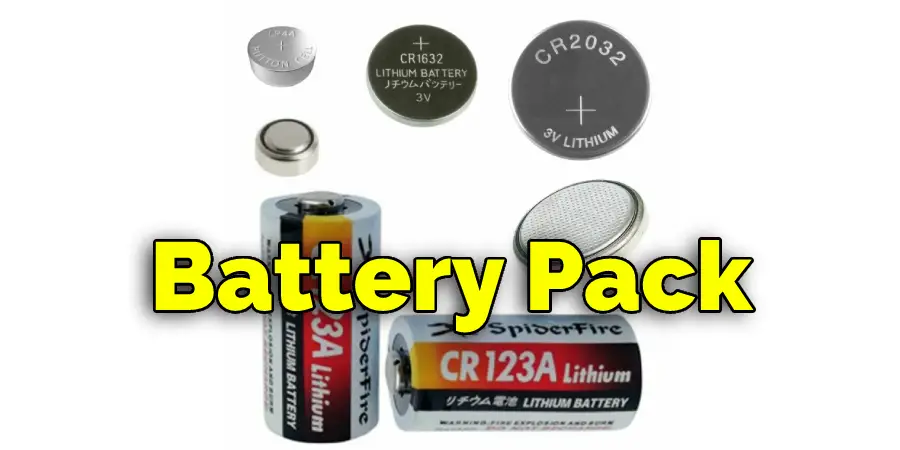
The next step is to insert batteries into the sight light. There are three battery slots, and each one requires a CR2032 battery. Install the batteries in the correct orientation, as pictured on the light itself. If you put them in the wrong way, the light will not work.
Step 5: Replace Screws on Sight Light Cover
Replace the screws that hold the sight light cover in place. Ensure that the screws are tightened securely, but be careful not to over-tighten them as they can strip the threads.
If your Trophy Ridge sight has a rheostat (light intensity adjuster), ensure it is turned up to the brightest setting. If it is not, you will not be able to see the light when you are shooting in low-light conditions.
Step 6: Turn on Your Trophy Ridge Sight Light
Once you have completed the steps above, it is time to turn on your light. To do this, find the switch located on the side of the sight light. Once you have found the switch, flip it to the “on” position. That’s it! Your Trophy Ridge sight light is now ready to use.
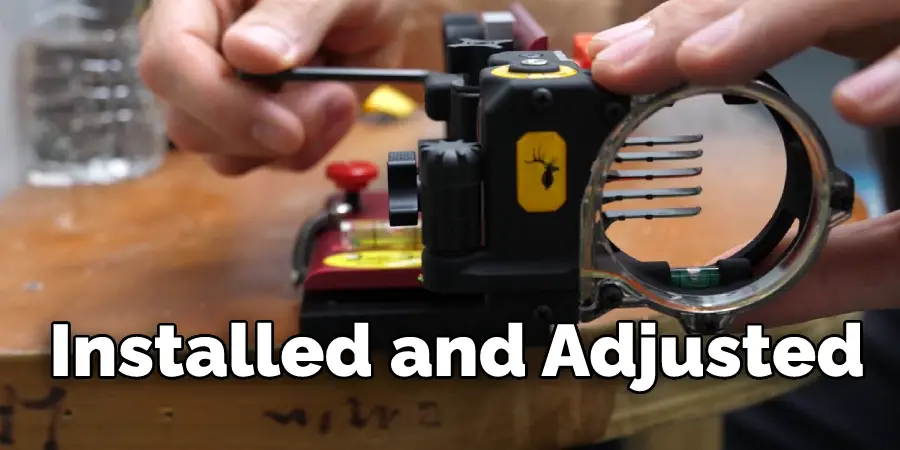
Now that everything is installed and adjusted, it’s time to take your bow out for a test drive! You should be able to see the illuminated sight pins clearly in any light condition. Keep reading for more information about how to turn on trophy ridge sight light.
How to Insert the Battery on Trophy Ridge Sight Light
Step 1: Open the Battery Door
Start by opening the battery door on the side of the sight. This will give you access to the batteries.
Step 2: Check the Correct Polarity
Most Trophy Ridge sights come with a red and a green lens. The red lens goes on the right side, while the green lens goes on the left. If you put them in backward, the light will not work.
If your sight does not have colored lenses, then the positive end of the battery should go toward the front of the sight, and the negative end should go toward the back.
Step 3: Insert Batteries Into the Battery Compartment
On the underside of the sight, you will find a battery compartment. Open it up and insert two CR2032 batteries. Make sure the positive and negative terminals are facing the correct way. Close the compartment and test the light to make sure it is working.
Step 3: Close the Battery Door
After installing the batteries, it is important to close the battery door. This will keep moisture and dirt out of sight and help keep your batteries in good condition.
Hold down on the latch with one hand to close the battery door and push the door closed with your other hand. You should hear a clicking noise when the door is closed properly.
Step 4: Turn on Your Sight Light
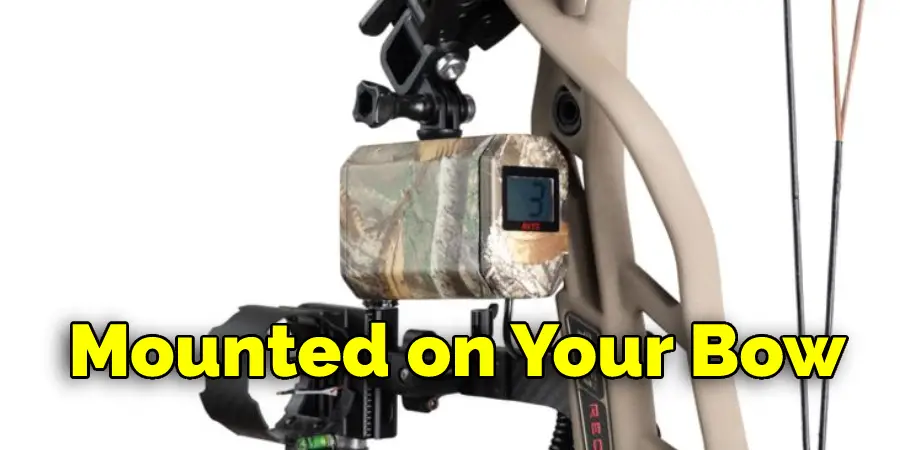
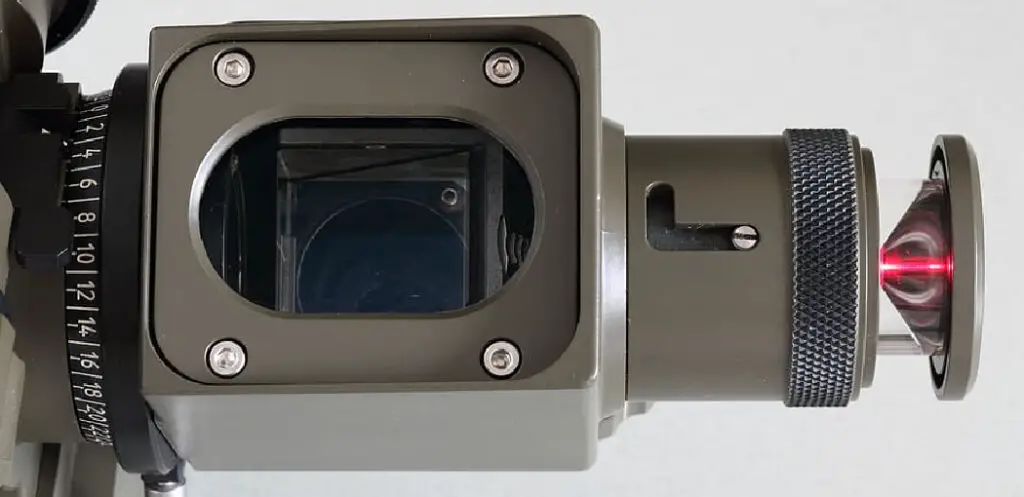
Now that your sight is mounted on your bow, it’s time to turn on the sight light. You’ll find a small switch on the side of the sight, near the top. Flip this switch to the “on” position, and you should see a bright red dot appear in the center of your peep sight. This red dot will help you align your sight with your target, making it easier to hit your mark.
Step 6: Turn Off the Light
After you have finished sighting in your bow, it is important to turn off the light. This can be done by pushing the button on the back of the sight and rotating it back to its original position.
If you’re having trouble seeing the red dot in bright sunlight, you may want to try adjusting the brightness of your sight light. Use the dial on the side of the sight to adjust the light until it’s comfortable for you to see. Be sure to turn off the light when you’re finished using it to avoid draining the batteries. My Sight is Not Level
You can start sighting in your bow with ease now that you know how to turn on trophy ridge sight light. Remember to adjust the brightness of the light until you can see the red dot clearly, and be sure to turn off the light when you’re finished using it.
How Do You Sight in A Trophy Ridge React Sight?
To sight in your Trophy Ridge React sight, you will need first to adjust the elevation knob to align the sight with the target. Then, use the windage knob to center the dot in the housing. Finally, fine-tune your aim by making small adjustments to both knobs until the dot perfectly aligns with your target.
If you have difficulty sighting in your React sight, it may be helpful to adjust the brightness of the light. To do this, press and hold the power button on the side of the sight until the light turns off. Then, release the button and press it again to cycle through three different brightness levels. Choose the level that provides the best visibility for your shooting conditions.
To turn the sight light off, press and hold the power button until the light turns off.
Frequently Asked Question
How Do You Use Trophy Ridge 4 Pin Sight?
Trophy Ridge 4 Pin Sight is a bow sight that uses four pins to help you accurately shoot your bow. The pins are color-coded so that you can easily identify them in low-light conditions. The sight also has an adjustable light that you can use to illuminate the pins in dark conditions.
What Is a Bow Sight Light?
A bow sight light is a small LED light attached to or near the bow sight. This light helps the archer see the pins on sight in low-light conditions.
To turn on the light, locate the power switch on the side or top of the light. Slide the switch to the “on” position. The light will illuminate and stay on until you turn it off.
What Is a Sight Light?
A sight light is an accessory that is often used on bows to help improve the shot’s accuracy. The sight light attaches to the bow and shines a light onto the target, which allows the archer to see the target more clearly. This can help to improve accuracy and make it easier to hit the target.
How Do You Turn on The Sight on A Bow?
Aligning the sight light is easy. First, make sure the bow is unstrung. Then look through the sight and locate the small round hole on the front of the housing. There’s a tiny slot above and below that hole. Next, look at your target and move the bow up or down until you see the double circle centered on your target.
Conclusion
The Trophy Ridge sight light is a great option for those who want to see their target in low-light conditions. This article has shown you how to turn the light on and off and some of its features. Be sure to try it out on your next hunting trip! Thanks for reading our post about how to turn on trophy ridge sight light.