Do you have an outlet in your home that’s been switched off, leaving you with no way to add a much-needed light fixture? Or perhaps you’re just looking for a new and exciting DIY project? Look no further than adding a ceiling light to a switched outlet. This project is perfect for beginners and provides great satisfaction when completed—not to mention it doesn’t require any major electrical work.

In this blog post, we’ll discuss the necessary steps on how to add a ceiling light to a switched outlet involved in turning an ordinary, along with the supplies needed, so that you can feel confident taking on this home improvement project. Let’s get started!
Can You Add a Ceiling Light to a Switched Outlet?
The answer is yes! Adding a ceiling light to a switched outlet doesn’t require any major electrical work. All you need is the right supplies, like a junction box, mounting bracket, and some basic wiring know-how. So, don’t be intimidated!
We’ll give you all the information you need to start your project. Take it one step at a time, and you’ll get there. First, however, you’ll need to gather all necessary supplies before starting the wiring. So let’s see what the supplies are.
Necessary Tools and Parts
To start, you will need to gather a few tools and parts.
- Wire strippers
- Power drill
- Drywall anchors/screws
- Ceiling mounting plate for light fixture
- Jumper wire
- Electrical tape
- Light fixture of your choosing (lightbulb, chains, canopy, socket, etc).
- Disconnect switch (optional)
Check the Existing Wiring
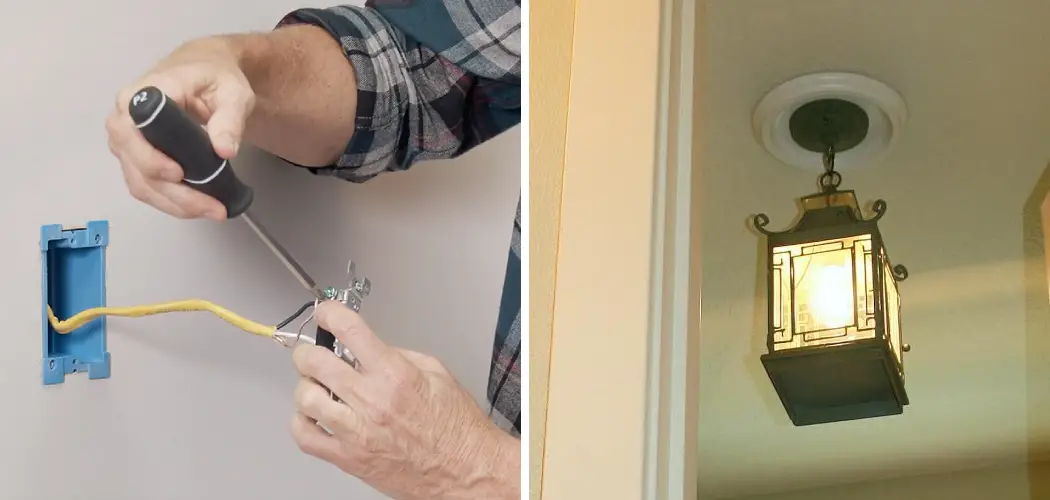
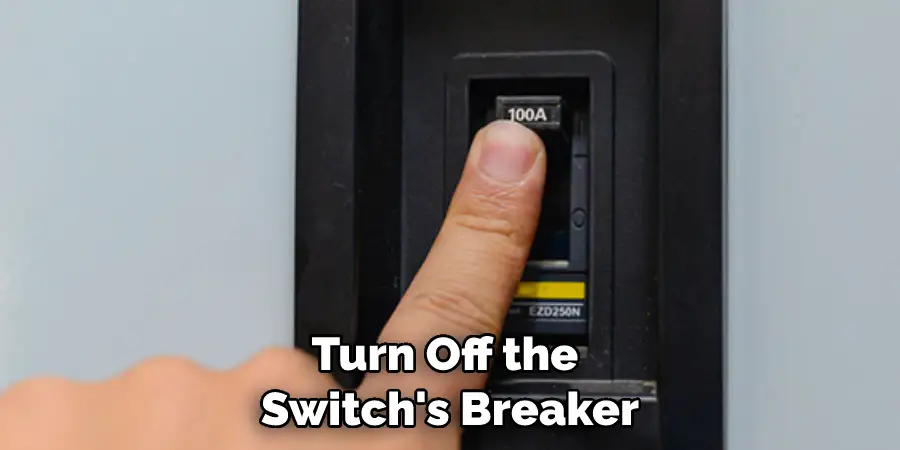
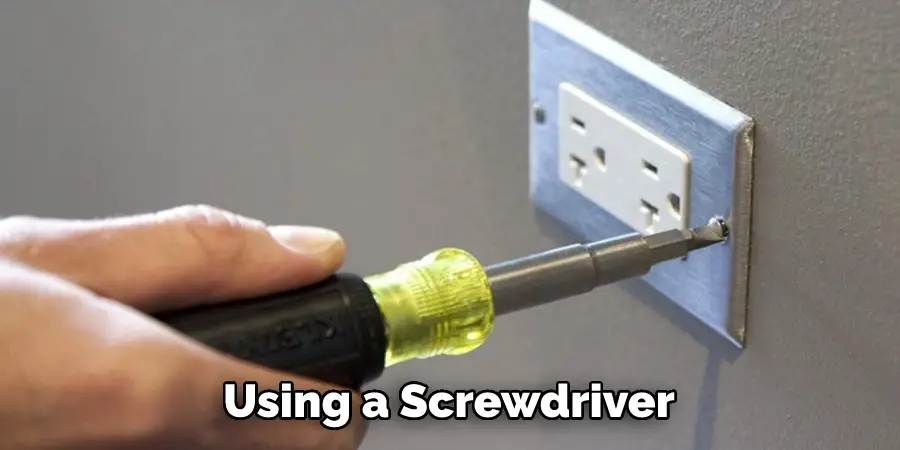
Before you begin, the first step is to remove the cover plate of your active switched outlet. To do this, turn off the switch’s breaker in the main electrical panel and use a flat-head screwdriver to unscrew it from the wall.
Once you have removed the cover plate, look at the wiring inside and ensure there are two sets of black and white wires. If so, the wiring is already pre-configured to support a ceiling light fixture.
If there is only one set of wires (black and white), you will need to install two hot wires for your ceiling light to work. Again, we recommend that you consult an electrician for further assistance in this case.
Now that you have ensured your wiring is compatible with ceiling light, it’s time to look at the easy steps of adding a new ceiling to a switched outlet.
10 Easy Steps on How to Add a Ceiling Light to a Switched Outlet
Step 1: Turning off
Turn off the power to the outlet. Otherwise, you run the risk of electric shock and electrocution. Remember that the power can be turned off at the breaker box or from a disconnect switch.
Step 2: Removing the Outlet Cover
After you’ve made sure that the power is disconnected, remove the outlet cover from the wall and locate the wires connected to it. While relocating your ceiling light, you’ll need to disconnect the outlet from its current wiring.
Step 3: Removing Outlet Wiring
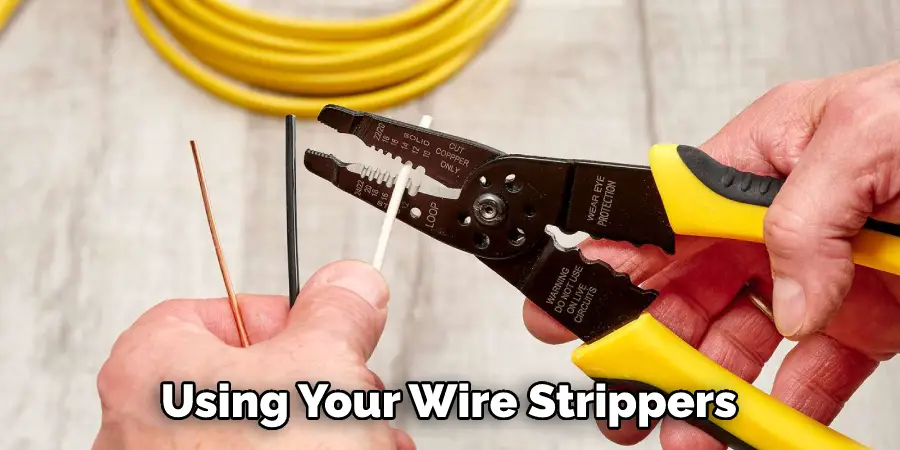
Using your wire strippers, gently remove the sheathing from the wires connected to the outlet. Be conscious of not cutting any of the wires beneath. Pay attention to which terminals each colored wire is connected to.
Step 4: Adding Jumper Wire
To add the ceiling light, you will need a jumper wire. A jumper wire is used when wiring a switch to an outlet. Take your power drill and attach one end of the jumper wire in the box where the wires are connected to the outlet. Then, attach it to the same terminal as the red wire.
Step 5: Mounting Ceiling Light Fixture
Please choose a suitable spot on the ceiling for your light fixture and mark it with a pencil. This is where you’ll be drilling the drywall anchors/screws to secure your mounting plate. If necessary, use a stud finder to locate a joist.
Step 6: Securing the Mounting Plate
Using your power drill and drywall anchors/screws, securely mount the ceiling mounting plate to the marked spot on the ceiling. Make sure it’s mounted correctly so you don’t have any issues attaching your light fixture later.

Step 7: Attaching the Light Fixture
Carefully attach the light fixture to your mounting plate. Make sure all screws are secure and that it is securely fastened to the mounting plate.
Step 8: Connecting Wires
You’ll need to connect the wires from your light fixture, jumper wire, and the outlet in a single box. First, connect the black wire from your light fixture to the same terminal as the black wire coming from your outlet. Next, connect the white wires and do the same with all ground wires.
Step 9: Installing Light Switch
Install a disconnect switch if you want control over turning your ceiling light on or off. You’ll need to attach the red wire from the outlet to one side of the switch and the red jumper wire to the other side.
Step 10: Finishing Touches
Once everything is connected properly, turn your power back on and test it. Ensure your light fixture is functioning properly and you can control it with the switch. Lastly, attach your lightbulb and cover/canopy to your light fixture and replace the outlet cover.
10 Safety Measures to Follow
- Switch off the power at the main breaker panel before beginning. Because this project involves electricity and wiring, it is important to ensure you are safe by turning off all power to the outlet.
- Unscrew and remove the cover plate from the existing outlet using a screwdriver. Be aware that the wires may be connected to the outlet, so have a pair of wire cutters on hand.
- Check the existing wiring to identify which outgoing black wire goes up to the switch and which one goes down. You can do this by connecting both ends with a tester or multimeter.
- Cut off the extra wire with your wire cutters and discard, then twist the exposed ends of the remaining two wires together. Twisting the wires together provides a stronger connection and reduces the chances of a loose connection.
- Connect the ceiling light fixture to its mounting bracket, then attach it to the electrical box in your ceiling with screws. It will depend on the type of light fixture you have, but some may require an additional bracket for extra support.
- Connect the two black wires from the switch to the black wire from the ceiling light fixture, then connect all white and bare copper wires.
- Twist a wire nut onto each connection to secure them and provide a weatherproof seal.
- Place the cover plate over the electrical box and secure it to the wall with screws.
For added safety, you must complete an electrical inspection once the project is completed. This will help ensure the wiring is up to code and that no mistakes are made.
Costing of Adding a Ceiling Light to a Switched Outlet
The cost of adding a ceiling light to a switched outlet will depend on the type of light you are installing and the materials needed for installation, such as wiring, mounting plate, etc. Generally speaking, you should expect to pay between $50-$200, depending on the size and type of fixture installed.
Professional electricians may also charge an additional fee for their labor. Therefore, hiring a qualified electrician for safety reasons and to ensure the job is done correctly is always recommended. All the necessary tools will cost around $20-$30, and the light fixture will range from $5-50. You may need a specialty bracket for your ceiling light, but these usually cost around $10.
Conclusion
You’ve taken a big step in home improvement by following these steps. Congratulations! Adding a ceiling light to a switched outlet isn’t a hard task, but it does require care and some intrinsic knowledge. However, if done correctly, rest assured that your hard work will pay off with a beautiful ceiling light illuminating the room.
Plus, knowing how to add a ceiling light to a switched outlet may come in handy one day if you ever need to do the same job elsewhere. So whether you’ve been wanting to spruce up a space or are looking for an affordable way to provide more light in your home, adding a ceiling light to your switched outlet is worth considering. So keep practicing, and who knows — maybe one day you’ll become an expert on do-it-yourself home repairs!
You Can Check It Out to Adjust Morimoto Headlights