
Are you having trouble adjusting your Morimoto headlights? If so, you’re not alone. Many drivers find that their headlights are too dim or too bright and struggle to adjust them properly. Luckily, there are a few simple steps that you can follow to adjust your Morimoto headlights like a pro.
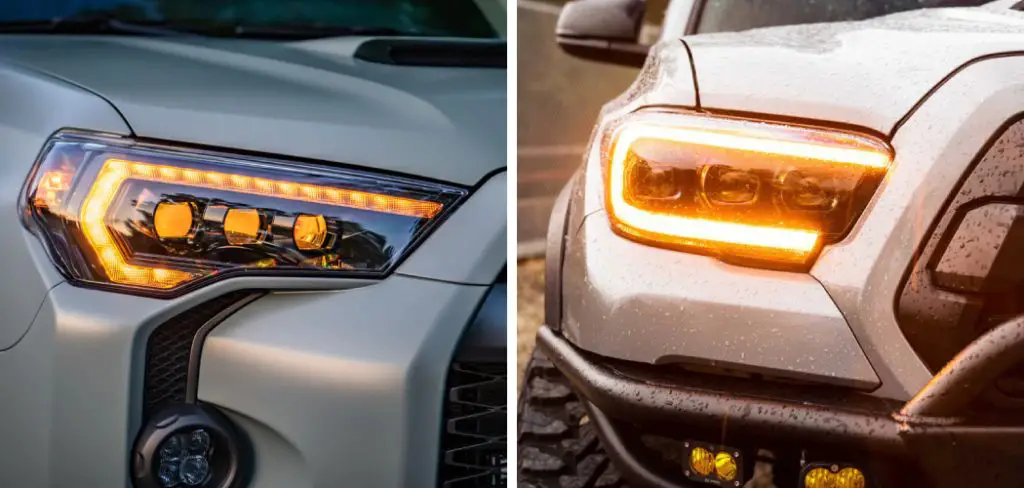
If you’re looking for ways to upgrade your vehicle’s appearance and performance, adding Morimoto headlights is one of the easiest and most cost-effective modifications you can make. They look great and provide excellent lighting capabilities, making them ideal for long drives after dark or navigating winding roads with low visibility.
In this blog post, we’ll discuss how to adjust Morimoto headlights so that you can ensure your lights are positioned perfectly, and you are driving safely at night. Read on to learn more about these unique headlight options and available adjustments.
What Will You Need?
Before you begin adjusting your Morimoto headlights, there are a few tools and supplies that you will need. These include:
- A headlight adjustment tool, such as an angle gauge or plumb line
- A flashlight or other light source for illuminating your headlights at night
- Safety goggles and gloves to protect your eyes and hands from exposure to bright light
Now that you have all of the necessary supplies, it’s time to start adjusting your Morimoto headlights. Here are the basic steps to follow.
8 Easy Steps on How to Adjust Morimoto Headlights
Step 1. Park Your Vehicle on a Flat and Level Surface:
Before you begin adjusting your Morimoto headlights, it’s important to ensure your vehicle is parked on a flat, level surface. This will ensure that your adjustments are accurate and provide maximum visibility for driving at night. Ensure that your vehicle is completely stationary before you begin.
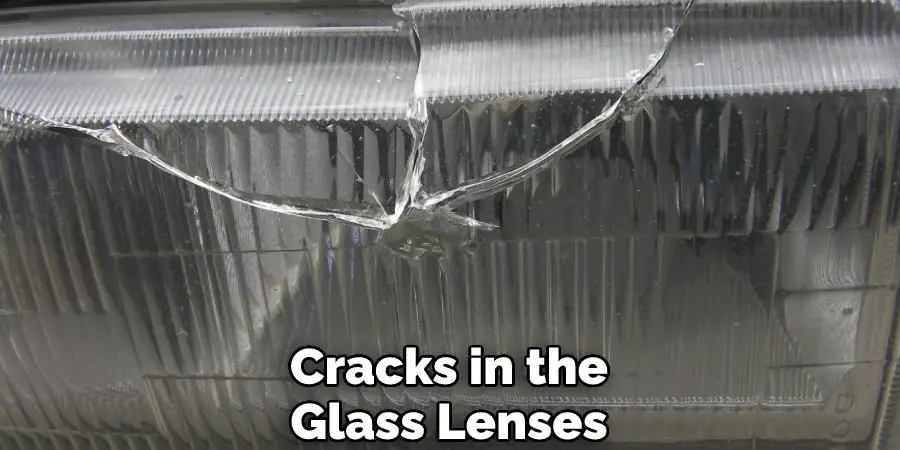
Step 2. Carefully Examine Your Headlights:
Once your car is parked optimally, take a few minutes to examine how your headlights are positioned carefully. Look for signs of unevenness or damage, such as cracks or chips in the glass lenses. If you notice any issues with your headlights, this may impact how they perform and should be addressed before making any adjustments.
Step 3. Get Proper Illumination:
Before adjusting your headlight beams, it’s important to find an appropriate light source that will provide you with enough illumination. A flashlight or other portable light source can be helpful for this step, as it will allow you to adjust your headlights in the dark without worrying about getting into traffic. Be careful when handling a flashlight or other light source, and always wear protective goggles to protect your eyes from bright lights.
Step 4. Use an Angle Gauge or Plumb Line:
To accurately adjust your Morimoto headlights, you will need to use a specialized tool known as an angle gauge or plumb line. These tools can be obtained from most auto parts stores and will help you to measure how your headlights are tilted and make adjustments to correct this. Don’t worry if you don’t have an angle gauge or plumb line on hand, as there are other ways to measure how your headlights are tilted.
Step 5. Measure the Height of Your Headlights:
The height of your headlights is an important factor in how well they illuminate the road as you drive. To measure how high or low your headlights are, you can use a tape measure or other tool to determine how many inches from the ground your lights currently fall. Special tools are also available to help with this step, such as a laser height gauge.
Step 6. Adjust the Height of Your Headlights:
Once you’ve measured how high or low your headlights are, it’s time to start making adjustments. Depending on how uneven or tilted your headlight beams are, it may require adding or removing spacers inside your vehicle’s headlight assembly to correct them. Simply follow the instructions provided with your angle gauge or plumb line to make these adjustments and achieve perfect alignment.
Step 7. Use a Flashlight or Other Light Source:
It can be difficult to judge how well your Morimoto headlights are aligned when it’s dark outside. For this reason, it’s often helpful to use a flashlight or other light source to illuminate the road as you drive at night. This will help you see how your headlights are performing and if any adjustments are needed.

Step 8. Check the Results:
After you’ve finished adjusting your headlights, take a few minutes to check how the changes impacted your visibility. Try driving at night on different roads and see how well your Morimoto headlights illuminate the road in front of you. If any adjustments need to be made, simply follow the same steps to make any necessary adjustments. With a bit of time and practice, you can get the perfect alignment for your Morimoto headlights and enjoy better visibility on the road at night.
Whether you are looking to improve your Morimoto headlights’ performance or make some minor adjustments, these simple tips can help you get the perfect alignment. With a little time and practice, you can achieve the perfect light output for your headlights and enjoy better visibility on the road at night. Good luck!
5 Additional Tips and Tricks
1. Before adjusting the headlights, it’s important to take a look at how they are currently set. You’ll want to ensure that your headlights aren’t misaligned or aimed too high or low, as this can significantly impact how well they work and how safe they are to use on the road.
2. Use a tape measure or a laser level to check how much your headlights are aimed up, down, left, or right. If necessary, adjust their position accordingly using the adjustment screws on the back of your headlight unit.
3. Before adjusting your headlights, it’s also a good idea to ensure they are clean and free of any dirt or debris, as this can affect how well they light up the road ahead.
4. If you’re having trouble adjusting your headlights, consider enlisting the help of a professional who has experience working with headlight units and knows how to get them set just right.
5. Finally, make sure that you keep your headlights properly maintained and clean them regularly. This will help ensure that they continue to work well and provide you with the visibility you need on the road.

While adjusting your headlights may seem intimidating at first, with a little know-how and patience, it’s a relatively simple process that can be done in just a few minutes.
Can Headlights Be Aimed Too High?
There is some debate about whether headlights can be aimed too high, as several factors can impact how well they illuminate the road in front of you. Generally speaking, aiming your headlights to provide an even and consistent level of light across your entire field of vision is best.
However, aiming them too high or low may result in reduced visibility or glare for other drivers, so it’s important to consider these potential consequences when making adjustments.
Ultimately, how high or low you aim your headlights will depend on your own preferences and driving conditions, so it’s important to experiment with different settings until you find one that works best for you.
Can You Adjust the Projector Headlights?
If you have projector headlights on your vehicle, then the good news is that you can indeed adjust them. In most cases, the adjustment process will be similar to how you would adjust any other type of headlight. This typically involves using an angle gauge or plumb line to check how well your headlight units are aligned and making necessary adjustments.
However, suppose you are having trouble adjusting your projector headlights. In that case, it’s a good idea to enlist the help of a professional who has experience working with this particular type of headlight unit. They will be able to quickly diagnose and fix any issues and get your lights set just right so that they provide you with optimal visibility on the road at night.
Frequently Asked Questions
What is the Correct Adjustment for Headlights?
It depends on the make and model of your headlights, as well as your driving habits. In general, you should adjust your headlights to the lowest possible setting that still provides a sufficient amount of light while driving. You can find the lowest possible setting by consulting your vehicle’s owner’s manual or online guides.
Are Morimoto Headlights Worth It?
The value of Morimoto headlights will depend on a number of factors, including the make and model of your vehicle, your driving habits, and the type of lighting you are looking for. However, generally speaking, Morimoto headlights are thought to be high quality and provide superior illumination performance compared to other brands. They are also often considered to be stylish and eye-catching, making them a popular choice among drivers and car enthusiasts. If you are looking for a quality set of headlights that will improve your driving experience and make your vehicle look its best, Morimoto headlights may be a good option for you.
Should Both Headlights Be the Same Height?
The height of your headlights will vary depending on the size, style, and make of your vehicle. However, typically the height of your headlights should be at least as high as the lowest part of your lower grille.
What is the Correct Position of Led Headlights?
They can be positioned in a variety of ways to best suit the needs of the vehicle and driver. Some common positions include:
- Low and forward: This position is used when driving in low-light or night conditions, and allows the headlights to project a wide beam of light forward.
- High and level: This position is used when driving during daylight hours, and projects a sharply focused beam of light down onto the road.
- Turned off: When headlights are turned off, they should be positioned so that the light shines straight down onto the road surface. This position minimizes glare and makes it easier to see in low-light or nighttime conditions.
- On high: Headlights can be placed on high mode when driving in bright sunlight or during daytime hours to increase visibility.
- Off: Headlights can be turned off when not in use to save energy.
Conclusion
After-market headlights are a popular upgrade for car enthusiasts. However, many people find the process of adjusting them to be difficult. This guide provides some easy steps on how to adjust Morimoto headlights so that they are properly aligned. After following these steps, you should have no problem getting your headlights looking great.

Now that you know how to adjust your Morimoto headlights properly, be sure to test them out before heading onto the road. Take some time to fine-tune the adjustments until you get them just right. It will become second nature with practice, and you’ll have no trouble keeping your headlight beams shining bright.
Hopefully, this guide has provided you with the information and tips you need to get your headlights looking great. Good luck, and happy driving!