Are you looking to upgrade your home lighting setup? Do you want something that’s high-tech, energy-efficient, and can be remotely controlled? If so, a wireless light bulb might just be what you need! Wireless light bulbs are the perfect way to bring convenience and modernity into your life.
With the right equipment and supplies–many of which can be found online or at local stores–you too can join the savvy ranks of those who have taken their illumination game up a notch. Read on to find out how to make a wireless light bulb easily.

Different Types of Wireless Light Bulbs
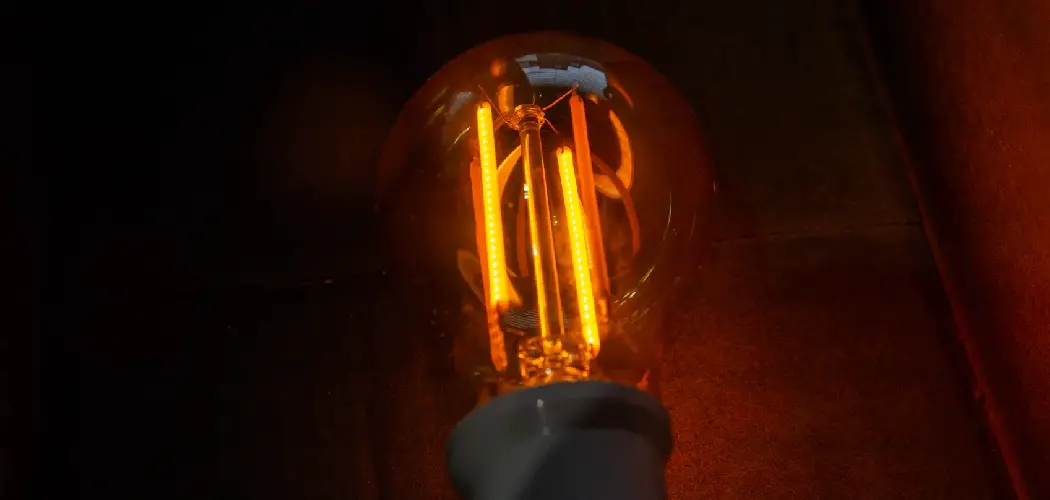
First, you’ll need to decide what type of wireless light bulb you would like. Various options are available on the market today, including LED bulbs and Wi-Fi-enabled bulbs. LED bulbs are usually more energy efficient than traditional incandescent bulbs and can last up to 25 times longer. Wi-Fi-enabled bulbs offer even more convenience, allowing you to control and adjust your lighting from anywhere in the house via a compatible app.
Once you have decided on the type of wireless light bulb you would like, it’s time to gather supplies and equipment. Along with the bulbs themselves, you will also need a power source and a compatible switch or remote. For LED bulbs, you will also need a dimmer/transformer to control the brightness of the light. Make sure that all components are compatible with each other before making your purchase.
Needed Tools and Supplies
Before you begin, you’ll need the following tools and supplies:
• A Philips Hue Light Bulb
• A high-end router for optimal performance
• Wi-Fi-enabled device (smartphone, tablet, laptop)
• Phillips Hue Bridge
10 Steps on How to Make a Wireless Light Bulb
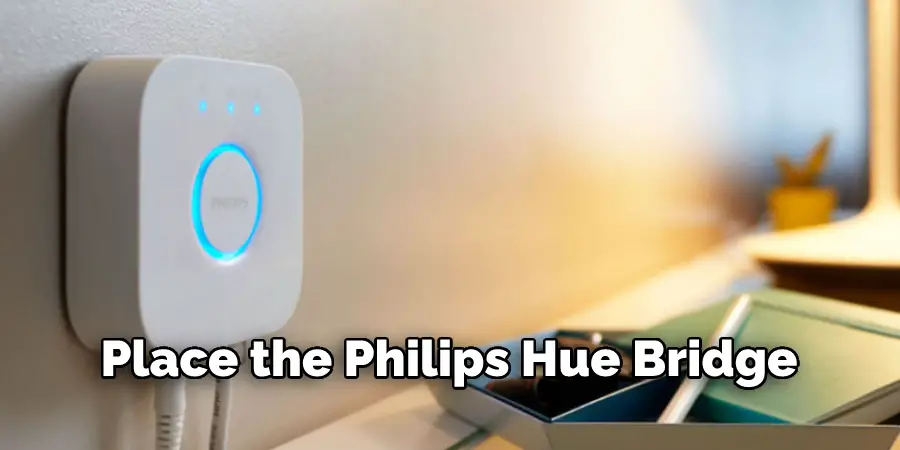
Step 1: Placing
Place the Philips Hue Bridge in an easily accessible spot near your Wi-Fi router. This will ensure that the two connect easily and without interruption. So, It’s important to locate your Philips Hue Bridge in close proximity to your router.
Step 2: Connecting
Connect the Philips Hue bridge to power and an open Internet port of your Wi-Fi router using the supplied cables. This will help the bridge establish an internet connection and allow you to control the light bulb remotely.
Step 3: Installing HUE App
Download and install the Philips Hue app on your Wi-Fi-enabled device. This will enable you to easily set up, configure, and manage the wireless light bulb. The app will also provide helpful tips and information on using the product.
Step 4: Setting Up
Launch the Philips Hue app and follow the on-screen instructions to complete your wireless light bulb setup. The app will guide you through each step, including connecting it to the bridge and configuring its settings. Once setup is completed, you’ll be ready to control your wireless light bulb from the comfort of your home.
Step 5: Activating
Activate the Philips Hue app and begin setting up your remote control features. You can easily adjust settings such as turning lights on/off, changing brightness levels, or creating custom lighting scenes right from your phone or tablet. You can even set up schedules so that the lights automatically turn on or off at specific times of the day.
Step 6: Extending
If desired, you can extend your wireless light bulb’s range by adding additional Philips Hue bulbs to your setup. This will enable you to control multiple lights from one central hub and create a unified lighting system throughout your home.
Step 7: Arranging
Once you have set up and activated all of the Philips Hue bulbs, it’s time to arrange them in the desired positions. This will ensure optimal coverage and performance. Place the bulbs based on what functions you plan to use them for. For example, if you’re using them for general illumination, you may want to place two in each room at opposite ends.
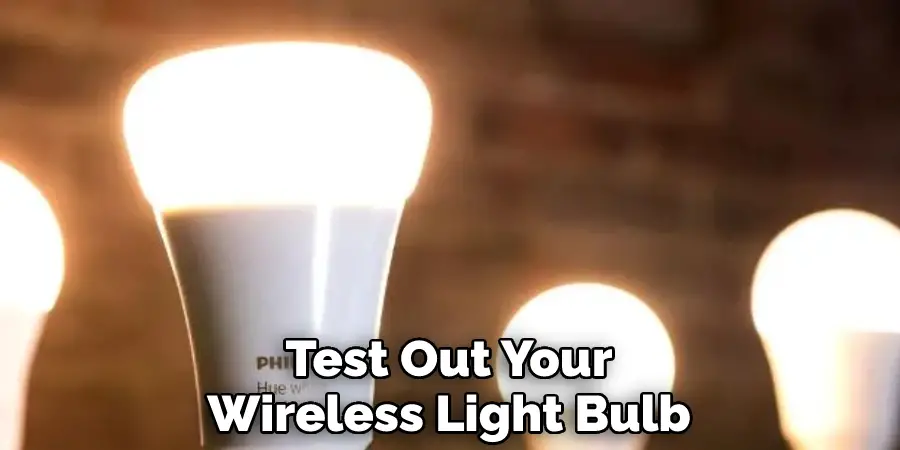
Step 8: Testing
Once everything is arranged properly, it’s time to test out your wireless light bulb setup. Using the Philips Hue app, turn on the lights and adjust their brightness levels as desired. You can also create custom lighting scenes or set specific schedules for when the lights should turn on and off.
Step 9: Troubleshooting
If you experience any issues with your wireless light bulb setup, don’t fret–several troubleshooting tips are available to help you get back on track. How often have you experienced a power outage? If so, you’ll need to reset the Philips Hue bridge and reconfigure your settings. You can also check the app for any updates or software versions that may be available.
Step 10: Enjoying
Once everything is properly set up and working as desired, sit back and enjoy! With your wireless light bulb system in place, you can now easily control the lighting in your home from anywhere. This is a great way to save energy, customize the ambiance of any room, and make your life a little bit simpler.
You Can Check It Out To Remove Spray Tint Off Tail Lights
10 Safety Measures to Follow
1. Never leave the lights on unattended. It will cause a fire hazard if left on for too long.
2. Do not place the wireless light bulbs near water or flammable materials as this may cause a fire risk. Remember always to keep them away from children and pets.
3. Ensure that the light bulbs are far enough away from curtains, bedding, or other materials that may catch fire if exposed to high temperatures. Otherwise, the risk of fire increases.
4. Use only Philips Hue bulbs with your wireless light bulb setup. Using other brands may lead to compatibility issues or even cause a fire risk. Remember that each bulb’s wattage rating should match the wattage recommended by Philips Hue.
5. Always follow the manufacturer’s instructions when installing or replacing light bulbs to prevent any electric shock risks.
6. When setting up your wireless light bulb setup, only use secure networks to protect your data from any potential threats or hackers. Secure network passwords should be used at all times.
7. Be sure to turn off your lights when not in use, as this will help save energy and reduce your electricity bill. Keeping it on when not used will waste energy and add to your monthly expenses.
8. Keep all the wires from the light bulbs out of reach from children and pets, as this may pose a risk of electric shock or fire hazard.
9. Make sure that you check for any damage or loose connections with the light bulbs before using them. Any signs of damage should be reported immediately to the manufacturer.

10. Avoid using dimmable bulbs in an open environment, as this may cause flickering or buzzing. This can also damage the bulb over time. Use them only in enclosed spaces for optimal performance without any risks.
Costing of Making Wireless Light Bulb
The cost of making a wireless light bulb will depend on the type and number of bulbs you need in your home. It’s best to start out small with just a few bulbs, then add more as you get comfortable with setting up and using them.
The initial cost for a basic Philips Hue starter kit is around $100. This includes the Philips Hue bridge and two light bulbs. To add more bulbs to your setup, you’ll need to purchase additional ones at around $30 each. You may want to consider investing in a smart dimmer switch or motion sensor as well, both of which are great additions that will increase the functionality of your wireless light bulb system.
Overall, the cost of making a wireless light bulb setup can range anywhere from $100 to over $500. The price will depend on the number and type of bulbs you need and any additional accessories like dimmers or motion sensors. You can get a great system without breaking the bank with careful planning and budgeting.
Making a wireless light bulb system is an easy and cost-effective way to upgrade your home. With the right setup, you can gain full control of the lighting in any room from the comfort of your own home. Follow the steps above to get started and enjoy all the benefits of having a wireless light bulb system.
Frequently Asked Questions
How Do Wireless Light Bulbs Work?
Wireless light bulbs work by sending energy from a light bulb to a receiver that can be placed anywhere in the house. The receiver then sends the energy back to the light bulb, which turns it on. This system is much more efficient than using an electric wire because it doesn’t require any extra wiring.
Do Wireless Light Bulbs Need Electricity?
Wireless light bulbs do not need electricity to work, as they use LED technology. LED light bulbs are more energy-efficient than traditional light bulbs, and they last longer because they don’t require replacement as often. They are also available in a variety of colors and styles, making them perfect for a variety of rooms in your home.
Are Wireless Lights Safe?
Wireless lights are a growing trend in home decor, and there is some concern that they may be dangerous. Some people worry that wireless lights could be a source of exposure to harmful radiation, and that they may cause health problems in people who are sensitive to electromagnetic fields. There is currently no evidence to support these claims, and there is no reason to believe that wireless lights pose any health risks. However, if you are concerned about the safety of wireless lights, it is always best to consult with a health professional before making any decisions.
What is a Smart Bulb?
A smart bulb is a light bulb that is equipped with a built-in electronic sensor and controller, allowing it to be controlled using an app or a remote control. The smart bulb typically has several features, such as the ability to turn on and off remotely, adjust the color temperature, and create schedules for automatic activation. The smart bulb can also be connected to the internet, allowing the user to access programming features and settings from any device with an internet connection.
The benefits of using a smart bulb include:
Ease of use: Smart bulbs are simple to use, requiring only a few minutes to set up and get started.
Customization: The smart bulb allows users to customize the appearance and function of the lightbulb to suit their own needs.
Privacy and security: Because the smart bulb is connected to the internet, it is protected by security measures such as passwords and encryption.
Cost savings: By using a smart bulb instead of traditional light bulbs, users can save money on their energy bills.
Conclusion
Making a wireless light bulb can sound intimidating, but it’s an easy project with the right supplies and knowledge. From the circuit board to connecting the wiring and choosing your bulb, you need to feel confident making the lamp to ensure that it will work properly and safely.
There are also smart-tech options available to customize your wireless light bulb experience.

With its many advantages, such as being energy efficient and reducing costs from needing a transformer or switches, a wireless light bulb is probably best for those looking for a more modernized method for illuminating their space.
Plus, when you’ve done all the work yourself following the steps of how to make a wireless light bulb, you’ll be proud of how much money you saved yourself by creating something new out of something old instead of buying brand new – no matter how creative or complex!