
If you are looking for a way to improve your lighting, you may want to consider installing high bay lights. These lights are perfect for large spaces, and they can help make your environment more comfortable and functional. In this article, we will discuss how to hang high bay lights. We will also provide tips on choosing the right light fixture for your space. Keep reading to learn more!

High bay lights are a type of lighting fixture that is often used in industrial and commercial settings. They are designed to provide high levels of illumination for large spaces. High bay lights are available in various sizes, shapes, and styles. Therefore, you can choose a light best suited for your space and needs. When hanging high bay lights, following the manufacturer’s instructions is essential. You will also need to consider the height of your ceilings and the size of your space.
Summary: High bay lights are a great way to add lighting to your work area. Follow these simple steps to hang high bay lights: 1. Measure the height of your high bay light and purchase the appropriate hardware. 2. Mark the location of the mounting bracket on the wall. 3. Drill a hole in the mounting bracket and mount the light. 4. Connect the power supply and plug in the light.
What Are the Types of High Bay Lights
There are three types of high bay lights: induction, fluorescent, and LED. Induction high bay lights use an electromagnetic field to create light, while fluorescent and LED high bay lights to use a gas-filled tube or semiconductor, respectively. Each type has its advantages and disadvantages.
Induction High Bay Lights
Induction high bay lights are the most energy-efficient type of high bay light. They also last the longest, with a lifespan of up to 100,000 hours. However, induction high bay lights are more expensive than other high bay lights.
Fluorescent High Bay Lights
Fluorescent high bay lights are less energy-efficient than induction or LED high bay lights, but they are less expensive. Fluorescent high bay lights also have a shorter lifespan, typically around 20,000 hours.
LED High Bay Lights
LED high bay lights are the most expensive type of high bay light, but they are also energy-efficient. LED high bay lights also last a long time, with up to 50,000 hours.
How to Choose the Right Light Fixture for Your Space
There are many things to think about when choosing the right light fixture for your room. You need to think about the size of the room, what kind of activity will be happening in the room, and what kind of look you want to create.
Size: The size of the room is an essential factor to consider when choosing a light fixture. You’ll want to ensure the fixture is proportional to the room so it doesn’t look out of place. For example, if you’re hanging a light over a table, you’ll want to make sure it’s not too small or too large for the space.
Type of activity: The activity taking place in the room is also an essential factor to consider. If you’re hanging light in a room where people will be reading, you’ll want to make sure the light is bright enough to provide good illumination. If you’re hanging light in a room where people will be relaxing, you might want to choose a fixture with a dimmer to adjust the light level to suit your needs.

The look you want to achieve is an important factor to consider. You’ll want to make sure the style of the light fixture complements the rest of the room’s decor. For example, if you’re hanging a light in a contemporary space, you might want to choose a sleek and modern fixture. If you’re hanging a light in a more traditional space, you might want to choose a fixture with more elaborate details.
When you’ve considered all of these factors, you’ll be able to narrow down your choices and choose the right light fixture for your space.
Required Tools and Materials
- Tape measure
- Level
- Drill
- 3/8″ drill bit
- 1/2″ socket and ratchet or impact driver
- Socket extension
- Pole mount bracket kit (includes straps, bolts, and nuts)
- Wire cutters/strippers
- Electrical tape
A Detailed Guide on How to Hang High Bay Lights
Step 1. Choose the Right Spot for Your High Bay Lights
Before you even get started, it’s important to pick the perfect spot for your high bay lights. You’ll know exactly where to drill holes and drive in screws. Here are a few things to keep in mind when choosing a location:
- High bay lights need at least 18 feet of clearance from the ground to the bottom of the light fixture.
- Each high bay light should be about 2 feet apart from each other.
- Make sure your high bay lights will be close enough to an electrical outlet so you can easily plug them in.

Step 2. Calculate the Correct Height for Your Light Fixtures
After you have gathered the necessary materials, the next step in hanging high bay lights is to calculate the correct height for your light fixtures. This will require you to measure the dimensions of your room, the height of your ceilings, and the type of bulbs you are using. With this information, you will be able to determine the best placement for your light fixtures to create the perfect ambiance in your space.
There are a few different ways to calculate the correct height, but the most common method is to take the room’s length and divide it by 2.5. This will give you an approximate height for your fixtures. For example, if your room is 20 feet long, you would divide that by 2.5 to get 8 feet. However, remember that this method isn’t always 100% accurate, so it’s always best to err on the side of caution and go a few inches higher or lower than the calculated height.
One method for finding the ideal height for your high bay lights is to take the wattage of your bulbs and divide it by 10. So, for example, if you’re using 150-watt bulbs, you would divide that by 10 to get 15 feet. However, this method isn’t always 100% accurate, so it’s best to use your best judgment when choosing the final height for your light fixtures.
Once you’ve decided on the correct height for your high bay lights, it’s time to move on to step three!
Step 3. Measure and Mark the Holes
Now that you know where you want your high bay lights to go, it’s time to measure and mark the holes for the mounting brackets. You’ll need a tape measure, a level, and a pencil to do this.
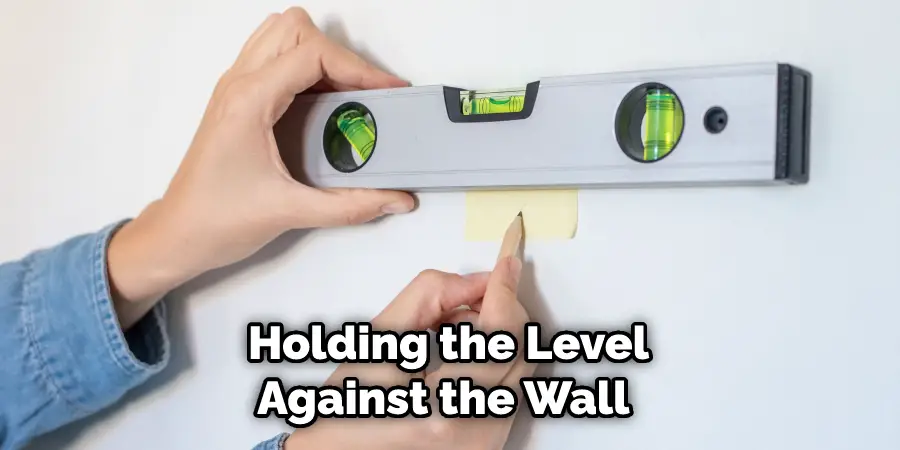
Start by holding the level against the wall at the spot where you want your light fixture to go. Then, use the tape measure to mark a point on the wall 18 inches from the ground (this is the minimum height for high bay lights). Next, use the tape measure to mark two more points on the wall 2 feet apart from each other (this is the recommended distance between high bay lights). Then, use the level to draw a line connecting the three points on the wall. Finally, use the tape measure to find the center point of the line and mark it with a pencil.
Once all three points are marked on the wall, use the level to draw a straight line between them. This will be your reference line for drilling holes.
Now that you have your reference line, it’s time to mark the holes for the mounting brackets. The first hole should be placed at the center of the reference line, and the other two holes should be placed 6 inches to either side of the center hole.
Once all three holes are marked, it’s time to move on to step four!
Step 4. Drill Holes and Install Mounting Brackets
Now that your holes are marked, it’s time to drill them and install the mounting brackets. Start by drilling a 3/8″ hole at each of the marks on the wall.

Next, please take one of the mounting brackets and hold it up to the first hole. Then, use a 1/2″ socket and ratchet (or an impact driver) to drive a screw through the bracket and into the wall. Repeat this step for the other two mounting brackets.
Step 5. Hang Your High Bay Lights
Now that your mounting brackets are installed, it’s time to hang your high bay lights! Start by threading the electrical cord through one of the mounting brackets and then plugging it into an outlet.
Next, take the light fixture and align the keyholes on the back of the fixture with the screws on the mounting bracket. Once properly aligned, use a 1/2″ socket and ratchet (or an impact driver) to drive the screws through the keyhole and into the mounting bracket. Repeat this step for the other two light fixtures.
Step 6. Turn on Your High Bay Lights and Enjoy!
Once all three light fixtures are correctly installed, it’s time to turn on your high bay lights and enjoy the results! If you followed all of the steps in this guide, you should now have a well-lit room free of dark corners and hotspots. Congratulations!
Precautions
Before starting any work, disconnect power to the fixture at the breaker box. Then, use a ladder or stool to climb up and remove the old light bulb. Inspect the socket for damage, then screw in the new LED light bulb. Be careful not to over-tighten, which can damage the socket. Finally, turn the power back on at the breaker box and test your new light bulb.
If you are working with a high bay light that uses metal halide or high-pressure sodium bulbs, it is vital to take extra safety precautions. These bulbs produce intense heat, so wear gloves and eye protection. Also, be aware that these bulbs contain mercury, so they should be disposed of properly.

Now that you know how to hang a high bay light, you can enjoy the benefits of LED lighting. LEDs are more energy-efficient than traditional light bulbs, so they’ll help you save money on your electric bill. They also last longer, so you won’t have to change them often. And, because they produce less heat, they’re safer to use and won’t add to the temperature in your workspace.
Frequently Asked Questions
Can You Surface Mount High Bay Lights?
Yes, you can surface mount high bay lights. However, there are a few things to keep in mind when doing so. First and foremost, you’ll need to make sure that the light fixture you choose is compatible with the surface mounting technology. Second, make sure that the light fixture is mounted securely to the wall so that it doesn’t move or shift during use.
Third, be sure to select a light fixture with a proper wattage rating – too low of a wattage may not be enough to produce the desired results, and too high of a wattage may cause overheating and damage to your equipment.
Finally, make sure to use an approved lighting cable and connectors – not all cables are compatible with surface mounting technology, and improper connections can lead to damages or even fires.
So there you have it – surface mounting high bay lights definitely aren’t too difficult nor too complicated! As long as you take care of the small details, installation should go smoothly.

What Size Wire for High Bay Led Lights?
It depends on the specific needs of your high bay led lights. However, common sizes for wire include 12 gauge or 14 gauge. These are both appropriate limits for indoor use and should be able to handle the weight and strain imposed by highbay led lights without breaking.
Should I Use 12 or 14 Gauge Wire?
When it comes to wiring, the thicker the wire, the sturdier it will be. That being said, 12 gauge wire is a good general-purpose size and can handle most applications. 14 gauge wire is slightly more expensive but can offer increased safety and performance in certain situations. If you’re not sure which size of wire to use, test it out first by installing a small piece in your home or office.
If you have any questions about electrical wiring or connectors, don’t hesitate to contact an electrician for help!
Can Electrical Outlets and Lights Be on the Same Circuit?
Yes, electrical outlets and lights can be on the same circuit. However, it is important to keep in mind that both of these items require an electrician’s install or repairs. If you are not comfortable with this type of work, then it may be best to have separate circuits for each item.
Conclusion
Do you have a high bay space in your home or office that could use some lighting? If so, consider using high bay lights to brighten up the area. Not sure how to hang them? We’ve got you covered! In this article, we outlined how to hang high bay lights like a pro. Ready to get started?