
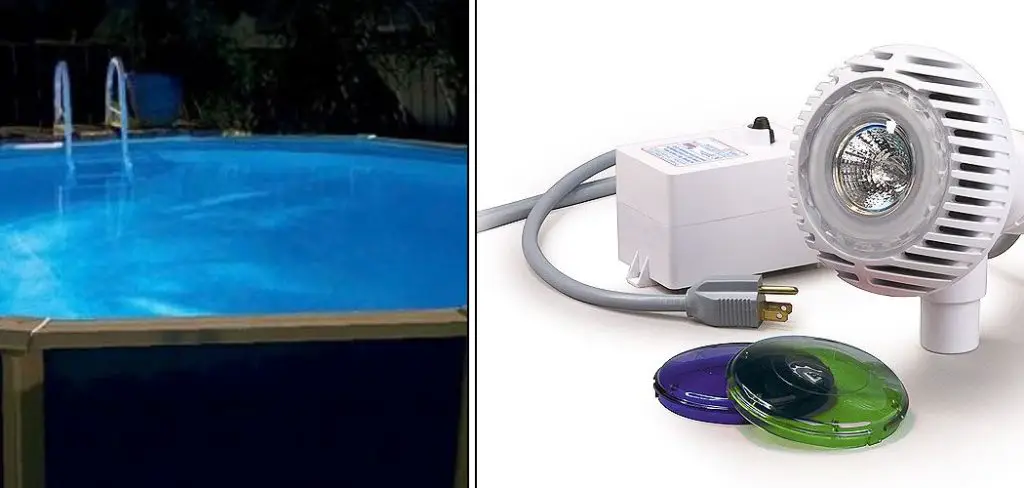
Installing a pool light is a great way to make your pool more fun and inviting, especially during the evening hours. If you’re looking for an easy, affordable way to add some extra lighting to your pool, consider installing an Aqualuminator pool light.
It is important to know how to install aqualuminator pool light. This type of pool light is simple to install and can be done in just a few minutes. Keep reading for instructions on how to install an Aqualuminator pool light.
Materials You Will Need
- Aqualuminator pool light
- Adjustable wrench
- Screwdriver
- Socket wrench or pliers
What is Aqualuminator Pool Light?
Aqualuminators are a type of underwater pool lights that are commonly used to illuminate swimming pools. These lights are designed to be placed underwater, and they use a series of LEDs to produce a bright, even light. Aqualuminators are available in a variety of different colors, and they can be used to create different effects in the pool.
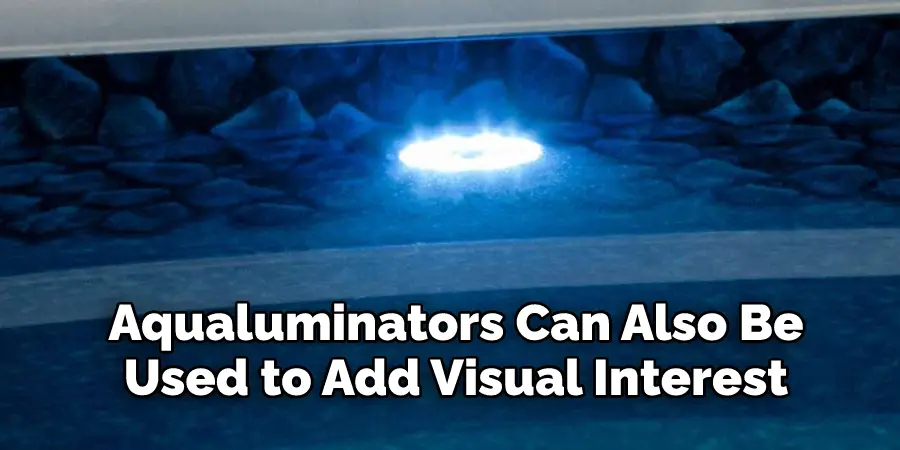
For example, blue Aqua Luminators can create a serene and calming atmosphere, while white Aqualuminators can provide a more energizing and exciting ambiance. In addition to providing illumination, Aqualuminators can also be used to add visual interest to the pool area. By strategically placing these lights around the pool deck, you can create a unique and eye-catching design. Whether you’re looking to add some extra light to your pool or you want to create a one-of-a-kind poolscape, Aqualuminators are a great option.
8 Steps Guide on How to Install Aqualuminator Pool Light
Step 1: Start by Turning off the Power
Before you begin the installation process, make sure to turn off the power to your pool. This will prevent any accidents or shocks while working with wiring and electrical components. You should also avoid touching any of the pool light components while they are still connected to an electrical source. If necessary, you can use a voltage tester to verify that the power is off.
Step 2: Unscrew the Light Cover
The next step is to unscrew the light cover from your existing pool fixture. Use a screwdriver to loosen the screws and remove the cover. You have to be careful when removing the cover, as you don’t want to damage it. It is an important part of the pool installation and will need to be reinstalled at the end. It is easy to lose track of which screws go where, so make sure to keep track of them.
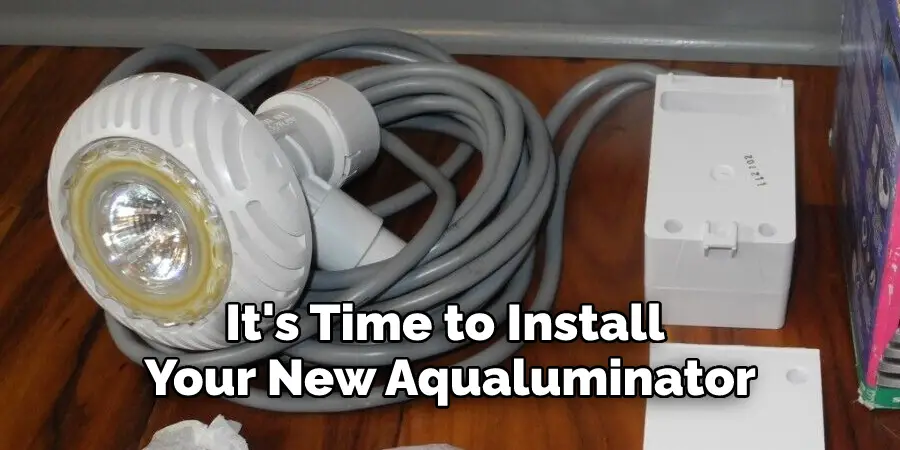
Step 3: Install the Aqualuminator
Once you have removed the cover, it’s time to install your new Aqualuminator pool light. Take the light and attach it to the existing fixture by screwing it in place.
If you do not have the correct screws for this, you can purchase them at your local hardware store. Make sure to use an adjustable wrench to tightly secure all of the screws in place. This makes sure that all of the wires are connected properly before moving on to the next step.
Step 4: Connect the Wires
Using an adjustable wrench, connect your Aqualuminator’s wires to the existing wiring of your pool light fixture. Make sure that all connections are secure before moving on. Proper connection of the wires is essential for a successful installation. The wires should be properly connected to the fixture and firmly secured in place.
Step 5: Attach the Mounting Plate
The mounting plate is what will hold your light in place. Attach the plate to the side of your pool with a socket wrench or pliers, then secure it with screws.The ground wires should also be connected to the pool’s metal framework while being careful not to over tighten them. Proper attaching of the mounting plate will ensure that your light is properly secured.
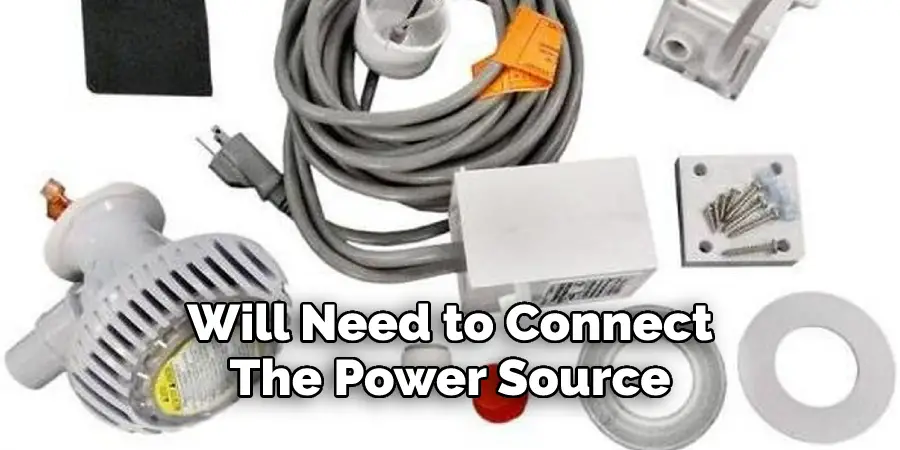
Step 6: Connect the Power Source
Now you will need to connect the power source for your Aqualuminator. First, locate the GFCI outlet, which should be located near the power source. Connect the two wires from your light to this outlet, and make sure all connections are secure. You should check all wiring to make sure there are no loose connections. If everything is secure, you can now turn on the power.
Step 7: Test the Light
Before moving on to the final step, it’s important to test your light to make sure it is working properly. Make sure that all wiring is connected and functioning correctly before testing your Aqualuminator pool light. Once everything is connected, turn on the power, and you should see a bright beam of light in your pool.
Step 8: Reinstall the Light Cover
The last step is to reinstall the cover that was removed during installation. Make sure all screws are secured tightly so that no water can enter the pool light fixture.
Once you have finished installing your pool light, all that’s left to do is turn on the power. Flip the switch and bask in the glow of your new Aqualuminator pool light! Once everything is in place, you are ready to enjoy your new Aqualuminator pool light.
Congratulations! You have successfully installed an Aqualuminator Pool Light in your swimming pool. Enjoy the bright and beautiful light for years to come. Happy swimming!
Additional Tips
1. Before you begin, there are a few things you need to do to ensure a successful installation. First, you need to make sure that the power is turned off to the circuit that will be supplying power to the light. Next, you need to remove the old light fixture from the pool.
2. Once the old light has been removed, you need to clean the inside of the light housing and the outside of the lens so that no dirt or debris could prevent the new light from sealing properly.
3. When you have prepared the area, you can begin installing the new light. Start by attaching the mounting bracket to the light housing using the screws that are provided. Next, attach the wires to the terminals on the light housing.
Make sure that you connect the black wire to the black terminal and the white wire to the white terminal. Finally, screw the lens into place and turn on the power to test your work.
4. If your new light is not working, there are a few things you can check. First, make sure that all of the connections are secure and that there is no loose wiring. Next, check to see if there is power going to the light by testing for voltage at the terminals with a voltmeter.
5. If there is power going to the light but it still isn’t working, chances are good that there is an issue with the bulb itself and you will need to replace it
Frequently Asked Questions
How Many Screws Come With the Aqualuminator Light?
Three screws come with the Aqualuminator light. Two of these screws are used to secure the light to the aquarium glass, and the third is used to adjust the light’s position. The screws are made of corrosion-resistant stainless steel, and they are designed to create a tight seal that prevents water leaks.
The Aqualuminator light comes with a two-year warranty, and it is backed by a team of customer service representatives who are available to answer any questions that you may have. If you have any problems with your Aqualuminator light, simply contact customer service for assistance. Thanks for choosing Aqualuminator!
How Do I Know If the Power is Off Before I Start the Installation?
Before beginning any electrical work, it is critical to ensure that the power is off. Depending on the size and scope of the project, this may mean shutting off power at the main breaker box or simply flipping the switch for the affected circuit. Failure to do so could result in serious injury or even death. For larger projects, it is always best to err on the side of caution and shut off power at the main breaker.
This will prevent anyone from accidentally turning the power back on while work is being done. Once the power is off, it is important to test all outlets, switches, and fixtures to make sure that they are true without power before proceeding. A simple circuit tester can be used to confirm that there is no electricity running through a wire. With these precautions in place, you can rest assured that your electrical work will be safe and effective.
Is It Difficult to Install the Aqualuminator Light?
The Aqualuminator light is designed for easy installation. The light screws into the existing return fitting, and a rubber gasket creates a water-tight seal. A 6-foot power cord is included, and the light can be plugged into any standard outlet.
Once installed, the light will automatically turn on when the filter is running, and it can be easily adjusted to create the desired effect. Overall, the Aqualuminator light is a simple and effective way to add a touch of ambiance to your pool or spa.
How Long Will It Take to Install The Aqualuminator Light?
Installation of the Aqualuminator light is a fairly simple process that can be completed in just a few minutes. First, remove the old light fixture from the aquarium. Next, attach the mounting bracket to the side of the aquarium using the screws provided.
Then, place the Aqualuminator light into the bracket and secure it in place with the thumb screws. Finally, plug in the power cord and turn on the light. That’s all there is to it! With just a few quick steps, you can have your aquarium illuminated with beautiful, natural-looking light.
Conclusion
Installing an Aqualuminator pool light doesn’t need to be complicated or intimidating. It’s quite simple when broken down into smaller steps as we’ve done here! You should carefully determine how to install aqualuminator pool light.
With a few basic tools and following our instructions above, anyone should be able to successfully install their Aqualuminator pool light quickly and easily without too much trouble! So go ahead – give it a try today! Enjoy your newly illuminated swimming space!