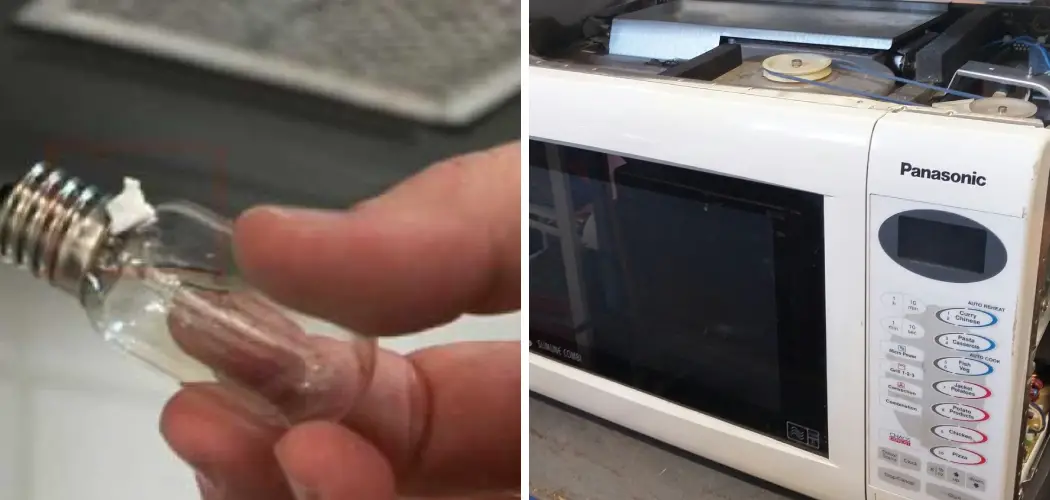
Do you have a Panasonic microwave that’s not generating enough light? Have you ever realized how eye-straining and difficult it is to operate the microwave in darkness? Don’t worry, replacing the light bulb couldn’t be simpler! It is important to know how to replace bulb in panasonic microwave.

In this blog post, we’ll teach you exactly how to replace your old broken bulb with a brand new one in no time. Our step-by-step guide will make sure that you have an easier time when replacing the bulb next time – let’s get started!
Tools You Will Need
- A Phillips head screwdriver
- A new light bulb
8 Steps Guide on How to Replace Bulb in Panasonic Microwave
1. Unplug Your Panasonic Microwave
Replacing the bulb in your Panasonic microwave doesn’t have to be a difficult task. All you need to do is carefully unplug the appliance from the wall outlet and then locate the panel on the top underneath which is where you’ll find the bulb and its protective housing.
Make sure to take all necessary safety precautions while replacing the bulb, including wearing gloves to avoid contact with broken glass or hot surfaces. With these steps followed correctly, you can have your Panasonic microwave shining bright again in no time!
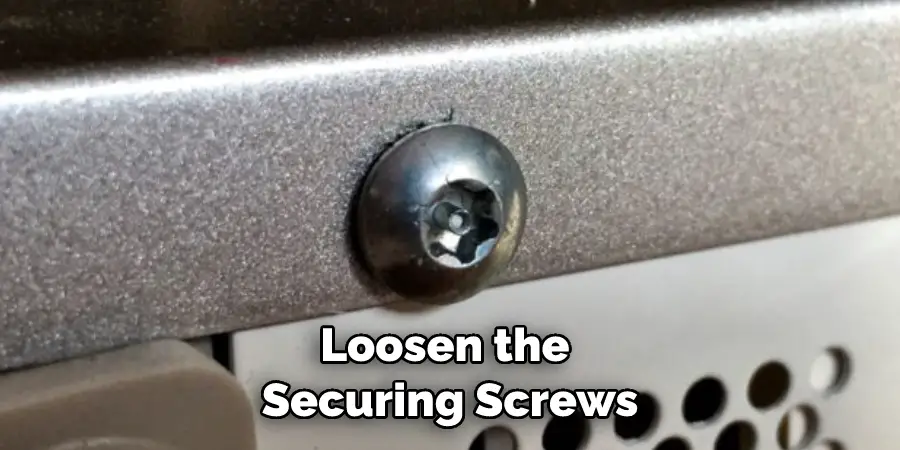
2. Remove the Screws
Removing the screws associated with your vent grille may seem daunting, but with the right tools, provide easy access to the light cover. A Phillips head screwdriver can easily unscrew and loosen the securing screws almost effortlessly.
Simply slide in the bit of the screwdriver in and turn it counterclockwise. With each rotation, move closer to fully removing each item – you will know when to stop once all of the screws have been released. All that’s left is taking out those screws and replacing them when you’re finished!
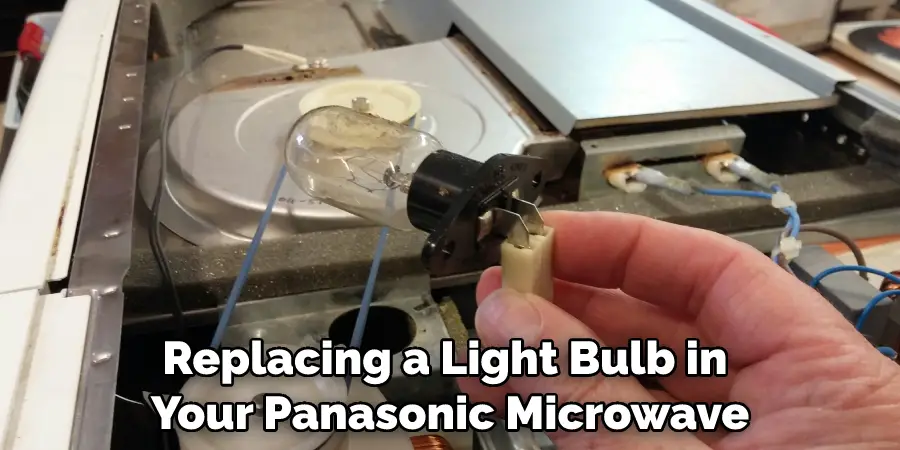
3. Replace the Old Bulb With a New One
When it comes to replacing a light bulb, the most important thing to remember is that the wattage rating should stay the same. Replacing an old bulb with one that has a higher wattage rating can be detrimental to your fixture and could cause fire hazards.
To replace a bulb safely, unscrew the old one carefully, making sure not to touch it with your bare hands as this can reduce its lifespan. Once removed, insert the new bulb of equivalent wattage, secure it in place and enjoy your newly illuminated room!
4. Secure the Light Cover Back
Replacing a bulb in a Panasonic microwave is as simple as unscrewing the light cover and removing the broken bulb. To ensure the new bulb is securely in place, start by getting the right size and wattage for your specific model – this information can usually be found in the user manual or product label.
After putting the new bulb into its socket and screwing it back into position, make sure to tightly secure the light cover back in with the screws you removed earlier. Replacing a bulb is relatively straightforward provided you have the right tools handy, and doing it on your own can save you time and money so that your Panasonic microwave can remain up and running.
5. Refit the Vent Grille
Installing or reinstalling the vent grille on a Panasonic microwave is easy to do but should be done with care. Begin by loosening any screws that secure the grill along the frame of the microwave, and remove it from its position. Before refitting the vent grille back onto your appliance, make sure it is properly aligned so that air can effectively pass through.
When the vent grille is secure, use a screwdriver to fasten the screws firmly into place. This will help prevent any parts from rattling during operation, thus prolonging its life span. Be sure to follow all instructions carefully to complete this important task safely and securely.

6. Plug the Microwave
Once you have replaced the old bulb with a new one, it’s time to put your microwave back into its original place in the kitchen and check if the new bulb is working. Start by plugging the microwave back into its outlet, and turn it on. Observe the new lightbulb while your microwave warms up.
If you notice a glow, then congratulations! Your hard work has paid off and you can now enjoy your fully functioning microwave once again!
7. Double-check
If your brand-new bulb isn’t functioning, check that it is installed properly in your Panasonic Microwave. Start by unplugging the microwave from the power source and removing the old bulb from the mounting bracket.
If there is any debris stuck to where the mounted bulb was, make sure to carefully clean it off. Using your hands or a screwdriver, hand-tighten the new bulb into place in the mounting bracket. After verifying that it is securely encapsulated into the bracket, plug your microwave back in and turn it on; if the light comes on then you have completed this task.
8. Clean Up Your Work Area
Replacing a bulb in a Panasonic microwave doesn’t have to be tedious or complicated. Before beginning the job, however, you must make sure your work area is clean and all tools are put away safely. It’s always good practice to clear clutter and keep the microwaving area free of any debris or objects.
By cleaning up and taking the time to organize your workspace, you can inexpensively maintain the environment of a professional service technician. Not only does this ensure Michelin-star results for each household appliance repair job; it eliminates the added risk of injury or damage during the repair project as well.
And there you have it – How to Replace Bulb in Panasonic Microwave in 8 easy steps! Following these simple instructions should help you replace the bulb in your Panasonic microwave with ease. If you want to continue to keep your microwave in top condition, it’s always a good idea to check and clean its interior regularly too.

What Are Some Tips for Replacing the Bulb in a Panasonic Microwave?
- Before you begin, make sure that you have the correct replacement bulb for your model Panasonic microwave. You can find this information in the owner’s manual or by contacting customer service.
- Unplug the microwave from the power outlet and remove any food or other items from inside the unit.
- Carefully remove the glass plate from the top of the microwave. Be careful not to drop or break the plate.
- Remove the metal cover from the top of the bulb. Be careful not to touch the glass of the bulb with your bare hands, as this can cause it to break.
- Screw in the new bulb and replace the metal cover.
- Replace the glass plate on top of the microwave.
- Plug the microwave back into the power outlet and press the “Power” button to turn it on.
- Check to make sure that the new bulb is working properly by opening and closing the door a few times. The light should come on each time you open and close the door.
- If you find that the new bulb is not working, contact customer service for further assistance.
- Once you have successfully replaced the bulb, be sure to dispose of the old one properly
Frequently Asked Questions
How Often Should I Replace the Bulb in My Panasonic Microwave?
Replacing the bulb in your Panasonic microwave is an important task to maintain the maximum effectiveness of your appliance. Generally speaking, your bulb should be replaced once a year to ensure you are getting the most out of your microwave.
It’s also important to note that if the bulb goes out suddenly, then it may suggest the socket is faulty and needs repair. Therefore, when replacing the bulbs, check that all connections are properly tightened and secure to avoid any issues in the future.
Overall, replacing the bulb in Panasonic microwaves every year can help keep them running for many years to come.
What Type of Bulb Do I Need to Replace in My Panasonic Microwave?
Replacing a light bulb in your Panasonic microwave is an easy task. Before purchasing an appropriate bulb, you should determine the wattage and type that your microwave needs. Check the manual provided with your microwave for exact specifications or look for a label inside the unit.
Your label might read “LMP” on some models, which stands for light-medium base precision. This type of base is unique to Panasonic microwaves and will require a precision lamp Replacement bulb which contains either 20 watts or 25 watts of power and can be easily acquired from many retailers.
In addition, take note of whether your bulb has a frosted cap at the bottom end as this feature will also affect which bulb you choose to purchase. Once you have all the required measurements in hand, you can buy the right replacement bulb and replace it quickly and safely.
Conclusion
Congratulations! You have now replaced the light bulb in your Panasonic microwave. You should carefully determine how to replace bulb in panasonic microwave. This is a very easy process and only takes a few minutes to complete.
Be sure to follow the manufacturer’s instructions when doing this so that you do not damage your microwave. We hope this article has helped you and feel free to contact us if you have any further questions about this or any other topic. Thank you for reading!
There you have it, a step-by-step guide on how to replace the light bulb in your Panasonic microwave. As you can see, it is not a difficult task and only requires a few household tools. If you ever have any other issues with your Panasonic microwave, be sure to check out our website for more helpful tips and tricks.