
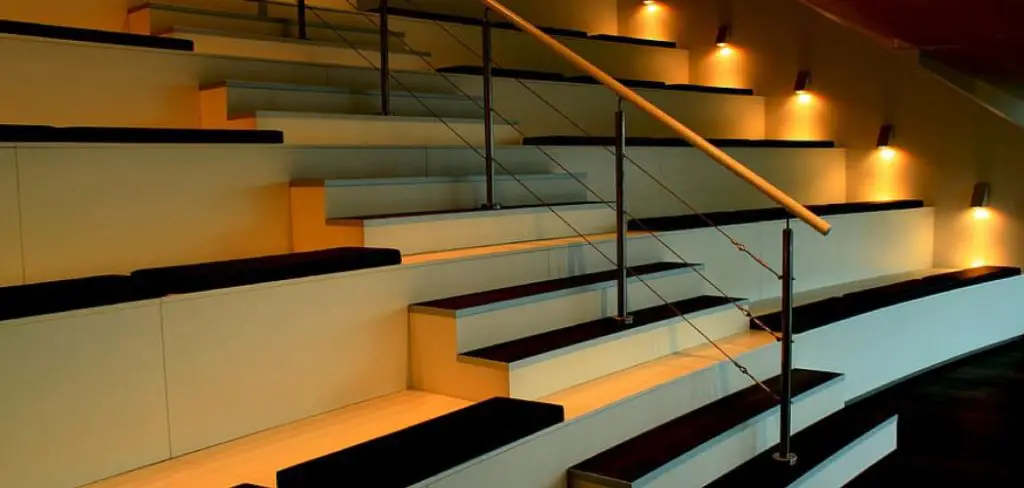
Are you looking to add a touch of sophistication and style to your stairs? Installing LED lights is an easy way to do just that! LED lighting can provide illumination and decorate the space, creating a unique atmosphere.
This guide will show you how to install led lights on stairs, step-by-step. With some basic tools and supplies, you’ll be able to get stunning results in no time. So let’s get started!
Step-by-step Guidelines on How to Install Led Lights on Stairs
Step 1: Choose the Location
When deciding where to install the led lights, make sure to consider the size of your stairs. You’ll want the led lights to be evenly spaced and provide adequate illumination to the area. You’ll also need to consider the power source and how it will be connected. That will determine how and where you need to install the lights.
Step 2: Measure the Space
Once you have chosen a location, measure and mark off the distance between each light. This will ensure that all the led lights are placed at even intervals and provide the desired amount of illumination. Before proceeding to the next step, double-check the measurements and make sure they are accurate. That way, you’ll avoid costly mistakes and the tedious process of re-measuring.
Step 3: Gather Your Supplies
Before you begin, ensure you have all the necessary supplies. You’ll need LED lights, power cords, mounting hardware, a drill, and electrical tape. That’s all you’ll need for the installation process. Remember to always take safety precautions when dealing with electricity. It’s best to leave the wiring to a professional.
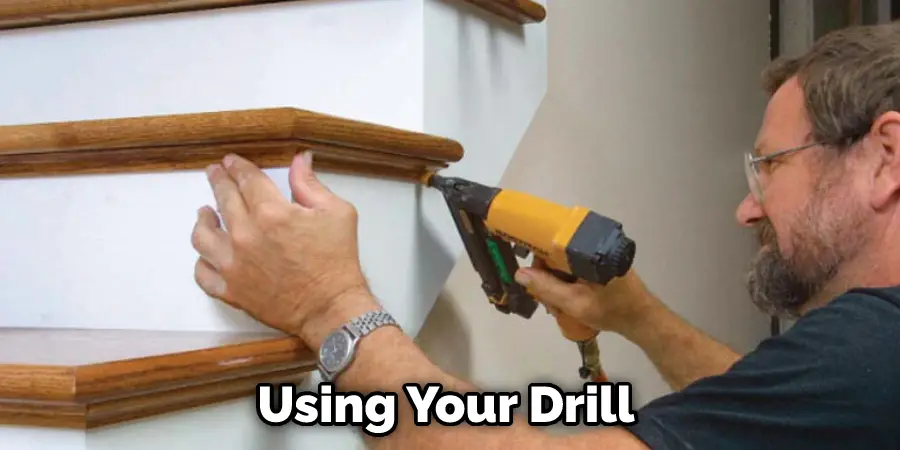
Step 4: Mounting Holes
Using your drill and measuring tape, mark off where each mounting hole should be located and then create them with the drill bit. Be sure to follow local building codes when drilling into walls or stairs! You may also want to consider using an anchor if the surface is not strong enough for the mounting hardware.
Step 5: Insert Brackets
Once you have created the mounting holes, insert the brackets into place and tighten them with a screwdriver. This will ensure that the lights are securely attached to the stairs. You may have to adjust the brackets depending on the size of the LED lights. That’s why it’s important to have the measurements from Step 2.
Step 6: Connect Wires
Attach one end of the power cord to each LED light and the other to a junction box or outlet, depending on your wiring type. Make sure all connections are secure and properly insulated with electrical tape. It is also important to keep wires away from sharp edges and other potential hazards. So use zip ties or electrical tape to keep the wires out of harm’s way.
Step 7: Install Lights
Carefully place each light into its bracket and tighten the screws until it is secure. Be sure not to overtighten, as this could damage the light or cause it to come loose from its mounting position. You may need to adjust the height of the light to create an even level with its neighbor.
Step 8: Test It Out
Before you fully install your led lights, make sure they work by testing them out with a voltage tester. Once you have verified that all the lights are functioning properly, you can proceed with the installation. It’s important to double-check that all lights are secure in their brackets before proceeding. You may need to adjust the height of each light to create even levels.
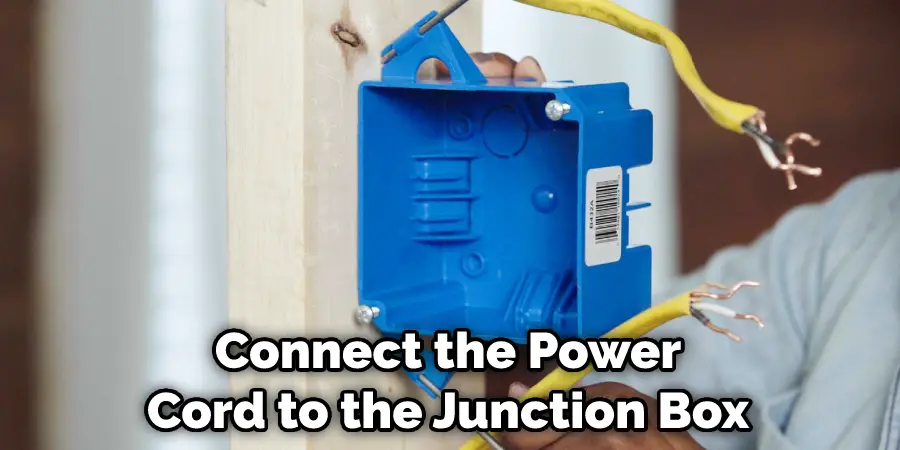
Step 9: Mount Junction Box
If you are connecting your led lights to a junction box or outlet, make sure to mount it in a safe and accessible location that is away from sources of water or heat. This will prevent electrical hazards. You may need to hire an electrician for this step if you don’t feel comfortable doing it yourself. This is especially true if local codes require it.
Step 10: Connect Wires
Connect the power cord to the junction box or outlet, making sure all connections are secure. Use electrical tape to insulate any exposed wires and protect them from moisture or dirt buildup. You may also want to secure the wires with tie wraps. But make sure not to overtighten them as this could damage the wires. It’s important to follow local building codes for this step.
Step 11: Secure Lights
Tighten each light’s mounting screws until they are firmly set in place and cannot be moved easily. This will ensure that the lights remain securely in place and provide adequate illumination. It is also important to make sure the lights are not covered by any obstructions. You don’t want them to be blocked by furniture or other objects in the room.
Step 12: Test Again
Use a voltage tester once more to ensure all the lights are functioning properly before you fully install them. This is an important safety precaution that should never be overlooked! You don’t want any accidents! So make sure all the lights are working before you proceed. It’s better to be safe than sorry.
Step 13: Hide Wires
For an aesthetically pleasing look, make sure all the wires are hidden from view. You can do this with wire coverings or by tucking them away behind walls or other objects. It’s also important to make sure that all wires are properly insulated. They should not be in direct contact with any metal or other hazardous material.
Step 14: Turn On the Lights
Make sure all connections have been made correctly and then turn on your lights. If everything was connected properly, they should light up instantly! That will be your cue to bask in the glow of a job well done. This is a great feeling! It’s time for the final step after your all hard work is done in this process. Remember to enjoy the moment and show off your work! Congratulations on successfully installing your LED lights.
Step 15: Enjoy Your New Look
Now you can stand back and admire your beautiful, new LED lighting solution! Not only will it provide a lovely accent to your stairs, but it also adds safety and security to the area. Be sure to keep the area clean and free of dust and debris to ensure your lights remain in good working condition and don’t forget to switch them off when not in use to save energy and money! It’s a win-win!
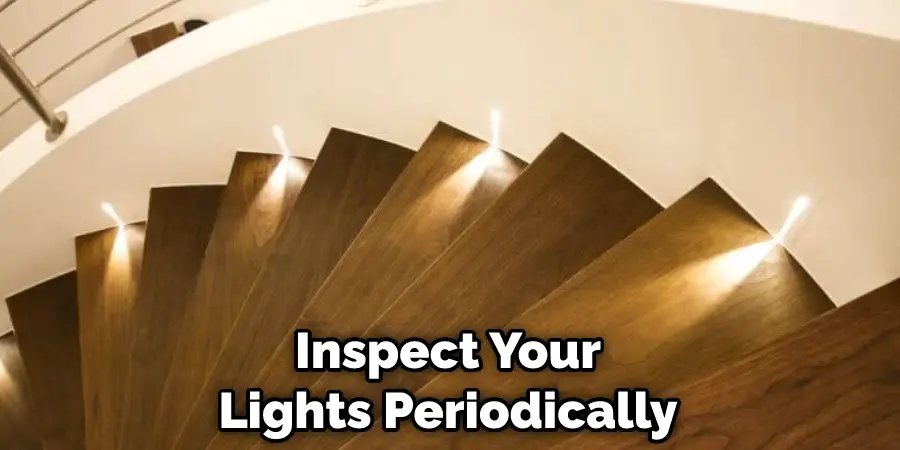
Step 16: Maintenance
Remember to inspect your lights periodically for any signs of damage or loosened wires. If you notice any problems, contact an electrician as soon as possible for repairs. You should also replace the bulbs when they start to dim or flicker. With proper maintenance, your LED light installation will last for many years.
With these easy-to-follow steps, installing led lights on stairs is a breeze! With just a few tools and some basic knowledge, you’ll be able to create stunning illumination that looks great and provides extra safety in stairways. Have fun with your project and enjoy the results of all your hard work!
Do You Need to Use a Professional Electrician?
Although this guide has taught you how to install led lights on stairs, it is always a good idea to consult an electrician for your project. This is especially true if local codes require electrical work to be done by a licensed and certified professional.
An experienced electrician knows the local codes and can ensure that everything is installed correctly and safely. So consider enlisting a professional if you’re unsure about any of the steps outlined in this guide. It’s always better to be safe than sorry!
Frequently Asked Questions
Q: What Kind of Led Lights Should I Use on the Stairs?
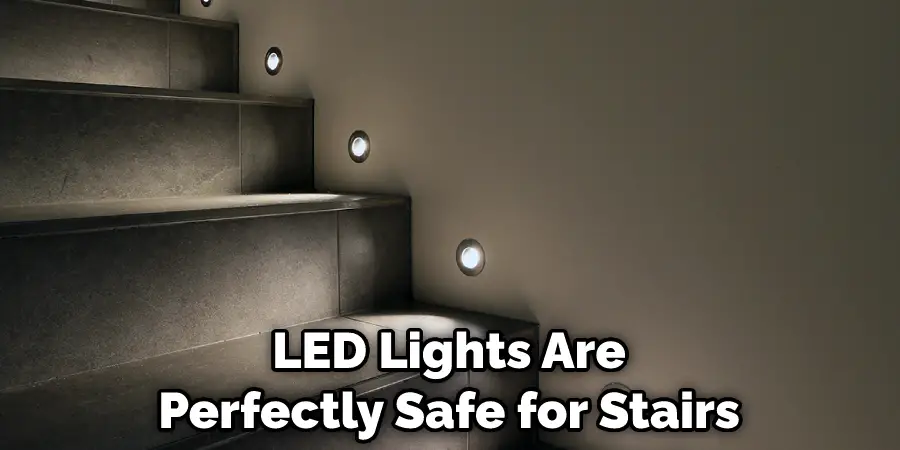
A: It is best to use recessed LED lights for this application. These lights are mounted inside of the stair risers and provide a clean, modern look.
Q: How Many Led Lights Do I Need for My Stairs?
A: This will depend on the size of the staircase. Generally, one light for every two steps should provide sufficient illumination. However, it is best to consult with a professional electrician to ensure that you have the correct number and type of lights.
Q: How Do I Connect Led Lights on the Stairs?
A: Connecting LED lights on the stairs is relatively easy. Start by connecting the wiring from each lamp to a junction box, then connect the boxes together with a 3-wire cable. Finally, connect the wire from the junction box to your power source.
Q: Are Led Lights Safe for Stairs?
A: Yes, LED lights are perfectly safe for stairs as long as they are installed correctly and properly maintained. As an added safety measure, you should use a voltage tester to ensure that all the lights are working before you fully install them.
Conclusion
Installing LED lights on stairs is a great way to bring light and life into an area of your home. By following the steps outlined in this guide on how to install led lights on stairs, you can easily create a beautiful lighting solution that provides both security and style.
With just a few tools and some basic knowledge, anyone can install LED lights on their stairs! So don’t hesitate to get creative and start your own LED lighting project today!