Do you want to bring a bit of fun and excitement into your home? Monster LED Light Remote is the perfect way to do just that. It’s easy to use, requires no programming or installation, and can be used with any type of lighting system in your home. With this remote, you can easily control the brightness, and color temperature, and even create effects like strobe lights or fading colors. In this guide, we will teach you how to work a Monster LED Light Remote so that you can start having some creative fun with your lights!

Step-by-step Guidelines on How to Work a Monster Led Light Remote
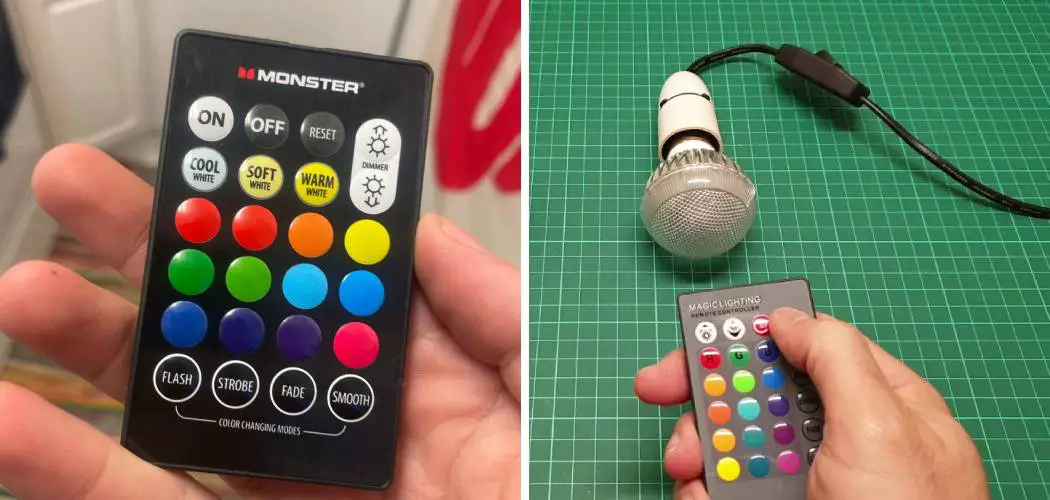
Step 1: Locate the Switch
Before you can get started with the Monster LED Light Remote, you will need to locate the switch that controls your lights. This could be a light switch, an outlet switch, or even a timer. Once you have located this switch, turn it on so that your lights are able to receive a signal from the remote. If you have any issues locating the switch, consult your user’s manual.
Step 2: Insert the Batteries
The Monster LED Light Remote requires two AAA batteries. Open up the battery cover on the bottom of the remote and insert them in the correct orientation. Once you have done that, make sure to close the cover securely. That way, no dust or moisture will get into the remote and damage it. It is also important to make sure the switch at the bottom of the remote is in the “off” position before you begin using it.
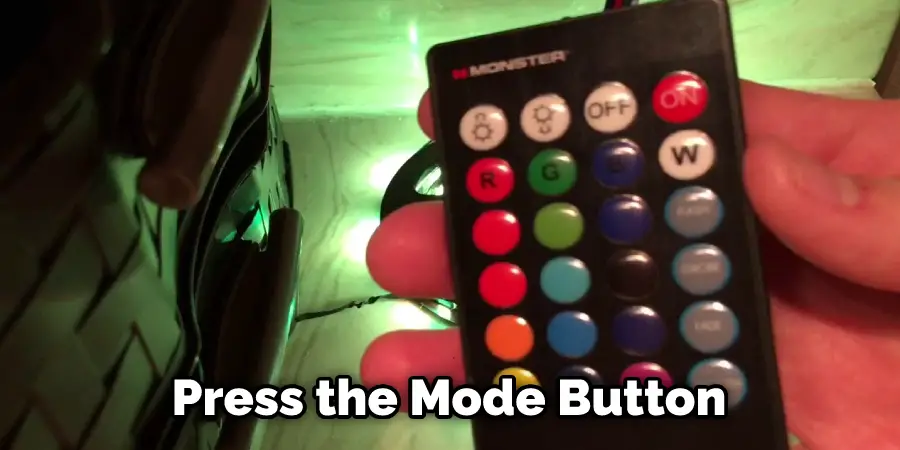
Step 3: Set the Mode
The Monster LED Light Remote has three different modes that you can choose from. The first is Manual Mode, which allows you to manually adjust the brightness and color temperature of your lights. The second is Scene Mode, which allows you to choose from a variety of preset lighting scenes. The third is Effects Mode, which allows you to create custom lighting effects. To switch between modes, simply press the mode button on the remote until you reach the desired mode.
Step 4: Adjust Settings in Manual Mode
If you are using Manual Mode, you can use the “+” and “-” buttons on the remote to adjust the brightness and color temperature of your lights. You can also press the “Auto” button to set the lights to their default brightness and color temperature. When you are finished adjusting the settings, press the “OK” button to save them. Make sure to press the “OK” button every time you make an adjustment in Manual Mode.
Step 5: Select a Scene in Scene Mode
If you are using Scene Mode, you can select from a variety of preset lighting scenes. Simply press the button with the scene you wish to use and it will automatically adjust the lights accordingly. You can also press the “Random” button to select a random scene. This is perfect if you don’t know what lighting scene you want to use. But if you prefer to choose a specific scene, use the “+” and “-” buttons to scroll through the available scenes.
Step 6: Create an Effect in Effects Mode
If you are using Effects Mode, you can create your own custom lighting effects. To do this, press the “+” and “-” buttons to adjust the speed, brightness, and color of your lights. Once you are happy with the settings, press the “OK” button to save the effect. You can also use the “Random” button to select a random effect. If you ever want to delete an effect, simply press the “Delete” button.
Step 7: Test Out Your Settings
Before you save your final settings, it is important to test them out. To do this, press the “Test” button on the remote and all the lights will turn on for a few seconds. This will give you a good idea of how your settings look before you save them. You can also press the “Back” button if you want to make any changes. That way, you can make sure that the settings you’ve chosen are just right.
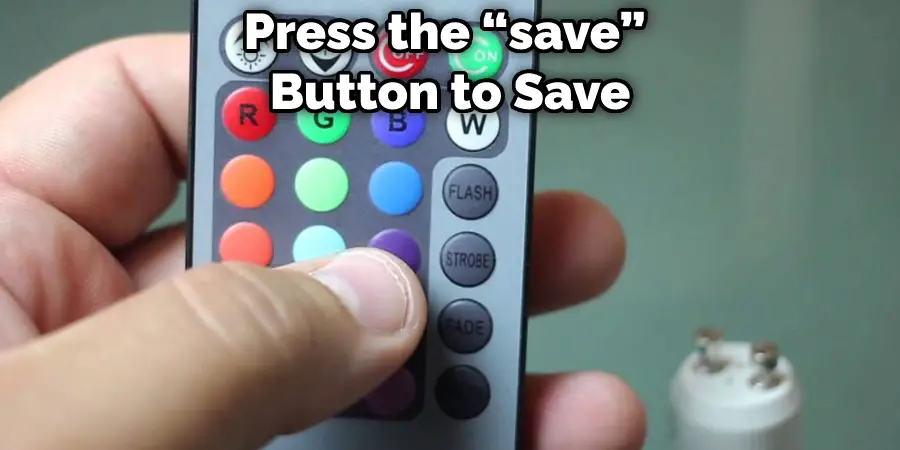
Step 8: Save Your Settings
When you are satisfied with your settings, press the “Save” button to save them. This will ensure that your settings are stored and can be easily accessed in the future. You can also use the “Back” button to go back and make any changes before you save them. That way, you will always have the perfect lighting setup. It is important to remember to press the “Save” button every time you make a change.
Step 9: Enjoy Your Lighting Setup
Now that you’ve set up your lighting, it’s time to sit back and enjoy it. With the Monster LED Light Remote, you can easily adjust and customize your lighting setup to create the perfect atmosphere. Whether it’s a bright white light for doing work or a cozy warm light for relaxing, you can do it all with the Monster LED Light Remote. So sit back, relax, and enjoy the beautiful lighting you’ve created!
Following these steps will ensure that you know how to work a monster led light remote. With this helpful guide, you can easily and quickly set up your lighting setup for any occasion! So take a few minutes to read through this guide and start creating the perfect lighting environment for you. With Monster LED Light Remote, you can easily control and customize your lighting setup to create the perfect atmosphere. So what are you waiting for? Try it out today!
What is the Use of Monster Led Light Remote?
Monster LED Light Remote is a great way to control and customize the lighting in your home or office. With the Monster LED Light Remote, you can easily adjust the brightness, color, and temperature of your lights. You can also select from a variety of preset lighting scenes or create your own custom lighting effects. This makes it easy for you to create the perfect atmosphere in any room. Whether you are looking to relax or focus, the Monster LED Light Remote has you covered. So try it out today and start creating the perfect lighting setup for you!
Do You Need to Use Professionals?
Although the steps outlined above are straightforward, they do require some technical knowledge. If you feel uncomfortable carrying out any of these steps yourself, then it is best to seek out the help of professionals.
Professionals can carry out all of these steps for you, ensuring that your Monster LED Light Remote is set up correctly. They can also advise you on any additional steps that you may need to take in order to get the best out of your lighting setup.
So if you’re feeling unsure about setting up your Monster LED Light Remote, then it may be best to leave the job in the hands of professionals. They will ensure that your lighting setup is up and running in no time!

Frequently Asked Questions
Q: How Do I Adjust the Brightness and Color of My Lights?
A: You can use the “+” and “-” buttons on the remote to adjust the brightness and color temperature of your lights. You can also press the “Auto” button to set the lights to their default brightness and color temperature.
Q: How Do I Select a Scene in Scene Mode?
A: You can select from a variety of preset lighting scenes by pressing the button with the scene you wish to use. You can also press the “Random” button to select a random scene.
Q: How Do I Create My Own Lighting Effects?
A: In Effects Mode, you can create your own custom lighting effects by pressing the “+” and “-” buttons to adjust the speed, brightness, and color of your lights. Once you are happy with the settings, press the “OK” button to save the effect.
Q: How Do I Test Out My Settings?
A: To test out your settings, simply press the “Test” button on the remote. All of the lights will turn on for a few seconds, giving you an idea of how your settings look. You can also press the “Back” button if you want to make any changes.
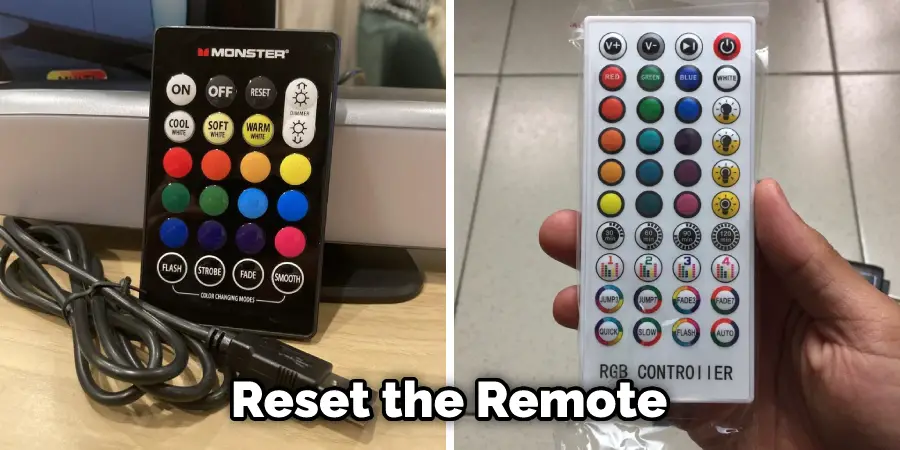
Q: How Do I Reset the Remote?
A: To reset the remote, press and hold the “Reset” button for 3 seconds. All of your settings will be reset to their default values.
Conclusion
Using the Monster LED Light Remote is a great way to easily and quickly create your perfect lighting setup. With it, you can adjust and customize the brightness, color temperature, speed, and effects of your lights with just a few clicks or taps.
You can also test out settings before saving them by pressing the “Test” button on the remote. And don’t forget that if you ever want to delete an effect from Effects Mode, simply press the “Delete” button!
All in all, this guide has provided helpful tips for working with your Monster LED Light Remote so that you can enjoy beautiful lighting anytime. Now that you know how to work a monster led light remote correctly and confidently, go ahead and start creating amazing lighting setups today!
You Can Check It Out to Fix Led Light Remote Wrong Colors