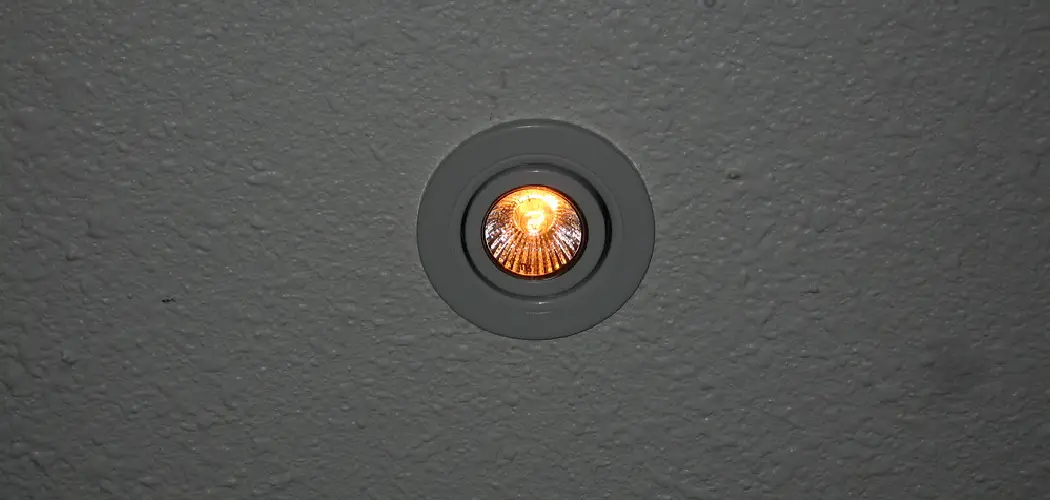
Are you looking for a cost-effective lighting solution that is both versatile and stylish? Recessed lighting perfectly balances form and function, making it an ideal option for any home.
If you’re someone who likes to stay up-to-date with the latest home decor trends, then you have probably noticed that recessed lighting is growing in popularity. Whether your style leans toward modern minimalism or cozy traditional vibes, adding a few dimmable recessed lights can go a long way in completing the look of any room. It may seem intimidating to install them yourself, but don’t worry – we’ve got all the information and tips you need to make it easy!
In this blog post, we’ll outline everything from essential supplies to setup steps on how to make recessed lights dimmable so that by the end of it, you’ll be ready to enjoy your own stylishly illuminated space.
What is the Use of Dimmable Recessed Lights?
Dimmable recessed lights offer a few key benefits when compared to other forms of lighting. For starters, they can be used to create an ambient mood during cozy nights in or for entertaining guests. The ability to control the light intensity also makes dimmable recessed lights great for tasks that require focused illumination, like cooking in the kitchen or working at a desk.
Additionally, dimmable recessed lights can help you save energy when they are used correctly. Since they use LED bulbs that consume less electricity than traditional lightbulbs and fluorescent lighting, your energy bills will be lower than if you were using other lighting solutions for your home.
What Will You Need?
Before you start installing your dimmable recessed lights, it’s important to ensure you have all the necessary materials. Here is a list of things to have ready before beginning:
- Recessed lighting fixtures
- LED bulbs (for maximum energy efficiency)
- Dimmer switch or control module
- Screwdriver
- Wire cutters
- Electrical tape
- Access to a power source
Once you have all your supplies, the next step is to install the dimmable recessed lights.
10 Easy Steps on How to Make Recessed Lights Dimmable
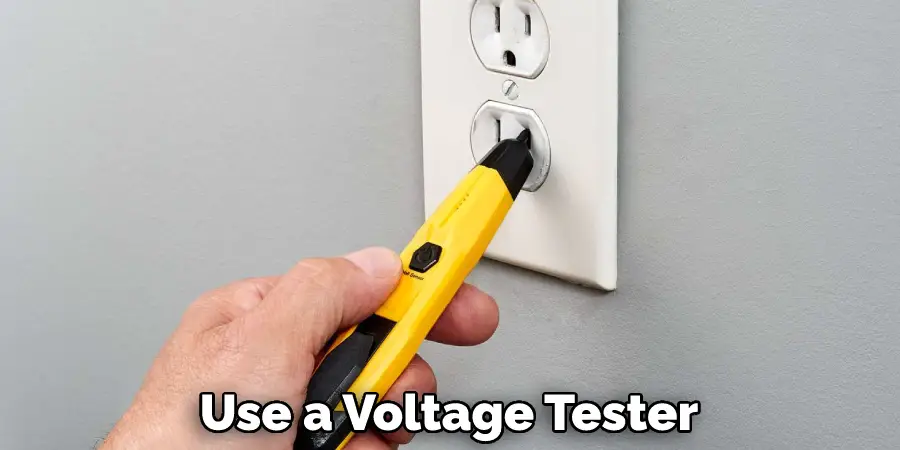
Step 1. Turn Off the Power:
Start by turning off the power at the circuit breaker to avoid any potential electrical shocks. You can use a voltage tester to make sure the power is completely turned off before you begin. It will also help to ensure that all the switches in the room are turned off before you begin.
Step 2. Remove Existing Fixture:
Unscrew and remove the existing recessed light fixture from its housing. It may also be necessary to detach any wires that are connected to the existing unit. Additionally, make sure to disconnect the ground wire before you proceed.
Step 3. Install LED Bulbs:
Unscrew the bulb from your new dimmable recessed light fixture and insert an LED bulb into it. Make sure to secure it tightly so that it doesn’t come loose during installation. If you’re using a control module, it may be necessary to connect the LED bulbs to it before continuing.
Step 4. Connect Wiring:
Connect the same wiring that was disconnected in Step 2 to your new dimmable recessed light fixture, making sure all connections are securely fastened with electrical tape or wire nuts if necessary. It’s important to make sure that all wires are connected correctly and verify the connections with a voltage tester before continuing. As an extra precaution, you may also want to test the light switch in the room before connecting the power again.
Step 5. Install Fixture:
Carefully place your dimmable recessed light fixture into the housing, making sure it fits snugly. Secure it with screws before you move on to the next step. You can use a level to ensure that the fixture is properly aligned and even.
Step 6. Connect Dimmer Switch:
The dimmer switch or control module will be used to regulate the intensity of your dimmable recessed lights. Connect it according to the manufacturer’s instructions, and make sure all wires are securely fitted in place. Be careful not to overtighten the screws, as this can cause damage.
Step 7. Test Lights:
Once everything is connected, turn on the power at the circuit breaker and test out your new dimmable recessed lights by turning them on and off manually or via a remote control, if applicable. Ensure that the switch is working properly and the lights are functioning before you move on to the next step. Otherwise, you may need to re-check your wiring and connections.
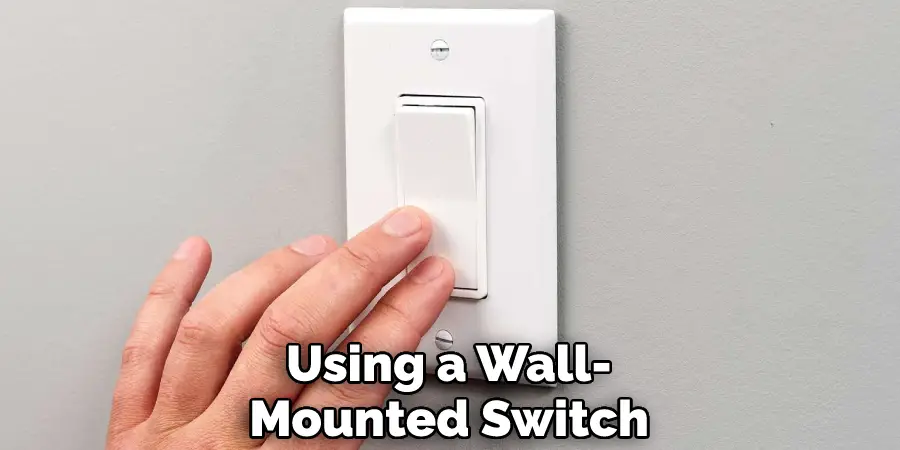
Step 8. Mount Wall Controls:
If you’re using a wall-mounted switch or remote control, mount it in a convenient spot that’s easily accessible. Make sure to follow the manufacturer’s instructions for mounting if necessary. Don’t forget to secure the switch in place with screws.
Step 9. Adjust Lighting Intensity:
Now you can adjust the intensity of your dimmable recessed lights by using the switch or control module. Try out different settings to see what looks best in your space and play around with different effects like fading, strobing, etc., as desired. If you’re using a remote control, make sure that all devices are connected properly and test them out first.
Step 10. Enjoy Your New Lights:
And there you have it! Thanks to your newly installed dimmable recessed lights, you now have stylishly illuminated space! Sit back and enjoy your handiwork – you deserve it! Remember to turn off the power at the circuit breaker when you’re done, and never leave any wires exposed.
By following the steps above, you can easily and safely make recessed lights dimmable. With a few simple tools, you’ll have your space illuminated just the way you want. Enjoy your new lighting setup!
5 Additional Tips and Tricks
1. If you want to make sure that your recessed lights are dimmable, check the wattage rating of your lightbulbs. Some bulbs require a specific wattage for compatibility with dimmers and switches.
2. Avoid installing halogen bulbs in recessed lighting fixtures, as these can generate a lot of heat, which can cause damage to the fixture or other components.
3. Before installation, measure the space between each recessed light to ensure they will fit correctly into place without compromising their functionality or aesthetics.
4. When buying dimmer switches for your recessed lights, consider one with an adjustable range-of-light setting so you can tailor the mood and brightness of each room accordingly.
5. For added convenience, try installing a digital dimmer switch that can be connected to your home’s smart devices. This would allow you to control the lights remotely and set up automated schedules and dimming levels.
By following these simple tips, you can ensure that your recessed lighting fixtures are attractive and highly functional in any room of your home. With careful installation and selection of compatible components, your recessed lights will provide beautiful illumination for years to come.
5 Things You Should Avoid
1. Don’t Use Bulbs Labeled “non-dimmable.” : Even if your recessed lights are rated for dimming, the bulbs you use must also be dimmable. Using non-dimmable bulbs will cause your lights to flicker or buzz and could even damage the circuit and cause a fire hazard.
2. Don’t Forget to Check Compatibility: When choosing dimmable LED light bulbs, ensure they are compatible with the recessed lighting and any applicable wall controls in your home. The wrong bulb type may not work properly or be unsafe for your circuit.
3. Don’t Install Incompatible Controls: Your chosen wall control should be compatible with the recessed lighting and the types of bulbs you plan to use. If it isn’t, you won’t have full dimming capabilities and may end up with flickering, buzzing lights or no dimming at all.
4. Don’t Overlook the Wattage: When choosing bulbs for your recessed lighting, make sure they don’t exceed the wattage capacity of the light fixture. Bulbs that draw too much power can cause the circuit to overload and potentially put you at risk of a fire hazard.
5. Don’t Bypass Installation Instructions: Take a few minutes to read through your specific product’s installation instructions and follow them carefully. If not done correctly, you could damage the recessed lighting or wiring in your home and unnecessarily put yourself and others in danger.
By following these tips, you can ensure that your recessed lighting is dimmable and safe. With the right components, you can create a warm and inviting ambiance in any room of your home.

Conclusion
Making recessed lights dimmable is a great way to increase the overall ambiance of any room in your home. Not only is it easy and relatively inexpensive, but it also offers an array of unique and interesting options for you to choose from.
Whether you’re trying to save electricity or just want more lighting diversity in your home, making recessed lights dimmable can be a great idea for anyone. It’s convenient for households with children as well as those who want to provide different atmospheres for social gatherings. Recessed lights can offer dramatic sparks of color and an inviting atmosphere for any event, providing the perfect backdrop.
With a few simple steps on how to make recessed lights dimmable, you can make recessed lights dimmable in no time and enhance the beauty of your home’s interior design. So why not give it a try? You might be surprised at the result!