Have you ever wanted to install a light but didn’t know how to mount it? In this blog post, we will show you how to easily mount lights to the headliner in your vehicle. We will provide step-by-step instructions, as well as tips and tricks, so that you can have professional-looking results.
So, whether you’re installing a new set of headlights or adding some extra lighting for off-road use, keep reading for all the information you need. If you’re looking to add some extra lighting to your car but don’t want to drill into the dashboard or use adhesive tape, then mounting the lights to the headliner may be a good option for you. This blog post will show you how to mount lights to headliner in a few simple steps. Let’s get started!
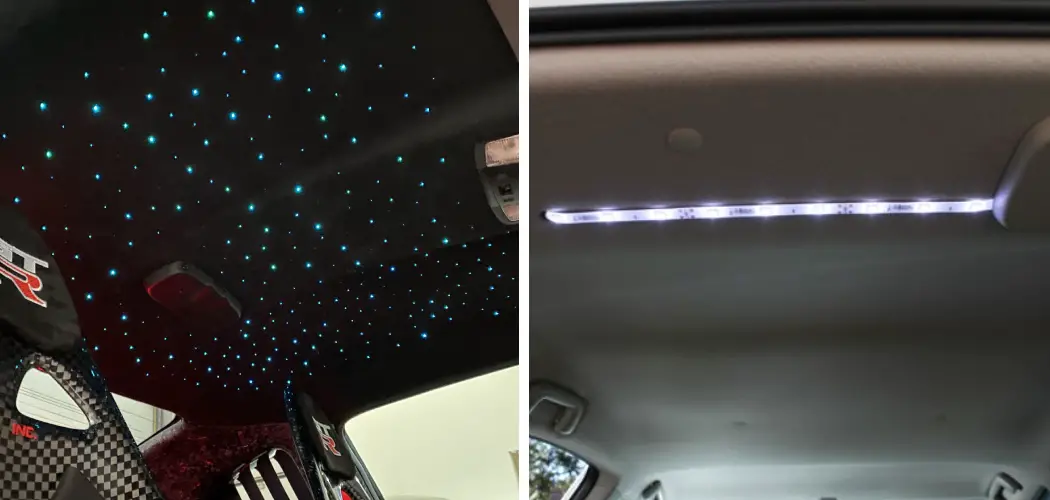
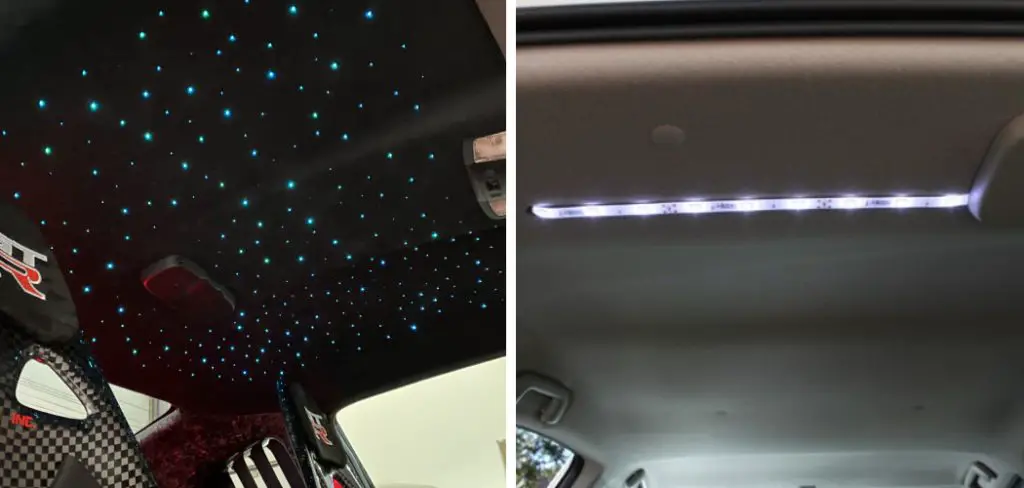
Summary: If you’re looking to add a little extra touch of class to your car, consider mounting some lights to the headliner. This can be a fun and easy way to spruce up your ride, and it’s also a great way to keep your car looking clean and fresh.
Why May You Need to Mount Lights to Headliner?
There are many reasons why you may want to mount lights to your vehicle’s headliner. Such as:
1. To Add Extra Lighting
Mounting lights to your headliner can add extra light for nighttime driving or off-roading. It will also make your vehicle more visible to others on the road. So if you want to upgrade your vehicle’s lighting capabilities, mounting lights to the headliner is a great option.
2. Aesthetic Appeal
Mounting lights to the headliner can also add a stylish and unique touch to the interior of your vehicle. This can be especially appealing for show cars or those who want to make their ride stand out from the crowd.
3. Functionality
Mounting lights to the headliner can also provide additional functionality for things like reading maps or finding items in your car at night. So if you want to enhance the lighting in your vehicle or add a touch of style, mounting lights to the headliner is the way to go.
4. To Give Your Vehicle a Custom Look
Mounting lights to your headliner can give your vehicle a unique, custom look that sets it apart from other vehicles. So if you want to add a personal touch to your ride, mounting lights to the headliner is a great option.
How to Mount Lights to Headliner in 7 Easy Steps
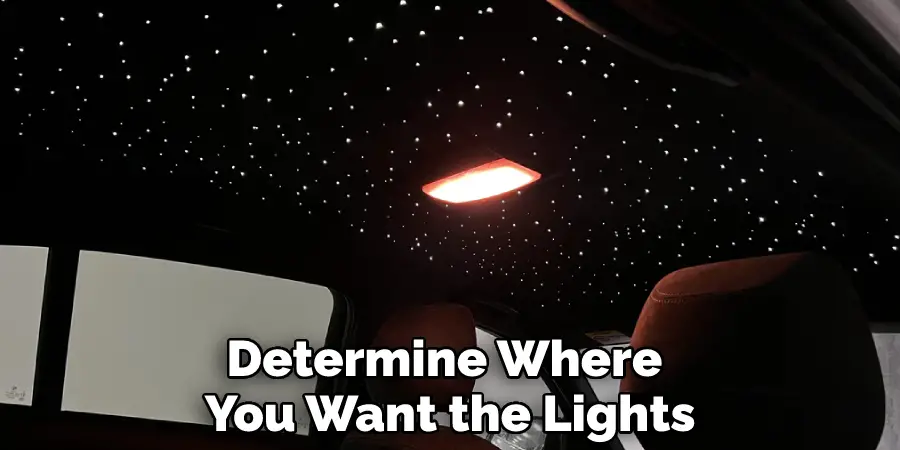
Step 1: Choose a Location Lights
Determine where you want the lights to be mounted on the headliner. You have to make sure that the lights do not interfere with the driver’s visibility or obstruct any safety features in the car. Also, be careful not to place the lights too close to any sensitive materials like airbags.
Step 2: Measure and Mark
Measure the area where the lights will be mounted and mark it with a pencil or marker. This ensures that the lights will be placed in a straight line. But make sure to leave some extra room for adjustments. Also, be careful not to mark any sensitive materials.
Step 3: Drill Holes
Using a drill and the appropriate size drill bit, carefully drill holes in the marked spots on the headliner. Make sure to go slow and steady to avoid tearing or damaging the headliner material. Also, be careful not to damage any wires or equipment behind the headliner.
Step 4: Install Mounting Brackets
Using screws and a screwdriver, secure the mounting brackets onto the drilled holes on the headliner. Make sure they are properly secured and not loose. You have to be extra careful not to damage the headliner or any equipment behind it.
Step 5: Attach Lights to Mounting Brackets
Carefully attach the lights to the mounting brackets, making sure they are securely fastened. You have to be careful not to damage the lights or the headliner material. Also, be careful not to block any safety features in the car or obstruct the driver’s vision.
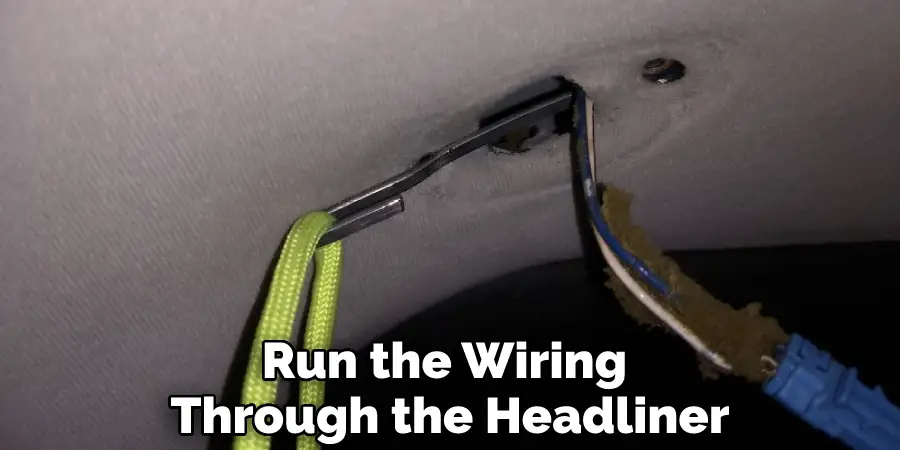
Step 6: Connect Wiring
Follow the instructions for your specific lights to properly connect and secure the wiring. Make sure all connections are tight and secure to prevent any potential hazards. Also, be careful not to damage any wiring or equipment behind the headliner.
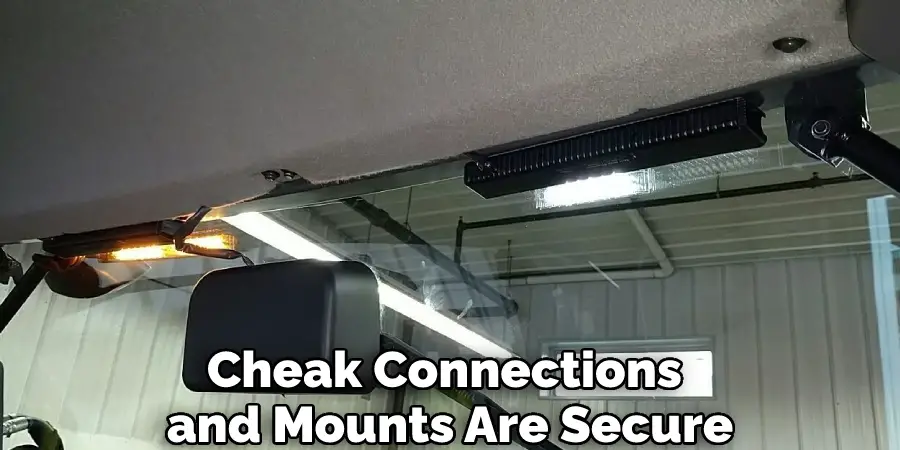
Step 7: Test Lights
Test the lights to make sure they are functioning properly and adjust accordingly. Make sure to double-check that all connections and mounts are secure before driving the car. If you find any issues, fix them before driving to prevent any potential hazards.
Following these steps will help ensure that your lights are properly and safely mounted on the headliner.
Some Additional Tips to Mount Lights to Headliner
1. Choose the Right Light Mount
Make sure the mount you choose is compatible with your specific type and size of light. Also, keep that in mind while choosing a location for the mount on your headliner. Make sure it won’t block your visibility or be in the way of any other equipment inside the vehicle.
2. Use Adhesive Hooks
If drilling into the headliner is not an option, using adhesive hooks can provide a secure mounting point for your lights. Just make sure to thoroughly clean and dry the area before applying the hook to ensure a strong bond.
3. Use a Drill
Drilling into the headliner is the most secure way to mount your lights, but make sure to use the appropriate drill bit and go slowly to avoid damaging the material. Also, it’s a good idea to mark the spot where you want to drill with a pen or pencil before starting.
4. Use Zip Ties
Zip ties can also provide a secure mounting point, but make sure to use the stronger and thicker ones that are rated for the weight of your lights. And as with adhesive hooks, thoroughly clean and dry the area before attaching the zip tie to ensure a strong hold.
5. Consider Wiring
Before mounting your lights, think about how you will wire them. Will you need to run the wiring through the headliner or along the edges? Plan this out before drilling or attaching mounts to make the process easier and avoid any unnecessary damage.
Frequently Asked Questions
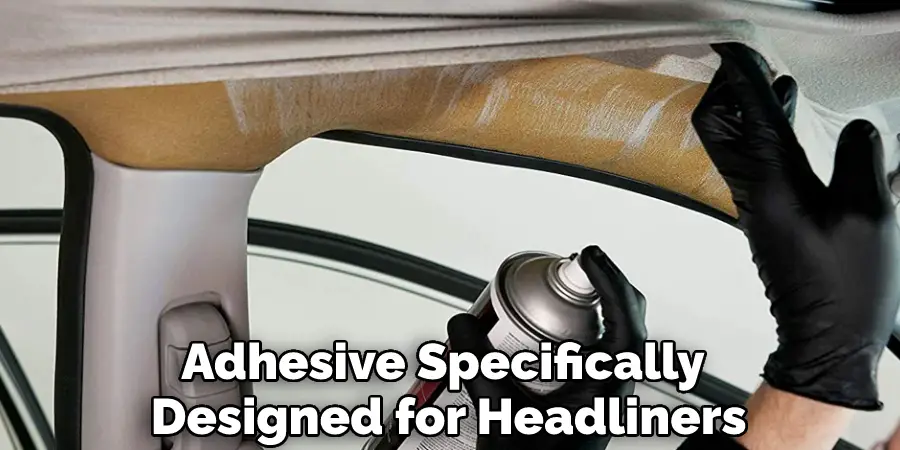
What Adhesive Do You Use for Headliners?
It is important to use a foam-safe adhesive, such as 3M Super Trim Adhesive or OEM-specified headliner adhesive. But make sure to follow the manufacturer’s instructions for proper application.
Can Lights Damage a Headliner?
It is possible, especially if they are not installed properly. Make sure to use foam-safe adhesive and follow the manufacturer’s instructions to ensure proper installation and avoid damaging the headliner. Additionally, it may be helpful to distribute the weight of the lights by using mounting brackets.
Is Gorilla Glue Spray Adhesive Good for Headliners?
It is not recommended to use Gorilla Glue Spray Adhesive as it may not be foam-safe and may damage the headliner. It is best to use an adhesive specifically designed for headliners, such as 3M Super Trim Adhesive or OEM-specified headliner adhesive. Always follow the manufacturer’s instructions for proper application.
Can You Use Any Spray Adhesive on a Headliner?
No, it is important to use a foam-safe adhesive specifically designed for headliners, such as 3M Super Trim Adhesive or OEM-specified headliner adhesive. Using any other type of spray adhesive may damage the headliner. Always follow the manufacturer’s instructions for proper application. It is also helpful to distribute the weight of the lights by using mounting brackets.
Will Fabric Glue Work on a Headliner?
It is not recommended to use fabric glue on a headliner as it may not be foam-safe and may damage the material. It is best to use an adhesive specifically designed for headliners, such as 3M Super Trim Adhesive or OEM-specified headliner adhesive. Always follow the manufacturer’s instructions for proper application. It is also helpful to distribute the weight of the lights by using mounting brackets.
Conclusion
Now that we’ve gone over the best way how to mount lights to headliner. It’s not as difficult as it might seem to mount lights to your headliner. With a few tools and careful planning, you can easily add accent lighting to your car. Be sure to take the time to test different locations and find the best place for the light before permanently attaching it. By following these simple steps, you’ll have great-looking headlights in no time.
Thanks for reading! We hope you found this blog post helpful. These are just a few tips on how to mount lights to your headliner. If you have any questions or would like help, feel free to reach out to us via the comment below. We’d be happy to assist you in getting your new lights installed and looking great!