Are you looking for a unique, creative way to customize your clothing? Sewing LED lights into fabric is an interesting and impressive technique that can add a touch of brightness (literally) to your wardrobe! It’s not difficult to do, and you can use it to create simple designs and words or add light-up accents to your clothing.

By learning how to sew led lights into fabric seams, you can take your favorite clothing items and make them stand out even more. This blog will walk through the basics of sewing LEDs into fabrics so that you can illuminate any garment most stylishly. So get equipped with needles, thread, and batteries—we’re about to start illuminating clothing!
Different Types of Led Lights
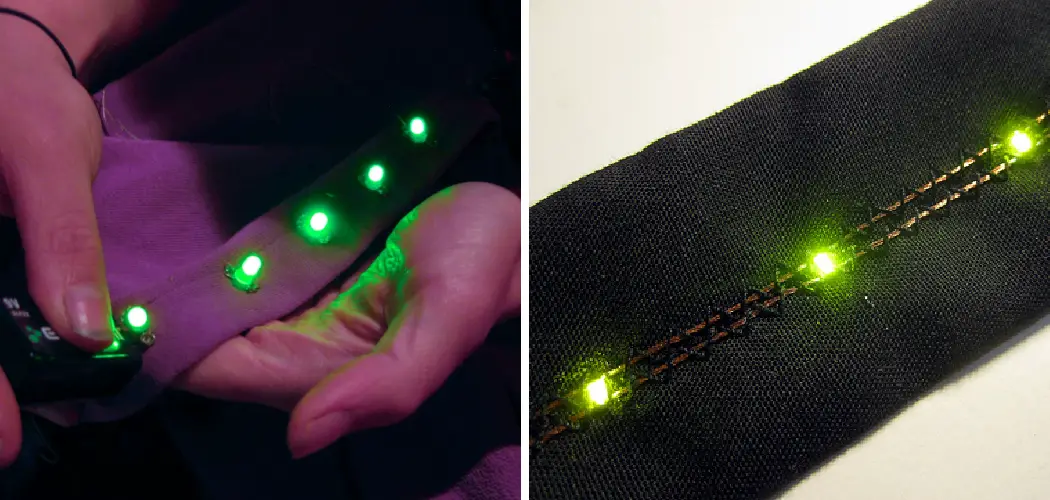
You can use two types of led lights to sew into the fabric: sewable circuit boards or sewable LEDs. Sewable circuit boards are used in larger projects and feature a pre-attached LED, battery holder, and on/off switch.
You can also get individual sewable LEDs that are tiny and require connecting to a battery or power supply. Sewable LEDs come in a variety of colors and have the advantage of being able to be sewn into any pattern or shape.
Sewable circuit boards are sometimes called “light-up patches” and come in many shapes and sizes. Sewable LEDs are typically identified by their size, such as
- 1mm LED
- 2mm LED
- 5mm LED, etc.
We will use sewable LEDs that require a battery and power source for this tutorial.
Choosing the Right Led Lights
When selecting LED lights for your project, it is important to consider the following factors:
• Brightness/ Intensity – The higher the number of lumens (a measure of light intensity), the brighter your LEDs will be.
• Size/ Shape – Consider what size and shape best fits your project’s needs.
• Battery Type – Depending on the type of LED, you may need to use button batteries or some other type.
• Cost – LEDs come in various prices, so shop around for deals.
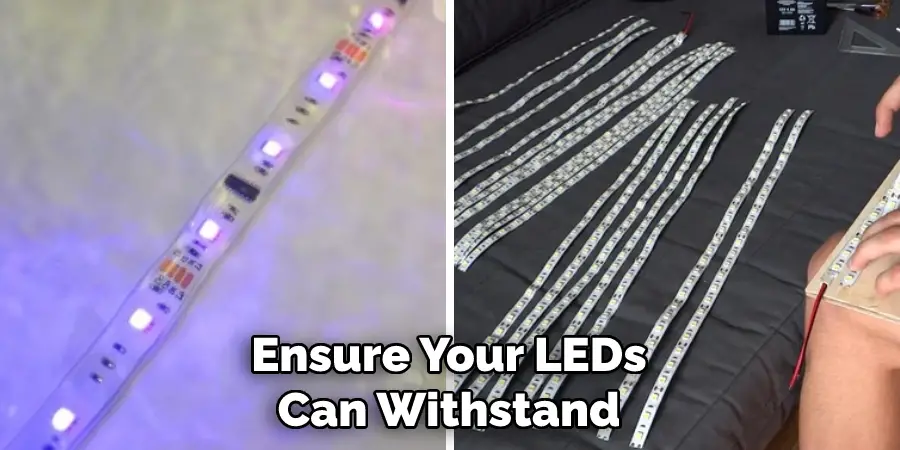
• Durability – Ensure your LEDs can withstand being washed and handled without breaking down.
Necessary Items You Will Need
- LED lights (You can buy these in bulk for a low cost from e-commerce sites. They usually come on strings or strips.)
- Needle
- Thread
- Batteries (for the LEDs)
- Scissors
- Fabric of your choice
With these things in hand, let’s get started. Here are 10 easy steps of how to sew led lights into fabric.
10 Easy Steps on How to Sew Led Lights Into Fabric
Step 1: Deciding the Pattern
decide on the pattern or design you want to create with the LEDs. You can choose to make simple lines, shapes or words. It will be easier to plan it out on paper first to get a better idea of how your design will look.
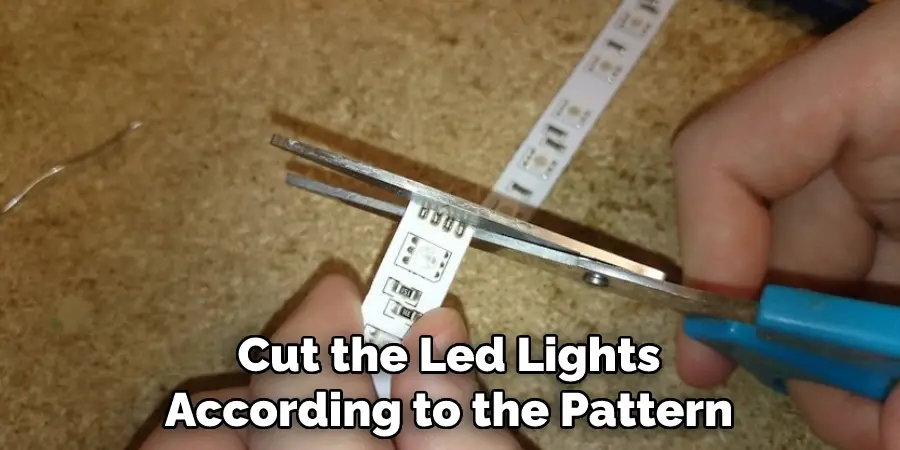
Step 2: Cut LED Lights
Cut the LED lights according to the pattern or design you want to make. Make sure no loose ends are hanging off. It will be easier to sew them into fabric if you have all the pieces ready. If the LED lights come on a string, you can use scissors to cut them into individual pieces.
Step 3: Cutting the Fabric
Cut a piece of fabric slightly larger than your LED design. This will give you some extra room when sewing it onto the garment or item. Cutting in sizes will also make it easier to sew.
Step 4: Placing LED Light
Place the LED lights onto the fabric and secure them with tape. This will ensure that they don’t move while you stitch them onto the fabric. Use pins to mark the locations on the fabric if necessary. Ensure the tap is not too sticky as it can pull up the fabric fibers.
Step 5: Choosing the Right Tape
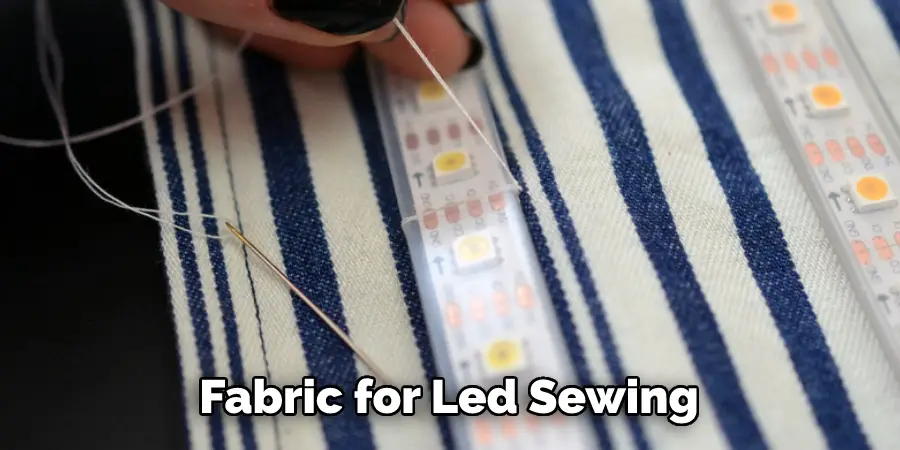
Thread your needle with a strong, thick thread. The thread must be able to handle the weight of the LEDs. The thick thread will also make the stitching more secure. Then it will be easier to sew the LEDs onto the materials.
Step 6: Making a knot
Make a knot at one end of your thread, and sew the leds onto the fabric. Start near the corner or edge of the fabric and work your way around until all of the LED lights are securely attached. Make sure to stitch tightly, so the LED lights stay in place.
Step 7: Making a Hole in the Battery
Once all of the LEDs are sewn onto the fabric, make a small hole at one end of your design. This is where you will put the battery to turn on and power up your LEDs. Again, make sure it is small enough so that the battery will fit snugly but not too small that it won’t hold the battery.
Step 8: Inserting Battery
Insert the battery into the hole and test your LED design to ensure all lights work. If one or more lights aren’t lighting up, try re-stitching that area to ensure it is securely attached.
Step 9: Sewing the Other End of The Battery
Once you have confirmed that all the LEDs are working, sew up the other end of the battery hole so that it is secure and won’t move around. This will also help prevent moisture or dirt from entering the hole and damaging your LED design.
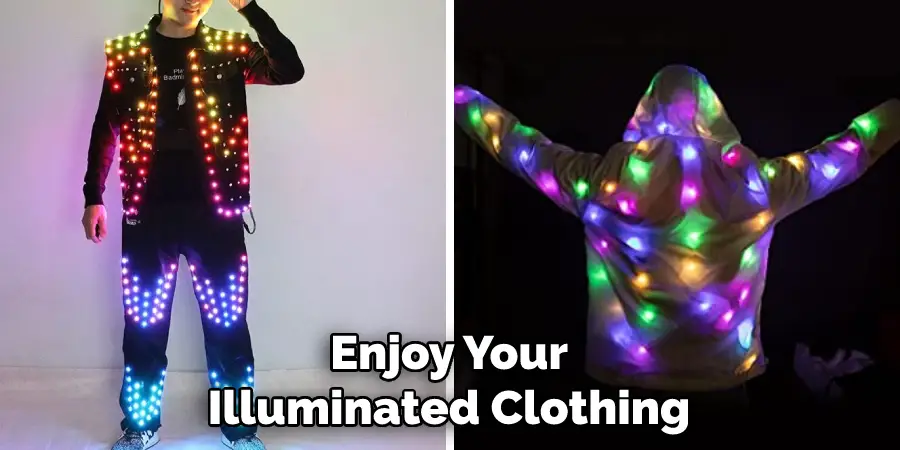
Step 10: Enjoy Your Illuminating Clothes
And that’s it! You are now ready to enjoy your illuminated clothing. If you followed these steps correctly, your LED design should be securely attached and able to light up for a long time. Now go out and show off your illuminating clothes to the world!
8 Safety Measures to Take While Sewing
1. Wear protective eyewear while working with the LEDs to protect your eyes from any sharp edges. To protect you from getting any stray pieces of thread in your eyes.
2. Make sure always to use the proper tools for each job. For example, make sure to use a hand-sewing needle instead of a machine one when working with delicate fabrics or small LEDs.
3. Be careful not to pull too hard on the fabric while sewing, as this can cause it to tear or fray. Likewise, be careful not to pull too tight on the thread, as this can cause it to break.
4. Work in a well-lit area when sewing so that you can see what you are doing and make sure all of your stitches are secure. Otherwise, you risk forgetting an LED or damaging the fabric.
5. Make sure to wear gloves when handling the LEDs and other small pieces, as these can be sharp and cause cuts if handled without protection. Without gloves, you might also transfer any oils or dirt onto the LEDs, which can interfere with their functionality.
6. Take regular breaks while sewing to rest your eyes and hands, as they can become strained from extended work periods. Additionally, taking breaks will help ensure that your stitching is more accurate and secure.
7. Read through all instructions before beginning any project to familiarize you with the necessary steps and materials. This will help you avoid making any costly mistakes and ensure your LED design is properly secured.
8. Make sure to use a low-temperature iron when pressing fabric for LED sewing, as high temperatures can cause the LEDs to melt or become damaged in some way.
How Long Will It Take to Finish the Project?
The amount of time it takes to complete your LED project will depend on the complexity of the design and how many LEDs you are sewing. On average, a simple design with only a few LEDs can take anywhere from an hour to a couple of hours. However, depending on the number and type of LEDs you work with, more complex designs can take several hours or even days.
Frequently Asked Questions
Will LED Lights Fade Fabric?
There are a few factors that can play into this, such as the type of LED light being used, the intensity of the light, and how often the light is used. Additionally, different fabrics will react differently to the light; for example, some fabrics may become more faded over time while others may not. As with any question regarding fading or damage caused by LED lights, it is always best to consult a professional if you are unsure about how to prevent or deal with this issue.
Is It Safe to Put Cotton on LED Lights?
The safety of using cotton on LED lights depends largely on the type of LED light being used and the amount of cotton used. Some LEDs are more sensitive to moisture than others, and if too much cotton is applied to the light bulb, it may cause it to burn out or fail prematurely. If you are unsure about how much cotton to use, it is best to contact an expert in the field to get advice.
Can I Cover an LED Light With Fabric?
Yes, you can cover an LED light with fabric to create a cozy and stylish lighting solution. To do this, first measure the dimensions of the LED light and then cut a piece of fabric to fit snugly around the light. Next, stitch the fabric onto the back of the LED light using a needle and thread, making sure to evenly distribute the stitching throughout the entire surface of the light. Finally, turn on the light and enjoy your new cozy lighting solution!
Are LED Lights Safe Near Fabric?
The safety of LED lights near fabric depends on a variety of factors, including the type of LED light, the wattage of the light, and the distance between the light and the fabric. Some factors to consider when deciding whether or not to use LED lights near fabric include:
- The type of LED light you are using. Some LED lights are specifically designed for use near fabric, while others may not be safe to use near fabric at all.
- The wattage of the LED light. Larger wattage lights may be more dangerous than smaller wattage lights because they generate more heat and are more likely to cause fires.
- The distance between the light and the fabric. The closer the light is to the fabric, the greater the risk of damage or injury.
- The condition of the fabric. If the fabric is delicate or exposed to moisture, it may be more susceptible to damage from LEDs.
Ultimately, it is important to test any LED light before using it near fabric to ensure that it is safe and will not cause damage or injury.
Conclusion
From beginner to advanced, these tips will get you up and running with sewing LED lights into the fabric. Whether you’re working on a costume or a dress or want to add some flair to your clothing, this tutorial gives you everything you need to bring a sparkly, LED, light-filled vision to life! Gather all the necessary supplies first, plan your vision precisely before starting, and use the correct tools for added success.
Nothing can take the place of practice and patience for perfecting this skill – it takes time to create something beautiful! Remember that safety comes first and always be prepared in case of fire. Finally, follow how to sew led lights into fabric and let your creativity soar as you embark on this unique journey of crafting something unique with LED lights!
You Can Check It Out To Add a Ceiling Light to a Switched Outlet