Installing boat lights to a switch can be intimidating, but it doesn’t have to be! With just a few simple steps and the right tools, you can easily wire your own boat lights and create an amazing atmosphere in no time. Whether you’re looking for decorative light-up features or practical navigation lighting, wiring your own set of boat lights is simpler than you might think.

In this blog post, we’ll take you through all the basics on how to wire boat lights to switch so that they illuminate as needed. You’ll learn which materials are required for installation, tips for connecting wires correctly and securely, and some helpful advice on choosing the perfect marine switch style for any application.
If you’ve been dreaming of customizing your favorite watercraft with beautiful accent lighting– look no further—read on to discover how to get started today!
What Will You Need?
Before you get started, make sure you’ve gathered all the necessary materials for a successful installation. You’ll need the followings:
- Wire in the appropriate gauge (the thicker the wire, the more power it can handle).
- Marine-grade electrical switches.
- Heat shrink tubing to secure connections and protect wires from corrosion.
- Crimping tools and twist-on connectors for making secure connections between the switch and wiring.
- Soldering iron and electrical solder for additional security.
- An appropriate number of waterproof LED lights (make sure they are rated for the voltage you will use).
With these supplies in hand, you’ll be ready to move on to the wiring process!
Now that you have all the necessary materials, it’s time to begin the installation process.
10 Easy Steps on How to Wire Boat Lights to Switch
Step 1. Find a Suitable Location:
Start by finding a suitable location for the switch. Depending on the size of your boat, this can be either inside or outside the cabin. If you’re installing the switch outside, make sure to choose a covered spot that is protected from any harsh weather conditions.
Step 2. Prep Wires for Connection:
Use crimping tools and twist-on connectors to prep the wires for connection. Strip the insulation off each end of the wire, then use the crimper tool to attach it securely to the switch. Use heat shrink tubing to ensure the connections are secure and waterproof if needed.

Step 3. Connect the Wires:
With the wires prepped, it’s time to connect them in the correct order. Start by connecting one end of the wire to either side of the switch, then attach the other end of the wire to one terminal on each LED light. Repeat this process until all lights are connected.
Step 4. Secure Connections with Heat Shrink Tubing:
After making your connections, use heat shrink tubing or electrical tape to secure them and protect them against corrosion. Wrap each connection individually for best results, and ensure that any exposed metal is safely covered up before moving on to the next step. Don’t forget to leave some slack in the wires so that they are not stretched too tightly.
Step 5. Test Lights:
Once you’ve finished connecting all of the wires and securing them with heat shrink tubing, it’s time to test out your lights! Turn on the switch, and make sure that all the lights are working properly. You can also use a multimeter to test the connections if necessary.
Step 6. Solder Connections:
If you want extra security for your connections, use a soldering iron and electrical solder to join them together. This will help keep everything in place, even if the wire gets exposed to harsh elements or rough conditions while out at sea. Try to keep the soldering as neat and tidy as possible to avoid any unnecessary mess.
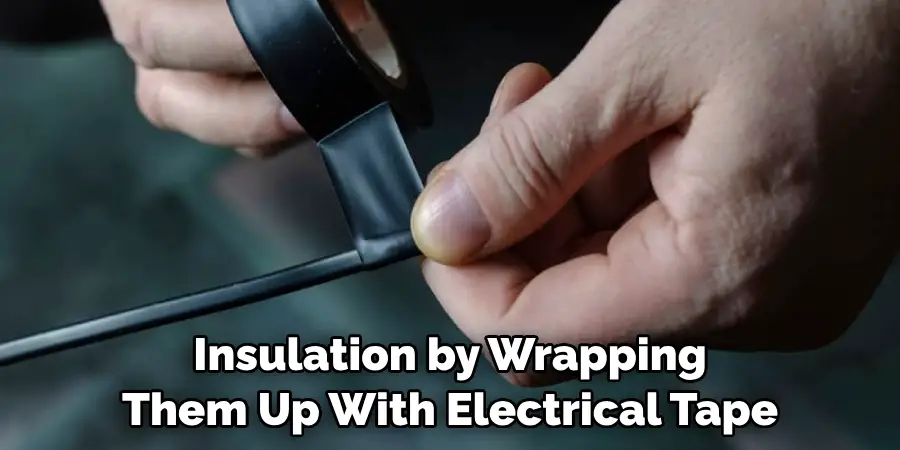
Step 7. Insulate Wires:
Now that all of your connections are secure and tested, add an additional layer of insulation by wrapping them up with electrical tape or heat shrink tubing once again. This will help protect against corrosion as well as any accidental shorts caused by loose wires. If you’re heat shrink tubing, make sure the tubing is large enough to cover the entire connection.
Step 8. Mount the Switch:
Once all of your connections are secure and tested, you can move on to mounting the switch in its desired location. Use screws or double-sided tape to mount it firmly, ensuring it won’t come loose when exposed to high winds or rough seas!
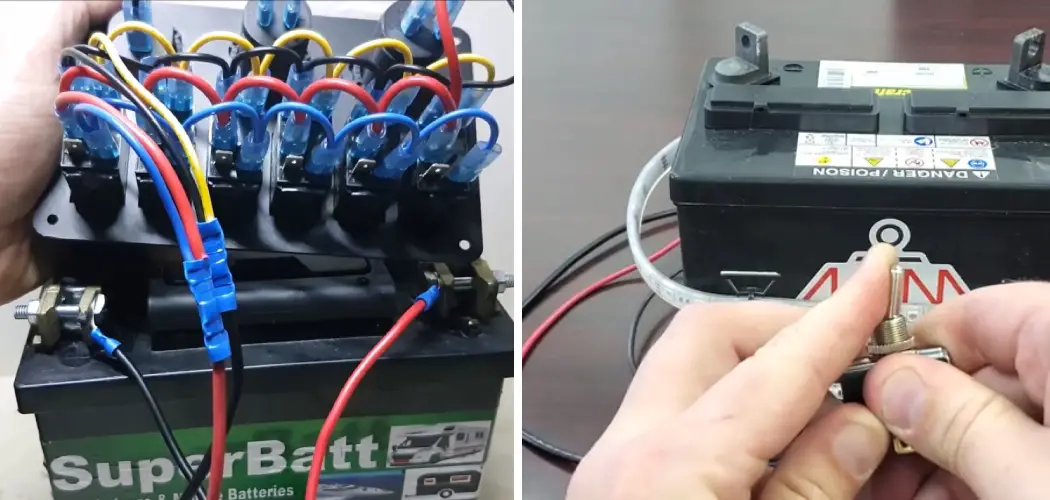
Step 9. Connect It to the Battery:
Now that your switch is mounted securely in place use additional wiring and connectors to connect it directly to the battery (or a power source, if applicable). Make sure all connections are tight and secure before testing out your lights again!
Step 10: Test Lights Again:
Once everything is connected and secured, test out your lights again just to make sure everything is working properly. If all the lights shine brightly, you’re ready to enjoy your newly wired boat lighting setup!
By following these steps, you can easily and quickly wire up boat lights to a switch. Make sure to double check all connections before exposing them to harsh conditions, as this will help keep both your wiring and lights in good condition for years to come. Have fun out on the water!
5 Additional Tips and Tricks
1. When wiring boat lights to a switch, always use the right gauge of wire. The type and thickness will depend on the power draw of the lights, so be sure to consult a qualified electrician if you’re unsure.
2. Make sure that all connections are properly insulated before testing them. This will help prevent short circuits or electrical fires in your boat.
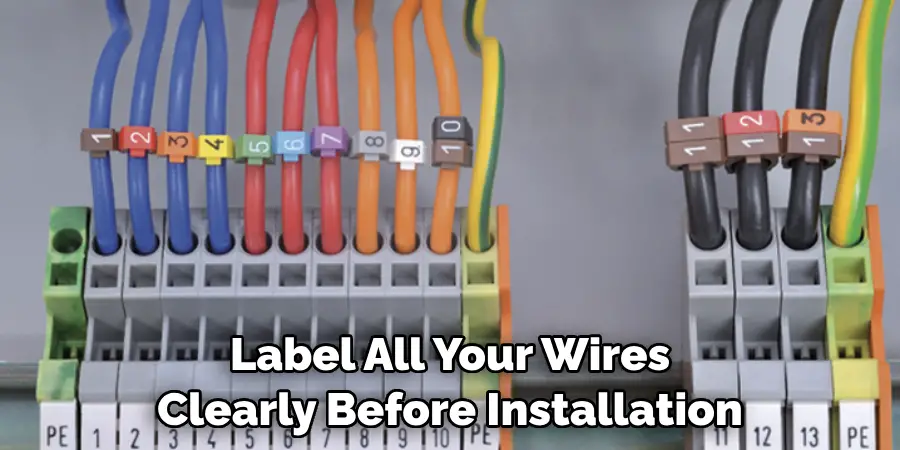
3. Label all your wires clearly before installation so you can easily follow them when troubleshooting later on. This will save you time and effort in the long run!
4. Use waterproof sealant around any connections exposed to moisture, such as those near bilge pumps or other wet areas of your boat.
5. Finally, make sure to test your wiring with a multimeter before using it to ensure that everything is working properly. This will help prevent any dangerous electric shocks or fires on board your boat.
Follow these tips and tricks for safely and efficiently installing boat lights on a switch! Not only will you save time, but you’ll also be able to enjoy your vessel without the worry of potential electrical hazards.
5 Things You Should Avoid
1. Never install a switch or any other electrical equipment near any source of flammable liquids or gases. This could create an explosive situation and result in serious injury.
2. Don’t use faulty, damaged, or counterfeit electrical components when wiring your boat lights. These can easily malfunction and cause dangerous electrical fire hazards on board.
3. Avoid using too thin of a wire gauge for your boat lights since this can overwhelm the circuit and result in overheating and potential fires.
4. Don’t attempt to install the lighting system yourself if you don’t have any experience with wiring circuitry – always hire a qualified electrician who is familiar with boats to do the job safely and correctly.
5. Don’t ignore any warning signs, such as sparks or smoke coming from your circuit – these may indicate an electrical problem that requires immediate attention. If you notice anything out of the ordinary, shut off the power and consult a qualified electrician to check out the issue immediately.
By following these tips and tricks when wiring boat lights to a switch, you can ensure that your lighting system is installed safely and correctly.
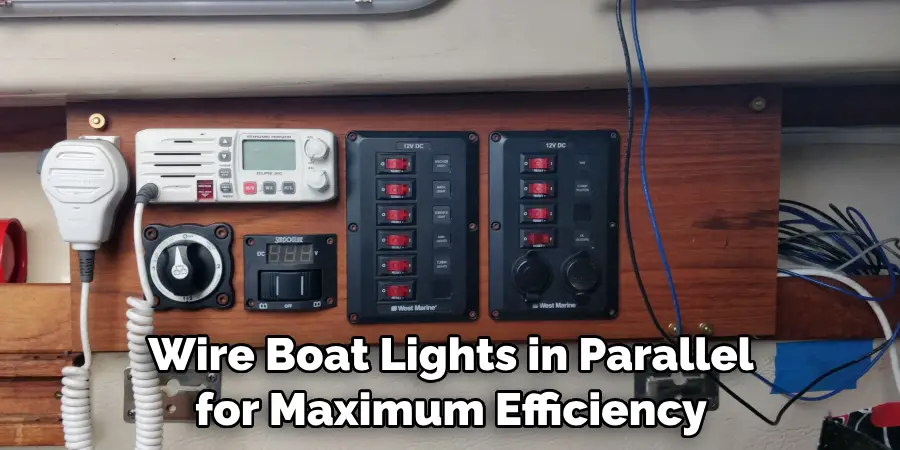
Are Boat Lights in Series or Parallel?
Boat lights are typically wired in parallel, meaning that each light is connected directly to the power source. This allows for more flexibility when wiring multiple lights since you won’t have to worry about exceeding the current rating of a single wire. It also makes troubleshooting and repairing much easier if needed.
Wiring boat lights in series also works, but it’s not as common or recommended due to the fact that each light will be affected by a load of other lights on the circuit. This can cause issues with dimming or flickering, which can be difficult to troubleshoot and repair.
Therefore, it is best to wire boat lights in parallel for maximum efficiency and ease of use for most applications.
Conclusion
Installing boat lights can be a daunting task. Taking the time to wire the lights properly correctly is paramount when it comes to a specular nautical display at night. Every boat will be slightly different in its design, which is why it’s important to follow the steps outlined in this blog post about how to wire boat lights to switch.
Regardless of the complexity of your project, with careful planning and well thought out actions, you will eventually achieve success. The greatest reward for all of your hard work will be seeing your beautiful setup light up the night sky in full glory!
Capturing that moment will be an unforgettable experience that will bring a smile to your face each and every time you think back on it.