
Are you looking to add some flair to your home décor by wiring LED lights to 120v? This blog post will walk you through the process of how to wire led lights to 120v. By following the simple steps outlined below, you can have your new LED lights up and running in no time! So what are you waiting for? Get started today!
Summary: There are many ways to wire led lights to 120v, but the easiest way is to use a male-to-male power strip. Simply plug each light into the strip, and then turn on the strip to power up the lights.
Why Should You Wire LED Lights to 120v?
There are a few reasons why you might want to wire your LED lights to 120v. Maybe you want to add some accent lighting to your living room or bedroom. Or maybe you’re looking for a way to light up your deck or patio for entertaining. Wiring LED lights to 120v is a great way to add some extra light to your home.
Another reason to wire your LED lights to 120v is that it provides a more consistent light output. If you’re using battery-operated LED lights, you might notice that the light output can fluctuate as the batteries start to die. But when you wire your LED lights to 120v, you’ll get a consistent light output that will last as long as the power is on. The other benefit of wiring your LED lights to 120v is that you won’t have to worry about changing batteries.
Lastly, wiring your LED lights to 120v is a great way to save money on your energy bill. LED lights are very energy-efficient, so you’ll decrease your energy usage (and cost) by making the switch.
Things You’ll Need
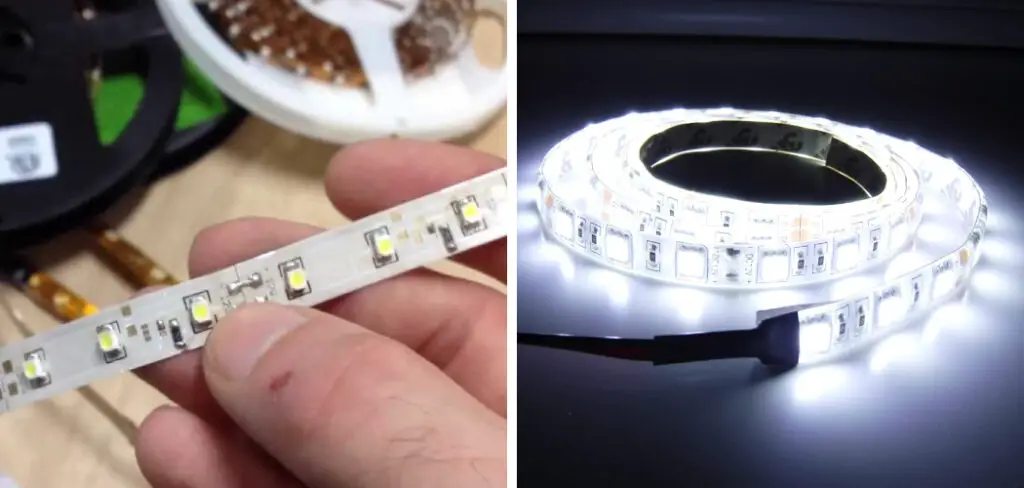
- An LED light fixture
- An LED-compatible dimmer switch
- 120v wire (stranded or solid core)
- Wire strippers
- Wire nuts
- A screwdriver
- A drill (optional)
Step by Step How to Wire Led Lights to 120v
1. Turn Off the Power
The first step is to make sure the power is off before you start working with any electrical wiring. Next, locate your home’s circuit breaker box and flip the switch for the circuit you’ll be working on. This will ensure that there is no power running to the area you’ll be working in.
2. Remove the Light Cover
Once the power is off, you can remove the light cover from the LED light fixture. Most light covers are held in place with a few screws. Use a screwdriver to remove the screws and set the cover aside. First, identify the black (hot) and white (neutral) wires. The green or copper wire is the ground wire and can be ignored for this project.
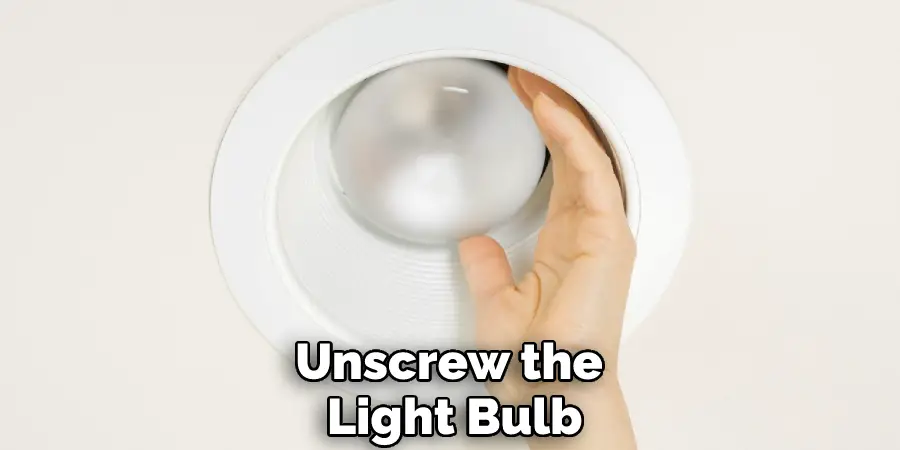
3. Unscrew the Light Bulb
The next step is to unscrew the light bulb from the LED light fixture. Once the light bulb is removed, you should see two small wire leads protruding from the socket. First, twist the black wire lead clockwise onto the brass-colored screw. Second, twist the white wire lead clockwise onto the silver-colored screw. Finally, screw the light bulb back into the LED light fixture.
4. Connect the Wires
Now it’s time to connect the wires. First, twist the black (hot) wire from the LED light fixture and the black (hot) wire from the 120v AC power. Next, twist the white (neutral) wire from the LED light fixture and the white (neutral) wire from the 120v AC power. Finally, twist the green or copper (ground) wires together. You can skip this step if your LED light fixture doesn’t have a ground wire.
5. Wire the Dimmer Switch
The next step is to wire the dimmer switch into the circuit. First, connect the black wire from the switch to the black wire from the outlet. Next, connect the white wire from the switch to the white wire from the outlet. Finally, connect the green wire from the switch to the green wire from the outlet.
6. Turn on the Power
Now it’s time to turn the power back on. Head back to your circuit breaker box and flip the switch for the circuit you’re working on. Once the power is back on, test your LED light fixture by turning the switch to the “on” position. If the light doesn’t come on, check your connections to make sure they’re secure.
7. Install the Light Cover
Once you’ve verified that your LED light fixture is working properly, it’s time to install the light cover. Make sure that the power is turned off before you begin. First, find the right size and style of light cover for your LED fixture. Trace the outline of the cover onto the ceiling so that you know where to cut. Using a hole saw or jigsaw, cut out the tracing. Install the cover by screwing it into place. Ensure the screws are tight so the cover doesn’t lose.
8. Enjoy Your New LED Light!
You’ve now successfully wired your LED light fixture to 120v AC power. Enjoy your new LED light and the money you’ll save on your energy bill. LED lights are very energy-efficient, so you’ll decrease your energy usage (and cost) by making the switch.
Tips and Warnings on How to Wire Led Lights to 120v
Tips:
- Be sure to purchase the correct size and type of wire for your project.
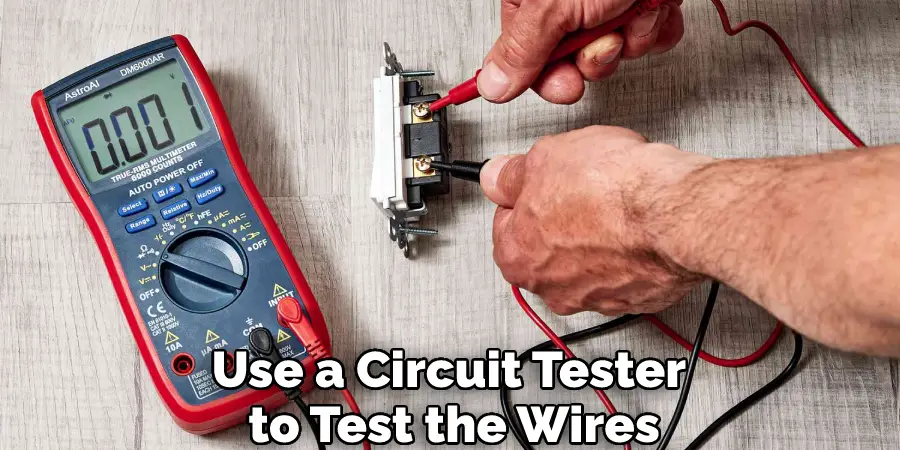
- Use a circuit tester to test the wires before connecting them.
- Follow all local building codes and regulations.
- Hire a professional electrician if unsure about any aspect of the wiring process.
Warnings:
- Never work on electrical wiring without turning off the power at the circuit breaker or fuse box.
- Never touch live electrical wires.
- Use extreme caution when working around high voltage wires.
- Wear rubber gloves and safety glasses when working with electricity.
- Do not attempt to wire Led lights to 120v if you are not experienced in working with electrical wiring.
- Do not overload the circuit by connecting too many Led lights.
- Use only UL (Underwriters Laboratories) approved materials and products.
How Much Does it Cost to Wire Led Lights to 120v?
The cost of wiring Led lights to 120v will depend on the number of lights you need to wire, the type and size of wire you need, the type of dimmer switch you use, and whether or not you hire a professional electrician. The average cost of the materials needed for this project is around $100. If you hire a professional electrician, you can expect to pay an additional $200-$300 for labor.
How to Prevent Electrical Fires when Wiring Led Lights to 120v
1. Use the Correct Size and Type of Wire
The first step to safely wiring led lights is to use the correct size and type of wire. Normally, led lights are low voltage and can be safely wired with a standard electrical cable. However, some types of led lights, such as those that run on 120 volts, require a special high voltage cable. So be sure to check the voltage of your led lights before purchasing wire.

2. Use the Correct Size Fuse
Another important safety measure when wiring led lights is to use the correct size fuse. Led lights can draw a lot of power, so it’s important to use a fuse that is rated for the amperage of your particular lights. If you are not sure what size fuse to use, consult an electrician.
3. Do Not Overload Circuit
When wiring led lights, it is important not to overload the circuit. This can be a fire hazard. Check the wattage of your led lights and ensure the circuit you are wiring them to can handle the load. Try to spread the load of the lights evenly across all the circuits in your home.
4. Use the Correct Size Breaker
When wiring led lights, be sure to use the correct size breaker. A breaker that is too small can cause a fire. Be sure to check the amperage of your led lights and purchase a breaker that is rated for that amount. If you are not sure what size breaker to use, consult an electrician.
5. Use the Correct Wire Gauge
The wire gauge is the thickness of the wire. The thicker the wire, the more electricity it can carry. When wiring led lights, use a wire gauge that is rated for the amperage of your particular lights. If you are not sure what size wire gauge to use, consult an electrician.
6. Do Not Cut or Splice Wire
When wiring led lights, do not cut or splice the wire. This can be a fire hazard. If you need to extend the length of the wire, use an extension cord that is rated for the amperage of your particular lights. Avoid using adapters, as they can also be a fire hazard.
7. Inspect Wiring Regularly
Be sure to inspect the wiring of your led lights regularly. Look for any signs of wear or damage, and replace the wiring if necessary. Be sure to follow all safety precautions when doing so. If you are not sure how to inspect the wiring, consult an electrician.

Frequently Asked Questions
Can I Connect LED to AC Power?
It depends on the specific LED and AC power supply. A few factors to consider include the type of LED, voltage and current requirements, and whether or not the LED is designed for use with an AC power supply. Additionally, some LED strips have built-in circuitry that allows them to be connected to an AC power supply, while other LED strips require a separate power supply.
Will a 12v LED Work on 120v?
Generally, a 12v LED will work on a 120v AC outlet, but there may be some limitations based on the type of LED and the power supply. Some 12v LED lights are designed to work on both AC and DC power supplies, while other lights are specifically designed for use with AC power only. If you are unsure whether a 12v LED light will work on a 120v AC outlet, it is best to consult the manufacturer’s instructions or contact the retailer where you purchased the light.
Can LED Lights Work With Any Amount of Voltage?
Yes, LED lights can work with any amount of voltage. LED lights use less power than traditional incandescent or fluorescent bulbs, so they can be used anywhere there is a low voltage outlet available.
Is 12v and 120v the Same?
No, 12v and 120v are not the same. 12v is the standard voltage for cars, trucks, bikes, and other consumer electronics. 120v is the standard voltage for residential use in the United States and many other countries.
Conclusion
So there you have everything you need to know about how to wire led lights to 120v. Follow these safety tips, and you’ll be sure to stay safe while wiring your led lights. We hope you found this article helpful. If you have any questions, feel free to leave a comment below, and we’ll do our best to answer them. Thanks for reading!