
Pendant light rods are a necessary but often unsightly part of any pendant light. They can be too long, too short, or just plain ugly. But there is a way to shorten them without compromising the look of your light. This article will show you how to shorten pendant light rod in just a few simple steps. Keep reading for more information.
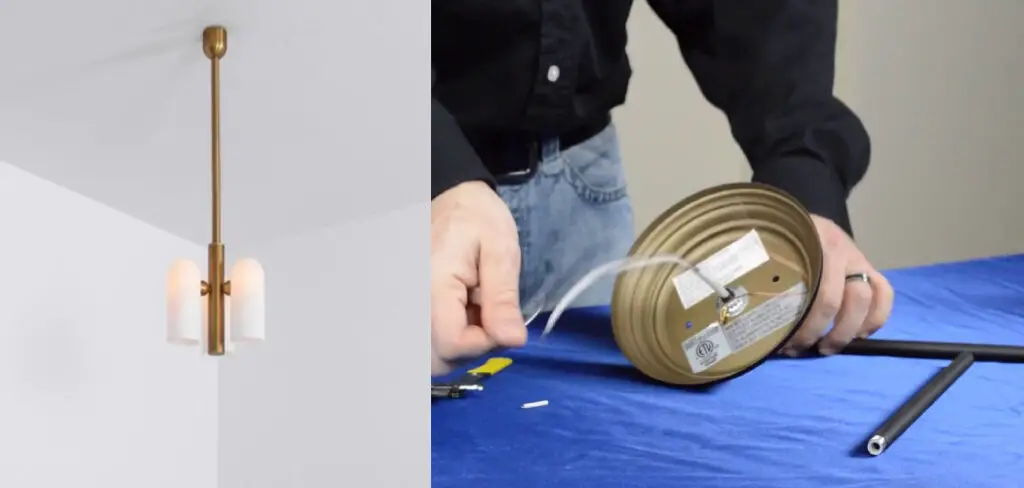
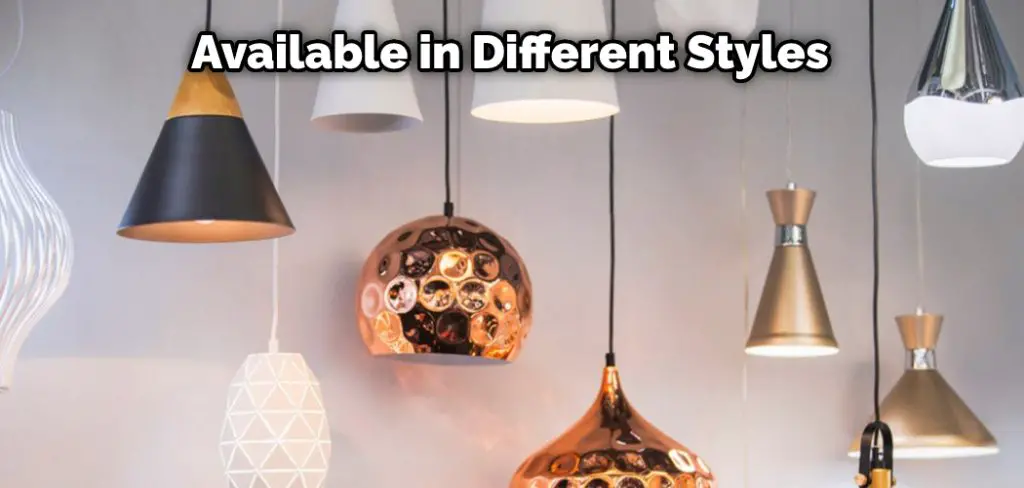
The pendant light is a type of light hung from the ceiling by a cord or chain. It is often used in kitchens and dining rooms to provide task lighting. Pendant light fixtures come in various shapes and sizes, and they can be made from a variety of materials, including metal, glass, and plastic.
One downside to pendant lights is that the rod or chain hanging from the ceiling can be unsightly. This is especially true if the rod is too long or too short. But there is a way to fix this problem without replacing the entire fixture.
Summary: Shortening a pendant light rod is a common modification made to adjust the hanging length of the light fixture to suit the specific needs and aesthetics of your space. There are two types of pendant light rods: threaded and unthreaded. The process of shortening the rod will depend on the type of rod you have, and you should always refer to the manufacturer’s instructions to ensure a safe and proper modification.
For threaded rods, the process is relatively simple. Unscrew the sections of the rod to reach the desired length, then reassemble the pendant light fixture following the manufacturer’s instructions. If the existing threaded sections do not provide the exact length you need, you may have to purchase additional sections or have a section custom-cut and threaded to fit your requirements.
For unthreaded rods, the process is slightly more involved. You will need to measure and mark the desired length on the rod, then use a pipe cutter or hacksaw to carefully cut the rod to the appropriate length. After cutting, use a file to smooth any rough edges and reattach the fixture components according to the manufacturer’s instructions. Always ensure that the electrical wiring is safely managed and secured during this process to avoid any safety hazards.
Why Would You Shorten Pendant Light Rod
Pendant light rods can be too long for some ceilings, so you may need to shorten them. But before you cut off any excess length, there are a few things to consider. Here are some reasons you might want to shorten your pendant light rod.
- The pendant light rod is too long for the ceiling height: If your ceiling is lower than average, or if the pendant light is hung too low, the rod may need to be shortened.
- You want to change the look of the pendant light: A shorter rod can give the pendant light a different look and help it fit better in a smaller space.
The current rod is damaged: If the rod is bent or otherwise damaged, it may need to be shortened to replace it.
What You’ll Need
- Pendant light
- Tape measure
- Screwdriver
- Level
- Pipe cutter or hacksaw
- Chisel
- Ruler or a straight edge
- Pencil
A Step by Step Guide on How to Shorten Pendant Light Rod
Step 1: Determine How Much You Need to Take Off
The first thing you need to do is figure out how much you need to take off the rod. To do this, measure the distance from the ceiling to the center of the light socket. Then, measure the distance from the center of the light socket to where you want the pendant to hang. Subtracting the second measurement from the first will give you how much material you need to remove.
Remember that some light fixtures can be heavy and may require two people to move them safely. If you’re not comfortable moving the light fixture yourself, or if it’s too heavy, then call an electrician. They will be able to safely move the light fixture for you and make sure it’s reconnected to the electrical system.
Step 2: Cut the Rod
Once you have your measurement, it’s time to cut the rod. If you’re using a pipe cutter, you can follow the instructions that come with the tool. If you’re using a hacksaw, you’ll want to clamp the rod in a vise before beginning to cut.
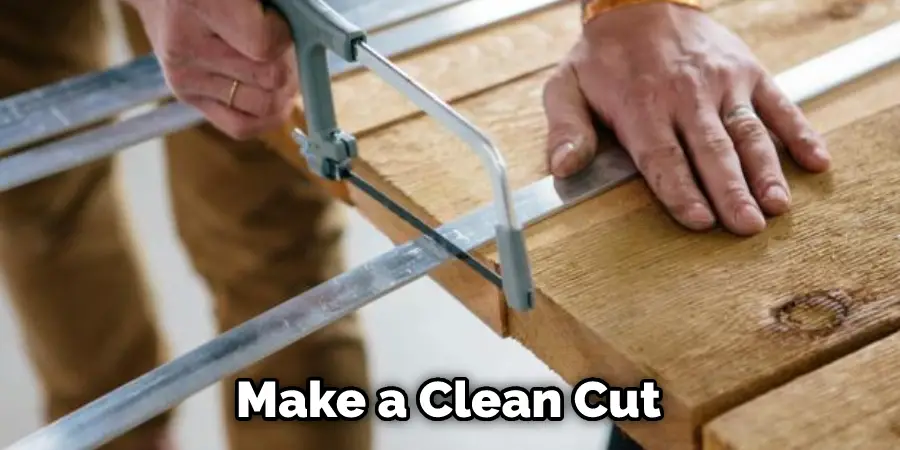
Regardless of which method you’re using, make a clean cut so that the end is level. A chisel can also file down any sharp edges left behind by cutting.
Step 3: Remove any Sharp Edges
Remember that some light fixtures can be heavy and may require two people to move them safely. If you’re not comfortable moving the light fixture yourself, or if it’s too heavy, then call an electrician. They will be able to safely move the light fixture for you and make sure it’s reconnected to the electrical system.
Step 4: Reattach the Rod
Once you’ve shortened the rod, it’s time to reattach it. Begin by screwing the rod into the socket. Then, hold the pendant to where you want it and mark the spot with a pencil.
Use a level to make sure your pendant is straight before making a mark. Then, once you’ve made your mark, use a straight edge to draw a line from the top of the pendant down to your mark. This will be your guide for where to drill a hole.
Drill a hole in the ceiling using a drill bit that is the same size as the screws that come with your pendant light. Screw the pendant light into place and enjoy your new, shorter lighting fixture!
Step 5: Hang the Pendant Light
After you have shortened the pendant light rod, it is time to hang it. First, find the center of the ceiling and make a small mark with a pencil. Then use a level to make sure the rod is straight as you hang it. Next, hook the pendant light onto the top of the rod and gently pull down on it until the light is at the desired height.

If you need to make any adjustments, simply loosen the screws on the connector at the top of the rod before re-tightening them. Finally, turn on the light and enjoy your newfound illumination!
Step 6: Clean Up
Once you have completed the project, it’s essential to clean up any tools or materials used. Put away the hacksaw, pipe cutter, and sandpaper. Make sure that all of the screws and drill bits are put away in a safe place. Wipe down the work surface with a damp cloth to remove dust or debris. And that’s it! You have successfully shortened your pendant light rod. These steps will help in how to shorten pendant light rod.
Tips and Warnings
Tips:
- Make sure the power is turned off to the light fixture before starting any work.
- Depending on the type of light fixture, you may need to unscrew the top or bottom to access the pendant light rod.
- Loosen the screws that hold the light fixture in place.
- Cut off the desired amount of the pendant light rod with a hacksaw.
- Reattach the light fixture and tighten the screws.
- Test out the light fixture to make sure it’s working correctly.
Warnings:
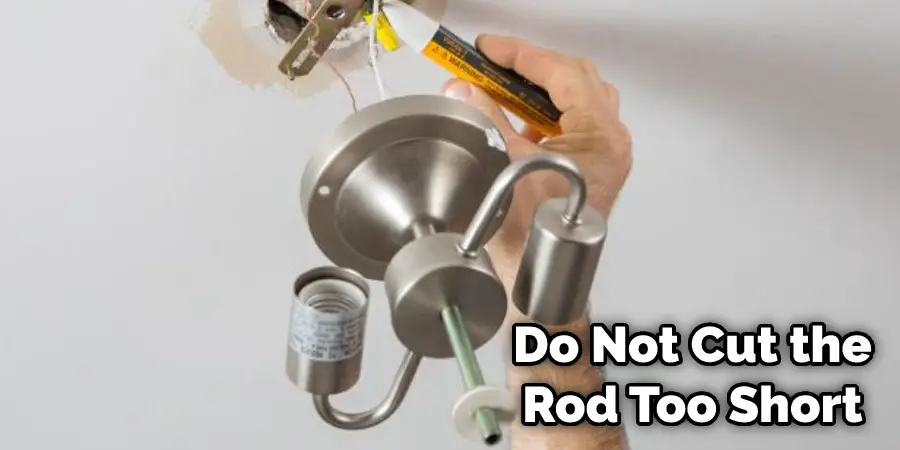
- Be careful when cutting the pendant light rod as it can be sharp.
- Do not cut the pendant light rod too short as it may not be long enough to reach the screws that hold the light fixture in place.
3 Ways to Shorten Light Fixtures for Low Ceilings
Materials:
- Recessed Lighting: Use recessed lighting fixtures to save space and create a cleaner look.
- Adjustable Pendant Lights: Choose pendant lights with adjustable cords or chains to customize the height of the fixture.
- Wall Sconces: Consider using wall sconces instead of hanging fixtures for shorter ceiling heights.
What Height Do You Hang Pendant Lights
When they picture pendant lights, most people have a height in mind, but what is the right height to hang them at?
There are a few things to keep in mind when it comes to hanging pendant lights:
- The height of your ceiling
- The size of your room
- The weight of your light fixture
Generally, you want to hang your pendant lights so that the bottom of the light is between 30 and 36 inches from the floor. However, this can vary depending on your specific situation. For example, if you have a high ceiling, you may need to hang your pendant lights higher not to overshadow them. On the other hand, if you have a low ceiling, you may want to hang them more down to be more visible.
If your pendant light fixture is particularly heavy, you may need to hang it even higher to avoid stress on the cord or chain. And if your room is tiny, you may want to hang your pendant lights a little bit lower to create the illusion of more space.
In addition to considering these factors, you also need to consider the length of the cord or chain on your light fixture. If it is too short, you will not be able to hang your light at the desired height. In this case, you may need to shorten the rod on your light fixture.
Where Should Pendant Lights Be Placed
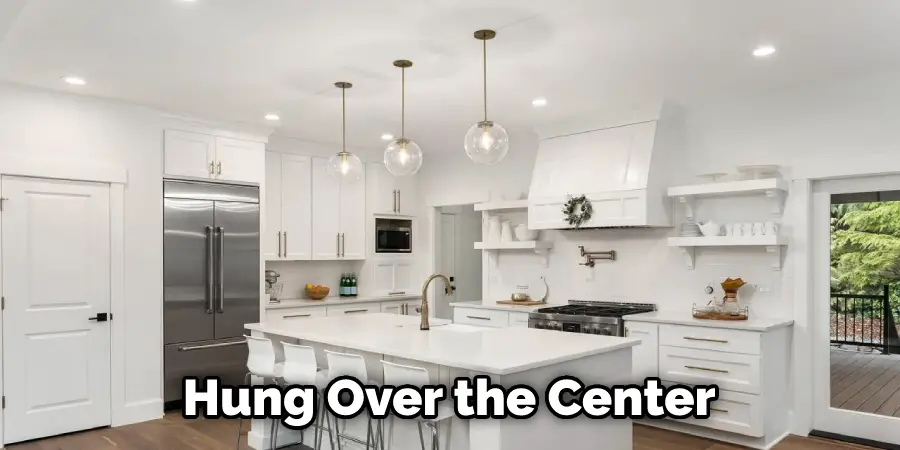
Pendant lights can be hung in various places, depending on the look you are going for. They can be placed over a kitchen island, in a bedroom, or a living room. Placing pendant lights in the wrong spot can ruin the effect you are trying to achieve. Here are some tips for where to place pendant lights: Over a kitchen island: Pendant lights are a popular choice for hanging over a kitchen island. They provide task lighting for cooking and can add a decorative touch to your kitchen. When choosing pendant lights for your kitchen island, make sure they are the right size. If they are too small, they will not provide enough light. If they are too large, they will overpower your island.
- Over a kitchen island: Pendant lights should be hung over the center of the kitchen island. This will create an evenly lit space.
- In a bedroom: Pendant lights should be hung above the bed to create a cozy atmosphere.
- In a living room: Pendant lights can be used as a task and ambient lighting in a living room. For example, hang them over a reading nook or near a TV to provide task lighting, or place them around the room to create an ambient light.
Do Pendant Lights Give Off Much Light
Pendant lights can give off a lot of light, depending on the size and style of the fixture. If you have a small pendant light, it might not give as much light as a larger one. But if you have a large pendant light, it could give off quite a bit of light. Pendant lights are also available in different styles, so some may give off more light than others. If you’re looking for a pendant light that will give off a lot of light, look for one with multiple bulbs or a large shade.
Frequently Asked Questions
Can You Make a Pendant Light Shorter?
Absolutely! By following a few simple steps, you can shorten the length of your pendant light quite significantly. Here are the steps you need to take:
1. Remove the bulbs – The first step is to remove the bulbs from your pendant light. This is usually easy to do, but you may need to use a small flathead screwdriver to unscrew them. Make sure to keep the bulbs in case you need them later on.
2. Cut the wires – Next, cut the wires that connect the bulbs together. You’ll want to make sure that the wire length is exactly equal on both ends – if not, your light will not work properly. Make sure to label each wire with a number or letter so that you can match them up later on.
3. Strip and solder the wires – Finally, strip and solder the wires together so that they form a circuit. Make sure that each end of the wire is soldered securely so that there is no chance of it breaking down in the future.
What Is the Standard Height for Pendant Lights Over an Island?
Pendant lights over an island can be very versatile and work well in a variety of settings. The standard height for pendant lights is 36 inches, but you can adjust them to fit your specific needs based on the type of light that you are using them for.
If you are looking for indirect sunlight, then a taller light may be more appropriate. If you want to use incandescent or fluorescent bulbs, then a lower light might be better suited since these types of lamps require less wattage than LEDs. And finally, if you are using LED strips or Smart Bulbs with wireless controls, then the height should not matter as long as they hang down below the fixture’s chord.
Should Pendants Be Centered Over Island?
Pendants should not be centered over an island. This design is often used in photography or graphic design and can lead to confusion for your viewers. When a pendant is centered over an island, it blocks the viewer’s view of the rest of the page or image. Instead, place pendants on either side of the island to give them equal footing.

Conclusion
So, there you have it. We’ve shown you three ways to shorten a pendant light rod. These methods are easy and take just a few minutes to complete. So, if your pendant light is too long, don’t despair – follow our simple steps on how to shorten pendant light rod and enjoy your perfect lighting solution in no time!