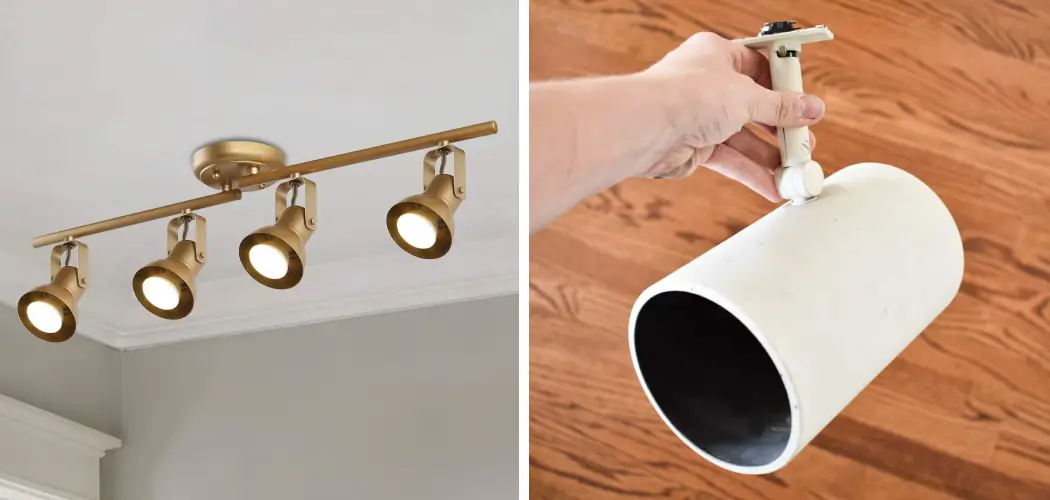
Track lighting is a great way to add both function and style to your home. It provides efficient, even illumination across your entire ceiling, so there are no dark spots or shadows. And because it can be installed wherever you want, track lighting gives you a lot of flexibility in terms of design.
One particularly popular way to use track lighting is to create a star ceiling. This involves installing LED lights directly into the ceiling or on top of suspended baffles painted to look like the night sky. This creates an amazing effect, with glowing points of light that simulate stars stretching out in every direction. While it may seem daunting to adjust track lighting, with a few simple steps, you will know how to adjust track lighting.
Summary: There are a few ways to adjust track lighting. You can use the remote or twist the light strands themselves. Whichever method you choose, be sure to follow these tips: 1. Make sure the track is leveled before adjusting the light. 2. Keep your fingers away from the light strands while adjusting them. 3. Use a level to ensure that the light is pointed in the right direction. 4. Twist the light strands in the opposite direction to the way they were twisted when they were originally installed.

A Stepwise Guideline for How to Adjust Track Lighting
Step 1: Turn Off the Main-power
Before adjusting track lighting, it is important to turn off the main power source for safety purposes. Unscrew the track light head using a screwdriver and remove it from the track. Using the appropriate tool, loosen and adjust the direction of the light head to direct it towards your desired area. Use a wrench or pliers to loosen and adjust the angle of the metal arm, then tighten it back into
Step 2: Drill a Hole in the Wall
If the track lighting needs to be moved to a different spot on the wall, use a power drill to create a hole where the new track will be placed. Then, insert the mounting bracket into the hole and secure it with screws or anchors.
Place the track onto the mounting bracket and screw it into place. Next, reattach the track light head and screw it onto the track.
Step 3: Feed the Cable From the Hole
If the track lighting needs to be connected to a power source, feed the electrical cable through the hole and connect it to the track. Turn on the main power source and test if the track lighting is functioning properly. Fine-tune the angle of the track light head to achieve the desired lighting effect. Remember to turn off the power source before making any adjustments and always use caution when handling electrical equipment.
Step 4: Adjust the Surface of the Track Light Head
To adjust the surface of the track light head, use a screwdriver to loosen and rotate the outer ring until it points in the desired direction. Tighten the outer ring back into place once adjusted. This will allow for focused lighting on specific areas or objects. If the track light is not producing enough light, try changing the bulb to a higher wattage. Check the compatibility of the new bulb with the track lighting before replacing it.

Step 5: Insert a Plastic Anchor
If the track light needs to be attached to drywall, use a plastic anchor to secure it. Drill a hole into the drywall slightly smaller than the size of the plastic anchor. Insert the anchor into the hole and screw the track lighting onto it. Ensure the track is securely fastened, so it does not come loose or fall.
Step 6: Fix Screws Into the Ceiling
If the track lighting needs to be attached to a ceiling, use screws to secure it. Use a power drill to fix the screws into the ceiling above where the track will be placed. Attach the track onto the screws and screw on the track light head. Turn on the main power source and adjust as necessary for desired lighting effects.
Step 7: Shape Lighting Configuration
To shape the lighting configuration, adjust the angle and position of each track light head. For a more dramatic effect, install dimmers to control the intensity of the lighting. Experiment with different configurations until achieving the desired effect.
Step 8: Cut Differing Lengths of Track
Using a hacksaw to cut the track into desired lengths if the track lighting needs to be arranged in a curved or angled shape. Reattach the track light heads onto the cut tracks and shape them into the desired configuration. Turn off the main power source before cutting or adjusting the tracks. Connect each section of the track using joining connectors, then attach and adjust the track light heads as desired.
Step 9: Connect the Wire
If the track lighting needs to be connected to a power source, connect the electrical wire to the track. Turn on the main power source and test if the track lighting is functioning properly. Adjust as necessary for desired lighting effect. Remember to turn off the power source before making any adjustments, and always use caution when handling electrical equipment.
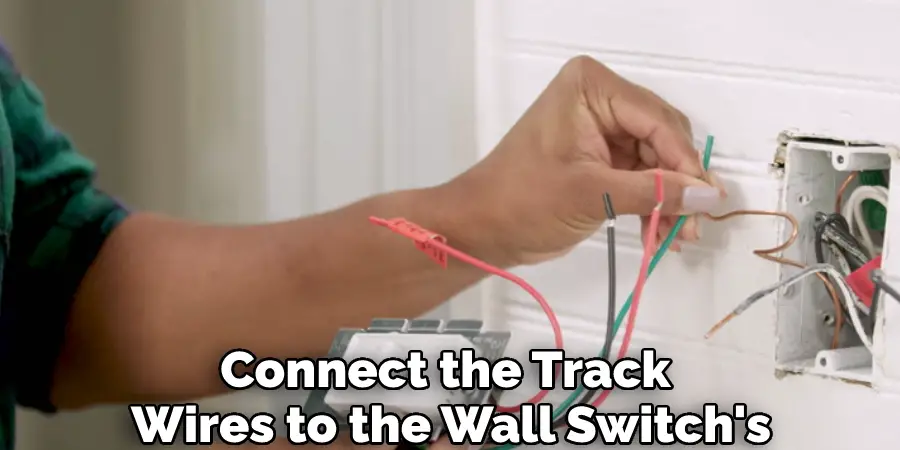
Step 10: Attach the Lights to a Wall Switch
If desired, attach the track lighting to a wall switch for easy control. Connect the track wires to the wall switch’s appropriate terminals. Turn on the main power source and test whether the switch controls the track lighting properly. Remember to turn off the power before making any adjustments, and always use caution when handling electrical equipment.
Step 11: Final Test
Before fully using the track lighting, do a final test to ensure that all adjustments and connections are secure and functioning properly. Then, make any necessary adjustments and always use caution when handling electrical equipment.
Important Tips for Safety Purpose
- Always turn off the power source before adjusting or changing the track lighting.
- Use caution when handling electrical equipment and follow all safety precautions.
- Make sure that the track lighting is securely fastened in place to avoid accidents or damage.
- Use compatible bulbs with the track lighting to avoid potential hazards.
- Consult a professional if unsure how to properly adjust and install track lighting.
How Much Does It Cost to Adjust Track Lighting?
The cost of adjusting track lighting will depend on the complexity of the adjustment and whether or not a junction box is required. Hiring a professional electrician for assistance may also add to the cost. Generally, the homeowner can make simple adjustments at minimal cost, but it is always recommended to consult with an electrician for safety reasons.
Additionally, the cost of any necessary materials, such as a junction box or mounting screws, should also be factored in. Overall, adjusting track lighting can range from being relatively affordable to potentially expensive, depending on the individual situation.
Where Should Track Lights Be Positioned?
It would help to consider how you want the light to fall on your subject or object. Do you want a focused beam or a more diffused effect? This will determine how close or far away the track lights should be from the subject. Then consider how many track lights you should use and where to position them about each other.
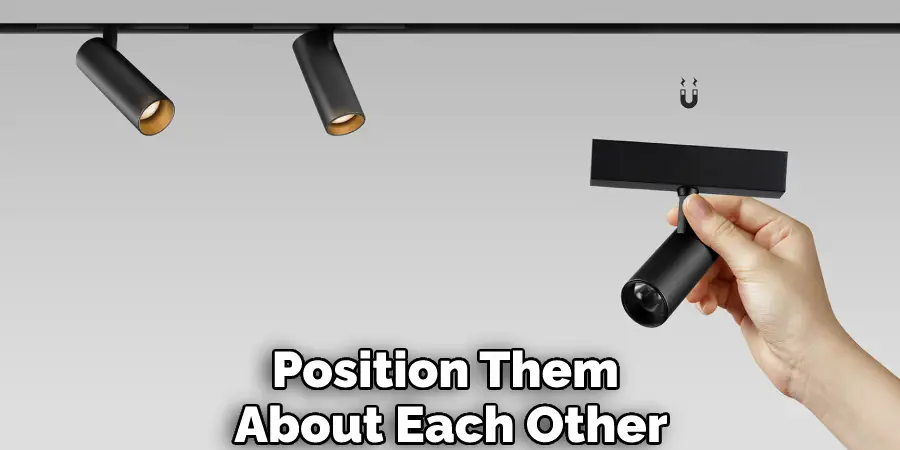
Try evenly distributing the lights, avoiding having too much light in one spot and leaving another area dark. To adjust the angle of the track light, loosen the mounting screws and reposition the track accordingly. The angle can also be adjusted by rotating the head of the light fixture. Finally, experiment with different brightness levels by dimming or brightening the track lights.
Does Track Lighting Need a Junction Box?
First, check if your track lighting needs a junction box. Some tracks can be directly wired into the electrical wiring of your ceiling, but others may require a junction box for safety and stability. Consult your track lighting installation guide or contact a professional electrician if you are unsure.
Once you have determined whether or not you need a junction box, follow the steps below to adjust your track lighting:
- First, turn off the power to the track lighting at the breaker box.
- Next, disconnect any wires connected to the track lighting.
- Next, loosen the mounting screws and slide the track to your desired position.
- If using a junction box, attach it to the ceiling with appropriate screws or connectors and re-connect the wires.
- Finally, turn on the power at the breaker box and test the track lighting for proper function.
If a junction box is required, ensure it is properly installed before proceeding with any adjustments to the track lighting.
You Can Check It Out To Join Strip Lights Together
Frequently Asked Questions
What is the Ideal Height for Track Light?
The height of a track light is typically around 6 feet tall, although this can vary depending on the brand and model. Track lights are designed to cast a flattering light onto a person or object, so they should be positioned at eye level or slightly below.
Are Track Lights Outdated?
Track lights are not obsolete, but they may not be the best option for certain applications. They are typically used to light up large areas, such as a room or stage, and are not well-suited for smaller areas or tasks that can be completed with more discrete lighting options, such as task lights or desk lamps. Additionally, track lights are often expensive and require a lot of electricity to operate, which can be an issue if your home is not well-wired or if you need to conserve energy resources.
Can You Trim Track Lighting?
Yes, it is possible to trim track lighting. However, it is important to be aware of the risks involved and take appropriate safety precautions when working with track lighting. Trimming track lighting can be a dangerous task, and improper handling may result in injuries. Always wear protective gear, including a dust mask and eye protection, when trimming track lighting. Additionally, make sure to disconnect the power to the track lighting before working on it so that you do not accidentally cause an electrical fire.
Is Track Lighting Good for Walk in Closet?
Track lighting can be a useful addition to a walk in closet, providing a source of light and illumination for items stored inside the closet. While track lighting may not be ideal for all types of clothing, it can be helpful for finding items in the closet or for making adjustments to clothing while it is hanging. Because track lighting is focused directly on the object being illuminated, it can provide a precise and consistent level of light. This type of light is also less likely to cast shadows or create harsh shadows, which can make it easier to see and adjust clothing.
Conclusion
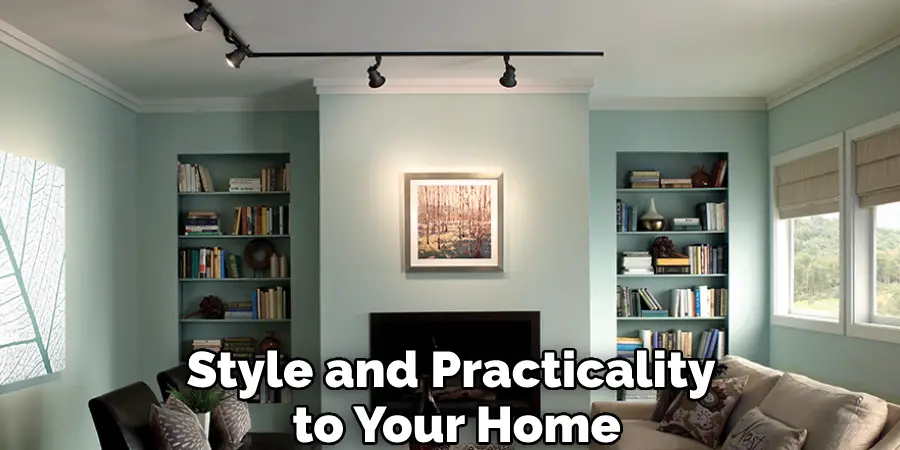
Adjusting your track lighting is a simple process that can make a big difference in the look and feel of your home. By following the steps outlined above, you’ll be able to create the perfect atmosphere for any room in your house. With a little time and effort, you can have beautiful, functional track lighting that will add style and practicality to your home.
Always use caution when adjusting track lighting and follow the manufacturer’s instructions for any specific guidelines. Adjusting track lighting can enhance the overall lighting design in a room, creating a more visually appealing space. We hope this article has been beneficial in learning how to adjust track lighting. Always ensure the steps discussed here are followed chronologically. Also, make sure the preventive measures are followed.
You Can Check It Out To Make Cool Colours With Led Lights