If you have ever been in a situation where you needed to change a light bulb, but couldn’t because the fixture was in a hard-to-reach place, don’t worry – you’re not alone. Changing a light bulb can be tricky, especially if you don’t know how to do it properly. In this article, we’ll show you how to change light bulb in nipple light. So read on for tips and tricks that will make changing light bulbs easier than ever!

Many people call these nipple lights or pendant lights, but you refer to them, they are a great addition to any room. They provide ambient light and can easily be moved around the house. They’re perfect for reading in bed; attach one next to your lamp, and voila: instant more relaxed environment!
Summary: Changing a light bulb in a nipple light, also known as a flush-mount or semi-flush mount light, is a relatively simple process that can be done safely with a few precautions. Before beginning, turn off the power to the light fixture at the switch and the breaker box to prevent electrical shock.
Allow the fixture to cool if it was recently in use to avoid burns. Carefully remove the light cover, which is typically held in place by screws, clips, or a threaded nut at the base of the fixture. Depending on the specific design, you may need a screwdriver to loosen the screws or clips or simply twist the nut counterclockwise to remove the cover.
With the cover removed, you will have access to the light bulb. Gently twist the bulb counterclockwise to unscrew it from the socket. If the bulb is stuck or difficult to remove, you can use a rubber jar opener or wear non-slip gloves for a better grip. Once the old bulb is removed, replace it with a new bulb that has the appropriate wattage and base size for the fixture.
Screw the new bulb into the socket by turning it clockwise until it is secure, taking care not to overtighten. Finally, reattach the light cover by reversing the process used to remove it. Ensure that the cover is securely in place before turning the power back on at the switch and breaker box. Test the light to confirm that the new bulb is functioning correctly.
What Are Nipple Lights
Nipple lights are small, lightbulb-style fixtures designed to be screwed into the nipple. When the nipple lights are turned on, they illuminate the nipple area, so it looks “hot”.
Nipple light sets usually include dozens of high-powered LED bulbs and a controller, which allows you to control the number of bulbs that are lit up at once and control either a pulsing or blinking rate.
Nipple lights are a new type of light that look like they belong in a factory or warehouse, but are actually more decorative and produce a warmer light than industrial lamps.
Nipple lights are often used in kitchens with no overhead lighting or for task lighting purposes such as countertops and islands. Although most people think they cannot be moved, these lights can swivel 360 degrees because they sit on top of a small stand attached to the ceiling. And since they’re fairly lightweight, you don’t need any special tools to change light bulbs in nipple light.
Tools and Materials
- Screwdriver
- Wrench or pair of pliers
- New Grounding Bar
- Wire nuts
- Replacement bulb(s)
A Step by Step Guide on How to Change Light Bulb in Nipple Light
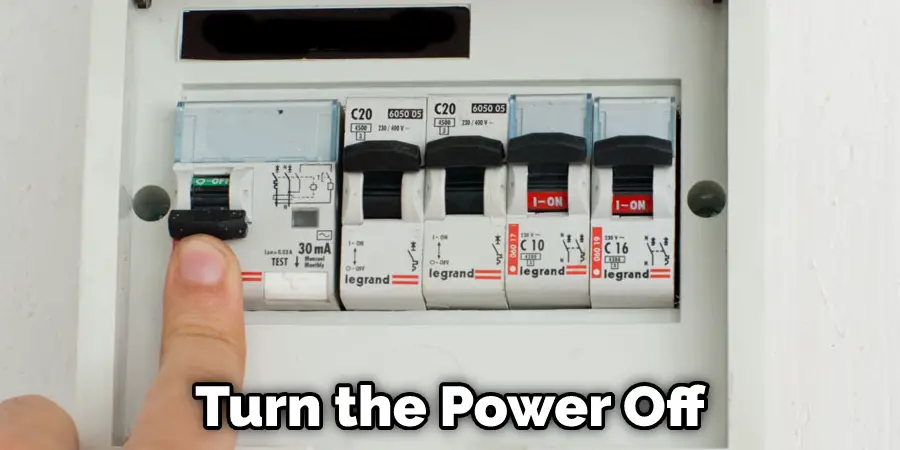
Step 1: Turn the Electricity Off.
Before you do anything, always turn the power off. In this case, before changing a light bulb in nipple lights, it’s essential to shut off the electricity so as not to be shocked if the electrical current is still on. It is also good practice to check that there is no current by checking for any tiny sparks from where you will change a light bulb in nipple lights or work on a nipple light installation. If there is a spark, don’t touch that wire and call an electrician immediately!
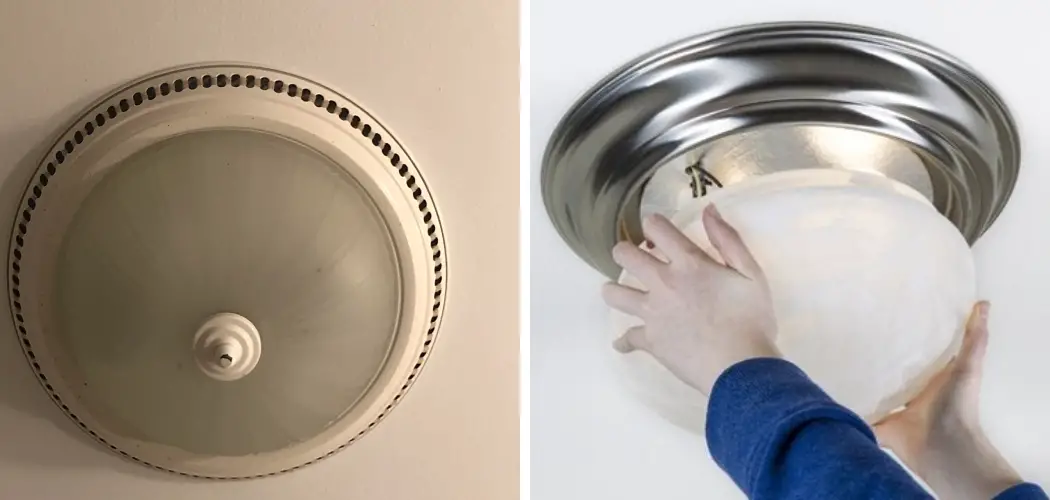
Step 2: Remove the Fixture from the Wall.
Before changing a light bulb in nipple lights, you must first take down the fixture from where it hangs on the wall. Use a screwdriver to remove the screws that attach the fixture to the wall and then carefully lower it so that you can work on changing a light bulb in nipple lights.
To avoid any parts falling when taking down a flush-mount lighting fixture, hold onto all pieces as they are unscrewed or loosened. Keep in mind that some mounting plates will be larger than others, so keep track of which size washer goes with which plate if necessary for when you hang up the nipple light once completed!
Step 3: Disconnect the Wiring.
Before you change a light bulb in nipple lights, you must first disconnect the wiring that connects to the bulb. To do this, you can usually unscrew or detach any caps on top of where a nipple light installation would be, and underneath unscrew two screws to release the electrical connection from the nipple light.
Carefully pull any wiring away from where a nipple light installation would be so as not to damage it with tools when replacing a broken or burnt-out bulb. In some cases, for pressure-fit nipples, there might be no access panel at all. Instead, a push-button switch will need to be pushed down while pulling the fixture away from the wall slightly. Then proceed by carefully detaching wire from bulbs and letting wires dangle into space once disconnected.
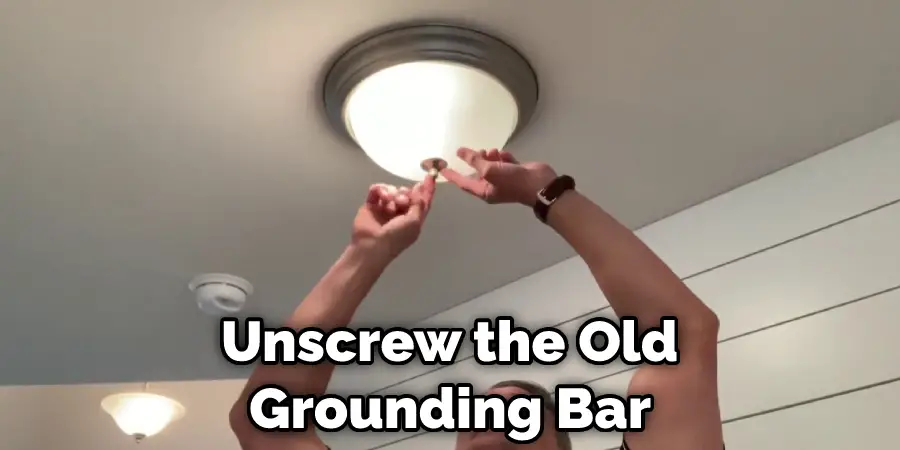
Step 4: Change the Grounding Bar.
To change a light bulb in a nipple light, you will need to change the grounding bar. First, unscrew the old grounding bar and screw in the new one. Be careful not to touch or cross any bare wires, as this will make you electrocuted! When changing a light bulb in nipple lights, ensure no electrical currents while replacing bulbs; otherwise, you risk getting shocked.
Step 5: Connect the Wires.
Once the grounding bar is changed, you can reattach any wires to it. First, connect the bare copper wire to the grounding bar. Then, screw on a wire nut tightly to make sure the connection is secure. You might need a pair of pliers or a wrench to do this, since it might not tighten by hand alone.
Then connect another wire from the nipple light fixture to its corresponding place in line with other wiring going to the switchboard, following the same pairing procedure as above. After connecting all wiring, make sure there are no connections crossed because if so, you risk getting electrocuted once switched back on. In addition, after changing a light bulb in the nipple light, make sure all caps are put back securely; otherwise, your nipple lights will not stay in place.
Step 6: Reattach the Fixture to the Wall.
After changing a light bulb in nipple lights, it’s time to replace your fixture on the wall! First, go through any components you’ve removed and line up all pieces so that they’re ready to be reassembled, including washers, screws, caps, etc. Then re-attach them in the order they were initially taken off previously.
Once the replacement part is secured to the wall, turn on the power so that you can test out your work by turning on the switchboard and see if everything turns on. Ensure both nipple lights are working correctly before replacing faceplates; otherwise, you risk getting electrocuted while trying to screw in covers! After confirming that there are no more electrical problems with changing a light bulb in nipple light, make sure tightening screws are tight enough to secure it.
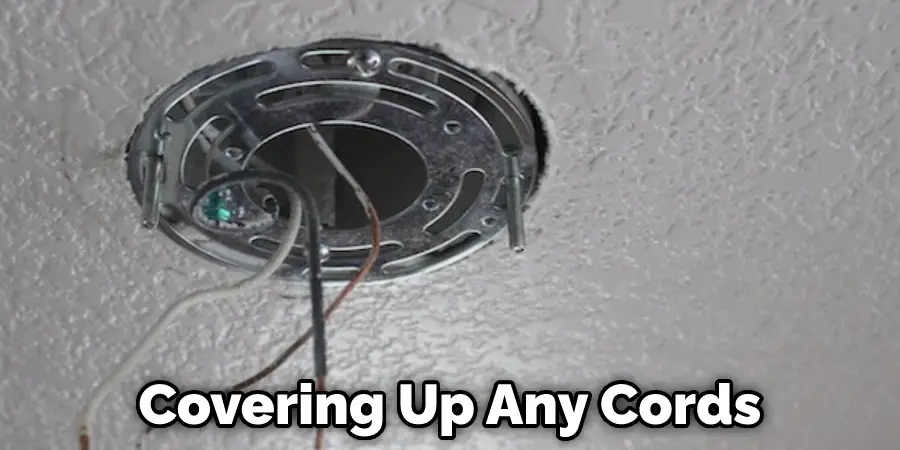
After testing your work, carefully screw the metal faceplates back on each nipple light, covering up any cords or electrical wiring attached to bulbs in line with where a nipple light installation would be placed. By completing these steps to replace a broken or burnt-out bulb, you have learned how to change a light bulb in a nipple light! Updating your nipple lights is a simple and easy process. As you can see, it only takes a few minutes to replace a light bulb on one of your nipple lights. This is a great way to ensure that your home is well-lit and ready for visitors or guests.
Additional Tips
- It is best to work with cold bulbs, which are easier to handle.
- If your nipple light has a plastic or glass cover on top of the lightbulb, remove it before attempting to replace the bulb.
- When removing the old lightbulb, be careful not to touch any metal parts in the lamp fixture. The oil from your hands can cause hot metal parts inside your lamp fixture to overheat and damage.
- Do not use water or other liquid on an electric nipple light. This could cause electric shock or damage the bulb if you touch its electrical contacts when wet. If you cannot immediately turn off power for moistened nipples lights, leave them turned on until they have dried completely.
- Never put your fingers into a cup of water and then touch electrical parts. If the metal contacts on the bulb are damp, wait for them to dry before you attempt to replace them.
Frequently Asked Questions
Is It Easy to Replace Nipple Light?
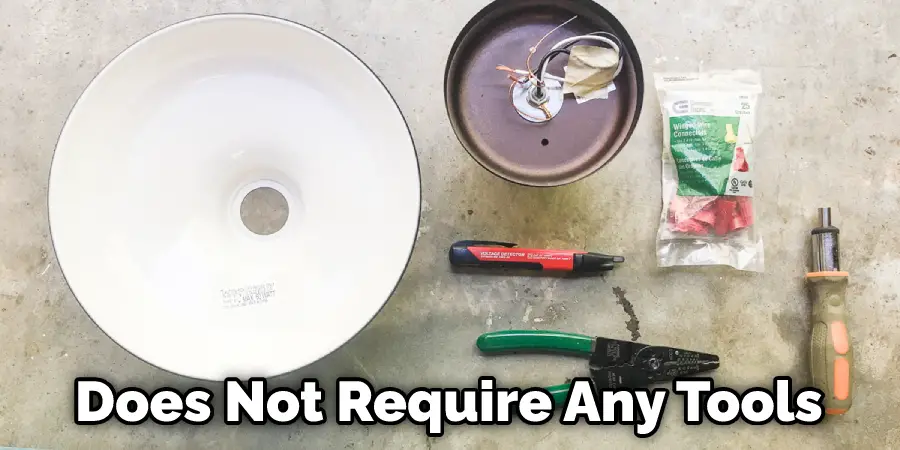
This is an easy task when it comes to changing the bulb in your nipple light. Changing a nipple light bulb does not require any tools and can be done within minutes once you know the technique behind removing the glass housing that covers the light itself.
How Often Do I Need To Change The Nipple Light Bulb?
Nipple lights can last anywhere from two weeks to two months with normal lamp usage. Replacing the bulbs more often is necessary for those using their lamps regularly and long hours daily, removing some of the pain from dry sockets. You can also replace your nipple lamp bulb after any issues or infections, even before the usual time frame has been reached.
Those with chronic conditions such as sinusitis, asthma, allergies, and cystic fibrosis may benefit from swapping out their lighting more frequently due to the risk of increased infections.
What Can I Use to Replace a Nipple Light?
There are a number of different types of lights that can be used to replace a nipple lightly, but the most popular are LED lamps. These lamps have been designed specifically for breastfeeding and typically emit a soft white light that is perfect for breastfeeding mothers. They also come with adjustable arms so you can customize the amount of light emitted from them.
Some people prefer Philips Avent lights because they offer multiple settings (high-low, dimmable) and are portable enough to take with you when traveling. Additionally, these lights often work well in both bright sunlight and low lighting conditions.
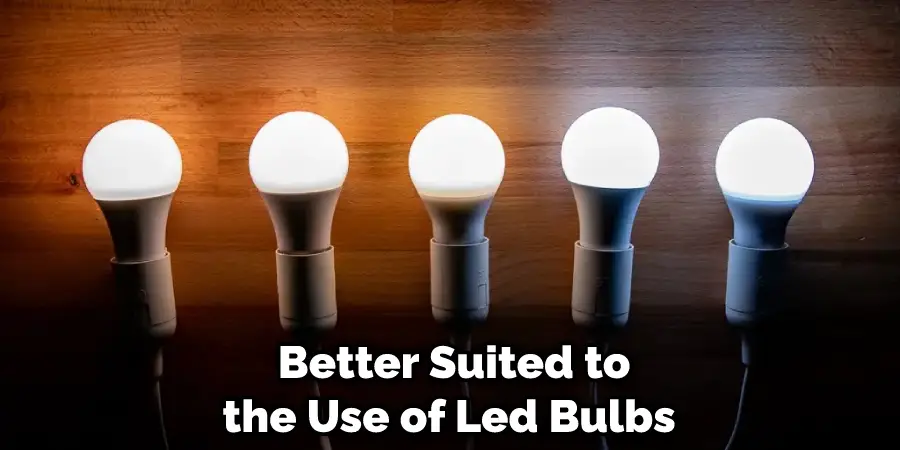
Can an Integrated Led Light Bulb Be Replaced?
While integrated LEDs are becoming more popular, they may not be suitable for all types of lighting applications. There are some outdoor lighting applications that are better suited to the use of LED bulbs, while others might require a CFL or incandescent bulb.
It is important to do your research before making any purchasing decisions in order to ensure compatibility and optimal performance.
What Light Bulbs Go in Boob Lights?
There are many types of light bulbs that go in boob lights, but the most common ones include incandescent and CFLs. Incandescent bulbs tend to be more expensive, but they also use less energy and last longer.
They produce a warmer glow than CFLs, but they can get hot enough to cause burns if touched. LED bulbs are now becoming popular as they offer both high brightness and long life expectancy.
Do Electricians Change Light Bulbs?
While there may not be a definitive answer to this question, most people believe that electricians change light bulbs.
This is because the task generally requires manipulating wires and knowing how to use tools like pliers and wrenches.
Furthermore, it’s usually considered an entry-level job for an electrician, so someone with skills in this area likely qualifies for the position.
You Can Check It Out to: Change Light Bulb Over Stairs
Conclusion
Although it is not the most conventional way to change a light bulb, it can be done. All you need is a little bit of creativity and some helpful tips from this article on how to change light bulb in nipple light! So don’t be afraid to try changing your nipple light bulb on your own – make sure you have all of the necessary supplies first.