Few things are as frustrating as LED lights that start peeling paint within a few months of installation. While there’s not much you can do to prevent the color on the light itself from chipping and peeling, you can take some measures to keep the problem from spreading. In this blog post, we’ll discuss how to prevent led lights from peeling paint. Keep reading to learn more! Then, read on to learn more!
Summary: Led lights are a great way to add brightness and style to any room, but they can also be a danger if not handled correctly. To prevent Led lights from peeling paint, follow these simple tips: 1. Use a protective film when installing the lights. This will help to prevent the paint from being damaged by the light. 2. Always use a light fixture that is specifically designed for led lights. These fixtures are typically made of thicker material and will be more resistant to damage. 3. Avoid direct sunlight when using led lights. The intense light can cause the paint to peel.
Why it’s Important to Prevent Led Lights from Peeling Paint?
There are a few reasons why it’s important to prevent your LED lights from peeling paint. First, it can be unsightly and embarrassing if your lights start peeling in a public space. Second, peeling paint can be a safety hazard, as it can lead to the light becoming unstable and potentially falling off the wall.
Finally, if the problem is left unchecked, it can cause extensive damage to the light itself and require costly repairs. By following the tips in this article, you can prevent your LED lights from peeling paint and keep them looking their best for years to come!
Required Materials:
- Painter’s tape
- Primer
- Paint
- Paintbrush
- Clean cloth
How to Prevent Led Lights From Peeling Paint Step by Step
Step 1: Determine
If your light fixtures are unpainted, you will need to prime them before painting them. If your light fixtures are pre-painted, you don’t have to take additional steps. Just install the lights as standard, making sure to seal them before painting correctly.
If your light fixtures are unpainted, you’ll need to prime them first before painting. How you do this will depend on your light fixtures’ material. Most light fixtures are either aluminum or plastic, and both require different methods of priming.
Step 2: Remove the Old Adhesive From the Led Strips
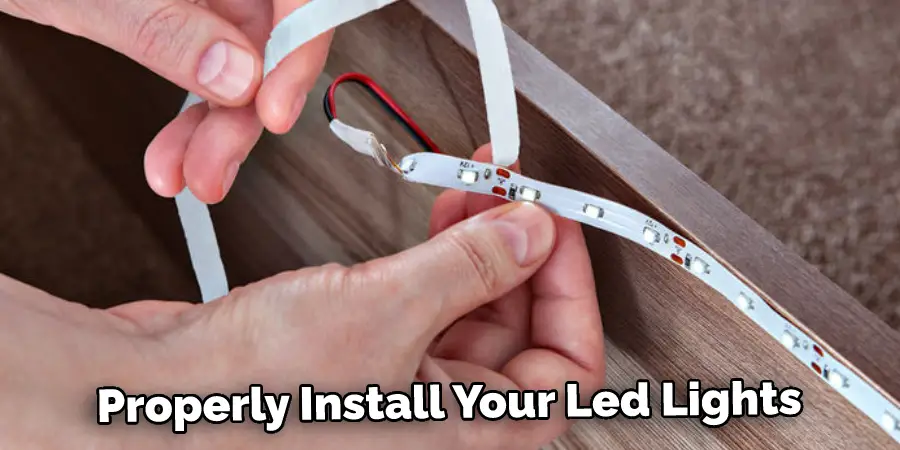
To properly install your LED lights, it’s important that you ensure they’re properly sealed before painting. How you go about this will depend on whether they’re pre-painted or unpainted, so we’ll discuss both in detail.
Pre-Painted Light Fixtures:
If your light fixtures are pre-painted and you want to prevent the paint from chipping and peeling, then it’s important that you remove the old adhesive before installing them. How you go about doing this will depend on whether your lights have a backing or not—if so, simply peel off the backing to expose the adhesive.
Un-Painted Light Fixtures:
If your light fixtures are unpainted and you want to prevent the paint from peeling, then you’ll need to add a thin layer of primer before sealing them. How you go about doing this will depend on whether your fixtures are aluminum or plastic. To prime aluminum fixtures, use a good quality primer that contains zinc chromate. This can be found at most hardware stores. Apply the primer with a paintbrush and let it dry for 24 hours before applying the sealer.
Aluminum Fixtures:
If your light fixtures are made of aluminum, then they must be properly primed before painting. How you go, this will depend on whether they’re bare aluminum or polymer-coated (i.e., pre-painted).
If you have unpainted aluminum light fixtures, you need to buy a special primer to paint them. This primer will fill in any small holes or divots on the surface of the aluminum, creating a smooth surface for the paint to adhere to. How you apply the primer will depend on whether or not your light fixtures have a backing plate. If they do, then you should apply a thin layer of primer to the fixture and allow it to dry.
After applying primer to your light fixtures, you can follow up by sanding down the dried primer with fine-grit sandpaper. This will create a smooth surface. If your fixtures don’t have a backing plate, then you’ll need to apply the primer in two stages—first around the edges of the fixture and again over the center. The amount of primer you apply will depend on how much coverage is needed—it should be sufficient to cover around 50% of each light.
Step 3: Get the Lights Off the Surface Safely
Before you can apply paint to your light fixtures, they’ll need to be removed from the surface they’re adhered to. How you do this will depend on whether they’re pre-painted or unpainted and their material composition—plastic or aluminum.
Pre-Painted Light Fixtures:
If your light fixtures are pre-painted, it’s important to remove them before painting. How you go about doing this will depend on whether they’re installed on surfaces like brick or concrete—if so, simply pick up the fixtures using your fingers or a pair of pliers and place them aside in a safe location where they won’t be touched. Once you’ve done this, you can safely paint the surface they were attached to. After completing this step, proceed to Step 4 below.
Un-Painted Light Fixtures:
You’ll need to remove any light fixtures that are unpainted and made of plastic or polymer materials before you start painting. How you go about doing this will depend on whether they’re installed on surfaces like brick or concrete—if so, simply pick up the fixtures using your fingers or a pair of pliers and place them aside in a safe location where they won’t be touched.
Once you’ve done this, you can then safely paint the surface they were attached to. After completing this step, proceed to Step 4 below. If you want to know more about how to prevent led lights from peeling paint, keep reading.
Step 4: Apply Two Coats of Paint
After removing your light fixtures from the surfaces they were attached to, you’ll need to apply two coats of paint. How you do this will depend on whether your institutions are pre-painted and their material composition—plastic or aluminum.
Pre-Painted Light Fixtures:
If your light fixtures are pre-painted, you should follow the instructions provided in How to Spray Paint Light Fixtures. How you do this will depend on whether they’re aluminum or plastic fixtures—plastic fixtures will require a specific procedure. Still, aluminum fixtures can be painted with any kind of paint for metal surfaces.
Un-Painted Light Fixtures:
If your light fixtures are unpainted and made of metal or aluminum, then they’ll require a specific procedure to ensure that the paint adheres properly. How you go about doing this will depend on whether they’re aluminum or plastic fixtures—plastic fixtures will require a number of steps. Still, aluminum fixtures can be painted with any kind of paint for metal surfaces.
Again, how you go about doing this will depend on whether your light fixtures are aluminum or plastic—plastic fixtures will require a different procedure. Still, aluminum fixtures can be painted with any paint for metal surfaces.
Step 5: Finish it up
After completing the first four steps, you should have two newly painted light fixtures—congratulations! How you finish them up will depend on what kind of paint was used to paint the surfaces—if oil-based enamel paints were used, then your fixtures may emit a strong odor for around 24 hours after finishing this step. How you do this will depend on how long you let the paint dry before finishing it up.
How you go about doing this will depend on whether your light fixtures are aluminum or plastic—plastic fixtures can be finished with any clear coat. In contrast, aluminum fixtures should only be completed with one designed for metal surfaces. Keep reading for more information about how to prevent led lights from peeling paint.
Frequently Asked Question
What is the difference between led lights and other types of lighting?
The difference between led lights and other types of lighting is that led lights use less energy and have a longer lifespan.
Can you use some primer before painting your walls with led lights so they won’t peel later on?
You can use some primer before painting your walls with led lights to prevent them from peeling.
What are the best methods to prevent led lights from peeling paint?
There are a few different methods that you can use to prevent led lights from peeling paint. Some of the best methods include using a primer before painting your walls with led lights, making sure that the walls are clean and free of dust and dirt, and using high-quality paint.
How much does it cost to prevent led lights from peeling paint?
It typically costs around $10 to $15 to use a primer before painting your walls with led lights. However, the cost may vary depending on the type of primer that you use.
What is the best way to prevent led lights from peeling paint?
There are a few different methods that you can use to prevent led lights from peeling paint. Some of the best methods include using a primer before painting your walls with led lights, making sure that the walls are clean and free of dust and dirt, and using high-quality paint.
Conclusion
There are many ways to protect your paint from led lights. You can use a reflective film, put up curtains and other window coverings, or even switch light bulbs for LED versions that emit less heat. Use this blog as inspiration and protection for your home’s interior design! Thanks for reading our post about how to prevent led lights from peeling paint.
You Can Check It Out To Use a UV Light on La Colors Gel Polish