There’s nothing quite like the peace of mind you feel when you know you have a reliable light source in case of an emergency. A good, sturdy Coleman lantern can give you that reassurance – and with a little TLC, it can last for years to come. This blog post will show you how to rebuild coleman lantern so it’s as good as new. Read on to find out more!
Summary: If your Coleman lantern is not working, there are several steps that you can take to try and fix it. First, check the voltage inside the lantern. If the voltage is low, it may be because of a broken wire. If the voltage is low and the bulb is still not working, it may be because of a burned out bulb. In any case, if these steps fails to fix the lantern, you will need to replace the entire light assembly.
There are a few reasons it’s important to rebuild the Coleman lantern. First and foremost, it ensures that your lantern is in good working order and can provide light in an emergency. Secondly, it helps to extend the life of your lantern – meaning you won’t have to replace it as often. And finally, it’s a great way to learn more about how your lantern works – so you can troubleshoot any problems in the future.
Things Youll Need:
To rebuild a Coleman lantern, you’ll need the following supplies:
- Screwdriver
- Pliers
- Lantern mantles
- Wick
- Fuel
You can find most of these supplies at your local hardware store. However, we recommend that you purchase new mantles and wicks rather than trying to reuse the old ones. This will help ensure that your lantern is in good working order and is safe to use.
How to Rebuild Coleman Lantern Step by Step Guide
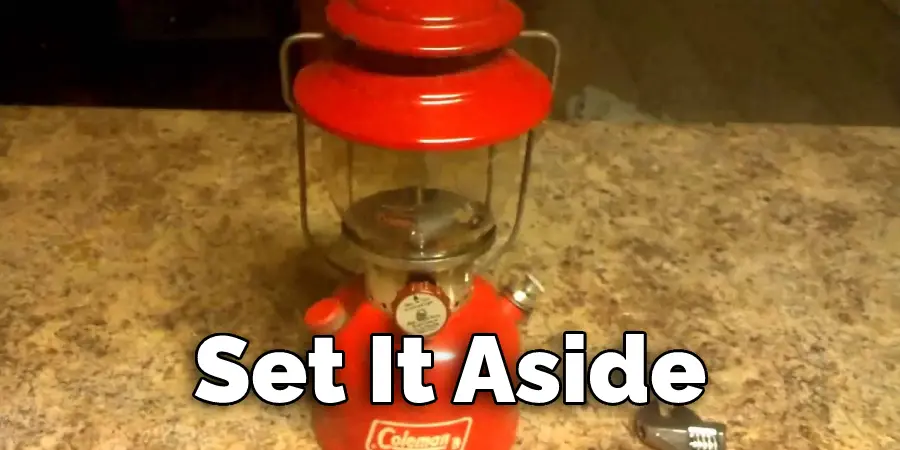
Step 1: Remove the Globe
Before you can get started, you’ll need to remove the globe. To do this, unscrew the screws holding it in place with a Phillips screwdriver. Then lift off the globe and set it aside. You should see four metal brackets inside your lantern – these are what hold up the mantle.
Once you’ve removed the globe, you’ll need to take off the mantles next. Use your screwdriver to unscrew and remove the brackets holding them in place, and set them aside. Note how they’re attached so you can put them back together easily later. Now lift off each mantle and discard it.
Step 2: Remove Brackets
Use a Phillips screwdriver to remove the screws holding each bracket in place. As you do so, take note of how they’re positioned, as this will help later on when you reassemble everything. Also, take a look at how the bracket attaches to the top mantle – you’ll need this knowledge to put it all back together.
Note how the bracket is placed – there should be a small metal wire attaching it to the top mantle and another wire connecting it to the lower one. 9) In the next section of instructions, the instructions say to “do steps 1-8 again.” You don’t have to do it again – you’ve already done all of that work. All you need to do is glue on the bracket and put the stem in place.
To remove the four brackets, set them aside in a safe place. You may need them later on when you reassemble everything, although it is recommended that you buy and use new ones.
Step 3: Remove Top Mantles
To use a lantern, you need to remove the top mantles. Be careful not to burn yourself on any exposed metal or glass! There are ridges on the inside of the top mantle – these ensure that the fumes rise through it and into the lantern chimney.
You’ll likely find the mantles covered in black soot. This is normal, and it can be cleaned off with a damp rag or cloth.
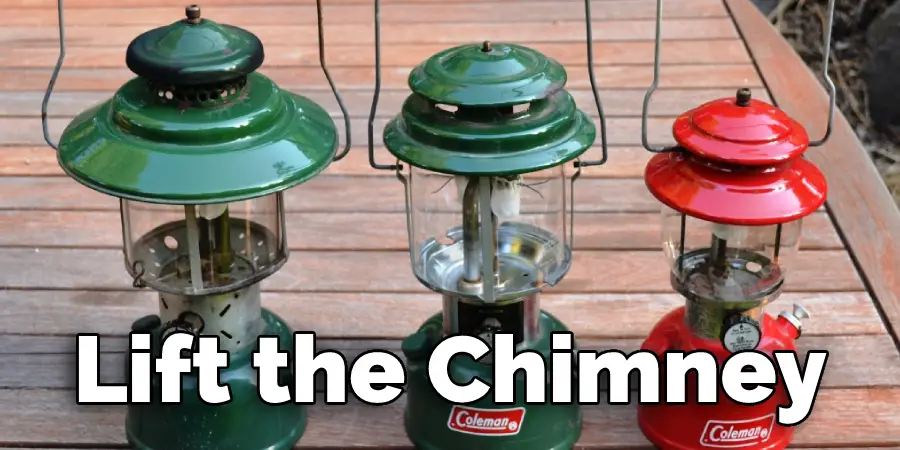
Step 4: Remove Chimney and Clean Out Fuel Tank
To remove the chimney, first unscrew the four screws that are holding it in place. Then gently lift the chimney and set it aside.
In order to remove the chimney, one must take a look at how it is attached to the fuel tank. There is a small tube with an inner ring that fits over a washer on top of the tank. This prevents the lantern from leaking when turned upside down.
Once you’ve removed the chimney, you can clean out your fuel tank if needed. You can do this by blowing into it – be sure to cover the bottom hole with your finger, so dirt doesn’t get inside! If there is sediment inside, use a soft brush to carefully remove it, so it doesn’t scratch the inside of your fuel tank.
Step 5: Remove Fuel Tank
Now that you’ve removed the chimney and cleaned out the tank, it’s time to remove the tank from the lantern itself. Use a Phillips screwdriver to unscrew and remove all screws holding it in place (there should be two screws on each side). Gently lift the fuel tank and set it aside.
Step 6: Remove Fuel Valve Assembly
Use a Phillips screwdriver to unscrew and remove screws holding the fuel valve assembly in place (there should be four screws total). Be sure not to lose any washers or other parts! Once you’ve removed these screws, gently lift the valve assembly and set it aside.
Step 7: Clean Fuel Valve Seat
Take a look at how the fuel valve seat is placed – it should be held in place by three Phillips screws (one on each side and one in the center). Before you remove these screws, we recommend using an old toothbrush to clean off any dirt and sediment that might be lodged inside.
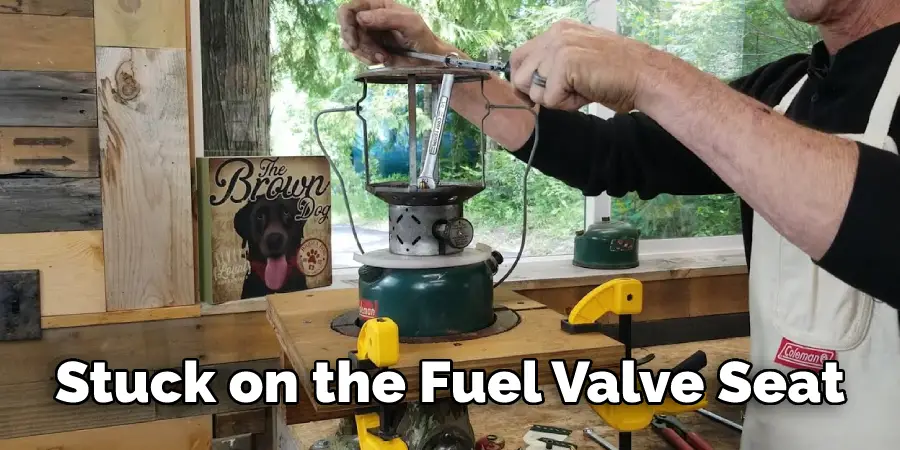
Once you’ve cleaned it, unscrew and remove the screws and set them aside with the others. Now use a cotton swab to clean off any dirt or residue that may be stuck on the fuel valve seat itself. Once you’re done, take a look at how it attaches to your lantern – this will help you when you reassemble it later on.
Step 8: Remove Fuel Gauge Assembly
Now use a Phillips screwdriver to unscrew and remove the screws holding the fuel gauge assembly in place (there should be four screws total). Gently lift the fuel gauge assembly and set it aside.
You’ll likely find a lot of rust on this assembly, especially on the inside. Use a #000 Phillips screwdriver to remove any screws that are rusted in place (there should be four screws total). Once you’ve removed all of these screws, gently lift up the gauge and set it aside.
Step 9: Remove Fuel Gauge Float from Bottom Assembly
Use your fingers to remove the fuel gauge float from the bottom assembly.
Step 10: Clean Bottom Assembly and Fuel Gauge Float
Now that you’ve removed your parts, clean off any dirt or sediment on them with a cotton swab. You can also use an old toothbrush to remove any deeper-seated grit or grime that doesn’t easily come out. Once you’re done, reassemble your fuel gauge parts. You can do this by first aligning the fuel valve stem at the bottom of the float with the hole in the bottom assembly (it should be facing upwards).
Next, place your washer over it and press down to secure it in place.
Once you’ve placed both the washer and the fuel valve stem, place your gauge float over it.
Now place your new O-rings around the screw posts on either end of the bottom assembly. Align them with your screws and press down to secure them in place. Do not remove any old O-rings! Once you’ve done this and checked that everything looks how it should, move on to the next step.
Step 11: Reassemble
Now that you’ve cleaned off your parts, it’s time to put them back together. Start by placing the fuel gauge float at the bottom of the tank. Align it with how it was originally situated and then gently press down to secure it in place. Make sure that there are no cotton fibers or other dirt or grit on the float itself. Next, place your new O-rings around the screw posts on either end of the bottom assembly.
Align them with your screws and press down to secure them in place. Once you’ve done this, move on to how it was originally assembled (aligning how it is how you found it). Finally, reattach your fuel gauge assembly to the bottom of the tank. Once you’ve done this, set your fuel gauge assembly aside and take care of how it was originally attached – aligning how you found it and how it is how you found it). Keep reading for more information about how to rebuild coleman lantern.
How Do I Fix My Coleman Gas Lantern?
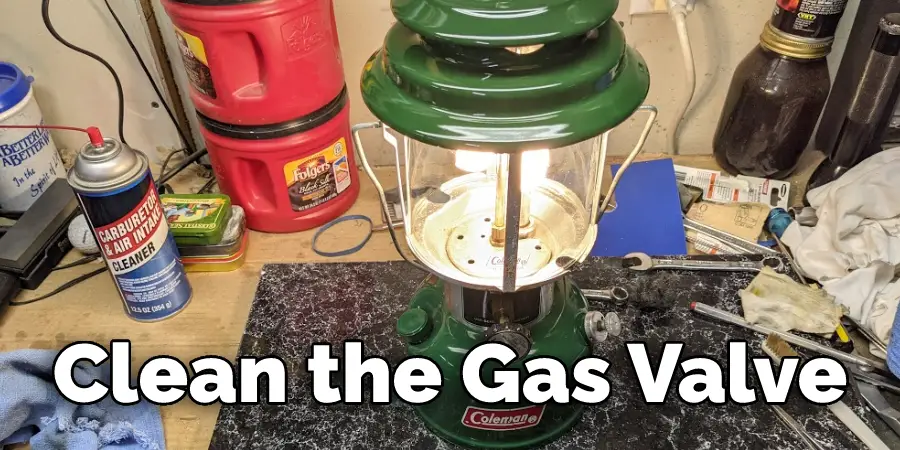
If your Coleman lantern will not light, the first step is to clean the gas valve. Turn off the fuel supply and remove the mantles. Use a soft cloth to clean the valve and then reattach the mantles.
If your Coleman lantern is not producing enough light, you may need to adjust the mantle height. To do this, remove the mantles and turn the gas valve off. Use a screwdriver to loosen the screws on the top of the lantern. Raise or lower the mantle bracket as needed and then reattach the screws.
If your Coleman lantern is leaking gas, turn off the fuel supply and remove the mantles. Disconnect the gas line and check for any leaks. If there are leaks, use Teflon tape to seal them and reattach the line.
Frequently Asked Question
What Model Coleman Lantern Do I Have?
If you are unsure what model your Coleman lantern is, go to the Coleman website and look up the owner’s manual for your specific model. Once you have identified your model, follow the instructions in the manual to rebuild your lantern.
How Do You Clean an Old Coleman Lantern?
To clean an old Coleman lantern, you will need a soft cloth, a toothbrush, mineral spirits, and kerosene.
Turn off the fuel supply and remove the mantles. Use a soft cloth to clean the lantern. If any built-up deposits are on the burner, use a toothbrush to scrub them off. Be sure to clean the area around the gas valve.
Pour mineral spirits into the fuel tank and shake it well. Use a soft cloth to wipe down the outside of the lantern. Pour kerosene into the fuel tank and shake it well. Use a soft cloth to wipe down the outside of the lantern again. Reattach the mantles and turn on the fuel supply.

Conclusion Paragraph:
The Coleman lantern is a classic camping accessory that has been around for many years. If your lantern is damaged, don’t worry! You can quickly rebuild it using some simple supplies and tools. We hope you found this tutorial helpful. Check out our other camping tutorials for more tips and tricks. Have a great trip! Thanks for reading our post about how to rebuild coleman lantern.
You may read also How to Open Half Lantern Outside Light