
Dome lights are a popular choice for lighting up the inside of a car. However, they can often be difficult to remove, especially if you don’t know how. It is important to know how to remove car dome light fixture.
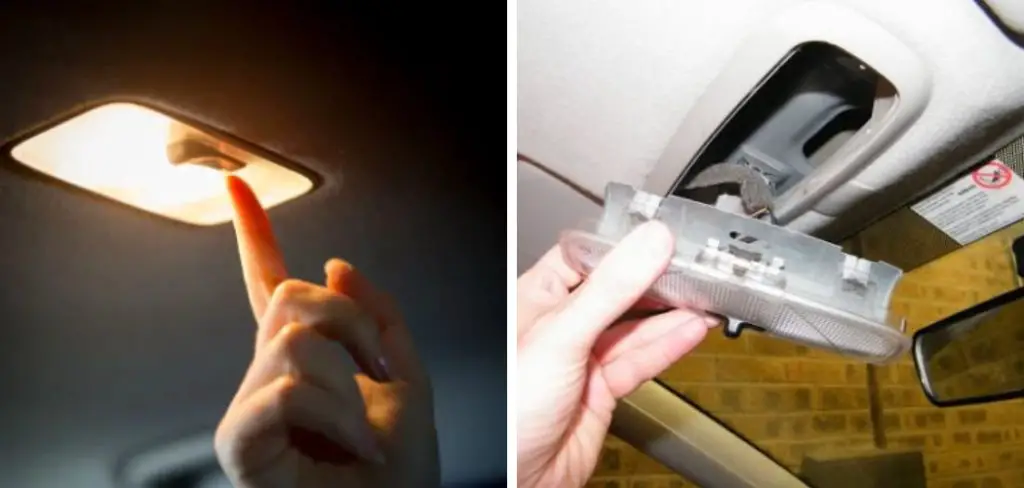
Whether you’re replacing a car dome light fixture or just cleaning it, knowing how to remove it is important. In this article, we’ll show you how to do it. We’ll also give you some tips on how to clean the dome light fixture. Keep reading for more information.
What You Will Need
- A Phillips head screwdriver
- A flat-head screwdriver
- A pair of pliers
- A new car dome light fixture (if you’re replacing the old one)
8 Steps Guide on How to Remove Car Dome Light Fixture
Step 1: Locate the Dome Light
There are a few ways you can locate your car’s dome light. The important thing is to look for it in the overhead console. If your car has an overhead console, the dome light will be located in the center of it. You can also look for it in the headliner near the front of the car.
The dome light will be located in the center of the headliner. You can look for it in the rearview mirror. The dome light will be located in the center of the rearview mirror. Once you have found the dome light, you can remove it by unscrewing it from its location.
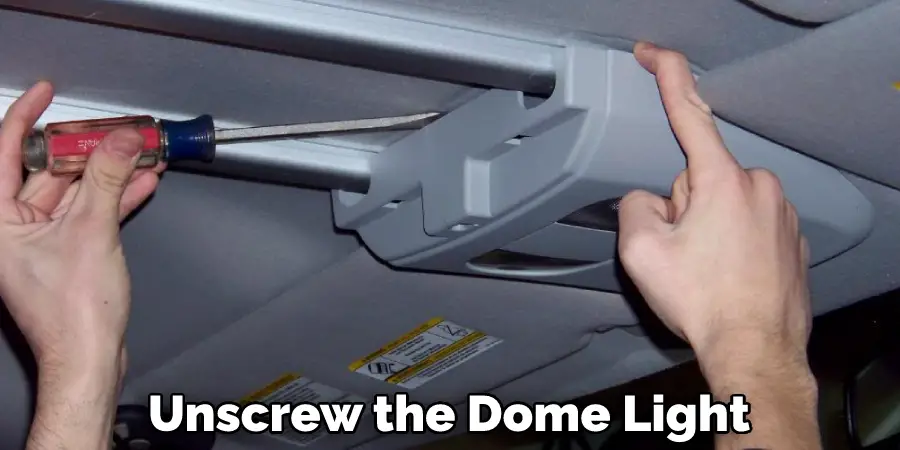
Step 2: Remove the Screws
The screws that hold the dome light fixture in your car are usually located on the base of the unit. To remove them, you will need to use a screwdriver. Gently prying off the lens cover with your screwdriver. Once the lens cover is off, you should be able to see the screws.
Using your screwdriver, unscrew the screws and remove them from the base of the unit. Pull the entire unit out of the ceiling of your car. Be careful not to damage any wires as you do this. With the unit removed, you can now clean it or replace it with a new one.
Step 3: Pull Down the Fixture
Pull down the fixture gently. Disconnect the wires. Unscrew the dome light and remove it from the car. Turn off the power before doing any work on the car’s electrical system. To avoid injury, be careful not to touch any live wires. Some cars have a second wire that must be disconnected before removing the dome light.
This wire is usually connected to the doorframe and activates the dome light when the door is opened. Be sure to check for this wire before removing the dome light fixture. If present, disconnect it before proceeding. Always consult your car’s owner’s manual for specific instructions on how to remove and replace components in your vehicle.
Step 4: Disconnect the Wires
The first thing you need to do is to disconnect the wires leading to the car dome light fixture. You can do this by gently twisting the connector on each wire. Once the wires are disconnected, you can remove the screws that hold the fixture in place.
Gently pull the fixture out of the opening, being careful not to damage the surrounding area. With the fixture removed, you can now take a look at the wiring and see if there are any loose connections. If everything looks good, you can now reattach the wires and screw the fixture back into place.
Step 5: Remove the Fixture
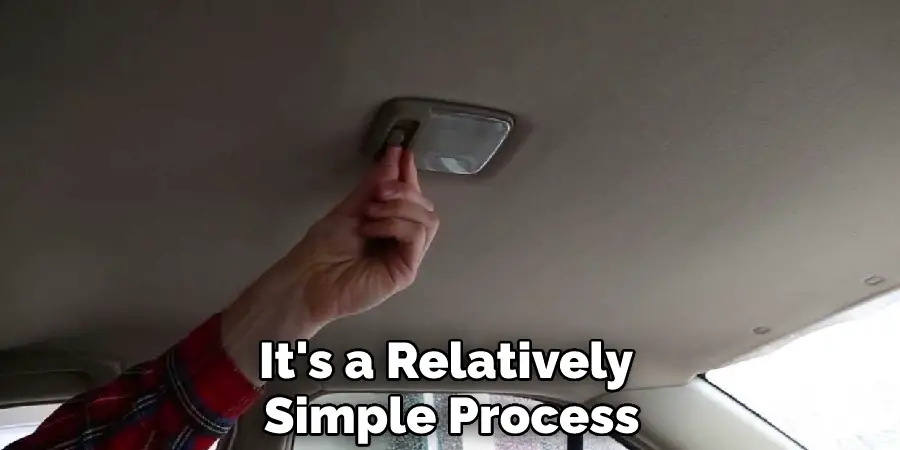
You may need to replace your car’s dome light fixture for several reasons. The most common reason is that the original fixture has become damaged or broken. In some cases, you may simply want to upgrade to a newer or nicer fixture. Whatever the reason, removing a car’s dome light fixture is a relatively easy process that can be completed in just a few minutes.
By locating the two screws that secure the fixture to the ceiling of your car. In most cases, these screws will be located on either side of the fixture. Once you have located the screws, use a screwdriver to remove them. With the screws removed, the fixture should easily pull away from the ceiling of your vehicle. If it does not, gently pry it loose with a flathead screwdriver.
With the old fixture removed, take a moment to clean up any debris or dirt that has accumulated on the ceiling of your car. Then, simply reverse the process to install your new dome light fixture. Be sure to tighten the screws securely so that your new fixture will stay in place.
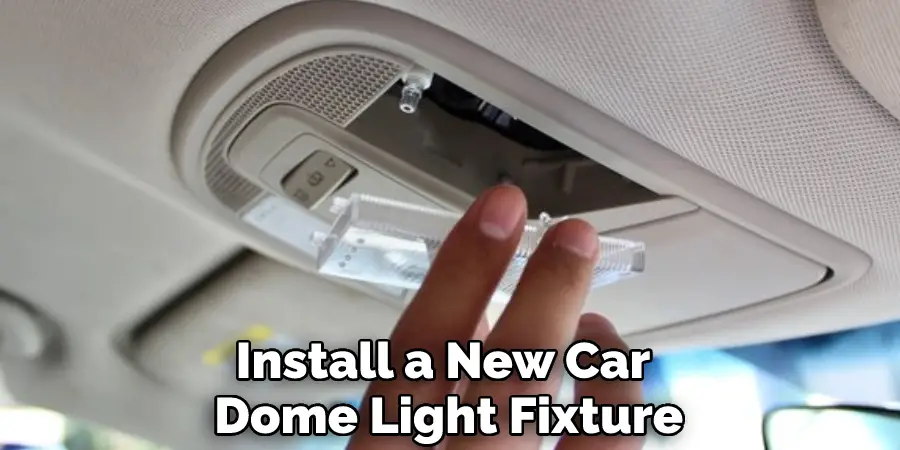
Step 6: Prepare the New Fixture (if applicable)
If you’re replacing the old fixture with a new one, you’ll need to prepare it first. Start by attaching the new wires to the fixture. Make sure you connect the positive wire to the positive terminal and the negative wire to the negative terminal.
Step 7: Install the New Fixture
You need to do is disconnect the negative battery terminal. This will prevent any shorts while you are working. You should use a small flathead screwdriver to pry up the lens cover. Underneath the cover, you will see the screws that hold the fixture in place. Use a Phillips head screwdriver to remove the screws and pull out the old fixture.
To install the new fixture, reverse these steps. You should insert the new light into the hole and screw it in place. With these simple instructions, you can easily install a new car dome light fixture.
Step 8: Test the New Fixture
Before you put everything back together, test the new fixture to make sure it’s working properly. Turn on the car’s ignition and turn on the dome light switch. The light should come on. If it doesn’t, check the connections and try again.
And there you have it! That’s how to remove and replace a car dome light fixture. We hope this guide was helpful. If you have any questions, feel free to leave us a comment below. Thanks for reading!
Tips on How to Remove Car Dome Light Fixture
- Before you begin, make sure that you have the following tools: a Phillips head screwdriver, a flat-head screwdriver, and a pair of pliers.
- Locate the screws that are holding the dome light fixture in place. These screws are usually located around the perimeter of the fixture.
- Use the Phillips head screwdriver to remove the screws.
- Carefully pull the fixture away from the ceiling of the car. You may need to use the flathead screwdriver to pry it loose if it is stuck.
- Disconnect the wiring harness from the back of the fixture.
- Remove the light bulb from the socket.
- Clean any dirt or debris from the socket with a clean cloth.
- Install a new light bulb into the socket.
- Reconnect the wiring harness to the back of the fixture.
- Carefully push the fixture back into place and screw it in with the Phillips head screwdriver

How Do I Disconnect the Wiring Harness From the Back of the Fixture?
To remove the car dome light fixture, you will need to first disconnect the wiring harness from the back of the fixture. You can do this by gently pushing on the release tab located on the back of the fixture.
Once you have done this, you will be able to slide the wiring harness out of the back of the fixture. After you have disconnected the wiring harness, you will then be able to remove the car dome light fixture from the vehicle.
How Do I Install a New Light Bulb Into the Socket?
It’s quite simple. First, you’ll need to remove the old bulb from the socket. To do this, twist it counterclockwise until it comes loose. Next, take your new bulb and insert it into the socket, again twisting it counterclockwise until it’s secure. You should replace the cover on the fixture and screw it back into place. And that’s it! Installing a new light bulb is quick and easy, and with these simple steps, you’ll have your room looking bright and welcoming in no time.
What Should I Do if My Car Dome Light Fixture Doesn’t Work?
While it may seem like a daunting task, removing and replacing a car dome light fixture is quite simple. Here are the steps you’ll need to follow:
You should open up your car’s hood and locate the fuse box. Once you’ve found it, take a look at the diagram on the inside of the fuse box cover to find the fuse that corresponds to your car’s dome light. Once you’ve located the fuse, use a pair of pliers to remove it from the box.
You should locate the wires that connect your car’s dome light to the fuse box. There are usually two wires – one for the ground connection and one for the power connection. Use a pair of wire cutters to snip the wires as close to the connector as possible.
You’ll need to remove the old dome light fixture from your car. Most fixtures are held in place with screws or bolts. Simply remove these fasteners and pull out the old fixture.
To install the new fixture, simply reverse these steps. Start by attaching the new fixture in place, then reconnecting the wires (making sure to use butt connectors or similar joiners)
Frequently Asked Questions
What is the Light Inside the Car Called?
The light inside a car is called the headlight. It’s a small, intense light that helps drivers see while driving at night or in poor weather conditions. Headlights also help to make cars more visible to other drivers, and they are required by law in most countries.
Is It Easy to Change a Light Fixture?
Yes, it is easy to change a light fixture. All you need is a Phillips screwdriver and some basic wiring skills. To change a light fixture, first unplug the existing light fixture from the electrical outlet and plug in the new light fixture. Make sure the wires are properly connected, and then use the Phillips screwdriver to tighten the screws on the light fixture. Once the screws are tight, reconnect the light fixture to the electrical outlet and test it to make sure it works correctly. If there are any problems with the new light fixture, please let us know so that we can correct them. Thank you for your question!
Do Electricians Replace Light Fixtures?
Yes, electricians often replace light fixtures, as they are frequently subject to breakage and need to be replaced in order to maintain the proper illumination in a particular area.
What is the Purpose of Dome Light?
A dome light is a type of light fixture that is used primarily in interior spaces, such as homes and offices. Dome lights are typically less expensive than traditional light fixtures and are often more efficient in terms of energy use. They are also popular for their decorative features, which can add a touch of elegance to an interior space. Dome lights come in a variety of shapes and sizes, and they can be mounted directly on the wall or placed on a stand.
Conclusion
Hopefully, this article helped show you how to remove a car dome light fixture. It’s a relatively simple process that anyone can do with the right tools. You should determine carefully how to remove car dome light fixture.
You should be very persistent on this. Be sure to take your time and be careful not to break any parts. With these tips, you should be able to remove your car dome light fixture in no time!