Have you ever wondered how to remove a porch light cover? It seems like it would be a simple task, but sometimes they can be quite tricky to get off. Removing a porch light cover is a relatively easy task that can be completed in a few simple steps. Although the specific instructions may vary depending on the make and model of your light fixture, the basic steps are generally consistent. In this blog post, we will show you how to remove porch light cover in easy steps. So, if you are looking to change your porch light bulb or just want to give your porch a fresh look, keep reading.
Summary: Removing a porch light cover is a simple task that is often necessary for replacing bulbs, cleaning the fixture, or performing maintenance. The process for removing the cover may vary depending on the design and style of your porch light, so it’s essential to familiarize yourself with the specific type of fixture you have. Common types of porch light covers include screw-on or threaded covers, clip-on covers, or covers secured by screws or other fasteners.
Before you begin, ensure that the power to the porch light is turned off, either by switching off the light or by cutting power at the circuit breaker. This will ensure your safety during the process. For screw-on or threaded covers, gently twist the cover counterclockwise until it releases from the fixture. Be cautious not to apply too much pressure, as this could potentially crack or break the cover. For clip-on covers, carefully locate and press down on the clips or tabs holding the cover in place, and gently remove the cover from the fixture. If your porch light cover is secured by screws or other fasteners, use a screwdriver or the appropriate tool to carefully remove the screws, taking care not to lose any small parts. With the cover removed, you can now access the bulb or other components for replacement or maintenance. To reinstall the cover, simply reverse the removal process, ensuring that the cover is properly secured and aligned. By following these steps, you can safely and effectively remove a porch light cover for various maintenance tasks.
What Is Porch Light
Porch lights are one of the most important parts of your home’s exterior lighting. They provide safety and security, and also add curb appeal and can increase your home’s value. Therefore, it’s important to keep your porch light in good working condition and to know how to remove the porch light cover when it needs to be replaced.
Things You Will Need
- A Phillips head screwdriver
- A flathead screwdriver
- A ladder (if needed)
- A New Porch light – Like this modern pair
5 Easy Ways on How to Remove Porch Light Cover
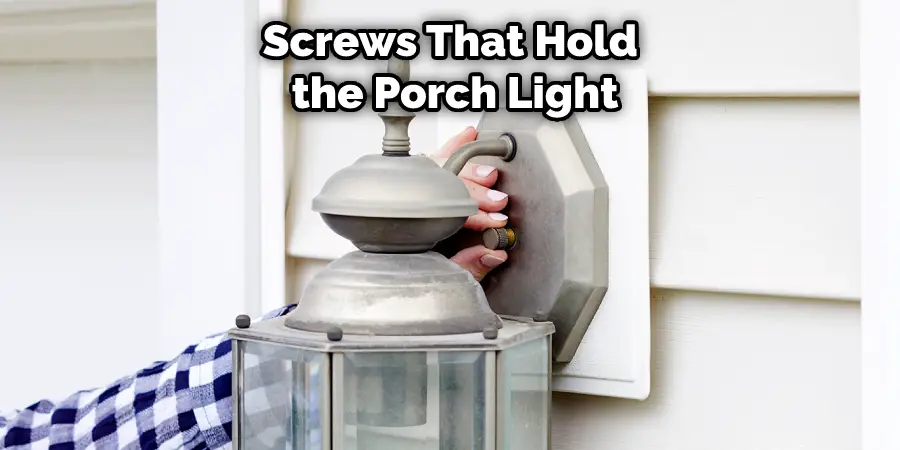
1. Locate the Screws
The screws that hold the porch light cover in place are usually located near the top or bottom of the glass. If you cannot find the screws, check the owner’s manual for your specific model.
2. Use a Screwdriver
Find the screws and remove them with a screwdriver, being careful not to strip them. If they are stripped, you may need to use a different screwdriver or a pair of pliers. The cover should come off easily once the screws are removed.
3. Clean the Glass
Once you’ve removed the cover, take a cloth and give the glass a good clean. Be sure to remove any dirt or debris that may have accumulated over time. You can use glass cleaner for this task, but make sure it’s non-abrasive. Use a lint-free cloth to avoid leaving streaks.
4. Inspect the Bulb
While you have the cover off, take a moment to inspect the bulb. If it is burnt out, replace it with a new one. Be sure to check the wattage to ensure you are using the correct type of bulb. Turn off the power. Find the switch that turns off the circuit for the light fixture.
If you can’t find a switch, flip the main breaker at the electrical panel to turn off all power to the house. The light fixture should be marked with a number, which corresponds to a number on the breaker. Turn it off.
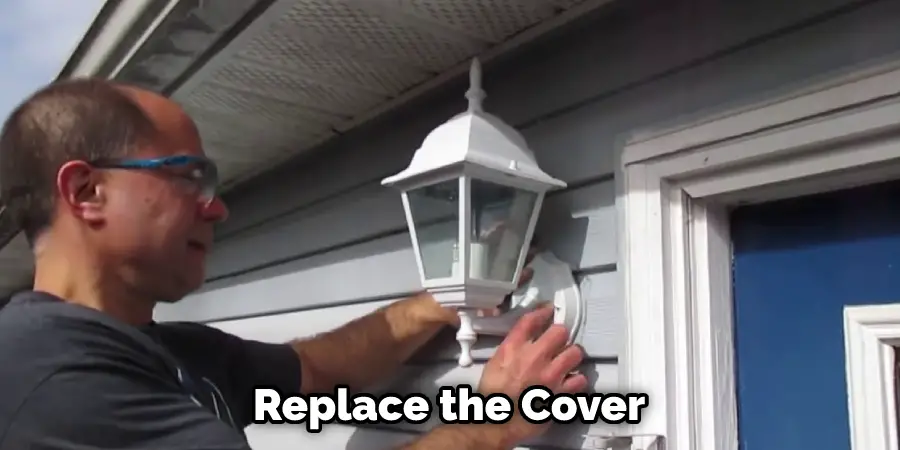
5. Replace the Cover
Once the glass is clean, and the bulb has been inspected, replace the cover. Be sure to line up the screws and tighten them, so the cover is secure. Porch lights are a great way to add curb appeal to your home. But over time, the covers can become dirty or damaged. So to keep the porch light looking its best, it’s important to clean the cover and glass regularly.
Step by Step Process on How to Remove Porch Light Cover
With a few simple steps, you can remove the porch light cover and have it look like new in no time.
Step 1. Turn Off the Power
Before starting, turn off the power to the porch light at the breaker box. This will ensure your safety while working. Power off the breaker that controls the light before proceeding.
Step 2. Place a Ladder
Place a ladder under the light so that you can reach the screws. If you don’t have a ladder, you can stand on a stool or chair. Be careful not to break the bulb when removing the cover. Ladder safety is important, so make sure the ladder is in a stable position before you climb it.
Step 3. Remove the Old Cover
Once the power is off, you can begin removing the old cover. Start by unscrewing the screws or bolts that hold it in place. If the cover is painted shut, use a utility knife to score along the edges carefully. Once the cover is loose, carefully pull it away from the light fixture. If there is a glass globe, be careful not to drop or break it.
Step 4. Clean the Fixture
Take a moment to clean the light fixture with the old cover off. Wipe away any dirt, dust, or cobwebs that have accumulated. If the glass looks a bit cloudy, you can clean it with vinegar and water solution. The vinegar will help to remove any build-up on the glass.
Step 5. Install the New Cover
Now it’s time to install the new cover. Start by holding it up to the light fixture to make sure it’s the right size and style. If everything looks good, proceed to screwing or bolting it into place. Be sure not to overtighten the screws, as this can strip the hole or break the cover. Your light fixture will be as good as new with the new cover in place.

Step 6. Turn on the Power
Once the new cover is installed, you can turn the power back on at the breaker box. Then, test the light to make sure it’s working properly. If everything looks good, you’re all done. Installing a new porch light cover is a quick and easy way to update your home’s exterior. You can give your front porch a whole new look with just a few simple steps. Be sure to follow the instructions that come with your new cover to ensure a proper fit. And always remember to turn off the power before starting any electrical work.
You Can Check It Out to Drive with A Broken Tail Light Cover
Tips and Warnings on How to Remove Porch Light Cover
Tips
- Always use a ladder when removing a porch light cover.
- Use gloves to avoid getting your hands dirty or cut.
- Be careful of glass shards if the cover is broken.
- Turn off the power to the porch light before removing the cover.
- Have a helper hold the ladder for you if possible.
- Inspect the cover for any damage before removing it.
Warnings
- Do not attempt to remove a porch light cover without first turning off the power to the light.
- Do not stand on the top rung of a ladder while removing a porch light cover.
- Do not use any sharp objects to pry off a porch light cover.
- Do not try to remove a porch light cover that is screwed in place.
How Do You Replace a Back Porch Light?
Climb the ladder and remove the existing porch light cover by unscrewing it from the base. If you are replacing the entire light fixture, unscrew the wires from the electrical box and carefully remove the entire unit. Screw the fixture into the electrical box, then screw on the new glass cover to install a new light. If you are replacing the glass, align it with the screws on the porch light base and tighten until snug. Test the new light by turning on the power at the breaker box.
When it’s time to change your porch light, you may be wondering how to remove the old one and install a new one. It’s a pretty simple process, but there are a few things you’ll need to know before you get started. First, make sure you have the right tools for the job. You’ll need a ladder, screwdriver, and maybe a pair of pliers. You may also need a new light fixture and glass cover if you’re replacing the entire unit.
To remove the old porch light, start unscrewing the base’s cover. If you’re replacing the glass, you can skip this step. If you’re replacing the entire light fixture, unscrew the wires from the electrical box and carefully remove the unit. Screw the fixture into the electrical box, then screw on the new glass cover to install a new light. If you’re just replacing the glass, align it with the screws on the porch light base and tighten until snug. Once everything is in place, turn on the power at the breaker box and test the new light.
Replacing a porch light is a quick and easy project that anyone can do. Just make sure you have the right tools and materials, and follow these simple instructions. Then, in no time at all, you’ll have a brand new light to brighten up your porch.
***
Frequently Asked Questions
How Do You Open an Outside Light Cover?
There are a few different ways to do so. The first way is to use a screwdriver. To do this, turn the screws counterclockwise until they release. Once they have been released, lift the light cover off of the lightbulbs.
The second way to open an outside light cover is using a keyhole. To do this, first locate the keyhole and line it up with the screw on one side of the cover. Insert the keyhole key into the screw and turn it clockwise until it reaches the top. Once it has been turned, lift the cover off of the lightbulbs.
The last way to open an outside light cover is using a clasp. To do this, locate the clasp on one side of the cover and line it up with the screw on the other side. Insert your fingers into each side of the clasp and twist them until they pop open. Once they have opened, lift the cover off of the lightbulbs.
What is a Porch Light Called?
A porch light is typically called a porch light, porch light fixture, or simply a light. It is a small, simple light used to illuminate a porch or entranceway. They are often made of aluminum or steel and are weatherproofed to withstand the elements. Some models feature built-in lights and switches, while others require separate lighting and switch installations.
What is the Purpose of a Front Porch Light?
Front porch lights are used to provide a safe and welcoming atmosphere for visitors, and to provide a visual indicator of the home’s presence in the darkness. They are typically located near the front door or at the walkway leading up to the door, and can be used to light the way as people approach or exit the home. Front porch lights can also be used to provide supplemental lighting during evening hours or when it is dark outside.
Are Porch Lights a Deterrent?
Porch lights can be a deterrent to burglars, as they may be confused by the light and decide to avoid the area. Additionally, porch lights can act as a warning to potential thieves that someone is home and ready to defend their property.
Conclusion
In this blog post, we will be discussing how to remove porch light cover. There are a few different ways that you can do this, and we will go over each one. Keep in mind that these instructions might not be applicable to all porch light covers, so please consult your specific model’s manual if necessary.
The most basic way to remove a porch light cover is by using a screwdriver. However, this method requires that you have the correct size screwdriver bit for your screws. If you don’t have the right size bit, you can try using a pair of pliers or vice grips to grip the screws better.
Another way to remove a porch light cover is by gently prying it off with a putty knife. This method is a bit riskier, as you might damage the cover if you’re not careful. Make sure to insert the putty knife at the seam between the cover and the light fixture, and apply gentle pressure until the cover pops off.