
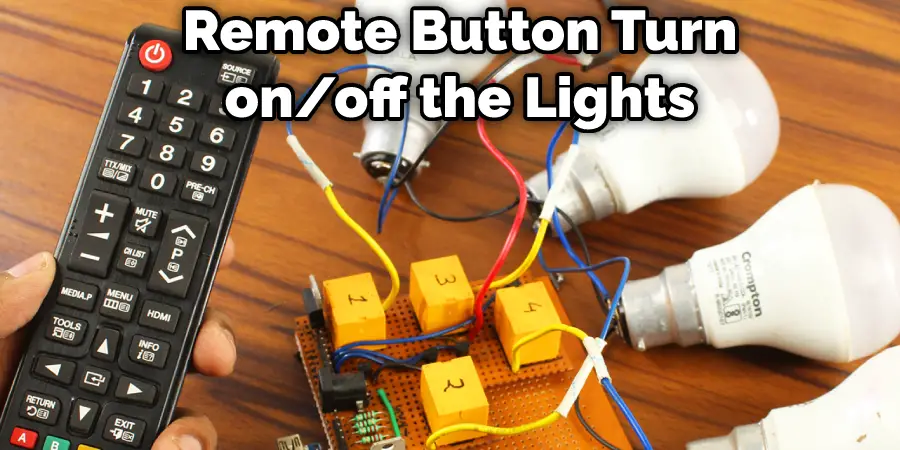
When you buy a set of LED lights, the assumption is that you can control them all with one remote. However, this is not always the case. In some instances, each light will have its remote. This can be frustrating when trying to create a synchronized lighting display. This article will show you how to sync LED lights to one remote.

Syncing led lights can be a frustrating endeavor for those who have tried to do it. This can be especially true when you purchase a set with multiple remotes and only want to use one to control them all.
Summary: Syncing multiple LED lights to a single remote control is a convenient way to control the lighting in your space with ease. This process may vary depending on the brand and model of your LED lights and remote control, so always consult the manufacturer’s instructions for specific guidance. In general, most LED lights and remote controls use a simple pairing process that involves putting the lights and the remote into a “sync” or “pairing” mode, allowing them to communicate with each other.
To sync the LED lights to one remote, first ensure that all the lights are connected to a power source and turned off. Next, turn on the first LED light and activate the pairing mode on the remote control, usually by pressing and holding a designated button or combination of buttons.
Once the remote is in pairing mode, point it at the LED light and press a specific button (as per the manufacturer’s instructions) to establish the connection. The LED light may flash or change color to indicate a successful connection. Repeat this process for each additional LED light, making sure to put both the light and the remote control into pairing mode each time. Once all the LED lights are synced to the remote, you can control their color, brightness, and other settings using the remote control.
Remember that the syncing process may vary depending on the specific products you are using, so always refer to the manufacturer’s instructions for accurate guidance.
A Detailed Guide on How to Sync Led Lights to One Remote
Step 1: Get Right Equipment
The first thing you need to do is get your materials. These can be found at a local hardware store and should include the following:
- LED lights – You can get these in many shapes and forms to fit any color or mood you want. They usually come with an attached remote control.
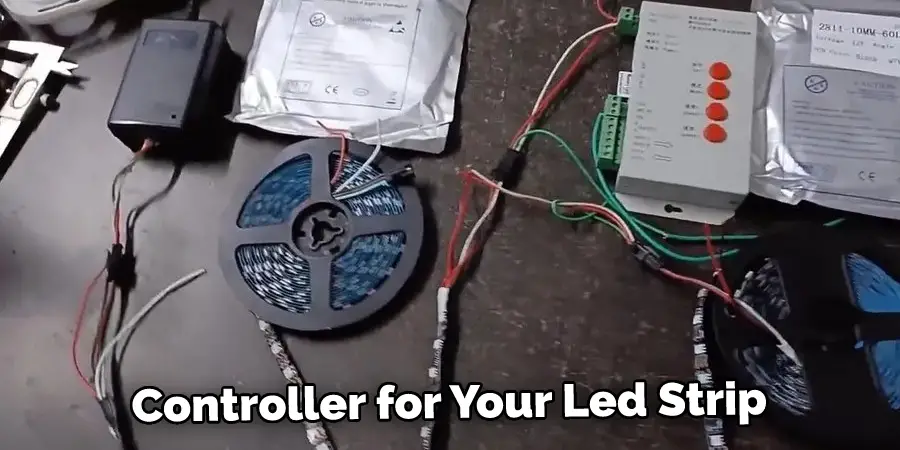
1 controller – This device will connect all of your LED lights, so they turn on/off/change colors at once. It plugs directly into an outlet then has a cord that connects it to all of your lights. It’s similar to a power strip with individual switches for each light, but this one also syncs them all, so they change/turn off/on simultaneously. - Power cords – Make sure the controller you buy has enough power cords to fit all of your lights. You don’t want to have to get any extra because that can get expensive, and you’ll also need a lot of extension cords if the distance between each light is too much.
Step 2: Connecting Light Strips to Single-zone Remote
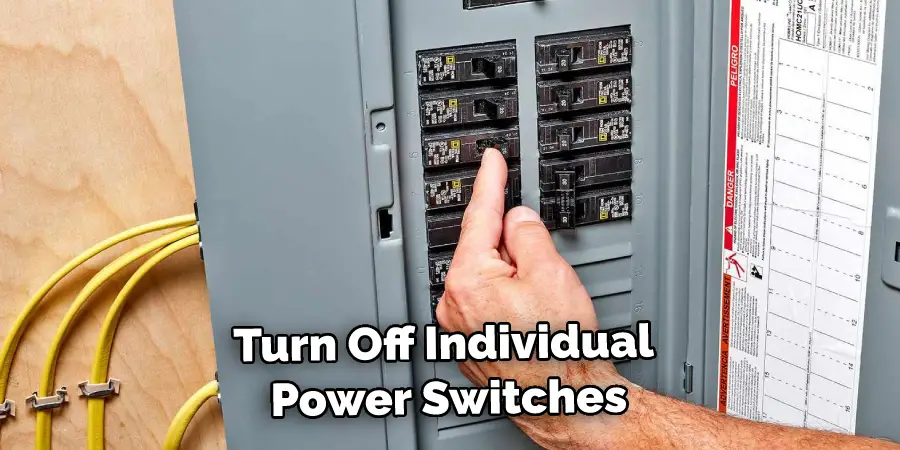
The process is straightforward if you have a remote that controls multiple zones. Just make sure all of your lights are plugged in and regulated by the same outlet (you will need to turn off individual power switches on your controller if they aren’t).
Then connect each light strip to the controller using its extension cord; plug one end into the controller, and the other end into the desired spot on each light. If there is a considerable distance between them, like across different rooms, you will need an extension cord and an outlet adapter (which makes it easier to plug more than one item into an outlet at once; it has multiple plugs on one end, which you can plug into the outlet, and then each individual cord from your light strips can plug into that outlet adapter, one at a time. They all connect to the same outlet and don’t use any extra energy).
this comes with many 3-way lamps). Finally, make sure none of these cords or strips are bent, crushed, folded, or put under stress – this can cause shorts, sparks, and even fires.
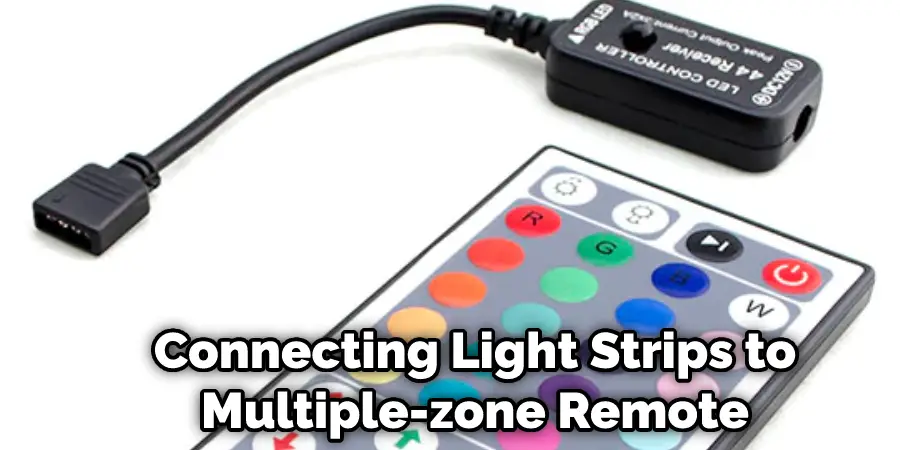
Step 3: Connecting Light Strips to Multiple-zone Remote
If you have a remote that controls only 1 zone, you will need to buy an extra controller and wire it independently. This can be done by plugging the first controller into an extension cord and plugging it straight into the outlet (this should include the more considerable surge protector-type adapter). Then split off one of its power cords to connect to both controllers. For more detailed instructions on wiring, please refer to the owner’s manual.
After attaching each light strip to its power cord, the second controller will be able to control each set of lights with its remote. Always avoid stressing the cords and follow Step 2’s instructions carefully to prevent crushing or putting too much weight on them. The only thing left to do after that is to set up your remotes and sync them!
Step 4: Check the Product Manual
Many LED strips come with a controller that has multiple zones, but others do not. Suppose your strip does not have this function. In that case, you will need to set the zone yourself using a multi-meter (this is used to detect how much different electricity parts of the wire are running through, and putting it to sync only one zone is as easy as turning a dial or pressing a button). If you’re having trouble, consult the product manual with your LED strip.
Step 5: Sync Lights With a Single-zone Remote
If you have a remote that controls one zone, it’s still possible to sync all of your LED lights. The process is more straightforward but will take a few minutes of trial and error.
Then switch off the power and press the number under each light (1 for red, 2 for green, 3 for blue) as they blink on and off – whichever light turns off last or doesn’t react means you’ve assigned the wrong color; do this again until all work correctly. Once you’re done, switch the power back on and hold down 2 & 3 together until it shuts off again (you may have to do this a few times) – this should now save the new color assignment to memory.
While this method is much easier than methods for other remotes, it still requires some patience and time – but the result is worth it.
Step 6: Sync Lights With a Multiple-zone Remote
To use this method, you will need a more advanced controller for your LED strip. First, you will need to switch on the power switch on the back of the controller. Next, you will need to plug the controller into an outlet. Finally, you will need to press one of the presets on the front of the controller to sync all of your lights up at once.
Suppose you don’t have any number buttons or preset options. In that case, you can set up your color controls manually by pressing a button labeled “color” and switching through each color until they begin blinking quickly – this means they are synced.
Step 7: Adjust the Lighting
Now that you’ve set the correct zone on your controller, all you need to do is press some buttons. To get started, turn everything on – every light switch should be turned on (often, the power switches are separate from the controller, so there is no risk of turning them off).
Then use an individual controller for each different color or mood you desire. Every light strip will have its settings for brightness and hue/saturation. There are also many controllers with preset modes like “fire,” “candlelight,” or various colors of “rainbow.”
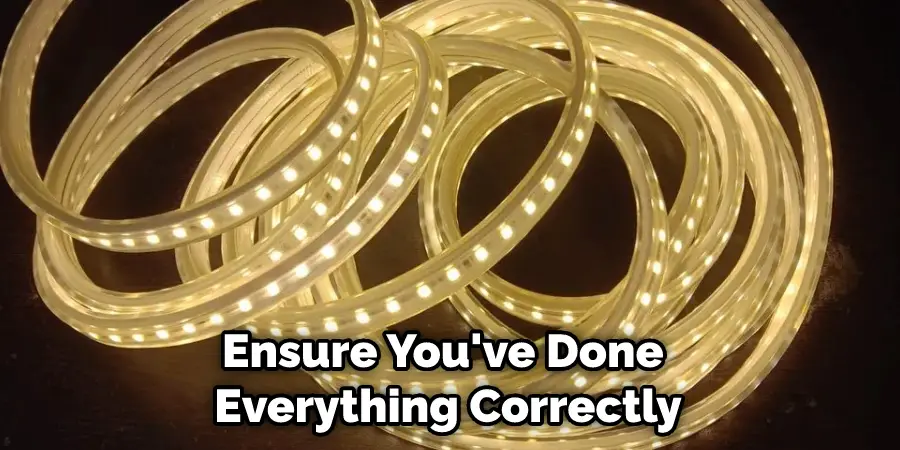
Step 8: Test the Connection
After your cable is firmly plugged in, test it to ensure you’ve done everything correctly. The best way to do this is to turn every light in that area (even if they’re already turned on). How can you tell which ones will go off when you flip the switch? If there’s a group of lights that stay lit when all others are turned off, then those will be the ones that will disconnect from their sync zone/remote control. Repeat this step until each light goes back on without any other lights being affected.
If any of your LED strips have been crushed or malfunctioned, replace them to avoid electrical fires and malfunctions while syncing. Likewise, if any cords or wires are severely damaged, it’s best to replace them because they can cause sparks and fires.
Step 9: Sync the Lights Together
After everything is set up correctly, you can get started on syncing your lights together. How this works depends on your controller; consult your product manual for further instructions if needed. Some controllers will sync all of them at once when you press a large button labeled ‘Sync,’ while others require you to do so individually for each light using its switch (this one requires you to turn on every individual light before turning off any or syncing with another).
Some products allow you to sync two different groups together (for, the living room and the kitchen) using one remote.
If you want to sync your LED strip lights with other external devices, like the TV or music player, you can use an HDMI port or a 3.5mm (e.g., headphone) jack. How this works varies significantly by model; consult your product manual for further instructions if needed.
Step 10: Decide How You Want Them to Turn On
After everything is set up, you can get started on syncing your lights together. How this works depends on your controller; consult your product manual for further instructions if needed. Some controllers will sync all of them at once when you press a large button labeled ‘Sync,’ while others require you to do so individually for each light using its switch (this one requires you to turn on every individual light before turning off any or syncing with another).
Step 11: Decide How You Want Them to Turn Off
Most people will want their LED strips to shut off when they leave the house/room for an extended period (i.e., going on vacation). How this works depends on your controller; consult your product manual for further instructions if needed.
Some controllers will sync all of them at once when you press a large button labeled ‘Sync,’ while others require you to do so individually for each light using its switch (this one requires you to turn on every individual light before turning off any or syncing with another). These steps will help in how to sync led lights to one remote.
You May Read to Sync Govee Light Bulbs Together
Troubleshooting Your Led Light Sync Problem
If you’re having trouble syncing your LED lights, there are several steps you can take to troubleshoot the issue:
- Check the power source: Ensure your LED lights receive power from a reliable source, such as a properly functioning outlet or a fully charged battery.
- Reset the lights: Turn the lights off and then on again to reset them. This can sometimes resolve sync issues.
- Check the remote: Ensure that your remote is functioning properly and has fresh batteries. You can also try using a different remote if you have one.
- Check the signal: Make sure that nothing is interfering with the signal between the remote and the lights. This could include physical obstacles or electromagnetic interference.
- Try a different synchronization method: If you’re having trouble syncing your lights using one method (such as a remote), try using a different method (such as a mobile app).
By following these troubleshooting tips, you should be able to resolve most LED light sync issues.
Precautions
- Before you sync the remote, make sure that your bulb is fully powered.
- The LED strip must be adequately grounded. Avoid using it if there are any potential electrical issues with the board or the power supply. If this happens, switch off all power immediately and contact an electrician for an installation safety checkup.
- Do not plug/unplug the power supply when lights are switched on. It may cause surge damage to the board, especially when it’s a low-quality product.
- Connecting one wire at a time ensures maximum safety! Handling both cables could cause a spark which will cause severe damage to your LEDs(burned) or could even start fire!!!
- Ensure that connecting two wires are correct or wrong because it will damage the board when plugged into the power supply!!!
- We are not responsible for any injury, death, loss, or damage to your LED strip because of your improper use.
- Make sure that the wire is not exposed. You can use a heat-shrink tube to insulate the wire.
Why Is My Led Strip Remote Not Working??
The most common reason that the remote will not work with your led strip is if you exceed the operational distance of 9 meters (30 ft). If this is the case, it may be necessary to purchase a repeater kit.
Set Up A Repeater Kit:
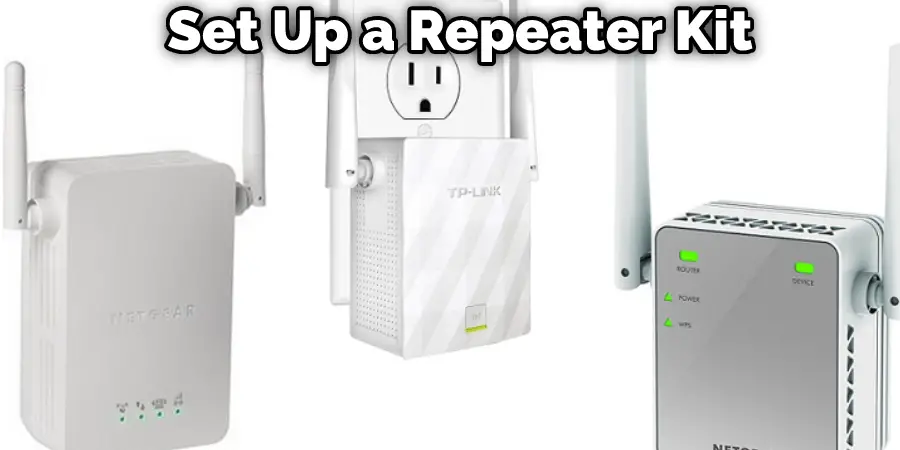
1. Place and stretch out your led strip and press the adhesive backing against a flat surface or board.
2. Once your led strip has been stuck down, plug in your transformer, then plug in your controller or receiver near where you have mounted your led strip. 3. Take one of the provided antennas from the kit and place it right at one end of your led strip; push it into place to make good contact with your led strip.
4. Now, take the second antenna and place it right at the other end of your led strip again. Push it into place to make good contact with your led strip. 5. Now plug in your remote control and point it at the receiver box; you should be able to see your strip lighting up once each time you press a button on your remote.
If you are still not getting any response, try moving the receiver box’s location or even turning off electrical appliances nearby that may interfere with its signal.
Once your remote is working, try to tuck the cables away snuggly so that there are no loose or unorganized wires. This will help with signal transmission and interference and keep it tidy!
You Can Check It Out to: Use Diy Buttons on Led Remote
Frequently Asked Questions
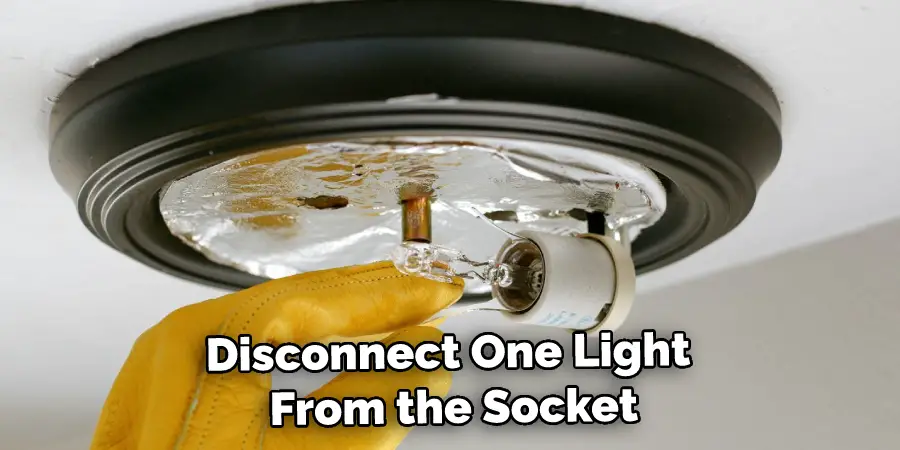
Can You Run Multiple Led Strips From One Controller?
Yes, you can split Govee Lights. Simply connect the lights to an outlet and then disconnect one light from the socket. Next, connect the other light to the same socket and turn it on. You’re now able to share your lighting with a friend or family member by splitting the workload!
Can You Sync Led Lights Together?
There are a few ways to sync led lights together, but the most common method is by using an inverter. This device allows you to convert AC power into DC power, which then can be used to control multiple LEDs.
Another way is by using a controller box and cables that connect your devices. This type of setup is more versatile but may require additional wiring skills. Additionally, some LED light strips come with built-in controllers that allow for easy synchronization between devices.
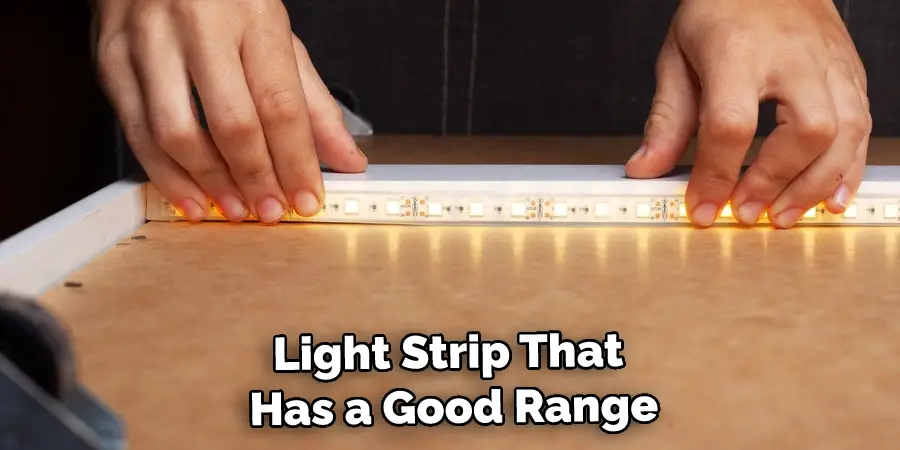
Are All Led Light Strips the Same?
There is no one-size-fits-all answer to this question, as the type of light strip you should buy depends on your specific needs and requirements. However, some general tips that you should keep in mind when buying light strips include:
1. Make sure to choose a light strip that is compatible with your existing ceiling/wall fixtures – some light strips are designed to work with specific types of bulbs, while others are designed to work with a variety of bulbs.
2. Choose a light strip that has a good range – Some light strips have a wider range than others, which means that they can cover a larger area. This can be helpful if you want to use the strip in multiple rooms or areas of your home.
3. Consider the brightness and quality of the light – Make sure to choose a light strip that is bright enough for your needs and that produces high-quality lighting. Choose one that has been tested and certified by an accredited third party.
4. Be sure to read the product reviews before making a purchase – This will help you get an idea of what other customers have thought about the light strip and whether or not it meets their specific needs.
Hopefully, these tips will help you choose the perfect light strip for your needs!
Can You Split Led Strip Lights?
Yes, you can certainly split LED strip lights. However, it is important to note that doing so may result in decreased strip light life and potential electrical hazards. Before splitting your LED strip lights, it is recommended that you consult with a professional to ensure the safety of both you and your property.
Conclusion
The remote control has a 2.5mm jack that can connect to any standard audio device with a headphone output, such as headphones or speakers. This lets you listen to the music from your phone through these devices and enjoy synchronized light effects simultaneously!
If you have an active stereo system in your house, it is also straightforward to do by simply connecting it up via RCA cables. It’s worth noting, though, if you are using Bluetooth for sound, there will be no effect on your lights – so make sure they’re synced before starting; otherwise, it won’t work correctly! We hope this article on how to sync led lights to one remote will be helpful.