
If you’re like me, when something goes wrong in your house, you want to try and fix it yourself before calling in a professional. And sometimes, that means trying to track down the source of a problem. In this blog post, I’ll show you how to trace light switch wiring so that you can figure out where a problem is coming from and fix it yourself.

It’s important to trace light switch wiring because if there’s a problem with your light switch, it can prevent you from being able to turn on the lights in your house. This can be a huge inconvenience, especially if you need to get up in the middle of the night and don’t have any other light source. By tracing the wiring, you can figure out where the problem is coming from and fix it yourself.
Summary: Tracing light switch wiring is essential for diagnosing electrical issues, identifying circuit connections, or planning a rewiring project. Before starting, gather the necessary tools, such as a non-contact voltage tester, wire tracer, or a multimeter. Ensure that the power is turned off at the main electrical panel to eliminate potential hazards. Begin by locating the light switch you want to trace and remove the cover plate using a screwdriver. With the cover plate removed, carefully pull the switch away from the wall, exposing the wiring.
Once the wiring is visible, use the non-contact voltage tester or multimeter to confirm that there is no live voltage present in the wires. Then, use the wire tracer or toner to trace the wiring path from the light switch to the corresponding electrical box or light fixture. This typically involves connecting the toner’s signal generator to the switch’s wiring and using the tracer’s receiver to follow the signal through the walls or ceiling.
If you don’t have a wire tracer, you can manually trace the wiring by visually inspecting the connections at the switch and any nearby junction boxes or fixtures. Document the wiring connections as you trace them to create a clear map of the circuit. Once the tracing is complete, carefully reattach the switch to the wall and replace the cover plate before restoring power to the area.
Tools You Need
1. Using a Circuit Breaker Finder:
If you’re having problems with your light switch, try to find the source of the problem. You can use a circuit breaker finder to help you track down the source of the problem in your electrical wiring. The circuit breaker finder detects the electrical current running through your wires, which can help you identify the source of the problem.
2. Manual Tracing of Circuit Breaker:
If you’re unable to find the source of the problem using a circuit breaker finder, another way to track down the source of the problem is by manually tracing the wiring. This can be done by following the wire from the light switch to the light fixture. Once you’ve found the light fixture, you can follow the wires leading to the light bulb. You can figure out where the problem is coming from and fix it yourself by doing this.
5 Methods to Follow on How to Trace Light Switch Wiring
Method 1: Using a Circuit Breaker Finder Tool:
An electrical switch is a device that can turn lights and ceiling fans on and off. It has two positions, on and off. The switch controls the flow of electricity to the lights or ceiling fan. The wires that connect the lights or ceiling fan to the power source are labeled black for hot wire, white for neutral wire, and bare copper or green for the ground wire. The black wire coming out of the switch box is how you can turn on the light by connecting it to the switch.
Here Are a Few Steps to Use a Circuit Breaker Finder:
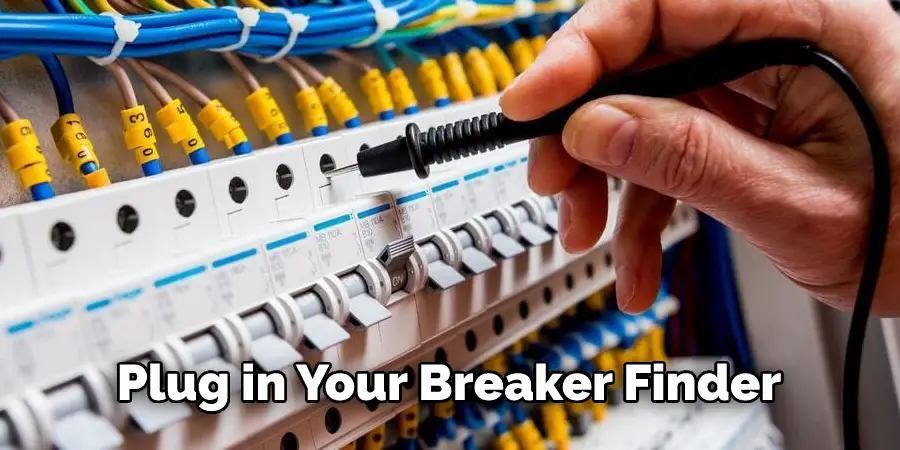
Step 1:
To find out how much electricity your circuit is using, plug in your breaker finder and turn it on. The monitor screen will show you the total current consumption, how many volts and amps each circuit is using, and how many circuits are being used.
Step 2:
Turn off all switches and overhead lighting fixtures.
Step 3:
Now, start turning on the circuit breakers until you find which breaker controls which switch. Once you find the right breaker, turn that breaker off and then on again. It should now be safe to turn your overhead lights back on. Here you will trace light switch wiring using a circuit breaker finder tool.
Method 2: Using a Multi-tester:
A multi-tester is how we can determine if we have power to a circuit without turning on the main breaker in our electrical panel. This is how you decide whether or not the circuit has power when you turn it off at the breaker box or when that particular breaker switch is turned off.
It Would Help if You Learned How to Trace Light Switch Wiring Using a Multi-tester as Follows:
Step 1: Connect the Tester Probes
First, you connect the tester probes to the terminals of the outlet. Take note that you need to connect them in backward order; black goes on gold or brass, white goes on silver or chrome, and there should be an indication that the outlets are life if your tester lights up.

Step 2: Turn Off the Power Source
After locating the power source in your circuit, flip the switch to turn it “off.” This will ensure no one incorrectly touches the wire ends when you’re trying to trace how they work.
Step 3: Install
the switch. Ensure that you take off all protective films from the switch before installation. Once installed, press down on the switch so that there are no visible gaps between it and the plate. This will ensure that the switch is connected correctly when using a multi-tester.
Method 3: Using an Electrical Tester:
This method is the most time-consuming, but it does help to pinpoint which wire has power running through it.
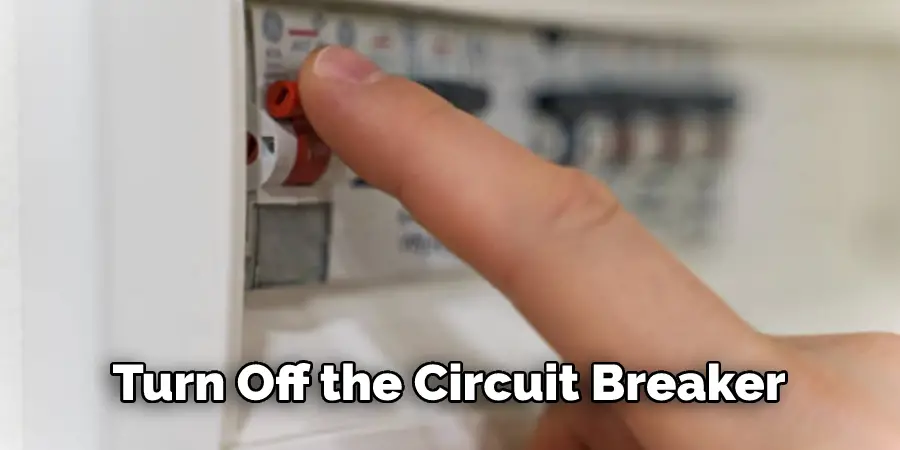
1. Turn off the circuit breaker that powers the switch you are trying to replace. If you do not know where your circuit breakers are, turn them off in your home’s main panel and then flip them back on one by one until the light in the room where your switch is located turns on.
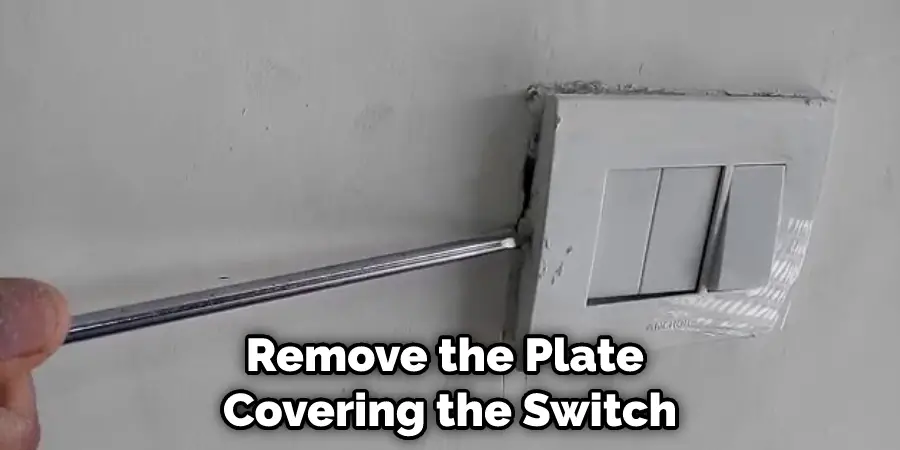
2. Remove the plate covering the switch by unscrewing it with a screwdriver.
3. Unscrew and remove the switch from its box, being careful not to touch any bare wires or screws that you cannot identify as part of the switch.
4. Set your multimeter to detect “continuity.” You can do this by turning the dial on the side of the meter until it is in this setting or pressing one of the buttons that say “light” or “continuity.”
5. Touch one end of your voltage tester to a bare wire and the other end to the grounding screw or bare wire inside the switch box. If there is no grounding screw, touch it to any bare wire and look for a number to appear on your test meter’s display. If you do not see a number, that wire does not have power running through it, and you can ignore it.
Method 4: Using an Electrical Print Out:
Often, you can buy electrical printout diagrams of your home. Usually, these will be available from dealers or outlet stores that sell appliances. These are just a more detailed version of the breakers diagram you find on the circuit breaker box. A great advantage to having one of these is if you’re not exactly sure how many wires are coming into a certain location, you can count how many wires are sticking out of a certain breaker.
Step 1:
Locate your breakers on your circuit breaker box diagram and note how many wires are hooked up to each one. In this case, there are two black wires hooked up to one of the main lines and two blacks hooked up to the top breaker.
Step 2:
After you have counted how many wires are connected to each breaker, it’s time to locate your light switches on the electrical printout diagram. Count how many black wires are sticking out of each switch and note how many totals there are. In this case, we have three black wires hooked up to the bottom switch and one black wire hooked up to the top, making four blacks in this circuit. The next thing to do is to figure out which breaker controls the light switches. You can tell because it will be a switch that has wires connected to all of the black wires coming from the switches.
Step 3:
Compare how many wires you found for each breaker on your electrical printout diagram with how many there are. In our case, we counted six blacks coming into the circuit breaker box and four blacks coming from the switches, which means two of those wires are not being used.
Method 5: Use a Multimeter:
A multimeter is a device for measuring electricity. To properly use one, you must first remove your light switch cover plate then place the probes on either side of the switch. The device will measure how much electricity flows from one wire to the next. For this test to be accurate, you must ensure that anything that might create a spark or shock is turned off, such as appliances and power tools.
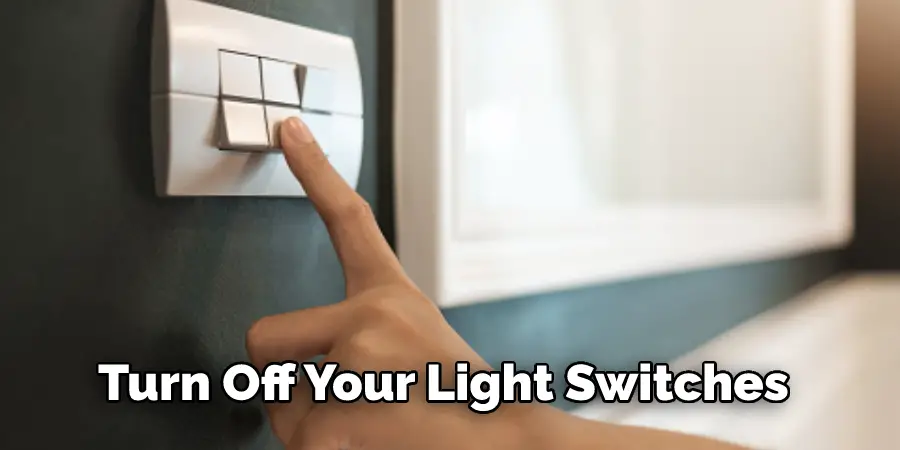
Step 1:
Turn off your light switches and cover plates before doing any testing.
Step 2:
Set your multimeter to the 20 voltage setting.
Step 3:
To test a light switch with a multimeter, you will need to probe the sides of the bottom and top of the switch. The multimeter will tell you how many volts are coming from that location. In this case, it should read 120 volts from each switch.
Step 4:
Probe the sides of both your light switches with one probe from your multimeter. It should read how many volts you’re getting from each location. In this case, it reads 120 volts from each switch which means we have a hot wire going to a particular switch and a neutral wire going to the other.
How Do Wire Tracers Work?
Wire tracers are tools used to identify and trace electrical wires and cables. They use either inductance or capacitance to detect and measure the current of a wire.
By using this method, a technician can easily distinguish between two different wires in a bundle, even if they are exactly the same size and material. Wire tracers can be used to diagnose wiring problems, troubleshoot circuits, or install new devices.
Here’s how they work:
Inductive Method
The inductive method uses current flow to detect the location of a wire or cable. It works by applying a small alternating current (AC) voltage across two probes that are placed on either side of the wire.
The induced current then flows back through the wire and is picked up by the other probe. This allows technicians to trace wires quickly without having to open up walls or ceilings to look for them.
Capacitive Method
The capacitive method works by measuring the capacitance between two points on a circuit. It does so by placing one probe at each point, allowing for measurement of any potential difference between them. This can be useful for finding shorts in circuits, as well as identifying which wires are connected where within a bundle.
Frequently Asked Question
How Can I Make Sure that My Home Appliances Are Working Properly?
There are a few ways to ensure that your home appliances are working correctly. You can call a technician to come and inspect your appliances or try to troubleshoot the problem yourself.
If you’re trying to troubleshoot the problem yourself, you can do a few things to help narrow down the cause of the issue. First, turn off the appliance and unplug it from the power outlet. Next, check the fuse box or circuit breaker to ensure that there is no problem with the wiring.
Finally, try plugging the appliance back in and turning it on if everything looks normal. If it still doesn’t work, you may need to call a technician.
How Do I Get Rid of Electrical Noise in My House?
If you’re having problems with electrical noise in your house, there are a few things you can do to try and fix the issue. First, try turning off all of the appliances in your house and unplugging them from the power outlets.
Next, check the fuse box or circuit breaker to ensure that there is no problem with the wiring. Finally, try plugging the appliances back in and turning them on if everything looks normal. If the noise is still happening, you may need to call a technician.
What Is an Ac Circuit Breaker and What Does It Do for Me as A Homeowner?
An AC circuit breaker is a device that helps protect your home’s wiring from excessive electrical current. It does this by shutting off the power to the circuit if it detects an overload. This can help prevent damage to your home’s wiring and appliances.
Conclusion
If you’re ever in doubt about how to trace light switch wiring or hook up a new light fixture, the internet is always there to help. With just a few simple steps, you can have your home looking and functioning exactly the way you want it.