There’s nothing quite like the convenience of a dome light. When you need to get something from your car in the dark, a dome light makes it easy to see what you’re doing. Replacing a dome light with a door switch is easy to add convenience to your life. This article will show you how to wire a dome light to a door switch in no time. Follow these simple steps, and you’ll be able to enjoy the added convenience of this upgrade in no time!

Wiring a dome light to the door switch is not hard, but it is essential to make sure you get the proper wire sizes and tap in the correct wire for your door switch to work correctly.
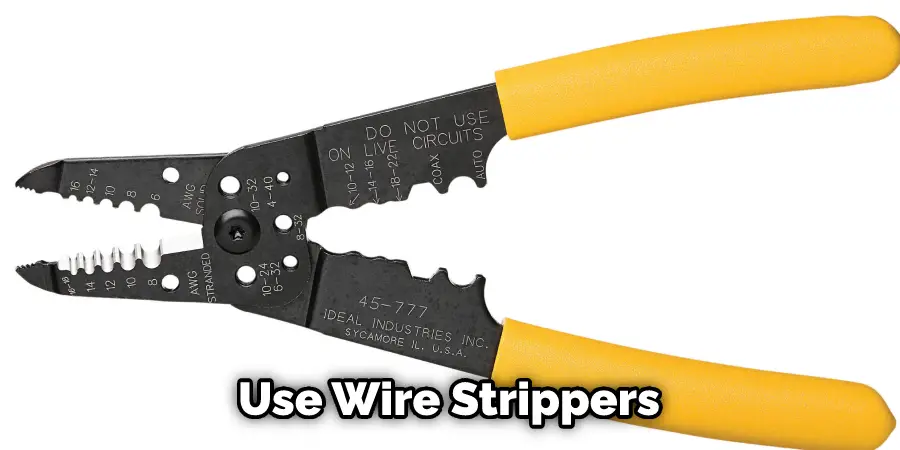
Summary: Wiring a dome light to a door switch allows the light to turn on automatically when the door is opened, providing convenient illumination in a vehicle or room. Before starting, gather the necessary tools and materials, such as wire strippers, connectors, electrical tape, and a multimeter. Ensure that the power source for the dome light is turned off or disconnected to prevent potential hazards.
First, locate the door switch, which is typically found in the door jamb or frame. Identify the wires connected to the switch; there should be at least one wire for the switch and another for the ground. Run a new wire from the positive terminal of the dome light to the door switch. Connect this wire to the switch using a suitable connector, such as a butt connector or quick splice connector.
Next, run another wire from the negative terminal of the dome light to a suitable ground point, such as the vehicle’s chassis or a grounded electrical box. If the door switch requires a separate ground wire, connect a wire from the switch’s ground terminal to the same ground point. Secure all connections with electrical tape to prevent short-circuiting.
Test the functionality of the dome light and door switch by opening and closing the door, ensuring that the light turns on and off as expected. If everything functions correctly, reassemble any disassembled components and enjoy the convenience of an automatically illuminated dome light.
Required Tools and Materials
- Flathead Screwdriver
- Wire Stripper
- Electrical Tape
- Soldering Iron & Solder
- Circuit Tester (optional)
A Stepwise Guide on How to Wire a Dome Light to a Door Switch
Step 1: Before You Start
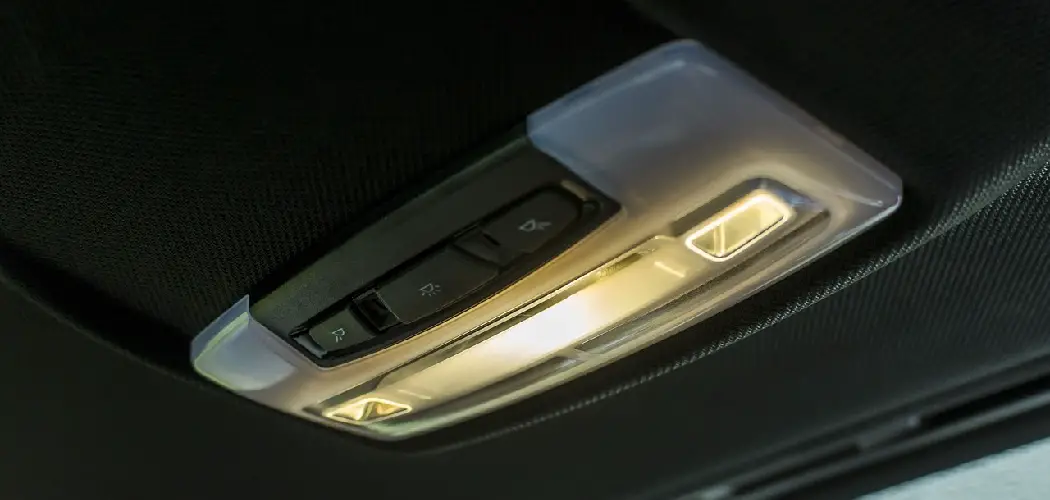
Turn off the main power to your car before beginning work. Next, remove the cover of your dome light. You can find this in your car’s manual if you do not know where it is located. Use a flat head screwdriver to pry off the cover of your dome light housing.
To replace a dome light bulb, first remove the old bulb by carefully pulling it out of the socket. Be careful not to break the bulb, as they are fragile and can be expensive to replace. Once the old bulb is out, consult your owner’s manual for more information on returning your dome light bulb.
Step 2: Locate Door Switch
To find the door switch, follow the wires from the dome light. Each wire goes to a terminal on top of a black box. This box is usually located above the glove compartment or near the fuse box in your car. There should be only one cable connected to each terminal.
Use a circuit tester (which you can buy cheaply online) to determine which wire goes with which terminal. These switches are usually designed to allow them to be tested easily using multimeters or even regular cellphones if they have an analog meter app.
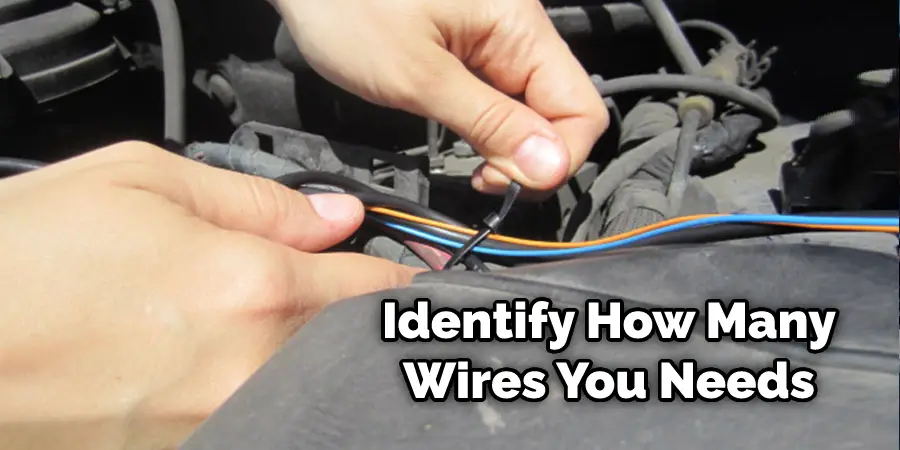
Step 3: Identify How Many Wires Needs Splicing
In order to wire a dome light to a door switch, you will need to cut the existing wires as close as possible to the terminals. The number of wires you need to splice will depend on your particular car and dome light. For example, if your vehicle uses a two-wire system, you will only be able to switch one of the two wires simultaneously. However, if it is a three-wire system, then you can switch either wire for your new dome light.
Step 4: Splice Wires Together
To wire a dome light, first use a wire stripper to remove the insulation from the wires. Then, twist the wires together with your fingers until you have a tight fit. Next, solder the twisted ends and insulate them using electrical tape or heat-shrink tubing to prevent short circuits. You can also use wire nuts if they are available. The dome light has a positive and negative polarity, which will work only when wired correctly.
The positive and negative sides of a car’s dome light are typically colored red and black, respectively. To wire the light correctly, consult your car’s manual and schematic diagram.
Step 5: Button Up
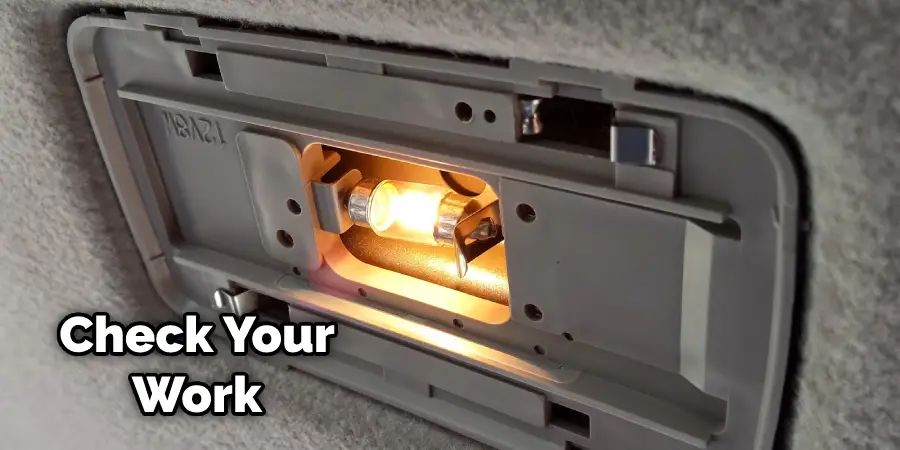
You need to put the plastic cover back on the dome light housing and be careful not to break anything. Then turn the power on and test your work by pressing the door switch. If there are problems with how it works, you may need to revisit your work and re-do some of your soldering or wire splicing.
Step 6: Test Light’s Functionality
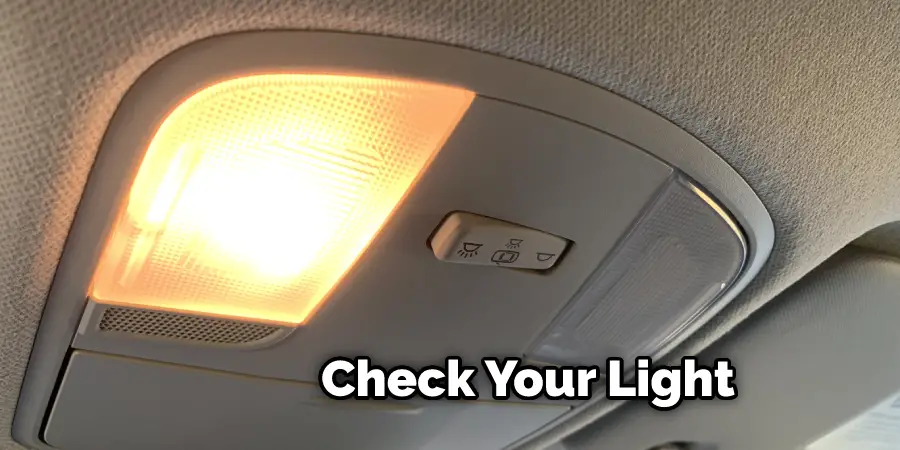
Test your dome light before reattaching the cover. If it works as intended, then replace the cap and enjoy your new, improved dome light as you drive home in style with a healthy glow emanating from within.
If you could wire a three-way switch to your light, that would be even better. A three-way switch allows you to turn on the lights from multiple locations instead of just one. This is very helpful if you have cars parked outside of your garage at night because you’ll only need to reach out and flick a switch instead of going all the way inside or down a flight of stairs which might wake up everyone, especially if they are sleeping. These steps will help you wire a dome light to a door switch.
You can check it out to Label Light Switches
Precautions
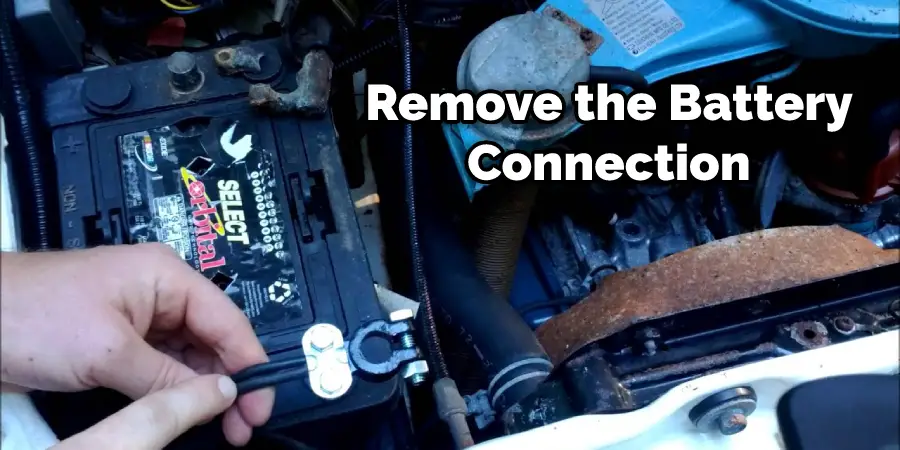
- Disconnect the battery before beginning any electrical work on your vehicle. Hold down the power button for 15 seconds to ensure no residual charges in the system.
- Never rely upon testing lights or wiring colors to ensure proper wiring; this is not always accurate due to color changes and the age of your vehicle’s wiring harnesses. Always use a voltmeter, if possible, when testing wires for continuity, voltage drops, or shorts; using a test light can burn out fuses and cause expensive problems if they are left attached to live circuits while probing around with them.
- Use wire strippers or cutters with cable clamps; these tools make it easy to strip the insulation off without cutting into the wire strands underneath or damaging the insulation.
- You can use two different color wires to extend the length of a single circuit, be sure they are correctly labeled so you can tell which wire is which when reassembling your vehicle’s electrical system.
- Use suitable quality connectors that do not easily corrode or oxidize; this includes solderless crimp style connectors and ring terminals and spade terminals for both permanent and temporary connections; avoid using wire nuts on heavy wiring (12 gauge or larger).
- Always check inside the terminal connector for corrosion; a corroded terminal should be replaced.
- Be sure to insulate all bare wire ends before applying power; avoid using electrical tape as it will shrink and loosen over time, allowing an insulation failure to occur. Use PTFE / Teflon / Self-Fusing Silicone Tape or Vinyl Electrical Tape instead, and those are designed to hold up over time. It is thin enough not to take up much room so that you can use it on both large and small wires alike; check your local hardware store for this type of tape as well as any other supplies you may need before starting work on your Dome Light Wiring Project.
- Test fit everything after installing it together; if a connection is too tight or making poor contact, you can permanently remove the part and trim some more insulation off with a utility knife.
- Make sure your crimp connectors are in good condition when using them to connect wires; if they are deformed or corroded, they should be replaced before applying power to keep from causing problems later on down the road during use of your Dome Light Wiring Project.
- Crimped wire connections do NOT require soldering, which creates additional resistance inside the wire due to large amounts of heat traveling through it (which causes oxidation).
Why Won’t My Dome Light Turn on When I Open the Door to My Car?
Dome lights are typically used to illuminate the interior of an automobile. It is usually built into the car’s roof near where its windshield meets its ceiling. A dome light consists of both a bulb and more translucent “cones” that diffuse the light it emits.
Some states have laws requiring them on all passenger cars, so you can be pulled over for having one burnt out, though they do make great night lights when camping! Typical bulbs range from 15 watts (H15/5W) to 25 watts (HB2). The H15/5W is usually found in smaller cars, while the HB2 is found in larger sedans and vans. More than one bulb type can be used in some domes, so pay attention to your car manual if you don’t know what kind of bulb your dome takes.
When the doors open, they break the connection between the ground and the wire that leads to the light (typically black), thus turning it off. When all of the doors are closed (hence creating a path to ground through their body), current flows from the battery through the door switch, into the wiring harness, back out through another door switch (if present), and finally lighting up your dome light!
How to Find the Location of the Dome Light?
- Check the owner’s manual: Look in the owner’s manual of your car, and you may find a diagram that shows the locations of all the interior lights, including the dome light.
- Inspect the ceiling: Look up at the ceiling of your car’s interior, and you may see a small plastic cover that is hiding the dome light. Gently pry the cover off with a flathead screwdriver.
- Use a flashlight: If you can’t see the dome light when you look up at the ceiling, then use a flashlight to search the interior more thoroughly. Shine the flashlight around the edges of the ceiling until you locate the dome light.
- Consult a mechanic: If you still have trouble locating the dome light, take your car to a mechanic. A professional mechanic should be able to locate the dome light quickly and easily.
How Do You Pack Away String Lights?
Packing away string lights can sometimes be a challenging task. To ensure that the lights remain intact and undamaged for the next use, it is essential to pack them away properly. The first step is to make sure that the lights are completely untangled and free from knots or twists. It is also essential to check if any of the bulbs are broken or need to be replaced before packing them away.
Once the lights are checked and untangled, one should start by coiling the lights neatly into a compact circle. One should avoid tying the lights tightly as this can cause them to tangle again in the future. After coiling the lights, place them in a container with a tight-fitting lid, such as a plastic container or a cardboard box. It is advisable to store the lights in a dry and cool place to prevent any damage from moisture or humidity. Properly storing away string lights in this manner will ensure that they are in excellent working condition for their next use.
Frequently Asked Questions
Why Are My Dome Lights Staying on?
First, if the light is connected to a switch that is not properly closed or locked, it may stay on even when the switch is turned off.
Second, some switches have an “override” feature that allows them to stay on standby even if the main power has been shut off. And finally, some switches will continue to send power even if they are no longer receiving input from something like a light bulb or fixture.
If you’re unsure which switch controls your dome lights and how they work, contact your home’s contractor or electrician for help resolving the issue. Additionally, make sure all of your switches are securely tucked away so they aren’t accessible by unauthorized individuals.
What Is a Door Jamb Switch?
A door jamb switch is a type of electrical switch that allows you to turn off or on lights in a specific area using just your hand. They are typically activated by inserting the thumb into a groove located near the top of the switch and bending it up toward the light fixture. When you release your thumb, electricity flows through the circuit and turns off or on the light.
Where Is the Fuse Located for the Dome Light?
If you are unable to find or replace your fuse, then you may need to have a technician come out and service your lighting system.
While this can be expensive, it is usually worth it since Dome lights are an important part of protecting your home’s interior from injury or damage.
What Is a Dome Override Button?
A dome override button is a switch that allows administrators or operators of an event to shut down the sound system in the venue should there be an emergency.
By pressing and holding this button, audio can be turned off completely from all channels. If necessary, the microphone channel can also still be used for emergencies.
Frequently Asked Questions
How do you convert a dome light to LED?
If you are looking to replace your dome light with an LED, there are a few things that you will need to do in order to make the conversion. First, you will need to purchase an LED light bulb. Next, you will need to remove the old dome light bulb from the fixture and replace it with the new LED light bulb. Finally, you will need to rewire the fixture in order to use the new LED light bulb.
Can I replace a dome light with a ceiling fan?
Yes, it is possible to replace a dome light with a ceiling fan. Dome lights are typically smaller and less-expensive light fixtures, while ceiling fans can provide more even lighting and be more versatile in terms of placement. If you are looking to replace a dome light with a ceiling fan, be sure to measure the dimensions of the new fixture and choose the appropriate model from our selection.
How long do LED Dome lights last?
LED Dome lights typically last between 10,000 and 20,000 hours, which is about twice as long as traditional incandescent light bulbs. This means that LED Dome lights will typically last between two and four years, depending on how often they are used.
Do dome lights burn out?
Different dome lights may have different life spans. However, in general, it is generally safe to assume that dome lights will not last indefinitely and may need to be replaced in the near future. Dome lights typically use a light-emitting diode (LED) as their primary source of illumination, and LEDs are known to have a shorter lifespan than other types of bulbs. As a result, it is important to take care of your dome lights by ensuring that they are properly installed, maintained, and shielded from sunlight and other elements that could damage or destroy them. If you notice any signs of wear or tear on your dome lights, please contact the manufacturer for assistance.
Conclusion
So, if you want to wire a dome light to the door switch, here are some steps for success. I suggest that you use a four-way button for your doorbell, though. If you want to wire the dome light, so it only lights when the doors are closed, Follow this article on how to wire a dome light to a door switch. Wires can be connected differently than shown in my photos. Always consult with an automotive wiring diagram if you are not 100% certain on how they should be connected.
You may also read: How to Make Black Light With Led Lights