
Have you ever been in a situation where you wanted to wire a doorbell but didn’t know where to start? This guide will show you how to wire a doorbell from a light switch. It’s not as difficult as it may seem and can be completed in just a few short steps.
Plus, you’ll end up with a functioning doorbell in no time! All you need is some basic wiring knowledge and some common tools. We’ll also provide some tips to make the process easy. So, if you’re ready to get started, keep reading for all the details.
A smart doorbell camera allows you to see who’s on the other side of your door, even when you aren’t home.
Summary: Wiring a doorbell from a light switch is an unconventional method of powering a doorbell, but it is possible with proper knowledge and precautions. This approach involves using the existing electrical circuit for the light switch to provide power to the doorbell. It is essential to have a clear understanding of electrical wiring and adhere to local electrical codes and safety guidelines. If you’re not confident in your ability to complete the task, consult a professional electrician for assistance.
Begin by turning off the power supply at the main electrical panel to ensure safety while working with the wiring. Locate the light switch you wish to use for the doorbell connection and remove the switch plate to access the wiring. Identify the hot (live) wire, usually black or red, and the neutral wire, typically white. Run a new wire from the light switch to the doorbell location, connecting the hot wire from the light switch to the doorbell’s transformer and the neutral wire to the doorbell’s chime.
Ensure that the transformer is compatible with the doorbell and has a voltage rating suitable for the doorbell’s requirements. Once the wiring is complete, replace the switch plate and turn the power back on at the main electrical panel. Test the doorbell to ensure proper operation. Always exercise caution when working with electrical wiring and consult a professional electrician if you encounter any issues or concerns.

6 Advantages of Wiring a Doorbell From a Light Switch:
1. Minimal Wiring and Installation:
If you wire your doorbell directly to a light switch, you won’t have to run new wires or install a dedicated doorbell circuit. This will make the process much simpler and reduce the likelihood of any wiring issues.
2. Increased Functionality:
You can wire your doorbell to a light switch so that it can be used with other things in your house. For example, you could turn on lights or change the temperature when the doorbell is rung. Or, you could turn on music or other sounds to cover up any noise from your doorbell.
3. Reduced Energy Usage:
If you wire your doorbell directly to a light switch, you can use less energy overall. For example, if you have a motion sensor light switch, the light will only come on when someone is actually at the door – no more wasted energy from leaving the porch light on all night long.
4. Enhanced Security:
If you wire your doorbell to a light switch, you can use less energy. For example, if you have a motion sensor light switch, the light will only come on when someone is at the door.
5. Increased Convenience:
Installing your doorbell directly to a light switch gives you more flexibility and convenience. For example, you can set it up so that the light in your entryway comes on automatically whenever you use the doorbell, making it easy to find your way and see who’s at the door.
6. Ideal for Multi-Family Dwellings:
If you live in an apartment or condo, you can wire your doorbell to a light switch. This will allow you to use features like motion sensor lights and intercom systems without installing separate systems in every nearby unit.
Step by Step Guide: How to Wire a Doorbell From a Light Switch
Step 1: Check the Power Source
Before starting any wiring project, it’s important to make sure that the power is turned off. In this case, you’ll need to turn off the power to the light switch that you’ll be working with. Once the power is off, proceed to the next step.

Step 2: Remove the Old Switch
Next, you’ll need to remove the old switch. To do this, unscrew the faceplate from the switch and then carefully remove the wires from the terminals. Once the wires are removed, you can take out the old switch.
Step 3: Remove the Existing Doorbell Wiring
Now that the old switch is out, you’ll need to get rid of the existing doorbell wiring. There may be a few different wires in this area, so make sure you know which ones are connected to the doorbell. Once you’ve identified these wires, cut them and carefully remove them from the wall.
Step 4: Connect the New Doorbell Wires
Locate the existing doorbell on the building, and mark the wires coming out of it. You will be connecting new wires to these existing wires- so as long as your new wire is color-coded correctly, you can match up and connect them at each end.
Step 5: Secure the Wires
Next, you’ll need to secure your wiring into place. To do this, first, cover any exposed wiring with electrical tape. Then, wrap the other end of the wires around the screws on your new light switch. Finally, tighten these screws as much as possible to make sure they are secure.
Step 6: Replace the Light Switch
You will need to replace the light switch with a doorbell switch. This can be done by simply unscrewing the old switch and screwing in the new one. Then, connect the wires to the correct terminals on the new switch.
Step 7: Mount the Doorbell Buttons
Once the wiring is all set, you can mount the doorbell buttons. Start by carefully drilling holes into the wall where you want to place the buttons. Then, insert the metal clip on the bottom of the doorbell button into the holes, and fasten it in place with screws.
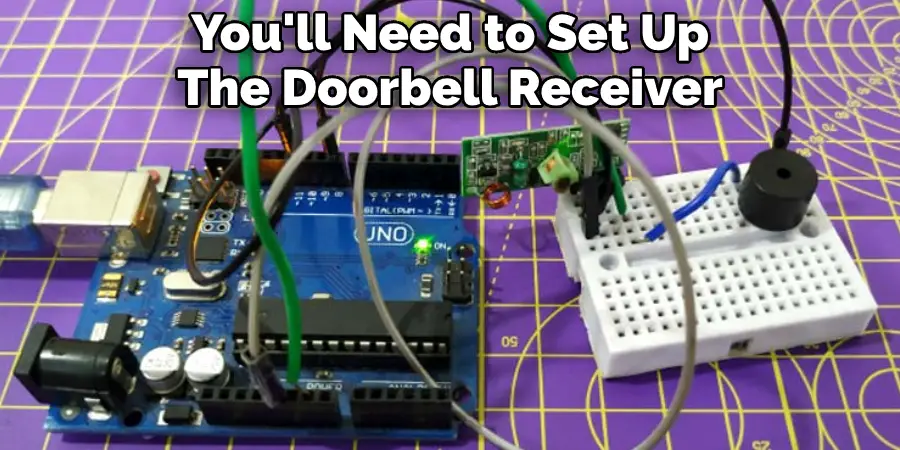
Step 8: Setup The Doorbell Receiver
You’ll need to set up the doorbell receiver. This involves connecting the wires from the button to the terminals on the receiver and then mounting it in place. Once everything is connected and in place, you can turn the power back on.
Step 9: Checking the Circuit Breaker
To be extra safe, you should always check the circuit breaker before working on any electrical project. This will ensure that the power is off and there is no risk of electrocution. Locate the circuit breaker box and flip the switch for the light switch that you’ll be working on.
Step 10: Wire the Doorbell to Light Switch
Now that the power is off, you can begin wiring the doorbell to the light switch. Start by connecting the positive wire from the doorbell to the top terminal on the light switch. Then, connect the negative wire from the doorbell to the bottom terminal on the switch.
Step 11: Connect the New Doorbell Transformer
Most houses with electric doorbells will have a transformer mounted near the main electrical panel. The new doorbell will need to be connected to this transformer in order to work properly. To do this, simply connect the positive wire from the doorbell to the top terminal on the transformer and then click the negative wire from the doorbell to the bottom terminal on the transformer.
Step 12: Turn On Power & Test Doorbell
Now that everything is wired, you can safely turn on the power and test your doorbell. But remember- even though you’ve disconnected the old switch, you should never work on any electrical project without checking the circuit breaker first!
Step 13: Enjoy Your New Doorbell
And there you have it- a brand new doorbell that will make all of your visitors jealous! Now, whenever someone comes to your door, you can impress them with your handy work. Just don’t forget to tell them that you did it all yourself!
You Can Check It Out to Connect Z Wave Light Switch

Some Additional Tips and Suggestions:
Here we have given some tips on how to wire a doorbell from a light switch.
1. If you’re not comfortable working with electricity, it’s always best to hire a professional.
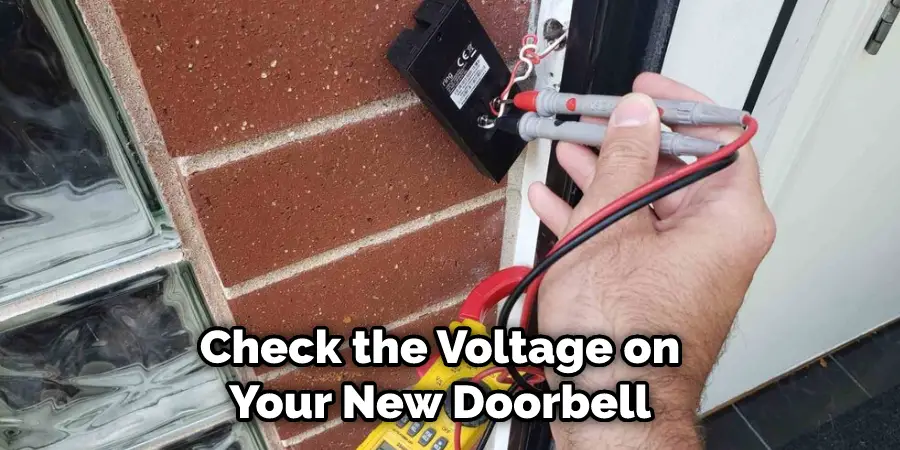
2. Check the voltage on your new doorbell before wiring it in. Most doorbells will require either 12 or 24 volts of power.
3. If you’re unsure which wires are positive and negative, use a multimeter to test them before connecting them to the switch or doorbell.
4. If you’re having trouble connecting the wires, consult a wiring diagram or get help from an experienced electrician.
5. Always double-check your work and ensure everything is connected properly before turning on the power and testing your new doorbell.
6. Follow all local building codes and regulations when wiring your doorbell.
How Should Doorbells Be Wired?
When it comes to wiring doorbells, there are a few different ways you can go about this. The easiest way is with a plug-in chime system, but if you’re looking for something more permanent and reliable, then the standard wire setup may be right for you. For example, you can wire your doorbell directly to it if you have an existing light switch, or go through the attic and wire it up to the circuit.
Regardless of which wiring system you choose, there are a few key things you’ll need to keep in mind. First, make sure that your doorbell is compatible with the system you’re planning on using – different products have different voltage requirements, so make sure to check before you start.
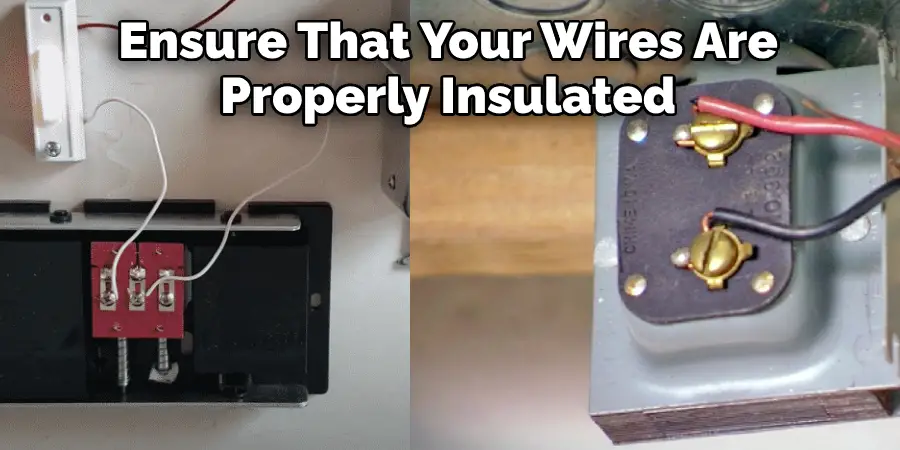
Also, ensure that your wires are properly insulated and attached so they do not cause any short circuits. Finally, when making connections and unplugging wires, take care to keep track of which wires go where it can be easy to lose track if you’re not careful!
Frequently Asked Questions
Can I Wire a Doorbell From a Light Switch?
Yes, you can wire a doorbell from a light switch. This is an easy project that just requires some basic electrical wiring skills and a few supplies.
Do I Need to Turn Off the Power to Install the Ring Doorbell?
Yes, it is recommended that you turn off the power before installing your Ring Doorbell. This will ensure that you do not cause unintended harm to the wiring or components of your home during the installation process. It’s important to take proper safety precautions and always to follow the instructions in the Ring Doorbell user manual.
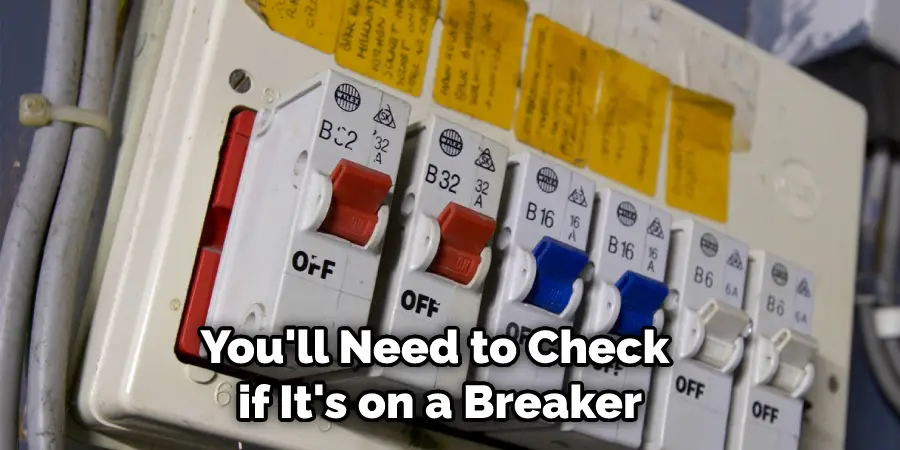
Is Your Doorbell on a Breaker?
To determine if your doorbell is powered by electricity, you’ll need to check if it’s on a breaker. To do this, turn the main power off and then go to your circuit breaker box. Look for a switch labeled “Doorbell.” If it’s on, then your doorbell is connected to a breaker and uses electrical power. If not, then it may use low-voltage wiring instead.
Does a Doorbell Need Its Own Circuit?
Depending on the type of doorbell you have, it may or may not need its own circuit. However, if you are installing a new doorbell, it is always a good idea to consult an electrician to ensure that the installation is done correctly and that the doorbell is properly wired.
What Do You Wire a Doorbell to?
A doorbell is a common fixture in most homes, and it can be easily wired to function as an Akron security sensor. The typical wiring configuration for a doorbell includes the use of two wires: one wire goes to the bell button (or pushbutton) on the inside of your house and another wire runs down to a connector near your front door. When someone presses or pulls on the bell button, this sends an electrical signal down the cord that connects to your home’s alarm system.
If you want additional protection from theft or unauthorized entry, you can also install a closed-circuit TV camera along with your security system. This will provide footage of anyone who attempts to break into your home while you are away. Additionally, if there is ongoing problem behavior at your address such as vandalism or trespassing, you can add advanced motion detection features so that cameras will start recording automatically when movement is detected indoors.
Which Breaker Switch is for the Doorbell?
different types of breaker switches that can be used for doorbells, but the most common are contactor-type switches. These switches are plugged into an outlet and the contactor will sense when someone comes too close, and then activate the circuit breaker. Other types of switches include photoelectric breakers, which work a bit differently. These switches detect movement rather than contact, so they’re usually used for motion sensors.
Final Words
Doorbell wiring is a simple process that can be completed in minutes. You need a screwdriver, wire cutters, and some electrical tape. The first step is to remove the cover of the light switch box. Wired doorbells require an AC transformer, which converts low voltage electricity into a higher voltage that can power the doorbell chime unit and button.
If your home has a wired doorbell, it’s likely that there is already an AC transformer installed near your front door. We hope this article on how to wire a doorbell from a light switch has helped shed some light on the process and that you are now feeling confident enough to tackle the task yourself. If you have any questions or want to know more, then feel free to comment below!