When replacing a fluorescent light fixture, you must use the same bulb wattage as what was previously in the fixture. This is because the ballast in the fixture regulates the amount of electricity flowing to the bulbs.
Summary: If you want to install a 4 lamp ballast for 3 lamps in your home, here is a step-by-step guide on how to do it. First, cut the power cord off of the old ballast and strip the wires free of insulation. Next, twist each wire around a screwdriver or drill bit several times to form a loop. Finally, crimp the ends of the loops together with pliers.
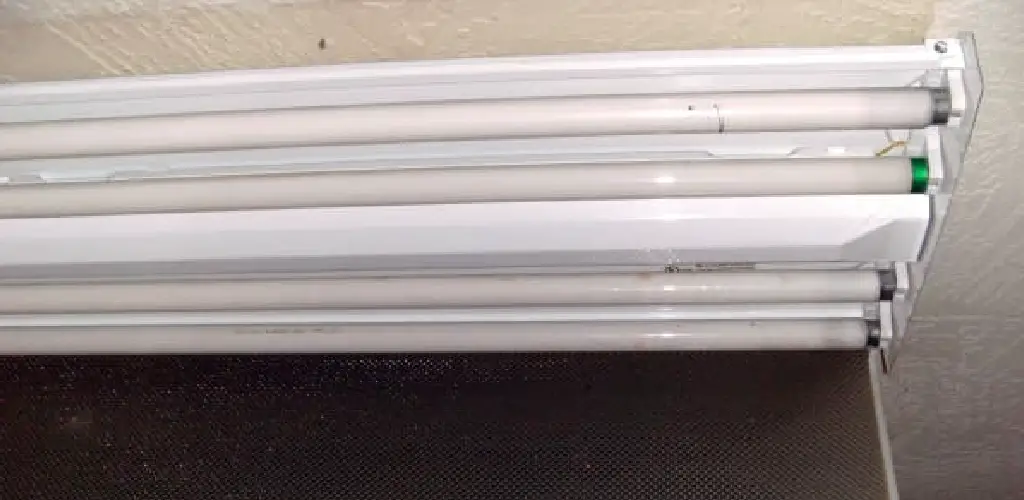
If you use a higher wattage bulb than previously, you may cause the ballast to overheat and fail. This blog post will show you how to wire a 4 lamp ballast for 3 lamps. We will also go over how to troubleshoot common problems. Keep reading for more information!
Required Tools and Supplies
- 4 lamp ballast (with 3 lead wires)
- 3 lamps
- Flathead screwdriver
- Philips head screwdriver
- Wire strippers
- Electrical tape
- Pencil and paper for notes
Step by Step Guide: How to Wire a 4 Lamp Ballast for 3 Lamps
Step 1: Shut Off the Power to the Fixture.
Before starting any electrical work, it is always important to shut off the power to the fixture. This can be done by turning off the circuit breaker supplying power to the fixture.
Step 2: Remove the Fixture Cover.

Use a flathead screwdriver to remove the screws that hold the fixture cover in place. Then, gently pull the cover away from the fixture, being careful not to damage the wiring or any of the electrical components.
Step 3: Disconnect the Wires.
Use a pair of wire cutters to cut the exposed wires, careful not to damage the insulation. Strip about 1/2 inch of insulation from each wire.
Step 4: Cut Out the Ballast.
The next step is to cut out the ballast. You’ll need a pair of wire cutters for this. First, cut the wires that connect the ballast to the socket. Next, cut the wires that connect the ballast to the transformer. Finally, cut the wires that connect the ballast to the capacitor.
Step 5: Strip the Ends of the Wires.
You need to strip the ends off of all the wires you’ll be using. This means taking off about 1/2 inch (1.3 cm) of the insulation that is covering the wire. Be careful not to cut or damage any of the wires as you’re doing this.
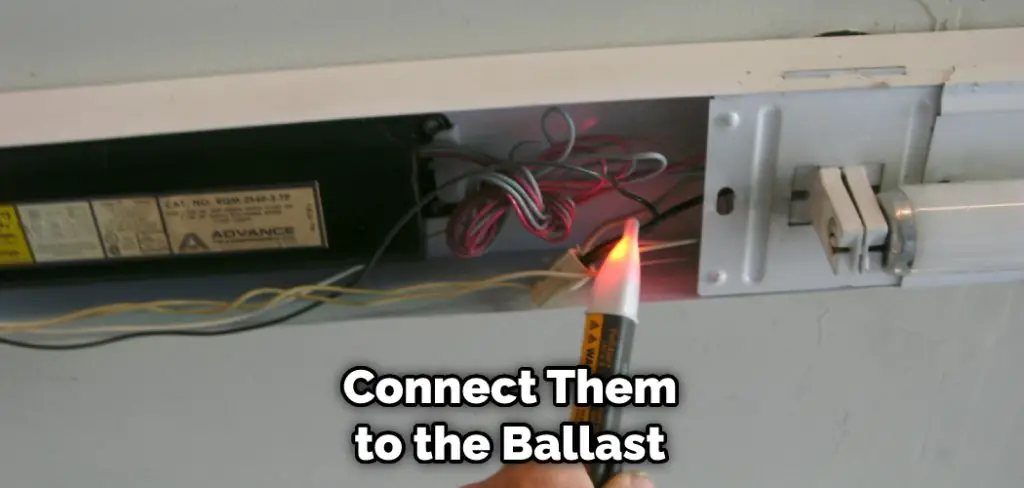
Step 6: Connect the Wires to the Ballast.
Once the wires are all stripped, it’s time to connect them to the ballast. There are three wires on the ballast: one for the sockets, one for the transformer, and one for the capacitor. Match each wire up with its corresponding connector on the ballast and twist them together. Use electrical tape to secure them in place.
Step 7: Solder the New Ballast in Place.
Place the new ballast in the opening you just cut, making sure the wiring terminals are at the bottom. You can either solder the positive and negative wires to the ballast, or use wire nuts for a more secure connection.
Step 8: Replace the Cover.
Put the cover back on the fixture and screw it in place. Turn on the power and test your new ballast. If everything is working properly, you’re done! If not, make sure all of your connections are tight and secure and that the wires are not touching each other.
If you’re having trouble with your new ballast, please contact us for assistance. We’re always happy to help!
Some Helpful Tips and Suggestions
- When wiring a 4 lamp ballast for 3 lamps, ensure that the voltage is compatible with the ballast.
- Follow the manufacturer’s instructions when wiring a 4 lamp ballast for 3 lamps.
- The wire connectors and staples should be placed in inconspicuous places where they will not be seen.
- Make sure that all of the connections are tight and secure.
- Always use caution when working with electricity.
- If you are not comfortable working with electricity, then hire a professional to do the job for you.
- Be sure to turn off the power before beginning any wiring work.
- Always use caution when working with live electrical wires.
Other Alternative Methods on How to Wire a 4 Lamp Ballast for 3 Lamps:
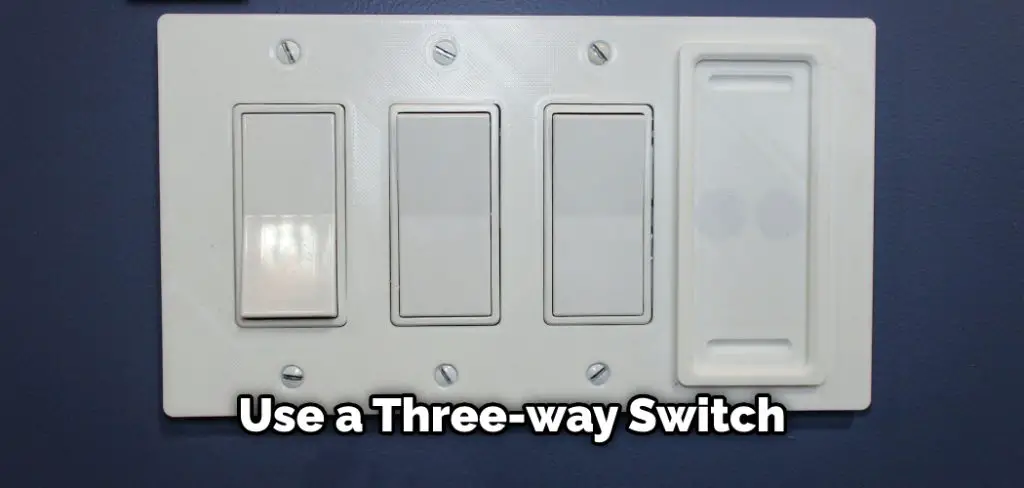
1. Use a Three-Way Switch:
The most common way to wire a 3-lamp ballast is to use a three-way switch and two 2-lamp ballasts. One ballast is wired in series with the switch and the other is wired in parallel with the switch.
2. Use a Four-Way Switch:
This is another common way to wire a 3-lamp ballast. You will need a four-way switch and two 2-lamp ballasts. One ballast will be wired in series with the switch and the other will be wired in parallel with the switch.
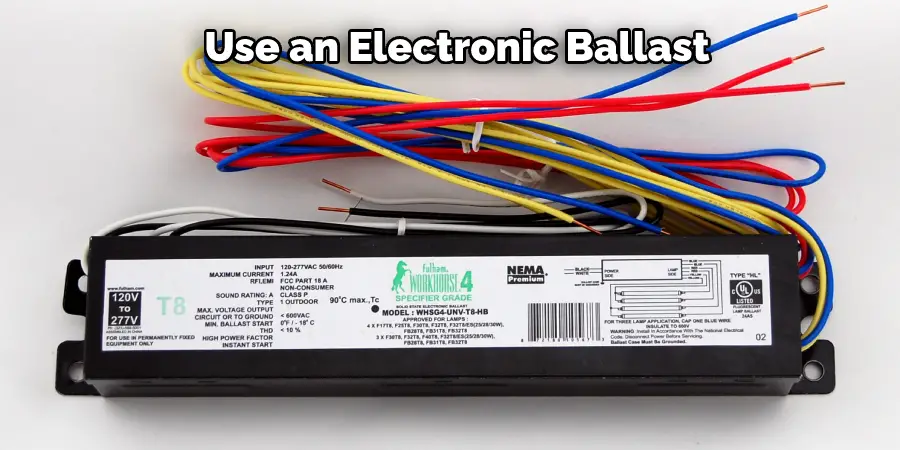
3. Use an Electronic Ballast:
An electronic ballast is a type of ballast that uses electronic circuitry to control the flow of electricity to the lamps. Electronic ballasts are typically more energy-efficient than magnetic ballasts and generate less heat. They also usually have fewer moving parts, which makes them more durable.
4. Use an Led Driver:
An LED driver is a type of electronic ballast that is designed to drive LEDs. It typically has a higher wattage rating than a standard electronic ballast, which allows it to drive more powerful LEDs.
5. Use an Isolated Transformer:
Some people choose to use an isolated transformer when wiring a 4 lamp ballast for 3 lamps. This is a good option if you are worried about voltage loss or if you live in an area with a lot of lightning. In addition, an isolated transformer will help to protect your equipment from any electrical surges.
6. Use a Battery Backup:
If you are using a ballast with a lamp rating of more than 1000 watts, you may need to use a battery backup to ensure that the lamp will start up properly. A battery backup is basically a small battery pack that plugs into the ballast’s power cord. When the power goes out, the battery backup will provide power to the ballast so that your lamps will not turn off.
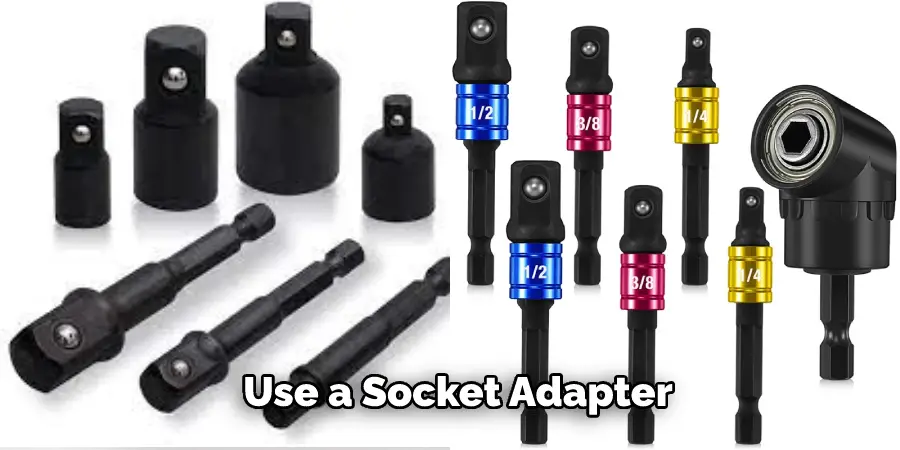
7. Use a Socket Adapter:
If you are using an odd-sized lamp socket, you may need to use a socket adapter to connect the ballast to the lamp socket. A socket adapter is a small device that plugs into the lamp socket and has a larger size socket that the ballast can connect to. You may need to use a socket adapter if your lamp socket is too small for the ballast plug or if your lamp socket is an odd size.
8. Use a Lamp Harness:
If you are using a lamp that has more than one bulb, you may need to use a lamp harness to connect the ballast to the lamp. A lamp harness is a small device that plugs into the socket and has multiple prongs that the ballast can connect to.
You Can Check It Out To Shake a Lava Lamp
Safety Precautions and Advice
- Always unplug the power cord before making any adjustments or repairs.
- Make sure the power is off before wiring.
- Wear rubber gloves when working with electrical wiring.
- Be sure to use the correct wire size for the circuit.
- Use caution when working with high-wattage bulbs.
Is It Safe to Leave a Fluorescent Light Bulb Socket Empty?
When it comes to leaving a fluorescent light bulb socket empty, there are a few things you need to keep in mind. First of all, if the socket is live (meaning there is power running to it), then it is not safe to leave the socket empty.
This is because there is a risk of electrical shock. Secondly, if the socket is not live, then it is safe to leave it empty. Again, this is because there is no risk of electrical shock. So, if you are not sure whether or not the socket is live, it is best to err on the side of caution and not leave it empty.
How Do You Wire Two Ballast Lights?
Wiring two ballast lights can be a daunting task, but it doesn’t have to be! Follow these simple steps and you’ll have your lights up and running in no time.
- Turn off the power at the circuit breaker before beginning any wiring. Make sure you don’t leave any tools or equipment near the light fixtures while working.
- Mount the two ballast lights on their respective bases firmly and securely.
- Attach a ground wire from the ballasts to the junction box or wherever needed for a secure electrical connection (usually green).
- Connect all white wires of both ballast fixtures in parallel using twist connectors, if needed using pigtail connections as splices instead of direct connections is recommended for safety reasons.
- Connect all black wires of both ballasts together in parallel using twist connectors, if needed using pigtail connections as splices instead of direct connections is recommended for safety reasons.
- Finally, connect the hot (black) wire from the power source to one of the black wires connected in step five above in order to provide current to both lighting fixtures simultaneously.
- Turn on the power at your circuit breaker and enjoy your new lighting setup!
Can You Change a 2 Way Ballast?
You can if you understand how the ballast is wired. The 2 way ballast has two hot wires and a common wire. The common wire is usually the white wire. The hot wires are usually one black and one red. If you cut the white wire and splice it to the black and red wires, the ballast will operate as a 3-way ballast.
What Could Happen if You Wire a Ballast Wrong?
If you wire a ballast incorrectly, it could damage your light fixtures or cause them to malfunction. In some cases, it could even start a fire. That’s why it’s important to follow the wiring diagrams that come with your ballast.
Wiring a ballast is not difficult, but it requires attention to detail and care. Incorrectly wiring a ballast can damage your light fixtures or even start a fire. That’s why it’s important to follow the wiring diagrams that come with your ballast.
You Can Check It Out To Change a Lightbulb in A Stairwell
Frequently Asked Questions
Can You Use a 2 Lamp Ballast for 3 Lamps?
This is a tricky question because there are a lot of factors that go into it. For example, the wattage of the lamps, the ampacity of the ballast, and the type of fixture (or lamps) you have. So, to be safe, you’ll need to check with an electrician to see if it’s safe to use a 2-ballast system with three lamps.
What Is the Grey Red Wire on the Ballast for?
A ballast is a component of an electrical system that assists in the distribution and transfer of electrical energy. It’s often found near lighting fixtures or power outlets, and its job is to help ensure that electricity flows smoothly throughout the system.
What Happens if You Wire a Ballast Wrong?
An improper installation of ballast can cause your AC system to malfunction, leading to power outages. In extreme cases, this could even lead to property damage or loss of life. By following the proper installation procedures for wiring ballasts, you can minimize the potential risks associated with incorrect installations.
First and foremost, make sure that the wire size corresponds to the available electrical outlet. Next, use insulated wire when connecting each socket together; do not connect wires directly from one socket terminal cable into another without adding an appropriate fuse or breaker. Finally, ensure that all connections are properly sealed by using tape or an electrician’s insulation sealant (if needed).
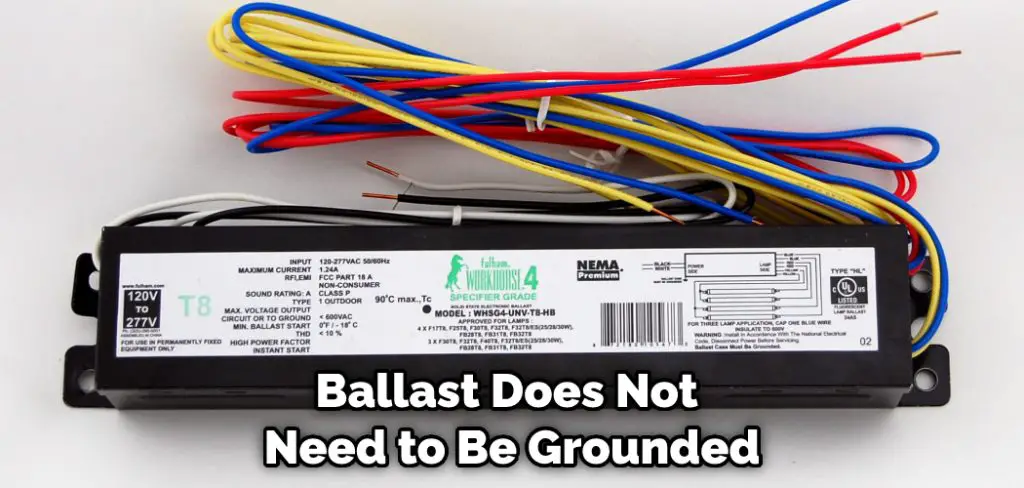
Does Ballast Need to Be Grounded?
The short answer is no. The ballast does not need to be grounded. However, if you’re experiencing any electrical problems with your system, it’s always a good idea to check to see if your Ballast is causing the problem. In some cases, Ballast may be the source of the interference and needs to be replaced.
Conclusion
In conclusion, wiring a 4 lamp ballast for 3 lamps is possible. By following the instructions in this article on how to wire a 4 lamp ballast for 3 lamps, you should be able to do it yourself with little trouble.
Be sure to use caution while working with electrical wiring and always consult a professional if you are unsure about what you are doing. Have you wired a ballast before? Let us know how it went in the comments below!
You can check it out to Set up Sunpak Ring Light