As a car owner, it’s important to stay on top of the maintenance for your vehicle. This includes not only changing oil and keeping detailed records about service visits but also performing regular visual inspections. One part of this inspection should include checking your brake light switch – a crucial component that helps activate the lights when you hit the brakes and keeps other drivers aware.

An issue with this switch can put the safety of you and those around you at risk, so it’s essential to take time out from your busy schedule to make sure it is in good condition!
In this blog post, we will guide you through how to check brake light switch quickly and easily – learn more now!
What is the Brake Light Switch?
Before we dive into the inspection process, let’s first understand what a brake light switch is and its role in your vehicle. The brake light switch is typically located near the top of your brake pedal, and it works by activating the brake lights when you step on the pedal. This signals to drivers behind you that you are slowing down or stopping. Without this switch, your brake lights would not turn on, potentially causing accidents or getting you a ticket!
Step-by-step Guidelines on How to Check Brake Light Switch
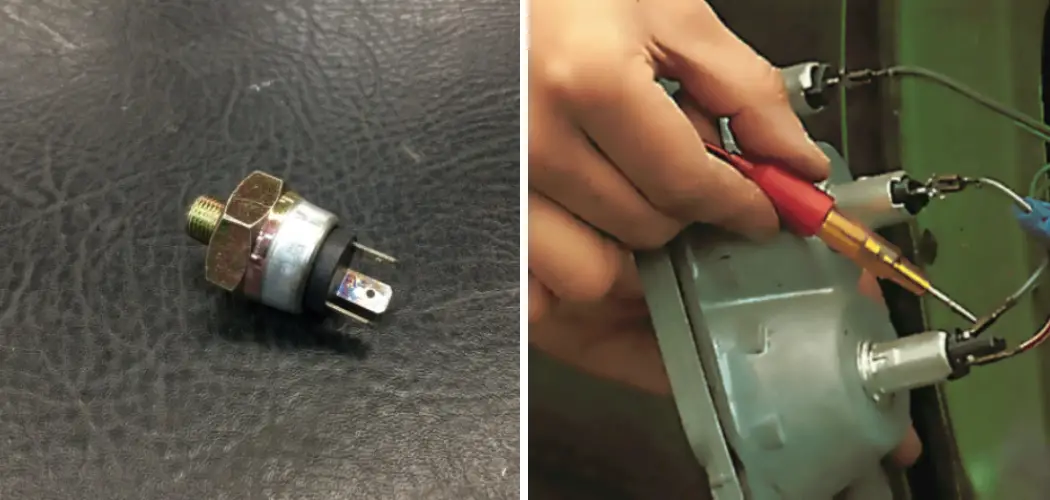
Step 1: Locate the Brake Light Switch
First things first, you need to locate the brake light switch. As mentioned earlier, it is usually near the top of the brake pedal. You can also consult your vehicle’s manual for assistance in finding it if needed. This switch will have a plunger that is pushed in when the brake pedal is pressed. Make sure the plunger moves freely and is not stuck in place.
Step 2: Check for Physical Damage
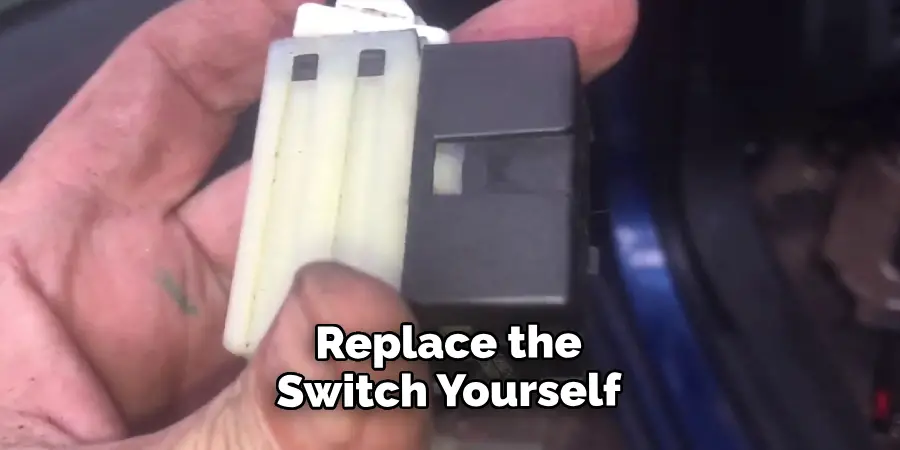
Next, inspect the switch for any signs of physical damage. Look for cracks, corrosion, or any other visible issues that could affect its functioning. If you notice any damage, it’s best to replace the switch immediately before it causes bigger problems down the road. You can purchase a new switch at any auto parts store.
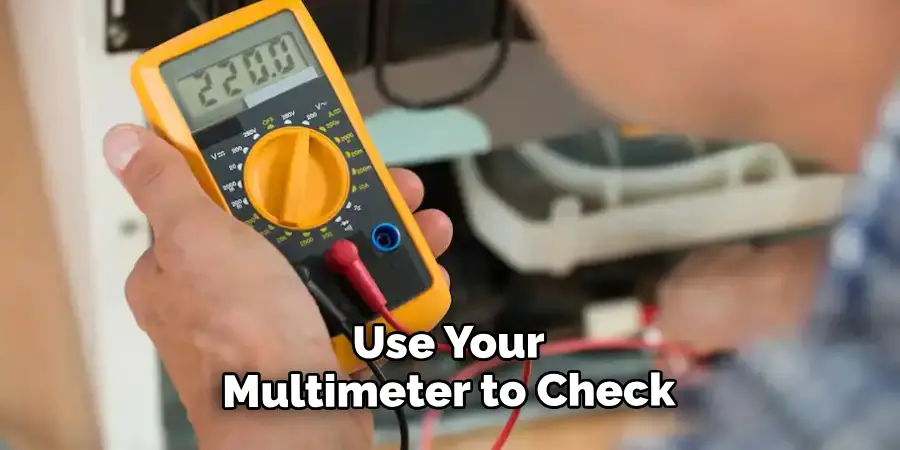
Step 3: Test the Electrical Connection
Now it’s time to test the electrical connection of the switch. You will need a multimeter for this step. With the car turned off, disconnect the wire connected to the brake light switch and use your multimeter to check for continuity between the two terminals on the switch. If there is no continuity, the switch needs to be replaced.
Step 4: Check for Proper Adjustment
In some cases, the brake light switch may not be properly adjusted, causing issues with its functioning. To check this, have someone sit in the driver’s seat and turn on the ignition. While they hold down the brake pedal, adjust the switch until it is in the correct position, and the brake lights come on. If the switch cannot be adjusted properly, it may need to be replaced.
Step 5: Test the Brake Lights
The final step is to test the brake lights themselves. Have someone else stand behind your vehicle while you press down on the brake pedal. If the lights do not turn on, there may be an issue with the switch or another underlying problem that needs to be addressed. Make sure to get it fixed as soon as possible for your safety and the safety of others on the road.
Following these simple steps can help you ensure that your brake light switch is in good condition and working properly. Regularly checking this component can prevent potential accidents and save you from costly repair bills in the long run. So don’t forget to add it to your routine vehicle maintenance checklist! Stay safe on the road with a well-functioning brake light switch.
Additional Tips and Tricks to Check Brake Light Switch
1. If you’re having trouble locating the brake light switch, consult your vehicle’s manual or try searching online for a diagram specific to your make and model.
2. When checking the brake light switch, it’s important to also inspect the wiring and connections. Loose or damaged wiring can affect the functionality of the switch.
3. Some vehicles have multiple brake light switches, so make sure you are checking the correct one. Refer to your manual or diagram for clarification.
4. If you have a multimeter, you can use it to test the continuity of the brake light switch. This can help determine if the switch is faulty and needs to be replaced.
5. It’s always a good idea to have a spare brake light switch on hand in case of emergency. They are relatively inexpensive and easy to replace yourself.
6. If you notice that your brake lights are still not working after checking the switch and its connections, there may be an issue with the fuse or a wiring problem elsewhere in the vehicle. It’s best to consult a professional mechanic for further diagnosis and repair.
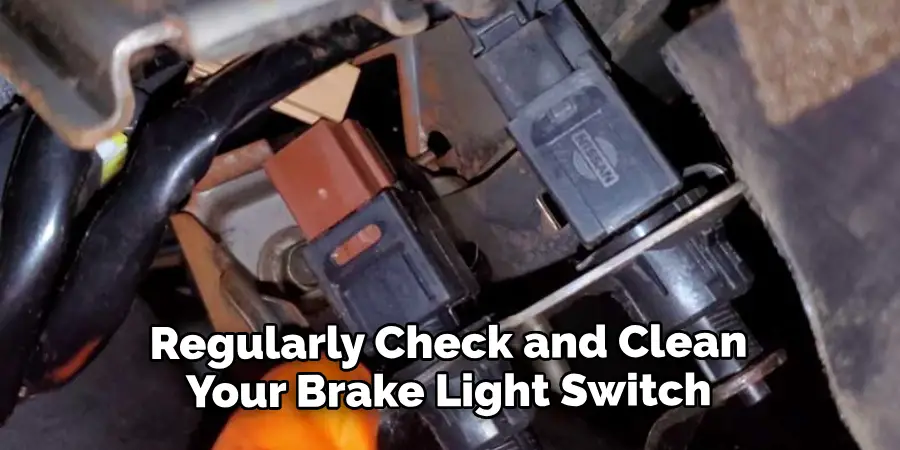
7. Regularly check and clean your brake light switch to ensure it stays in good working condition and prevents any potential issues from arising. This can also extend the lifespan of your switch.
8. If you are unsure or uncomfortable with checking the brake light switch yourself, don’t hesitate to take your vehicle to a certified mechanic for assistance.
9. Always make sure to properly dispose of old brake light switches and any other automotive parts in an environmentally friendly manner. Continuously maintaining and checking your brake light switch can ensure the safety of yourself and others on the road. It’s a small but important part of keeping your vehicle in top working condition.
10. Remember, having functional brake lights is not only essential for your own safety, but it also helps other drivers on the road know when you are braking. So don’t neglect checking and replacing your brake light switch when necessary.
Following these tips and tricks will not only help you effectively check your brake light switch, but also ensure the safety of yourself and others on the road. Regular maintenance and proper replacement of faulty parts are crucial for keeping your vehicle in optimal condition. Keep these tips in mind and always stay cautious on the road. Happy driving!
Precautions Need to Follow for Checking Brake Light Switch
1. Before you start checking the brake light switch, make sure to take all necessary safety precautions. This includes wearing protective gear such as gloves and goggles. Also, ensure that the vehicle is parked on a flat surface and that the parking brake is engaged.
2. Always refer to the owner’s manual for specific instructions on how to check the brake light switch for your particular vehicle model.
3. If you are not familiar with car mechanics, it is best to seek professional help for checking and repairing the brake light switch. This will ensure that the task is performed correctly and safely.
4. Never attempt to check the brake light switch while the engine is running as this can be dangerous.
5. Before starting any work on the brake light switch, disconnect the negative battery cable to avoid any electrical accidents.
6. If you notice any signs of damage or wear on the brake light switch, it is important to replace it immediately. Do not attempt to repair a damaged switch as this can compromise the safety of your vehicle.
7. Ensure that the brake light switch is cool before touching it, as it can become hot while the car is in use.
8. When checking the brake light switch, make sure that all electrical systems are turned off to avoid any interference and accurately diagnose the issue.

Following these precautions will not only ensure your safety but also help in accurately checking the brake light switch of your vehicle. So, always make sure to follow these precautions when planning to check the brake light switch. Now let’s take a look at the steps to follow for checking the brake light switch.
Frequently Asked Questions
What Are the Signs of a Faulty Brake Light Switch?
The most obvious sign of a faulty brake light switch is when your brake lights do not turn on when you press the brake pedal. This is a crucial safety feature that alerts drivers behind you when you are braking and prevents potential accidents. Other signs of a faulty brake light switch include flickering or dimming brake lights, difficulty shifting out of the park, and an illuminated warning light on your dashboard.
Can I Replace the Brake Light Switch Myself?
Replacing the brake light switch can be a relatively simple task, but it does require some basic knowledge of electrical systems and vehicle mechanics. If you have experience working on cars and the necessary tools, then you may be able to replace the switch yourself. However, if you are unsure or uncomfortable with this task, it is best to leave it to a professional mechanic.
Is It Safe to Drive with a Faulty Brake Light Switch?
No, it is not safe to drive with a faulty brake light switch. Not only does it put you and other drivers at risk for potential accidents, but it is also against the law to drive with malfunctioning brake lights. If you suspect your brake light switch is faulty, it is important to get it checked and fixed as soon as possible.
Conclusion
With the above outlined you can easily understand how to check brake light switch. It is important to regularly check and maintain all components of your vehicle, including the brake light switch, for optimal safety on the road. If you notice any signs of a faulty brake light switch, it is best to address the issue as soon as possible to ensure safe driving conditions. Remember, safety should always be your top priority when it comes to operating a vehicle.
So, make sure to keep your brake light switch in good working condition and stay safe on the road. Happy driving!