
Grow tents are a great way to get started in indoor gardening. They provide all the benefits of an indoor garden, like protecting your plants from pests and bad weather while taking up a fraction of the space. However, people often have one question about how to hang light in a grow tent. This guide will show you the best way to do it. Read on for more.
Many grow tents are designed with different kinds of mounts for hanging up lights, but most contain metal hooks at the top. These are convenient because there is no need to drill holes in the frame or use screws (though it doesn’t make much difference if you want to use screws).
Summary: In this quick tutorial, we will show you how to hang light in a grow tent. First, cut a hole in the tent near the top so that the light can shine through. Next, use some wire or a piece of sturdy string to hang the light above the hole. Finally, make sure the light is secure and enjoy your fresh garden plants!
Importance of Grow Lights
While it is true that sunlight contains all the colors of spectrum needed by your plants, it is also essential to provide supplemental lighting for your indoor growing. How much light you need depends on what plant species you are trying to grow and where they will be in your garden.
Types of Grow Lights
There are four types of lights for indoor gardening: High-Intensity Discharge (HID), Fluorescent, Incandescent, and Compact Fluorescent (CFL). Each one uses a different technology and emits light at different wavelengths.
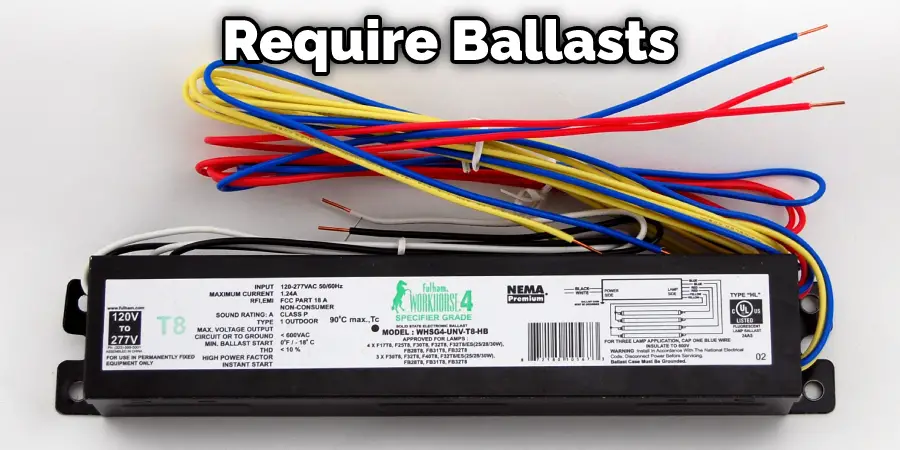
HID lights emit light at wavelengths needed for vegetation. They are commonly used in commercial greenhouses and produce more light than other types of lights for plants. However, they are usually hung very high above the plants to throw out as much light as possible (usually at least 24 inches off the ground). They also require ballasts, extra wiring, and built-in sockets. For these reasons, HID is generally not considered for home gardeners.
Fluorescent grow lights use less energy than incandescent or CFL grow lamps and produce less heat, making them easier on your plants. You can get them in strips similar to shop light fixtures or tubes like traditional fluorescent bulbs; both will work well for indoor gardening. Kits containing both tube and strip lights are available for purchase. The best fluorescent grows light emits light only at the red and blue wavelengths, as these are the best colors of the spectrum to be absorbed by plants.
Now twist your colored wires together and screw on some wire nuts. This will keep them from touching or anything else they shouldn’t touch. Then, tape over that with electrical tape. In our case, we’ll connect the incoming black wire with the outgoing white one like this.
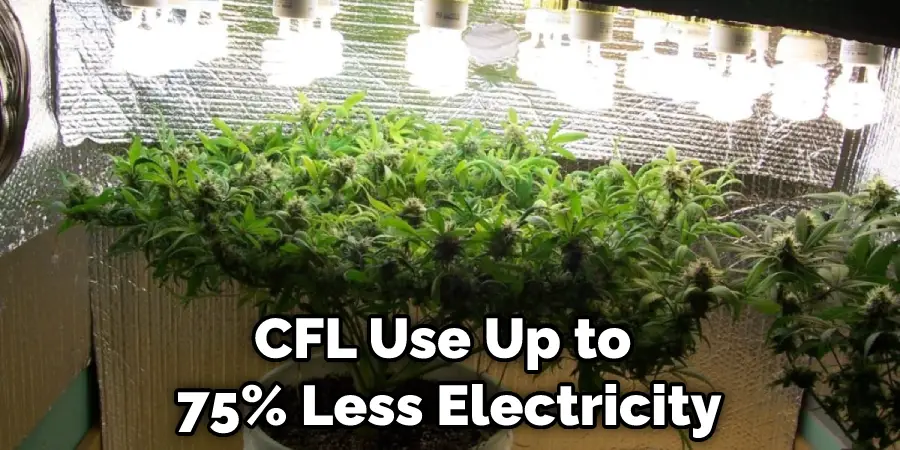
Compact Fluorescent Grow Lights (CFL) use up to 75% less electricity than incandescent bulbs and emit very little heat, making them an excellent choice for indoor gardening. You can hang them closer to your plants without worrying about burning them. CFLs are available in different color temperatures, determining their wavelengths of light emission. More excellent colors produce more blue light, while warmer colors produce more red light.
Tools and Materials:
- Light
- Ballast or wall plug
- Chain
- S hooks
- Screw hooks
- Timer
- Knife or wire cutters
- Lighter or matches
A Step by Step Guide on How to Hang Light in Grow Tent
Step 1: Determine How High To Hang Light
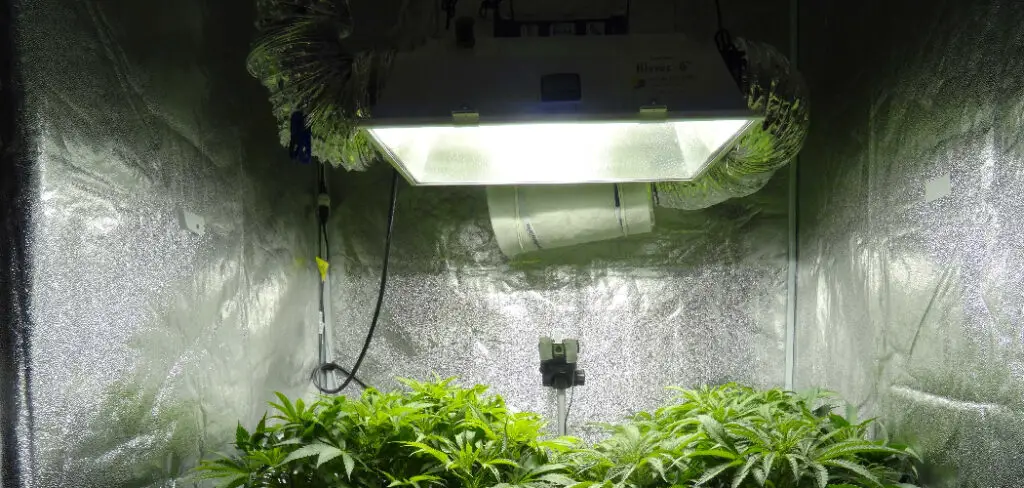
Hang light at least 6 inches above the tallest plants. How you decide where to place your lights depends on how quickly you want your plants to grow, especially in places with lots of large buds growing near the light source. Generally, lighting should be 18-24 inches from plant tops for best results. Of course, this will depend on fan strength and other factors which could affect the actual distance needed between your lights and plants.
Step 2: Determine How Much Space You need Between Your Lights
Now twist your colored wires together and screw on some wire nuts. This will keep them from touching or anything else they shouldn’t touch. Then, tape over that with electrical tape. In our case, we’ll connect the incoming black wire with the outgoing white one like this.
Light fixtures and ballasts can put out too much heat and burn your plants without adequate airflow or ventilation. How much ventilation you need between your reflector and the next bulb depends on how many watts of power each bulb uses, so to find out what size vent space you need for a particular setup, try to figure out which one is larger: Your fan or your lights? If it is the fan, you will need more room than if it is the actual light fixture. Figure this out by using our formula below:
The height of the plant x How many bulbs = How high off the ground should fans be kept (Minimum).
Example: 4 feet high plant with 1 400 watts bulb = 2 feet minimum.
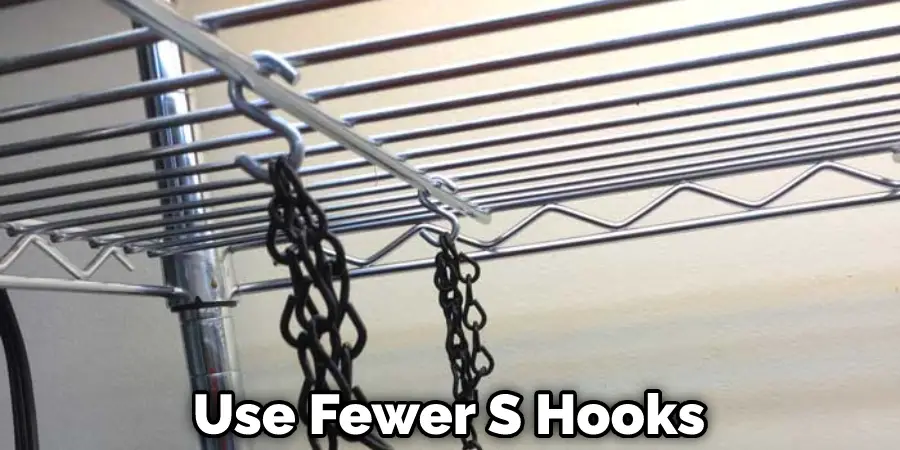
Step 3: Determine How Many S Hooks You Need to Hang the Light
The number of S hooks you need depends on the height and amount of space you have between your reflector and the next bulb. So, if you want to hang a light up high, for example, to create more room at ground level or to avoid blocking airflow, you would use fewer S hooks than if you hung it low or off to the side, where there isn’t enough space between lights.
Generally speaking, though, most people find that a tiny hook in each corner usually does fine when hanging their lights. Ensure it’s sturdy enough not to fall over because it could hurt someone or burn something if the light ever fell onto it.
Step 4: Hang a Ballast or Wall Plug
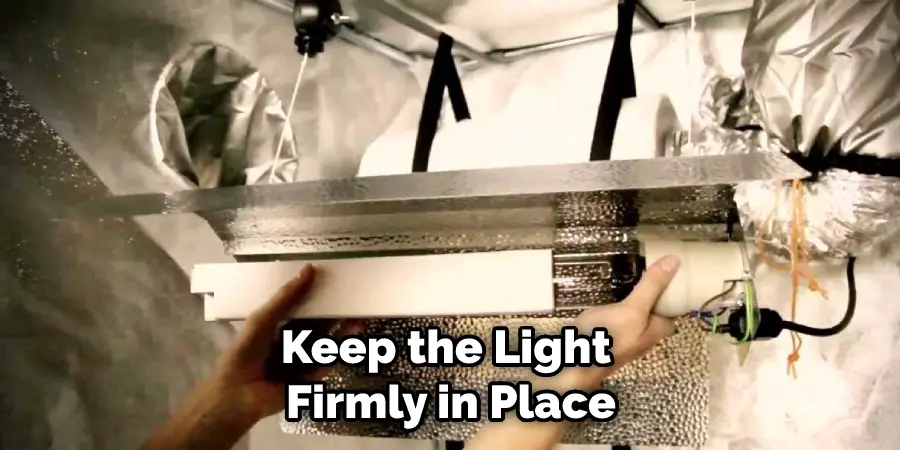
The person is saying to hang the ballast from two screw hooks placed on either side of the ballast, and then attach those screw hooks with chain as pictured above. They also say to make sure the hooks are high enough off the ground so they don’t get bumped or dropped.
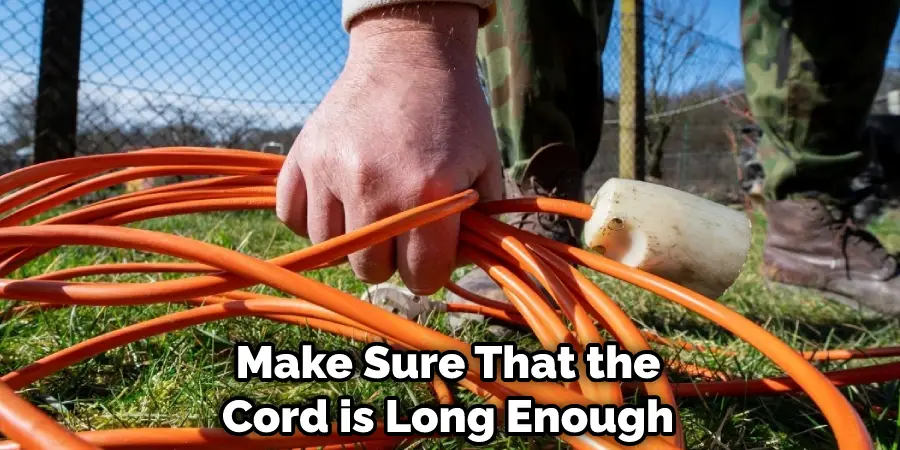
If you have an extra-long cord from the wall, plug it into the ballast try not to coil it up too tightly when hanging it. Coil it just enough so that there is no slack in the cord but not so tight that it’s all twisted up. Also, make sure the ballast doesn’t get too close to your reflectors because it could melt the plastic.
Step 5: Hang Your Lights
Hang your lights from chains hooked onto one or more S hooks depending on how many you have and their lengths. Please make sure the chain is strong enough to hold up your lights but not so heavy that it will drag down the light fixtures themselves and cause them to fall over. Also, make sure there is nothing in the way of the lights hanging from those chains, such as anything that might block airflow or ventilation around those lights, because again, this could pose a potential fire hazard due to overheating of wiring.
Hanging multiple timers as pictured above can be helpful, and an extension cord if you need some length between where your ballast is plugged into a wall outlet. Remember that extension cords or timers that are overloaded with watts can create a fire hazard, so don’t overload your timers and extension cords. How many amps an outlet is rated for will be printed somewhere on it unless you have a GFCI outlet. If there isn’t a label on it, try to figure out the maximum amount of watts it should safely handle using the “15% rule”.
Step 6: Finishing Up
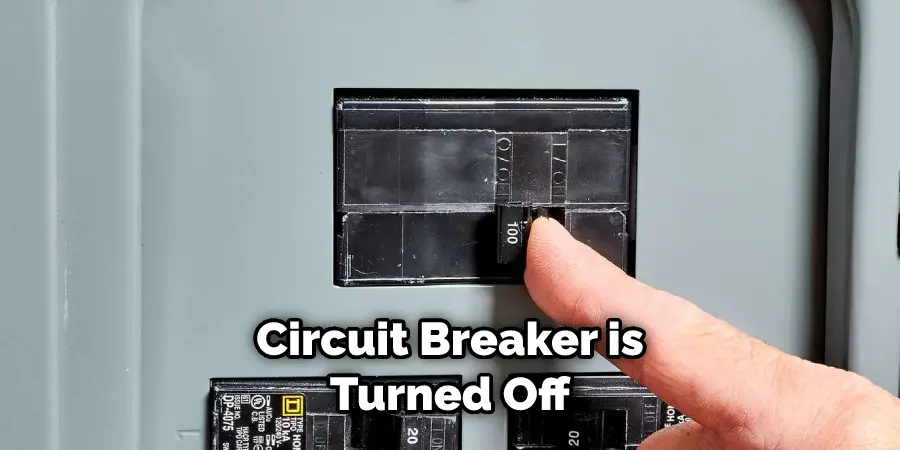
Before turning on your lights, fans, and other necessary electrical equipment in your grow room, ensure the circuit breaker is turned off to avoid any electrical risk. Then, start from one end of that circuit breaker box, flip each switch off, then back on before moving onto the next one until you get to the last switch, which controls whatever you’re trying to turn on. Doing this in a controlled manner ensures that the power to your electrical equipment is turned off and on in a logical order. If you were to simply turn off all the switches, then turn them back on one by one, you would be taking unnecessary risks with your electrical system.
If there are multiple switches for a particular appliance such as a fan, light, or ballast, then turn them all down at once when they are not plugged in because this will cause all electricity going through that circuit to be temporarily cut off but safely so with no risk of fire hazard whatsoever. These steps will help in how to hang light in grow tent.
You Can Check It Out To Change Rv Interior Light Bulbs
Where Should Grow Lights Be Placed in Grow Tent?
As a general rule, start with hanging them around 6 or 7 feet above the floor line of your grow tent. How far apart should they be spaced? A reasonable distance between two light fixtures is about 6 inches.
However, if there are no more than 42 inches (including cord) between bulbs, you can put them closer together. If I am using the HID lighting system in my grow room, MH for vegetative growth, and HPS for the flowering stage; How high it is placed will determine how close they get to plants during their final stage of life cycle buds are forming.
Frequently Asked Questions
What Do You Hang a Grow Light With?
When hanging a grow light, it is important to make sure that the cord is long enough so that you can place it where you want it. Additionally, be sure to use a clamp or holder if possible in order to keep the light firmly in place. You may also want to buy an extension cord if necessary.
When looking at grow lights, there are different types and sizes available, so be sure to choose one that best matches your needs and space constraints. Some of the most popular options include HID (high-intensity discharge) lamps, LED (light emitting diodes), and fluorescent tube lighting. Make sure to get advice from a professional before making any purchase; choose the right type of equipment for your home environment – this will save you time and money down the road!
Where Does the Ballast Go in a Grow Tent?
A grow tent is similar to a mini greenhouse and is used for indoor marijuana growing. The ballast goes inside the tent, typically in one of two places: on top of the poles or between the poles. This ballast helps to maintain an even temperature throughout the chamber and prevents waves from forming that could cause water leaks and soil erosion.
Can You Use a Grow Light Bulb in a Regular Lamp?
This is because the bulbs used for growing plants are not as powerful as general lighting bulbs and therefore do not require an extra transformer or heavy-duty wiring. Just be sure to get a CFL (compact fluorescent) grow light bulb instead of an HPS (high-pressure sodium) model since they tend to produce more heat and result in faster plant growth.
Can a Grow Light Burn a Plant?
It is safe to use a grow light to grow plants – as long as you are using the correct type of grow light for the type of plant you are growing. If you are not sure what type of grow light is right for your plants, please contact us and we would be happy to help you out.
Conclusion
Now that you know how to hang light in grow tent, it’s time to get started on your indoor garden. By following the tips we’ve outlined in this blog post, you should be well to have a successful harvest. Don’t forget to come back and check out our other blog posts for more tips and advice about growing cannabis indoors. Thanks for reading!