You need a light but don’t have a voltage converter. No problem! In this article, we’ll show you how to hook up a 12v light to 110 without any special equipment. Follow these simple steps, and you’ll be ready to light up your world in no time!

Hooking up a 12v light to 110 can be easy. The first thing that you’ll need to do is find an item that will act as a 12v power inverter. If you need one, here is an inverter we used successfully in the past. Or if you already have something like this, then great!
Summary: Hooking up a 12V light to a 110V power source requires the use of a step-down transformer or voltage converter, as connecting the light directly to a higher voltage source can damage the light or cause a short circuit. A step-down transformer or voltage converter is a device that reduces the voltage from 110V to the required 12V, ensuring the light operates safely and efficiently. Before purchasing a transformer, check the light’s power requirements to determine the appropriate wattage for the transformer.
To hook up a 12V light to a 110V power source, start by connecting the light to the output terminals of the step-down transformer or voltage converter, ensuring the positive (usually red) and negative (usually black) wires are properly connected. Plug the transformer or converter into a 110V outlet, and switch on the power.
The 12V light should now operate correctly, powered by the 110V source. Always exercise caution when working with electrical components, and follow the manufacturer’s instructions for the light, transformer, or converter. Consult a professional electrician for assistance if you are uncertain about any aspect of the process or encounter difficulties.
Tools and Materials
- 110 V wall outlet (i.e., “household” power)
- 12 V light (i.e., a small red flashing LED)
- Electrical tape or wire nuts
- Wire strippers and cutters
A Step by Step guide on How to Hook Up a 12v Light to 110
Step 1:
To make an extra long 4′ extension cord, you will need to cut the male end off of an extension cord. The female plug should remain intact on one end, while the male plug will get cut off even with the outer insulation on the other end. You will strip away about 1′ of insulation from this free end that you just made into a cord. This makes it easier to attach wires without stripping them individually and ensures enough room for all three conductors in your cord.
Step 2:
In order to work with the wires, you need to take them out of the two-wire nuts and lay them out. Then, you need to strip 1 foot of insulation off of both ends of the extension cord, exposing at least 3/4 inch of bare wire on each end.
Step 3:
To make a clockwise loop with the three strands of insulated wire from an extension cord, twist them together. If any strand is longer than another, wrap it around the shorter piece(s) first.
Remember, there are three wires in this cord, so you will need to twist together each wire with its neighbors. You now have two options for completing this second end of the cord:
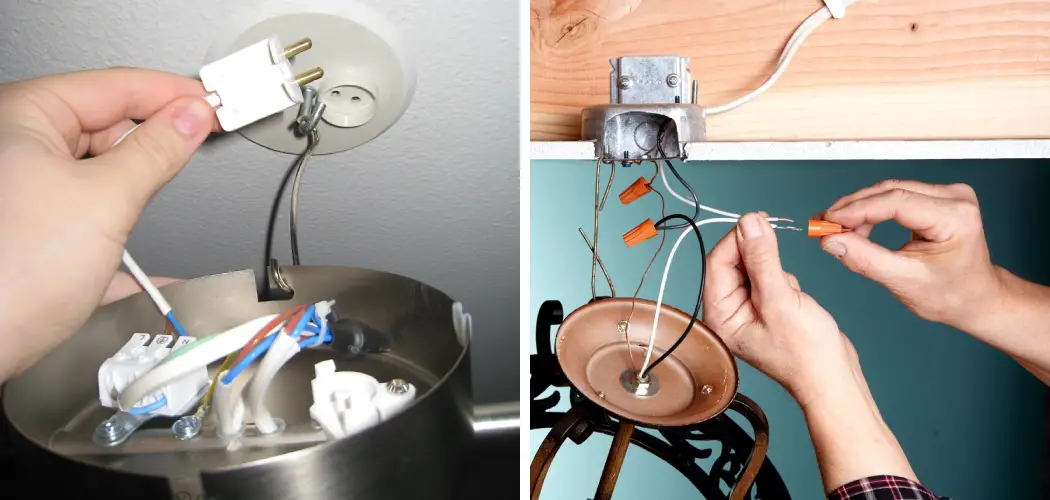
Option 1- Using Wire Nuts
If you want your light/appliance to be able to unplug from your extension cord at any time, place each wire nut over each twisted section and tighten them down securely. The screw-on wire nuts allow you to make sure that they do not become loose too quickly, protecting people and appliances from exposed wiring. This is often the preferred method if someone wants their light or machine to disconnect without cutting into it.
Option 2- Using Electrical Tape
If you want to keep a light or appliance from coming apart, you should solder the wires together and cover them with electrical tape. But be careful! The wires can get very hot and burn you. Also, make sure that no metal wires are poking out through any gaps in the insulation, or it could cause a short circuit.
Also, do NOT use too much solder as there should only be a fragile coating over all three wires. Electrical tape is the best option if your light will not be able to come apart from your cord (such as when you are hooking up a small LED light bar in an emergency vehicle)
Step 4:
To hook up a 12v light to 110, you will need to strip about 1 inch of insulation off each end of the cord. Then, wrap one strand from each side together in a clockwise direction. This will become your “neutral” wire for this extension cord. With those two wires now twisted together into a clockwise loop, you should turn all three strands on one side into a counterclockwise circle.
Step 5:
You are preparing to attach a male plug. You should only need to strip away about 1/4″ of insulation from these free ends as we do not require much bare wire showing to make connections with.
If you wish, you can twist together all three strands on this end into another clockwise loop just to be safe. Now you are ready to attach the male plug into your 12v outlet. How this step is completed will depend on how many prongs are on your pin, but here are some general guidelines:
- Tape the wire on one side of the male plug with electrical tape or plastic tubing so that it cannot come in contact with any other metal parts of your plug while being turned. – If your male ends have four screws, twist them together in a clockwise loop before attaching the wires onto them. If it only has two screws, twist together 2 and 3 (same black and white/red as neutral) and twist those together before attaching them to their respective screws. If it has only one screw, attach the black wire to this screw (it will make sense as to why later – if not, just use your common sense).
- Turn the male plug 180 degrees so that it is upside down from how you first attached the wires to it. How you position, it does not matter too much as long as there are no parts of metal sticking out where they could come into contact with another piece of metal on the plug or your extension cord’s female end. While holding this plugged in securely, twist each pair of wires clockwise around one another before affixing them tightly using wire nuts or electrical tape. Make sure that all excess lengths of wire are cut off so that none can come into contact with anything.
Step 6:
Once this is done, you now have yourself an extension cord that can either be detached at the male plug or with safety wire-nuts at the female wall extractor end. This is extremely useful for those who need to use it with different appliances or lights and would like to swap them out as needed rather than needing to go back and undo all their wiring. How you proceed from here on will depend entirely on what you plan on doing with your new extension cord. If it is a temporary project, a simple knot around a screw in a nearby stud should hold just fine until you are finished.

How you go about permanently mounting your light to the cord depends very much on what kind of light and cord you have. How to do this with a small LED light bar will be covered in the next Instructable as it may require additional steps such as drilling holes into the case of the light or using another method that does not involve wiring that could damage your 12-volt system. However, these steps will help in how to hook up a 12v light to 110.
You can check out it to Find Reverse Light Wire
Precautions
- Be sure to use an in-line fuse with your light. If there is a short, the fuse will blow before you have a chance to clean up any broken glass or potential fire hazards
- Always test your lights before attaching them to anything. Then, make sure they work before leaving the store or office.
- Using your vehicle’s wiring harness will give you an easier way to connect lights to power without having to cut any wires. Still, you may encounter problems down the road with broken connectors, corrosion, etc. If this happens, you would need to replace your entire wiring harness at a cost that outweighs the benefit of saving time today. And even if your car doesn’t have a wiring harness running back from where ever you’re hooking up your light(s) to on/underneath your dashboard that has been around long enough to be corrosion-ridden and unreliable – there is still no guarantee that using a wiring harness wouldn’t end up damaging other components in your car or truck.
- To save time and ensure a clean, professional look to your wiring job, use solderless connectors to attach all of your wires instead of crimping them with pliers
- it gives you a much better connection that is less prone to damage from vibrations and heat. And soldering will always give you the best link.
You Can Check It Out to: Convert 12v Led Lights to 120v
Frequently Asked Questions
Can You Use a 12v Bulb in a 110v Socket?
It may be possible to use a 12V bulb in a 110v socket, but it is not recommended as the power provided by the bulb might not be enough to run certain appliances or electronics.
If you are unsure whether or not your appliance or electronics will work with a 12V bulb plugged into an outlet using standard electrical wiring, test it out first before plugging in anything important.
What Happens When You Put a 12v Bulb in a 120v Socket?
What happens when you put a 12V bulb in a 120V socket is that the voltage will be high enough to hurt the bulb. The electrical current flowing through it can cause it to heat up, explode, or catch on fire. Either way, this is not something you want happening and would most likely require professional assistance if it does occur.
Can You Wire 12V lights to 110?
It is generally not advisable to directly wire 12V lights to a 110V power source. Doing so can be dangerous and can cause a fire hazard, as the lights may not be able to handle the higher voltage and may overheat or burn out. Instead, you should use a voltage converter or transformer to step down the voltage from 110V to 12V, and then connect the lights to the converted power source. This will ensure that the lights operate safely and efficiently without any risk of overheating or damage.
Are All Led Lights 12volt?
No, not all LED lights are 12volt. Older style incandescent and halogen lightbulbs are typically 12volts, while newer fluorescents and LEDs use a 9-12v dc power supply. Make sure your LED light is compatible with the power supply you’re using before connecting it!
Is 1500 Watts a Lot for an Outlet?
There is no one-size-fits-all answer to this question, as the number of watts that an outlet can handle will vary depending on its location and the types of appliances that are plugged in. However, a general guideline would be to avoid using outlets that are labeled as being able to handle less than 1000 watts.
Conclusion
We hope you have learned how to hook up a 12v light to 110. In conclusion, if you’re looking to install a light fixture that’s powered by 110 volts and needs to be hooked up with 12v power sources, then you should invest in a transformer. This will allow the lower voltage of your appliance to be compatible with the higher-voltage requirements of your light fixtures. In addition, providing this type of electricity distribution can make hooking up any lighting system much more accessible while also giving yourself peace of mind knowing that there won’t be any problems from mismatched voltages.