Removing a ceiling light cover can be a pain, especially if clips hold it in place. This article will show you how to remove ceiling light cover With clips. We will also provide tips on avoiding damaging the light cover or the ceiling. Let’s get started!
Many of us reach a time in our lives when we need to replace old ceiling light covers. There are several reasons why you may need to remove the cover, such as replacing a broken cover or fixture or if you want to upgrade to a new one.
Summary: Removing a ceiling light cover with clips is a simple task that can be accomplished with minimal effort and tools. The process may vary slightly depending on the specific design of the light fixture and clips, but generally follows a similar approach. Before attempting to remove the light cover, gather necessary materials, such as a flathead screwdriver, a non-slip mat, and a ladder or step stool. For safety purposes, turn off the power to the light fixture, either by switching off the light or disconnecting power at the circuit breaker.
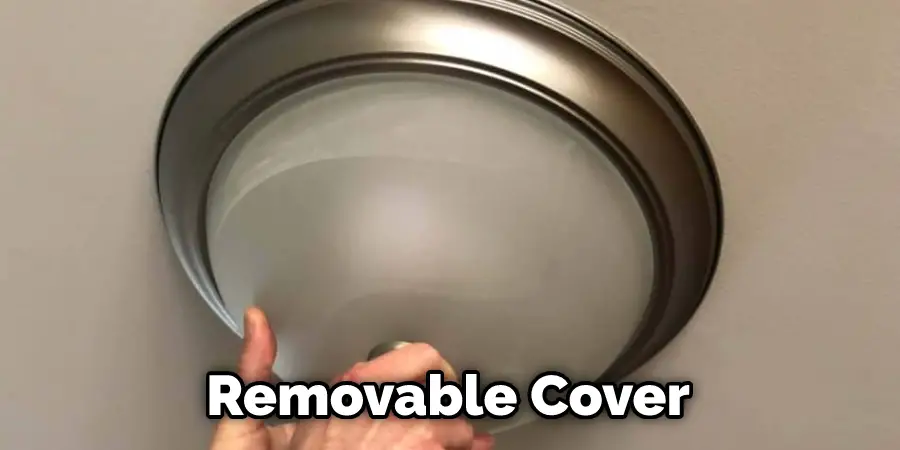
Start by setting up a ladder or step stool on a non-slip mat beneath the light fixture, ensuring stability and safety. Carefully examine the ceiling light cover to identify the location of the clips that hold it in place. These clips may be metal or plastic and can be located around the perimeter of the cover, typically evenly spaced. Gently press up on the light cover to create a small gap between the cover and the fixture, then use the flathead screwdriver to carefully pry the clips away from the cover.
Be sure to work slowly and cautiously to avoid damaging the clips or the light cover. Once all the clips have been disengaged, carefully lower the light cover, holding it securely to prevent it from falling. With the light cover removed, you can now access the light bulb or other internal components for replacement or maintenance. To replace the cover, simply reverse the process by positioning the cover back onto the fixture and snapping the clips back into place, securing the cover. By following these steps, you can safely and effectively remove a ceiling light cover with clips for various maintenance tasks.
Tools and Materials
- Ladder or Stool
- Phillips screwdriver
- Grabber tool or old rag
- Wire cutters
-
2 ceiling light fixture clips - Gloves
A Detailed Guide on How to Remove Ceiling Light Cover With Clips
Step 1: Make Your Plan
In order to install your new ceiling light, you must first determine what type of lights are already installed in the space. Once you know that, you can figure out the best way to remove it. For example, if there are two metal hooks holding up the fixture in your kitchen on either side of the space where the light bulb goes, then it’s probably a clip-on fixture.
Step 2: Prepare Your Work Space
If you’re looking to do some work on your ceiling, it’s important to have a stable area to stand on. Whether you use a stool or ladder, make sure it’s placed securely before you begin. And if you’re using a ladder, it’s always best to have someone around in case you need help. To remove the ceiling light cover, simply hold onto either side and lift until it comes off. Once you’re in position, placing an old rag down may help you grip the surface and keep the area clean.
In order to remove the ceiling light cover with clips, you will need to use some essential tools. To do this, find a Phillips screwdriver and grabber tool or old rag. You can also use wire cutters for replacing electrical wiring if needed. Don’t try to be superman, so don’t attempt to do this job when you feel tired after a long day at work because it could lead to injury!

As soon as you’ve found the right tools for this project, put on your gloves. You don’t want to get dirty only to realize that you’re not protected from injury because it is caused by splinters or falling debris.
Step 3: Support the Cover and Locate the Loose Clip
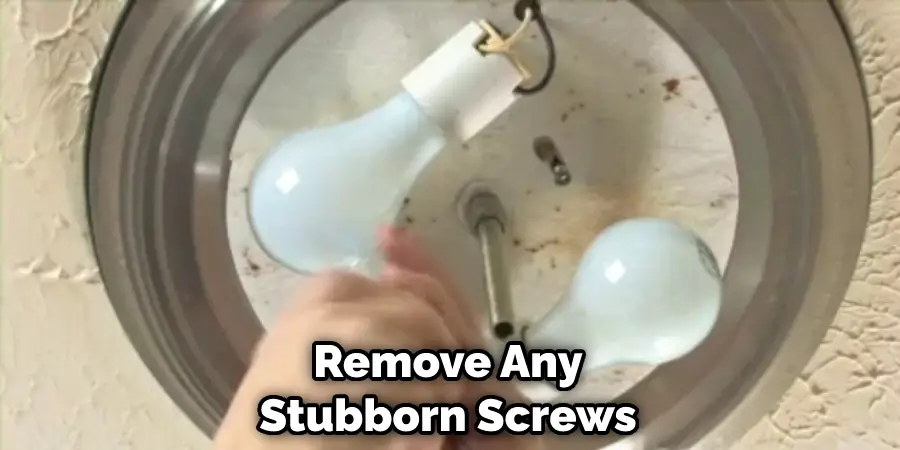
The first thing you have to do is find a way to support the cover with one hand. In most cases, there are two clips at the ends of the ceiling light cover that attaches it to its bracket. One or both clips may be loose enough to move out of their slots and hang freely, or they may be held in place by a screw. You will need to support the cover as you detach these clips using your grabber tool or old rag and remove them from their brackets. The following list has details:
- If the clip doesn’t come free quickly, then feel around for screws holding it in place as well as where it meets the bracket if needed, then use your screwdriver to loosen them
- If the clip doesn’t come free quickly and there is no screw holding it in place, then you will have to cut its wires or let go of that end because, without proper support, your ceiling light cover could drop unexpectedly and cause injury.
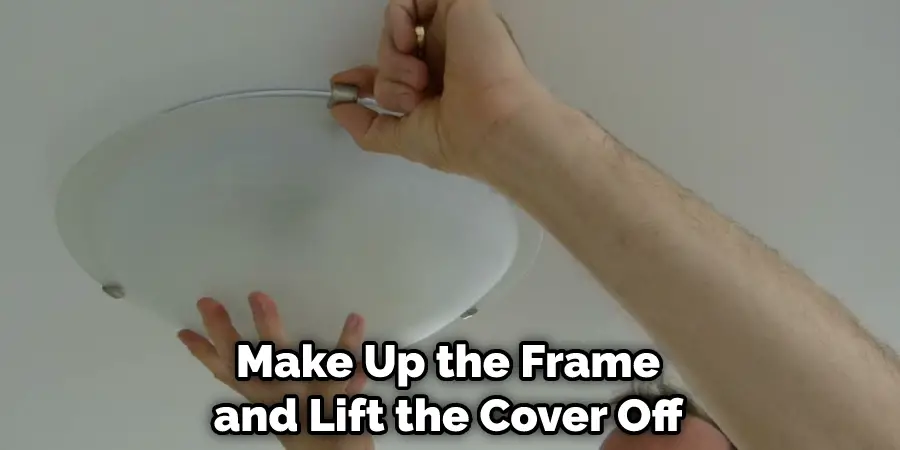
Step 4: Remove the Ceiling Light Cover
To remove a ceiling light cover, first lift it up with one hand while supporting one of the corners or ends with the other hand. Then, insert your fingers into the loops of wire that make up the frame and lift the cover off completely. Finally, set the cover aside on a stool or ladder.
Step 5: Unscrew Cover Attachment
Now that you’ve removed the hanging part of your old ceiling light fixture, it’s time to inspect the side where it was connected to the base. Look for screws holding them together and remove them carefully if needed. Please note: This is a crucial step in how to remove ceiling light cover with clips, and it can be quite time-consuming and tedious. But it’s necessary work to avoid the cover falling off while you’re using your flashlight.
Step 6: Prepare Bracket for Mounting New Cover
If your new ceiling light cover has round plastic pins in mounting clips, take them out and put them aside with the screws you removed earlier. You can leave the screws in place because they might be needed when connecting your new ceiling light fixture to its bracket later.
Step 7: Take Apart Old Ceiling Light Fixture Base
You may have noticed that the old light base has two parts, just like the hanging part. The smaller one is where electrical wiring connects it to power sources outside through cable clamps or wires held together by screws. The more significant part is where light bulb sockets are placed. When removing the base, take note that you only need to remove the screws or clamps then pull out its wiring (if any). Do not try to unscrew its fundamental parts; these are compactly designed and cannot be disassembled because of this.
Step 8: Screw New Ceiling Light Fixture Base in Place
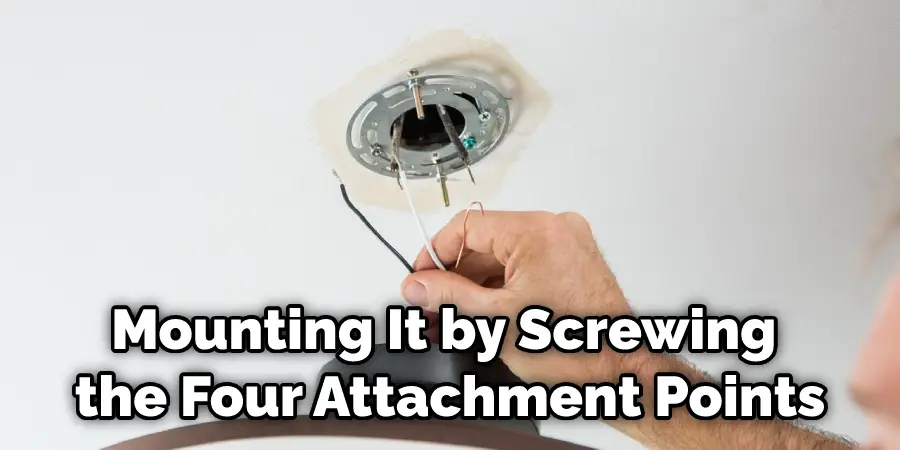
The final step in installing your new ceiling light fixture is mounting it by screwing the four attachment points for this part on your ceiling light bracket. This is the easiest part of this entire process. Once that is done, reattach its wiring, and it should be all set to go! When you’re satisfied with how things look, turn your circuit breaker back on and flip the switch for your new ceiling light fixture.
Step 10: Clean Up and Enjoy
After your new ceiling light fixture is in place, the only thing left to do is clean up the area where it used to be and remove its cover from your stool or ladder (if you haven’t done this already). Any mess you made should be cleaned up, mainly screws and wire cuttings on the floor below. These steps will help you remove the ceiling light cover with clips.
You Can Check It Out to: Remove Light Fixture Cover With Clips
Tips and Warnings
Tips:
- Make sure to turn off the circuit breaker or remove the fuse located on the fixture’s electrical box before you begin.
- Take a photo of your light fixture before removing so you can use it as a reference for putting everything back in its proper place once you’re done replacing the light bulb or cover.
- If you have more than one light bulb, remove each one by turning counterclockwise. Once you reach the final bulb, pull it from its base to avoid having any glass shards fall inside your light fixture.
- Put on safety glasses and gloves when working with bare bulbs and glass covers (in case they shatter). Also, remember that asbestos is commonly found in older insulation and ceiling tiles, which means you should take extra precautions while performing this project.
- Don’t forget to hold onto your screws while removing light bulbs since you may need them during reassembly.
Warnings:
- Removing the cover of your ceiling light fixture can be dangerous. The glass may shatter while you’re removing it, which means you should hold onto the pieces that fall to avoid injury. You should also wear safety glasses and gloves to prevent cuts or abrasions while handling sharp shards.
- Ceiling light fixtures are heavy. Keep in mind that you won’t be able to lift the fixture too high without pulling yourself up towards it, which may cause injury.
- You should never work on your lighting fixture if you’re unsure about how to handle it safely. If there isn’t a removable cover, you can instead try unscrewing any screws that hold your ceiling light fixture in place before disconnecting the wires and working with bare bulbs or insulation.
You May Also Read: Change Tall Ceiling Light
Frequently Asked Questions
Can I Replace the Globe with a Light Fixture?
There is no definitive answer to this question as every light fixture is different and may require a slightly different approach when replacing the globe. However, one method that might work for you is to remove the old globe and replace it with a more decorative or stylish replacement.
This could be done by removing the screws that hold the old globes in place, then installing your new Globe either through drilling or screwing it into position.
Do I Need to Remove Ballast for Led Lights?
No, ballast does not need to be removed for LED lights. In fact, ballast can actually help to increase the lifespan of LED lights. Ballast is what’s called a load-bearing element and it helps distribute the weight of the light fixture evenly, preventing damage from occurring.
Can You Replace Fluorescent Tubes With Led Tubes?
Unfortunately, you cannot replace fluorescent tubes with LED tubes. While LEDs do have some benefits over traditional bulbs, such as reduced energy consumption and shorter lifespan, they are not able to produce the same level of light as fluorescent lamps. In fact, LED lights may actually cause eye strain or other visual issues when used in areas where visibility is important.
Can’t Get Ceiling Light Cover Off?
Ceiling light cover removal can be a tricky task, but it’s not impossible. Follow these tips to get the job done:
Use a screwdriver to pry up along one edge of the ceiling light cover until it starts coming off in chunks. Work your way around the entire circumference of the fixture using this method, removing all pieces as you go.
Be careful not to scratch or damage any electrical wires that may be hidden underneath the fixture. Once all of the screws and covers are removed, use an electric drill with a 3/8-inch bit to remove any stubborn screws holding down wiring harnesses or other components.
Finally, use pliers to carefully pull out stray wire clips and adjustments if needed.
Conclusion
We hope this article on how to remove ceiling light cover with clips was helpful. Ceiling light covers are often challenging to remove because they’re made of thin, fragile plastic. The best way is with clips! It’s the easiest method for removing these types of lights that I’ve found. You can find them at any hardware store or home improvement center, and they’ll only cost you about $15-$30 depending on your needs (how many fixtures).
They come in different sizes to fit most standard ceiling light fixture sizes, so it should be easy enough to purchase one.