There are so many tutorials for making Christmas lights in different colors. But, it is a lot easier than you might think. In just a few simple steps, you can create LED lights that are all the same color. This tutorial will show you how to make LED lights one color without any extra materials. It’s really easy and can be done in a few minutes!
Summary: LED lights, especially strip lights or smart bulbs, offer a wide range of colors and effects, allowing users to personalize their lighting to suit their mood, preferences, or environment. However, there may be instances when you want to set your LED lights to a single color, either for a specific ambiance or for simplicity. Making your LED lights display a single color usually involves adjusting the settings using a remote control, a smartphone app, or an inline controller, depending on the specific LED light product you are using.
For LED lights controlled by a remote, locate the color buttons on the remote and press the button corresponding to the desired color. Some remotes may have a color wheel, allowing you to select a color by moving the wheel or pressing a specific area. When using a smartphone app, open the app associated with your LED lights and navigate to the color settings or color palette.
Choose the desired color by tapping on it or using a color picker tool, if available. For LED lights with an inline controller, press the color selection buttons to cycle through available colors until you reach the desired one. In some cases, you may need to consult the user manual for your specific LED light product to ensure you are using the correct method for selecting a single color.
By adjusting the settings of your LED lights using the appropriate control method, you can set them to display a single color to achieve your desired ambiance or aesthetic. This versatility is one of the advantages of LED lighting, allowing you to create a personalized and dynamic lighting environment in your home or workspace.

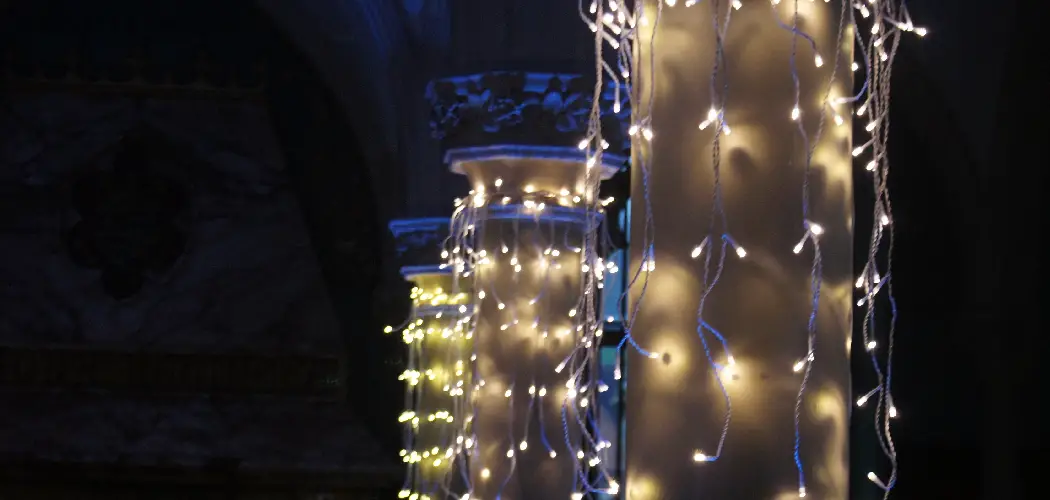
Led lights are a type of light that is becoming more popular in homes and businesses. This is because they are more energy-efficient than other types of lights, and they last longer. They come in many colors, but you can also find them in just one color, which is the case with this tutorial.
Things Youll Need
- Computer
- Led lights
- Electrical wire
How to Make Led Lights One Color Stepwise Guide
Led strips are a type of light that is very thin and can be used to light up a space. Hey, they are often used in backlighting or accent lighting.
Step 1: Analogously
To power your circuit, connect the positive and negative terminals of your power supply to the corresponding terminals on your circuit. The arrow on each LED strip indicates the direction that current should flow, from the positive end of the diode or pair down to the negative end.
You can think of this as a series of steps going downward, with one set of legs representing the positive end and the other representing the negative end. Follow these steps in order and the LED strip will light up.
Step 2: Connecting in Parallel
Connect your power source to one end of an LED strip, and then connect the other end of that LED strip to the positive terminal on your power supply. Now, connect another LED strip in a similar fashion, wiring them both in parallel to your power supply, with both of the LED strips wired so that their positive terminals are connected together. Each strip should also have its negative terminal connected together.
Step 3: Power Supply

To attach your power supply to a resistor, you can use alligator clips or another method that is appropriate for your system. It may be helpful to have a set of helping hands to hold everything in place while you get it hooked up. If you want more light, use a lower-ohm resistor. If you want less light, use a higher-ohm resistor.
Step 4: Digital
check your power supply voltage using a digital multimeter. A good start is to use the lowest setting of 2 volts DC and gradually increase if you do not see anything happening, but be careful not to damage your components. It is possible that either may be set incorrectly, so double-check that they are right if nothing appears on your led lights.

Step 5: Power Supply Voltage
now that you know your voltage read where on the strip to solder. I you’re using a 12-volt power supply, connect it to an orange wire or one of its equivalents on the 5-meter strip (it will probably say somewhere which is positive and negative). I you’re using a 9-volt power supply, connect it to a red wire or one of its equivalents on the 5-meter strip. I you’re using a 5-volt power supply, connect it to a blue wire or one of its equivalents.
Step 6: AC Power Supply
connect the AC adapter to your power supply and then send electricity into the DC jack. You’ll know it’s working if there is a red LED light in the center (positive) and an adjacent black (negative) LED next to it. ke p reading to learn more about how to make led lights one color.
Step 7: Soldering the Power Source
cut two lengths of wire to make a jumper, and solder one end of each wire to the resistor. Ea h length needs one end connected through the resistor. So er the other end to either strip’s positive solder point (marked with a +). You could also solder the ends to the positive and negative terminals, but then you won’t be able to disconnect them without damaging your LED strips.
Step 8: Cutting
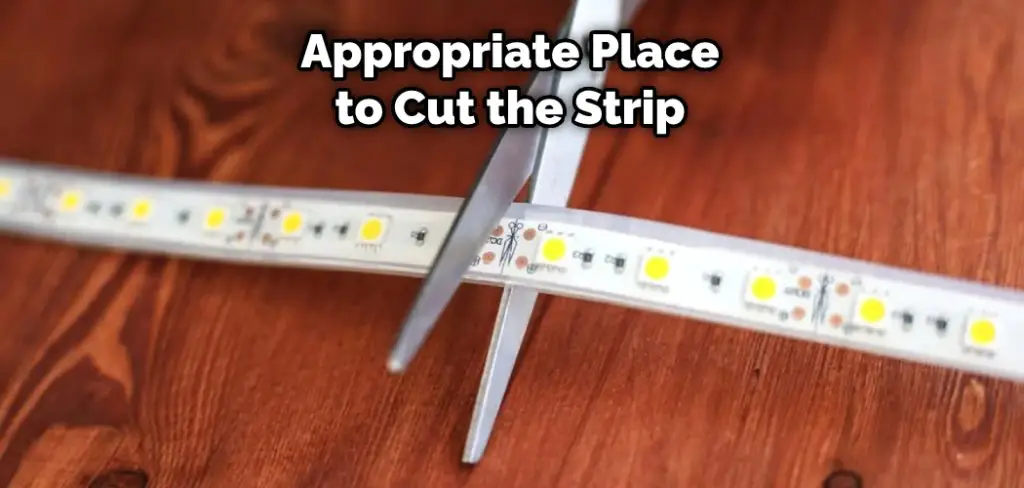
if you are using anything smaller than a 5-meter strip, calculate the appropriate place to cut the strip. You can use this online calculator or just do some easy math by doubling your length and dividing by 12 (for 12v power) or 9 (for 9v). Remember to buy a few extra feet if you make mistakes when soldering.
Step 9: Soldering the Strips
now that you’ve calculated where to cut, solder one end of your LED strip to your resistor (positive wire only!). Lea e the other is free, so you can attach it later. Use n alligator clip or another clip to hold it in place, or press down on the soldering iron until it melts.
Step 10: Wiring – 12 Volt Analog Strip
connect the exposed metal of your negative wire to one of the exposed wires on a resistor. Conn ct exposed metal of a positive wire to a different exposed wire on a resistor and connected exposed metal from the power supply to another exposed wire from resistors. Reply t this same process if you have more leads in the series.
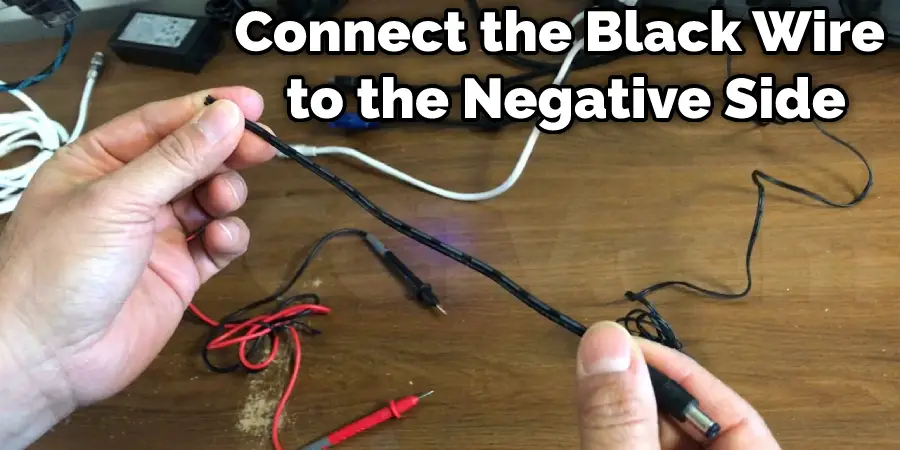
Step 11: Wiring – 5 Volt Digital Strip
connect the black wire from your power supply to an exposed negative wire on your digital strip. Connect another exposed negative wire on the strip to a resistor or other component (something that will not burn easily). Conn ct the red wire to an exposed positive wire and connect another exposed positive wire on the strip to a resistor or other component.
Step 12: Add Inputs
if you are using a different strip, connect the black wire to the negative side of the power supply, then connect one green wire to an exposed positive wire on your strip. Conn ct another green wire to a resistor or component. Then do the same for each additional input (red and white) until all are accounted for.
Step 13: Uploading to Edison
use the Arduino IDE to upload your code. This example will change the LEDs to one color, which is done by finding out what position each led is in and then telling them all to be that color. Conn ct Edison to the computer using USB, start-up Arduino IDE (you may need Arduino-builder if you don’t see anything appear). upload d code using Arduino IDE
Step 14: Run Code!
Power is applied when Edison’s USB Micro B is connected to the computer. When it is not, power will automatically be supplied by the battery (if plugged in). Once running with the appropriate code, you can disconnect Edison from the computer, and it will continue to run.
When connecting Edison to a computer, make sure the USB Micro B is in the port closest to the center of the board.
Step 15: Going Further
You can change the colors of your led strip with this code by changing which number each color represents. If you want to create a fade effect, define more than one color and change what position they need to be at for it to start changing colors. You can also use an “if” statement for on/off control or other controls.
Tips and Warning
Tips:
- When wiring the LEDs, make sure that the longer lead is attached to the positive side, and the shorter lead is attached to the negative side.
- If you’re using a power supply, make sure that it’s set to the same voltage as the LEDs.
- If you’re using a resistor, make sure that it’s the right type and size for your LEDs.
- Always hook up the positive side to the red wire and the negative side to black.
- Warning:
Please be very careful when working with electrical wiring. I’m per wiring can result in a fire hazard. If y you’re not comfortable doing the wiring yourself, please consult a professional. Also, make sure you know what type of LED lights are compatible with your project. Using the wrong kind will damage them and even cause a fire hazard.
Can I use spray paint for this purpose
You could use spray paint to adhere the LED strip to a surface. But Howe er, you need to make sure that it is scorched before connecting the power supply.
What is the best way to paint led lights
There is no definitive answer to this question. Some people recommend using spray paint, while others say that it’s best to use a brush. Whichever method you choose, make sure that the paint is completely dry before connecting the power supply.

You Can Check It Out to: Make the Color Black With Led Strip Lights
Frequently Asked Questions
Why Are My Led Lights 2 Different Colors?
There are a few things you can check to determine the source of the color discrepancy in your Led lights. First, make sure that all of your lights are plugged into the same power outlet and that they’re all turned on.
Next, inspect the wires that connect your light fixtures to the power supply. If you notice any damage or corrosion on the wires, it might be causing the different colors. If all else fails, you can try to reset each light by turning it off at the circuit breaker and then back on.
Can You Cut Led Lights?
While there isn’t a concrete answer, it is generally recommended that you avoid cutting or touching led lights. Doing so could damage the light bulb and result in decreased brightness and a shorter lifespan. Additionally, if the light bulb gets wet, it can cause Sparks that can ignite something else in the room – resulting in an even greater fire hazard.
What Can I Do With Leftover Led Strips?
Leftover led strips are an excellent way to recycle your old electronics and make them into new creations. All you need is a solder gun and some lead (or a lead-free alternative), plus patience! Here’s how it works: Hot glue the end of each strip onto something sturdy, like wood or metal.
Then use the soldering iron to melt down the leads on either side of the strip until they overlap slightly. Once that is done, simply cut off the excess material using a knife or scissors, leaving you with two joined strips that look like regular LED lights!
You can now use these new lights in various ways; for example, put them inside containers as e-cyclers or candelabras, install them in plants as grow light bulbs, or string several together to create neon panels.
Is It Safe to Cut Led Light Strips?
Various reports have surfaced alleging that the use of LED light strips may be harmful to both health and the environment.
Before getting into the specifics of the reports, it is important to note that there is no scientific evidence linking LED light strips with any health problems. In fact, some studies have shown that they may even have some benefits, such as reducing eye fatigue and improving sleep quality.

With that said, it is always important to exercise caution when it comes to anything that could be potentially harmful to your health or the environment. That being said, there is no evidence at this point linking LED light strips with any negative effects. So, for the time being, it seems safe to cut them down!
Conclusion
There are various ways to create one color LED lights, and we’ve outlined the most popular methods for you below. Once you determine which method is best, follow these steps to create your custom light. New ED lights are a great way to save energy and have beautiful mood lighting, but sometimes they can be too bright.
In t his blog post, we’ll teach you how to make led lights one color so that they’re not as distracting or harsh on the eyes. If you want more information about our services for making light bulbs look natural daylight, check out these articles below!
You May Also Read: How to Get Led Light Residue Off Wall