
Are you looking to add a touch of elegance to your space? Why not try light purple led lights? These lights are perfect for injecting a little bit of color into any room and can be used to create an ambient effect. This article will show you how to make light purple led lights using nothing more than some basic tools and supplies. So read on to learn more!

Can You Make Light Purple Led Lights?
Yes, you can make light purple led lights! In fact, it’s a straightforward process and only requires a few basic tools and supplies. You can make your cash by following the steps below.
Required Materials for This Project Include
- One Arduino board
- One breadboard
- Jumper wires
- RGB LED
- 220-ohm resistor
- 10k ohm resistor
This project’s primary controller is an Arduino board. Its components are interconnected by a breadboard, with jumper wires creating the necessary connections. An RGB LED is a three-color LED that can be controlled individually. The resistor values depend on the type of RGB LED used.
How to Make Light Purple Led Lights Step by Step Guide
Step 1: Determine
Determining how many LED lights to use is the first step in creating a purple light display. Consider the size and spacing of the lights to create the perfect look for your project.
Step 2: Gather Supplies
Once you know to Make Light Purple Led Lights, the next step is to gather your supplies. You will need:
Voltage or a power source for your led lights - An LED strip light
- Wire cutters
After deciding to Make Light Purple Led Lights, it is time to gather supplies. First, you need to find some LED strip lights, wire cutters, and a voltage source.
Step 3: Determine the Lights and Power Source
We will be using a LED strip that is 5 meters long and 3 LEDs wide. The actual voltage of the circuit is 12V, but since this is unregulated (no solid regulator), it can range anywhere from about 9-15 volts. That means that if you were to use four conventional AA batteries in series, they would drop the voltage from 4 x 1.5V = 6 volts to about 5.25 – 5.75 volts, which is not enough to light up the LEDs (which drop around 3-3.5 volts each), so we need a power source that outputs 12V and can supply more than about 20 ma of current per LED. With 4 AA batteries, this would be about 20 mA x 12V = 240 milliamps (mA). nice, the current for each LED is 20ma, which means that you can have a maximum of 6 LEDs in series.

I used two red LED lights that are 300 mA each to represent the positive/12v terminal of the power source and two blue LED lights that are 200 mA each to represent the negative/ground terminal of the power source.
To create the circuit, I used a small protoboard from RadioShack with three sets of screw terminals on the back. This allowed me to wire everything together easily and with a good, solid connection. I recommend the same for you, as most LED strips come with three connectors to make hooking it up very easy.
Step 4: How to Make the Circuit
We are using three-pin screw terminals on the LED strip so that you can easily hook it up to a power source. This also makes it very easy to modify in the future if you decide to add more lights or change colors. So go ahead and solder four wires with alligator clips onto each of the three connectors on the LED strip.
And then solder a wire with an alligator clip to each of the screw terminals on the protoboard that will connect to a single LED light.
Then, solder another lead onto one of those leads and attach it to either of the red wires coming from the power source. (Remember to put a blocking diode in between the positive wire and lead to prevent power from flowing back into your batteries.) That’ll be used to connect the positive side of each parallel LED strip.
Attach another lead to one of the wires and solder it to either of the blue wires coming from the power source. This will be used to connect the negative side of each parallel LED strip.
Then solder one final lead onto any one of those leads and attach it to either red or blue screw terminal. This will be used to connect everything to the power source. And that s it! Now you can put everything together and attach it to a power source to see some cool light!
Step 5: Make the Lights
In this step, we will be adding LED lights onto the protoboard. Because it’s a small board, you have a little more flexibility in where you place your lights, but I kept mine nice and neat by measuring out exactly how much space each light would take up.
So go ahead and start by placing the first LED where you want it, then bend its leads slightly to hold it in place.
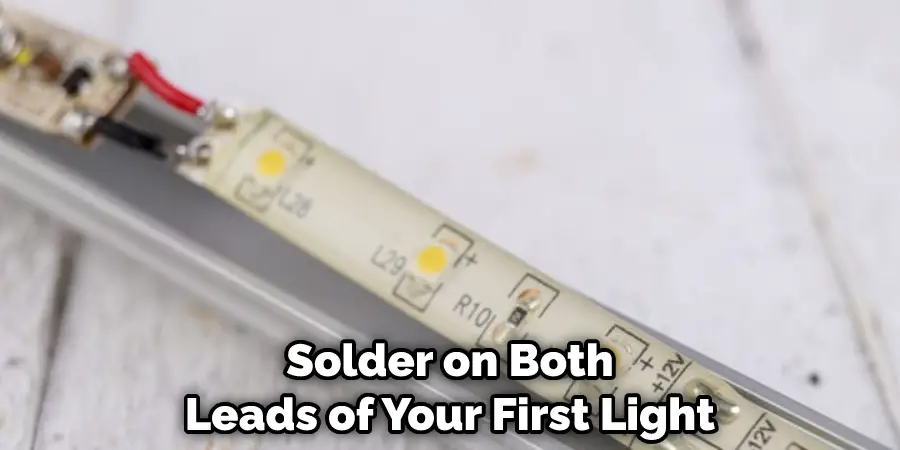
Then solder on both leads of your first light. Again, I use black wires for negative and red wires for positive so that they are easy to keep track of while soldering. Finally, solder your wires onto the positive and negative terminal of your battery holder.
This can be a little tricky since there is only so much space to work with, but you should be able to get it done by soldering the positive wire onto the positive terminal and the negative wire onto the negative terminal.
Now do this three more times! As you can see, this project does require quite a bit of soldering! Keep reading for more information about how to make light purple led lights.
Step 6: Put Everything Together
Now that you have everything finished (or at least mostly finished), it’s time to put the cover back on the battery case. I was able to use some small bolts and nuts from an old project to hold the LED strip in place. Start by placing the LED strip inside of where it needs to go. Next, put the nuts on each bolt and tighten them down with a wrench. Then take small lots that are long enough to go through all four batteries, but not too long that they protrude out the bottom of the case, and thread them into the nuts on the LED strip. Then tighten them down until everything is snug, but not too tight that you break anything!
Now take your AA battery holders and place them inside of their designated slots. Put a battery in each one and close it back up. The case should be turned on with the push of an on/off button again as it did before!
Step 7: Now Enjoy Your New Light!
Now that everything is fixed and good to go, turn it on and enjoy your new light! It’s a very soft and soothing light, and I love the color. I’m thinking of making one for my bedroom so that I can have something relaxing to look at while going to bed or when waking up in the morning before sunrise. If you do the same, just be careful where you put it since it can get very hot!
I hope this How-To gave you an idea of how to make light purple LED lights for yourself!
You May Read to Prevent Led Lights From Peeling Paint

What Is the Best Way to Make Light Purple Led Lights?
There are a few different ways to make light purple led lights. One way is to use a lig t purple LED, and the other way is to use a white LED with a light purple filter.
The easiest way to make light purple led lights are to use a light purple LED. You can find these LEDs at most electronics stores. Simply solder the LED t the appropriate wires, and then you’re done!
Suppose you want to use a white LED with a light purple filter. You’ll need to get your hands on some light purple filters, which can be tricky. Once you have the filters, you’ll need to cut them to the appropriate size and then glue them over the white LED. This will produce light purple led lights, but it won’t be nearly as bright as the other method.

Frequently Asked Question
How Much Does It Cost to Make Light Purple Led Lights?
It depends on the quantity. For example, 5mm lights are fairly l w price, but I suggest at least ten lights for this project.
First, take apart the mini light string to locate the LED bulb in the strand (this is where you will be doing your soldering.) Some sets of mini lights might have two LEDs in one unit (4 pins). These sets are a bit ha der to solder, but the same principles apply.
Is Making Light Purple Led Lights Worth It?
It definitely depends on what you want to use the lights for. If you need many of them, the price might be worth it. But if you only need anew, it might be cheaper to just buy them pre-made.
You Can Check It Out to: Make Purple With Led Lights
Conclusion
So there you have it – everything you need to know about making light purple LED lights. We hope you found this post helpful, and be sure to let us know if you have any questions in the comments section below. Have fun experimenting with different colors and shades, and happy crafting! Thanks for reading our post about how to make light purple led lights.